
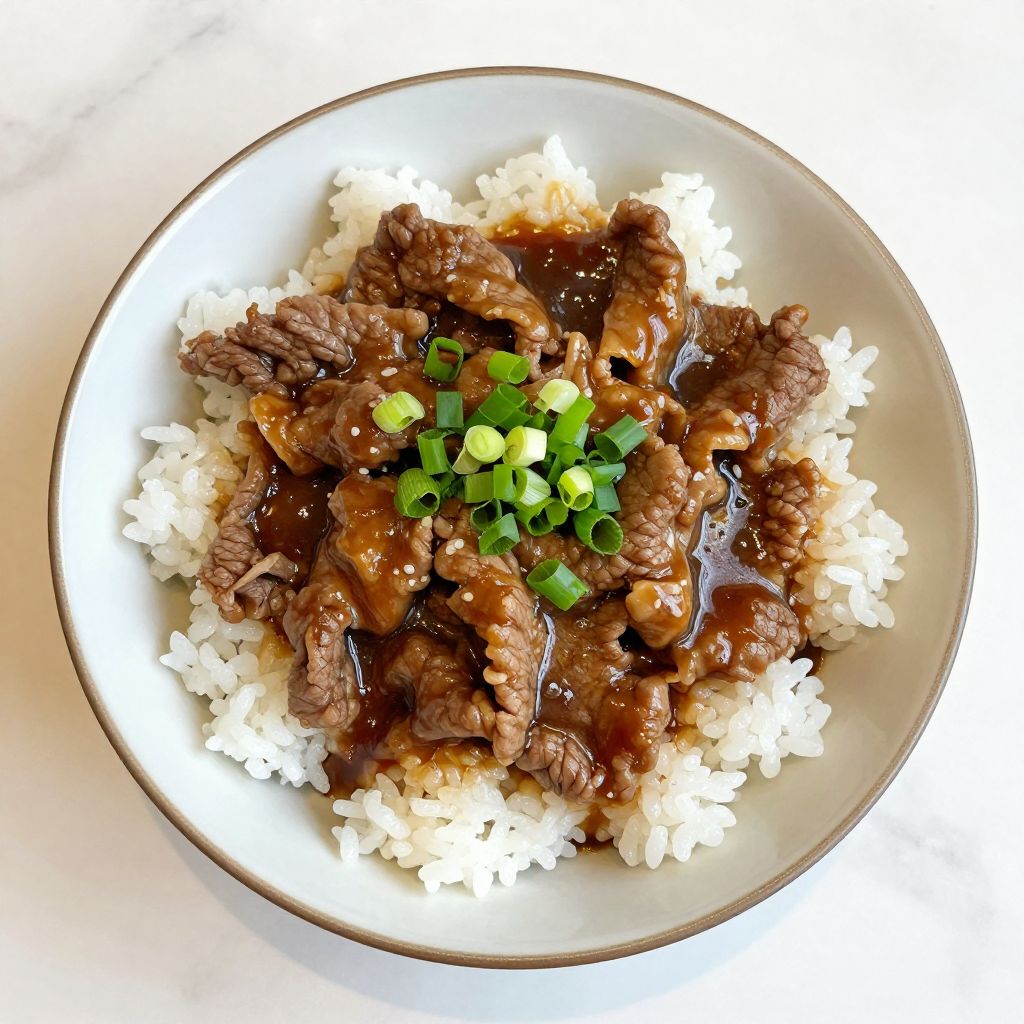
Picture this: tender, savory beef simmering in a rich, umami-packed sauce, served over a warm bed of rice. The Yoshinoya Beef Recipe captures the essence of this beloved Japanese dish, making it a quick and satisfying meal that transports you straight to your favorite restaurant.
This recipe is special because it combines flavor and ease, perfect for busy weeknights or a cozy weekend dinner. With its melt-in-your-mouth texture and a balance of sweet and savory, you’ll understand why this dish is a staple in many households.
Why You’ll Love This Recipe
This Yoshinoya Beef is a delightful dish that checks all the boxes.
- Quick to prepare, making it perfect for any night.
- Rich, savory flavors that can satisfy any craving.
- Versatile, easily adaptable to suit dietary preferences.
- Uses simple ingredients that you might already have at home.
My Experience Making This Recipe
When I first tried making this dish, I was blown away by how quickly it came together. The aroma of cooking beef and onions filled my kitchen, making my mouth water in anticipation.
As I served it, my family couldn’t get enough of the tender beef and the glossy sauce clinging to the rice. Their happy faces said it all, and I knew this recipe was a keeper.
Recipe Overview
- Recipe Name: Yoshinoya Beef
- Servings: 4
- Prep Time: 10 minutes
- Cook Time: 15 minutes
- Total Time: 25 minutes
- Course: Main Course
- Cuisine: Japanese
- Calories per Serving: 350
Equipment You Will Need
- Large skillet or wok
- Cutting board
- Sharp knife
- Measuring spoons and cups
- Wooden spatula or tongs
Ingredients for Yoshinoya Beef
- 1 lb beef (flank or sirloin, thinly sliced)
- 1 onion (sliced thinly)
- 1/4 cup soy sauce
- 2 tbsp mirin
- 2 tbsp sake
- 1 tbsp sugar
- 1/2 cup dashi broth (or beef broth)
- 2 cups cooked rice
- Green onions (for garnish)
Ingredient Notes and Substitutions
- Beef: Thinly sliced beef provides tenderness. You can substitute with chicken or tofu for a different protein.
- Soy sauce: Adds depth of flavor. Low-sodium soy sauce works well if you’re watching your salt intake.
- Mirin: This sweet rice wine is essential for authenticity. You can replace it with a mix of sugar and water if unavailable.
- Dashi broth: A traditional Japanese stock that enhances umami. Use beef broth as an alternative if needed.
How to Make Yoshinoya Beef
Step 1: Prepare the Ingredients
Begin by slicing the beef and onion. Thin slices cook quickly and absorb the flavors better.
Step 2: Mix the Sauce
In a bowl, combine soy sauce, mirin, sake, sugar, and dashi broth. This mixture will infuse the beef with a rich flavor.
Step 3: Heat the Skillet
Place your skillet over medium heat and add a splash of oil. A hot skillet ensures the beef sears properly, locking in the juices.
Step 4: Cook the Onions
Add the sliced onions to the skillet and sauté until they are translucent. This step builds a sweet base for the dish.
Step 5: Add the Beef
Introduce the sliced beef to the skillet, stirring until it begins to brown. This should only take a few minutes; overcooking can toughen the meat.
Step 6: Pour in the Sauce
Once the beef is browned, pour the sauce mixture over it. Let it simmer for about 5 minutes, allowing the flavors to meld beautifully.
Step 7: Serve Over Rice
Scoop the cooked rice onto plates and top with the beef and sauce. This creates a comforting and hearty meal.
Step 8: Garnish and Enjoy
Finish with a sprinkle of green onions for a fresh crunch. This little touch elevates the dish visually and in flavor.
Pro Tip: For the best flavor, let the beef marinate in the sauce for 30 minutes before cooking.
Tips for the Best Yoshinoya Beef
- Use high-quality beef for the most tender results.
- Don’t skip the dashi; it adds authentic depth.
- Keep the heat consistent to avoid uneven cooking.
- Serve immediately for the best texture and flavor.
- Adjust the sweetness by varying the sugar based on your taste.
Common Mistakes to Avoid
- Overcooking the beef can make it tough; cook just until browned.
- Using too much broth can dilute the flavor; stick to the measurements.
- Skipping the marinating step loses out on enhancing flavors.
- Not slicing the beef thinly can result in uneven cooking.
Serving Suggestions
This dish is perfect on its own but can be paired with a few sides to make it even more delightful.
- Steamed broccoli for a nutritious crunch.
- Pickled vegetables for a tangy contrast.
- Miso soup for a classic Japanese touch.
- Japanese potato salad for a creamy side.
Variations to Try
- Add stir-fried vegetables for a colorful twist.
- Substitute the beef with chicken or tofu for a lighter option.
- Incorporate mushrooms for an earthy flavor boost.
- Use brown sugar instead of white for a deeper sweetness.
Dietary Adaptations
- Gluten-free: Use tamari instead of soy sauce.
- Dairy-free: This recipe is naturally dairy-free.
- Vegan/Vegetarian: Swap beef for tofu and use vegetable broth.
- Low-carb/Keto: Serve over cauliflower rice instead of traditional rice.
Storage and Reheating
Refrigerator
Store leftovers in an airtight container for up to 3 days.
- Cool completely before sealing.
- Keep the rice separate to maintain its texture.
Freezer
This dish can be frozen for up to a month.
- Make sure to use a freezer-safe container.
- Label with the date for easy tracking.
Reheating
Reheat in the microwave or on the stovetop until warmed through.
- Add a splash of water if it seems dry.
- Heat gently to avoid overcooking the beef.
Nutrition Information
| Nutrient | Amount |
|---|---|
| Calories | 350 |
| Total Fat | 15g |
| Saturated Fat | 5g |
| Carbohydrates | 40g |
| Fiber | 2g |
| Sugar | 6g |
| Protein | 20g |
| Sodium | 800mg |
| Cholesterol | 65mg |
This nutrition information is an estimate and can vary based on specific ingredients used.
Frequently Asked Questions
Can I substitute the beef for another protein?
Yes, chicken or tofu works well as a substitute, though cooking times may vary.
Can I make this recipe ahead of time?
You can prepare the sauce and slice the beef ahead of time, but it’s best to cook it fresh.
How do I store leftovers?
Store in an airtight container in the refrigerator for up to 3 days or freeze for later use.
What if my beef turns out tough?
Overcooking can cause toughness, so make sure to cook just until browned.
Can I use ground beef instead?
While not traditional, ground beef can work; just adjust cooking time accordingly.
Final Thoughts
There’s something truly comforting about a steaming bowl of Yoshinoya Beef. I hope you give this recipe a try and enjoy the delightful flavors that come with it.
For more delicious recipes, check out my take on Beijing Beef or explore the classic Gyudon Recipe. Happy cooking!
Yoshinoya Beef
Ingredients
Equipment
Method
- Slice the beef and onion thinly.
- In a bowl, combine soy sauce, mirin, sake, sugar, and dashi broth.
- Heat a large skillet over medium heat and add a splash of oil.
- Add the sliced onions to the skillet and sauté until translucent.
- Introduce the sliced beef to the skillet, stirring until it begins to brown.
- Once the beef is browned, pour the sauce mixture over it and let it simmer for about 5 minutes.
- Serve the beef and sauce over the cooked rice.
- Garnish with green onions before serving.