

Gyudon is the ultimate Japanese comfort food that delivers big flavor in under 30 minutes. This savory beef bowl features tender sliced beef and sweet onions simmered in a rich soy and mirin broth, all served over steaming hot rice.
Whether you need a quick weeknight dinner or a satisfying lunch, this recipe has you covered. Let me show you exactly how to make restaurant quality gyudon at home.
Why You’ll Love This Recipe
This gyudon recipe hits all the right notes for busy home cooks who refuse to sacrifice flavor. Here is what makes it special.
- Ready in under 30 minutes from start to finish
- Uses simple pantry staples and affordable ingredients
- One pan cooking means minimal cleanup
- Perfectly balanced sweet, savory, and umami flavors
- Endlessly customizable with your favorite toppings
My Experience Making This Recipe
I first made gyudon during a particularly chaotic Tuesday when I had exactly zero energy for complicated cooking. What started as desperation turned into a weekly tradition in my kitchen.
The aroma that fills my kitchen while the beef simmers is absolutely intoxicating. That sweet and savory steam hits you, and suddenly everyone in the house mysteriously appears asking when dinner is ready.
My family now requests this dish at least twice a month, and honestly, I never get tired of making it. The satisfied silence around the dinner table tells me everything I need to know.
Recipe Overview
- Recipe Name: Gyudon (Japanese Beef Bowl)
- Servings: 4
- Prep Time: 10 minutes
- Cook Time: 15 minutes
- Total Time: 25 minutes
- Course: Main Dish
- Cuisine: Japanese
- Calories per Serving: 520
Equipment You Will Need
- Large skillet or wide saucepan
- Sharp knife and cutting board
- Measuring cups and spoons
- Rice cooker or pot with lid
- Wooden spoon or spatula
- Serving bowls
Ingredients for Gyudon
For the Beef and Onions
- 1 pound thinly sliced beef (ribeye or sirloin, sliced against the grain)
- 1 large onion, halved and sliced into thin half moons
- 4 cups cooked Japanese short grain rice
For the Sauce
- 1 cup dashi stock (or water with 1/2 teaspoon hon dashi)
- 1/4 cup soy sauce
- 3 tablespoons mirin
- 2 tablespoons sake
- 1 tablespoon sugar
- 1 teaspoon fresh ginger, grated
For Topping
- 4 eggs (optional, for onsen tamago or raw egg)
- 2 green onions, thinly sliced
- Pickled ginger (beni shoga) for serving
- Shichimi togarashi (seven spice) for serving
Ingredient Notes and Substitutions
- Thinly sliced beef: The thin cut allows the meat to cook quickly and absorb maximum flavor. Substitute with shabu shabu beef from Asian markets or ask your butcher to slice ribeye paper thin.
- Dashi stock: This provides the essential umami backbone of the dish. Substitute with low sodium chicken broth plus a splash of fish sauce if dashi is unavailable.
- Mirin: This sweet rice wine adds depth and a subtle sweetness. Substitute with 1 tablespoon rice vinegar mixed with 2 tablespoons sugar.
- Sake: The alcohol tenderizes the meat and adds complexity. Substitute with dry white wine or additional dashi.
- Japanese short grain rice: The sticky texture is perfect for soaking up the sauce. Substitute with medium grain rice like Calrose if needed.
How to Make Gyudon
Step 1: Prepare Your Rice
Start your rice first since it takes the longest. Rinse 2 cups of Japanese short grain rice until the water runs clear, then cook according to your rice cooker or stovetop method.
Perfectly cooked rice is the foundation of great gyudon, so give it the attention it deserves.
Step 2: Mix the Sauce
Combine the dashi, soy sauce, mirin, sake, and sugar in a measuring cup or small bowl. Whisk until the sugar dissolves completely.
Preparing the sauce ahead means you can add it all at once without scrambling to measure while cooking.
Step 3: Slice the Onion
Cut your onion in half from root to tip, then slice each half into thin half moon shapes. The onion should be about 1/4 inch thick so it softens properly during cooking.
Consistent sizing ensures every piece cooks evenly and turns silky soft.
Step 4: Cook the Onions
Add the sauce mixture to your skillet and bring it to a simmer over medium heat. Add the sliced onions and cook for 5 to 7 minutes until they turn translucent and slightly softened.
The onions absorb the sauce flavors as they cook, becoming sweet and incredibly tender.
Step 5: Add the Ginger
Stir in the freshly grated ginger and let it cook for about 30 seconds. Fresh ginger adds a bright, slightly spicy note that cuts through the richness of the dish.
Grating ginger releases more flavor than mincing, so grab a microplane if you have one.
Step 6: Cook the Beef
Spread the beef slices in a single layer over the onions. Let the beef cook undisturbed for about 1 minute before gently stirring.
Thin beef cooks incredibly fast, so watch carefully to avoid overcooking. The slices should still be slightly pink in spots when you stir.
Step 7: Simmer Everything Together
Continue simmering for another 2 to 3 minutes until the beef is just cooked through and the sauce has reduced slightly. The liquid should be flavorful but not completely evaporated.
You want enough sauce to soak into the rice, so resist the urge to cook it down too much.
Step 8: Prepare Your Toppings
While the beef finishes cooking, slice your green onions and prepare any other toppings. If using eggs, you can poach them soft or serve them raw on top in traditional style.
Having toppings ready means you can serve immediately while everything is hot.
Step 9: Assemble the Bowls
Divide the hot rice among four serving bowls, pressing it gently with a rice paddle. Spoon the beef and onion mixture over the rice, making sure to include plenty of that delicious sauce.
The rice will soak up the sauce, creating the perfect bite in every spoonful.
Step 10: Add Final Toppings and Serve
Top each bowl with sliced green onions, pickled ginger, and an egg if desired. Sprinkle with shichimi togarashi for a little heat.
Serve immediately while the steam is still rising. Gyudon waits for no one.
Pro Tip: Freeze your beef for 20 minutes before slicing to make paper thin cuts much easier, or buy pre sliced shabu shabu beef from an Asian grocery store.
Tips for the Best Gyudon
- Use the thinnest beef you can find or slice. Paper thin meat is the secret to authentic texture.
- Do not skip the dashi. It provides an umami depth that water simply cannot replicate.
- Cook the onions until they are truly soft. Undercooked onions throw off the whole dish.
- Keep the beef slightly pink when stirring since it will continue cooking from residual heat.
- Taste and adjust seasoning before serving. A splash more soy sauce or mirin can make all the difference.
- Warm your serving bowls in the oven at 200F for perfect temperature retention.
Common Mistakes to Avoid
- Overcooking the beef: Tough, gray beef ruins the delicate texture that makes gyudon special.
- Using thick cut beef: Thick slices do not absorb the sauce properly and take too long to cook.
- Reducing the sauce too much: You need that flavorful liquid to season the rice underneath.
- Skipping the sake or mirin: These provide sweetness and depth that sugar alone cannot achieve.
- Serving on cold rice: Hot rice is essential for the full gyudon experience.
Serving Suggestions
Gyudon is satisfying on its own, but a few simple sides elevate it into a complete meal. Here are my favorite pairings.
- Miso soup with tofu and wakame seaweed
- Quick pickled cucumbers with rice vinegar and sesame
- Simple side salad with ginger dressing
- Steamed edamame with flaky salt
- Kimchi for a Korean twist
Variations to Try
- Cheese gyudon: Top with melted mozzarella or cheddar for an indulgent fusion twist that is wildly popular in Japan.
- Spicy gyudon: Add a tablespoon of gochujang or sriracha to the sauce for serious heat lovers.
- Mushroom gyudon: Include sliced shiitake or enoki mushrooms with the onions for extra umami.
- Negidama gyudon: Top with extra green onions and a raw egg yolk for the classic Yoshinoya style.
- Garlic gyudon: Add minced garlic with the ginger for a more robust flavor profile.
Dietary Adaptations
- Gluten free: Use tamari or coconut aminos instead of soy sauce. Check that your mirin is gluten free as well.
- Dairy free: This recipe is naturally dairy free as written.
- Vegetarian or vegan: Substitute thinly sliced king oyster mushrooms or extra firm tofu for the beef. Use vegetable dashi.
- Low carb or keto: Serve over cauliflower rice instead of white rice. Skip the sugar or use a sugar substitute.
Storage and Reheating
Refrigerator
Store the beef and sauce separately from the rice for best results.
- Beef and sauce keep for 3 to 4 days in an airtight container
- Cooked rice keeps for up to 5 days when properly stored
Freezer
Gyudon freezes surprisingly well for meal prep purposes.
- Freeze the beef mixture in portions for up to 2 months
- Thaw overnight in the refrigerator before reheating
- Rice can be frozen separately for up to 1 month
Reheating
Gentle reheating preserves the tender texture of the beef.
- Reheat the beef mixture in a skillet over medium low heat with a splash of water
- Microwave rice with a damp paper towel for 1 to 2 minutes
- Assemble fresh and add new toppings for best results
Nutrition Information
| Nutrient | Amount |
|---|---|
| Calories | 520 |
| Total Fat | 18g |
| Saturated Fat | 7g |
| Carbohydrates | 58g |
| Fiber | 2g |
| Sugar | 8g |
| Protein | 30g |
| Sodium | 890mg |
| Cholesterol | 75mg |
Nutritional values are estimates based on standard ingredients and may vary based on specific products used and portion sizes.
Frequently Asked Questions
Can I use a different cut of beef for gyudon?
Ribeye and sirloin work best because of their marbling and tenderness. Chuck or flank steak can work if sliced very thin, but they may be slightly chewier.
Can I make gyudon ahead of time?
You can prep all ingredients and mix the sauce up to a day ahead. Store everything separately and cook fresh for the best texture and flavor.
How do I get paper thin beef slices at home?
Freeze your beef for 15 to 20 minutes until firm but not solid. A sharp knife will then glide through, creating thin slices effortlessly.
Why is my gyudon sauce too salty?
Use low sodium soy sauce if regular soy sauce is too intense for your taste. Adding a bit more sugar or mirin can also help balance excessive saltiness.
Is it safe to eat raw egg on gyudon?
In Japan, raw eggs are commonly eaten due to strict food safety standards. Use pasteurized eggs if you are concerned, or cook the egg soft poached style.
Final Thoughts
This gyudon recipe proves that incredible food does not require hours in the kitchen. With simple ingredients and straightforward technique, you can create a bowl that rivals your favorite Japanese restaurant.
Give this recipe a try and discover why Japan considers gyudon the ultimate comfort food. Once you taste that first bite of tender beef over perfectly seasoned rice, you will understand the hype.
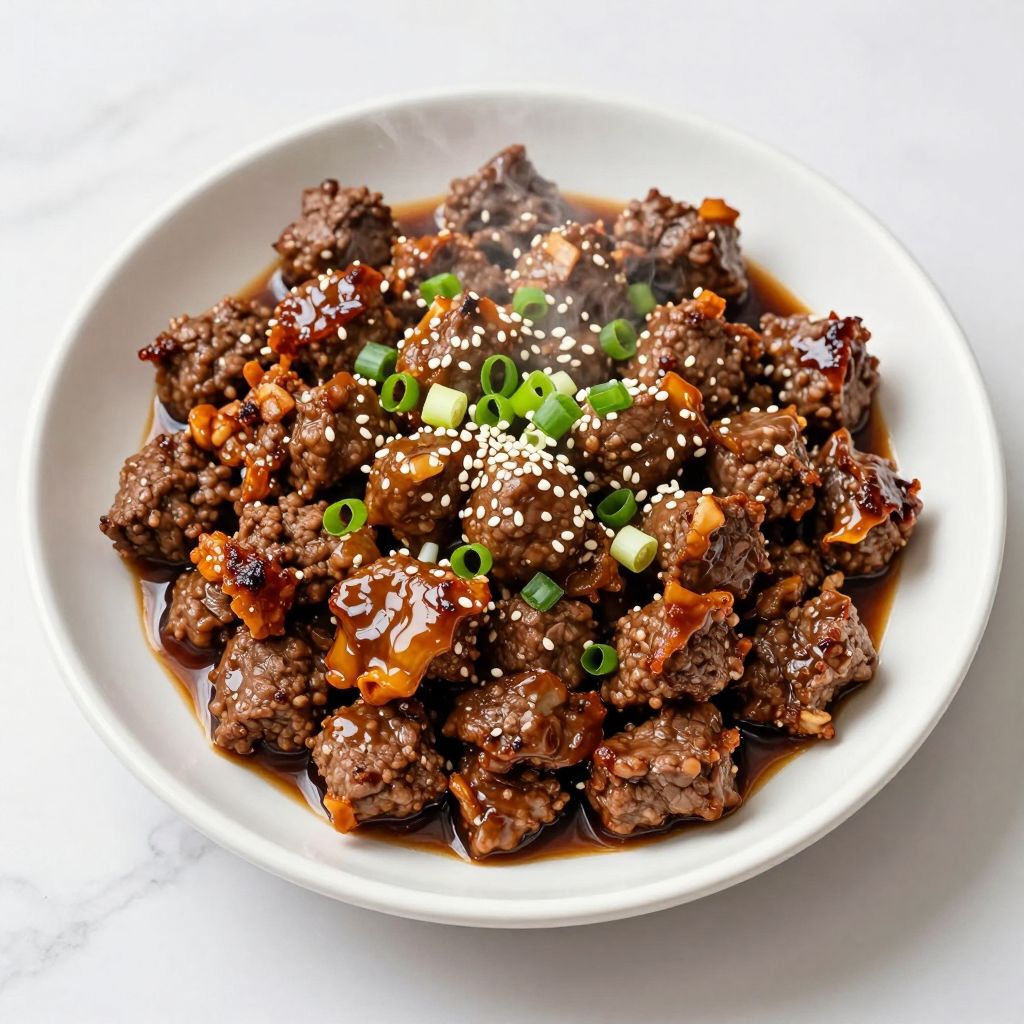
Mongolian Ground Beef
Ingredients
Equipment
Method
- Mince the garlic and ginger and slice the green onions; set aside.
- Heat a large skillet over medium-high heat until a drop of water sizzles, about 2 minutes.
- Add vegetable oil and then ground beef in a single layer; let it brown undisturbed for 2–3 minutes.
- Break up the beef and continue to cook until no pink remains, about 5–7 minutes total.
- Tilt the pan and spoon out excess fat, leaving a thin coating in the skillet.
- Reduce heat to medium and add garlic and ginger; cook, stirring constantly, for 30 seconds to 1 minute until fragrant.
- In a small bowl, whisk together soy sauce, brown sugar, water, and red pepper flakes until sugar dissolves.
- Pour the sauce into the skillet and increase heat to medium-high; cook, stirring constantly, for 2–3 minutes until sauce thickens and coats the beef.
- Remove from heat and stir in sesame oil; season with salt and pepper to taste.
- Transfer to a serving plate and garnish with sliced green onions and sesame seeds.