
There’s something uniquely satisfying about working with Nagaimo, a Japanese yam that has a wonderfully slippery texture and a subtly sweet flavor. This recipe highlights its versatility, making it a delightful addition to various dishes, whether you are looking for a fresh side or a main component in a stir-fry.
What makes this recipe special is its simplicity and the way it elevates the humble nagaimo into a star ingredient. The creamy texture combined with a slight crunch offers a satisfying bite that’s hard to resist.
Why You’ll Love This Recipe
This nagaimo recipe is perfect for those looking to explore new ingredients. It’s a fantastic way to enjoy a healthy dish while impressing your friends.
- Quick and easy to prepare.
- Unique texture that adds interest to your meal.
- Versatile ingredient for various cuisines.
- Nutritious and low in calories.
My Experience Making This Recipe
The first time I cooked with nagaimo, I was pleasantly surprised by its texture. As I sliced it, the slippery, almost gelatinous quality caught my attention, making me eager to see how it would transform during cooking.
When I served it to friends, they were intrigued and delighted by the unique flavor and texture. It quickly became a favorite, showcasing how something so simple can bring joy to a meal.
Recipe Overview
- Recipe Name: Nagaimo Recipe
- Servings: 4
- Prep Time: 10 minutes
- Cook Time: 15 minutes
- Total Time: 25 minutes
- Course: Side Dish
- Cuisine: Japanese
- Calories per Serving: 90
Equipment You Will Need
- Cutting board
- Sharp knife
- Skillet
- Spatula
- Measuring spoons
Ingredients for Nagaimo Recipe
- 1 medium nagaimo, peeled and sliced thinly
- 2 tablespoons olive oil
- 1 teaspoon soy sauce
- 1 teaspoon sesame oil
- Salt and pepper, to taste
- Chopped scallions, for garnish
Ingredient Notes and Substitutions
- Nagaimo: This yam is used for its unique texture and flavor. You can substitute with regular yams or sweet potatoes, but the texture will differ.
- Olive oil: It adds richness to the dish. Can be replaced with any cooking oil of your choice.
- Soy sauce: This provides umami flavor. Tamari can be used for a gluten-free option.
- Sesame oil: It enhances the dish with a nutty flavor. You can skip it if you prefer a lighter taste.
How to Make Nagaimo Recipe
Step 1: Prepare the Nagaimo
Start by peeling the nagaimo with a sharp knife. This will reveal the white flesh that will become tender during cooking.
Step 2: Slice Thinly
Slice the nagaimo into thin rounds, about 1/8 inch thick. Thin slices will cook evenly and absorb flavors better.
Step 3: Heat the Skillet
Place a skillet over medium heat and add the olive oil. Heating the oil ensures that the nagaimo will sear nicely and develop flavor.
Step 4: Add the Nagaimo
Add the sliced nagaimo to the skillet in a single layer. Avoid overcrowding to allow each piece to cook evenly.
Step 5: Season
Sprinkle salt and pepper over the nagaimo. This simple seasoning enhances the natural flavor of the yam.
Step 6: Cook Until Tender
Cook for about 7-10 minutes, flipping halfway through. You want them to be tender yet retain a slight crunch.
Step 7: Add Soy Sauce and Sesame Oil
Once tender, drizzle with soy sauce and sesame oil. This will add depth and a savory note to the dish.
Step 8: Garnish and Serve
Remove from heat and garnish with chopped scallions. This adds a fresh touch and a pop of color to your dish.
Pro Tip: For extra flavor, consider adding a sprinkle of sesame seeds when serving.
Tips for the Best Nagaimo Recipe
- Always slice nagaimo just before cooking to prevent oxidation.
- Use a non-stick skillet for easier cooking and cleanup.
- Pair with grilled meats for a balanced meal.
- Experiment with different seasonings like garlic or ginger for added flavor.
- Keep an eye on the cooking time to avoid mushiness.
Common Mistakes to Avoid
- Overcooking the nagaimo can make it mushy. Keep it tender for the best texture.
- Using too much oil can overwhelm the dish. A little goes a long way.
- Not seasoning the nagaimo properly can result in blandness. Season well for full flavor.
- Skipping the garnish can leave your dish looking dull. Fresh scallions add visual appeal.
Serving Suggestions
This nagaimo dish pairs beautifully with a variety of meals. Here are some delicious ideas.
- Serve alongside grilled chicken or fish.
- Add to a rice bowl with vegetables.
- Pair with miso soup for a comforting meal.
- Include in a bento box for a delightful lunch option.
Variations to Try
- Add a splash of rice vinegar for a tangy twist.
- Incorporate diced vegetables like bell peppers for added color.
- Top with spicy mayo for a kick of flavor.
- Mix in cooked noodles for a hearty dish.
Dietary Adaptations
- Gluten-free: Use tamari instead of soy sauce for a gluten-free option.
- Dairy-free: This recipe is naturally dairy-free, fitting for all diets.
- Vegan/Vegetarian: Entirely plant-based, suitable for vegan diets.
- Low-carb/Keto: Nagaimo is relatively low in carbs, making it a good choice for keto diets.
Storage and Reheating
Refrigerator
Store leftovers in an airtight container in the fridge. They will last for up to 3 days.
- Ensure they are cooled before sealing to avoid condensation.
Freezer
Freezing nagaimo is not recommended due to texture changes. It is best enjoyed fresh.
- If frozen, expect a mushier texture upon thawing.
Reheating
Reheat on the stovetop over low heat. This helps preserve the texture and flavor.
- Add a splash of water to create steam and prevent sticking.
Nutrition Information
| Nutrient | Amount |
|---|---|
| Calories | 90 |
| Total Fat | 5g |
| Saturated Fat | 0.5g |
| Carbohydrates | 10g |
| Fiber | 2g |
| Sugar | 1g |
| Protein | 1g |
| Sodium | 200mg |
| Cholesterol | 0mg |
This nutritional information is approximate and can vary based on specific ingredients used.
Frequently Asked Questions
Can I make this recipe ahead of time?
Yes, you can prep the nagaimo and store it in the refrigerator for up to 24 hours before cooking.
What if my nagaimo is too slippery to slice?
Using a sharp knife and a stable cutting board can help. You can also chill it in the fridge for a bit to firm it up.
How can I store the leftovers?
Store any leftovers in an airtight container in the fridge for up to 3 days. Reheat gently on the stovetop.
Can I use nagaimo in salads?
Absolutely! Nagaimo can be grated or thinly sliced for a fresh salad addition.
Is nagaimo good for you?
Yes, nagaimo is nutritious, low in calories, and provides fiber, making it a healthy choice.
Final Thoughts
Cooking with nagaimo opens up a world of flavors and textures that you simply must experience. I encourage you to give this recipe a try, and I think you’ll be pleasantly surprised by how delicious and satisfying it can be.
For more delightful recipes, check out this Nothing Bundt Cake Recipe or explore the comforting flavors of Oden Recipe. Happy cooking!
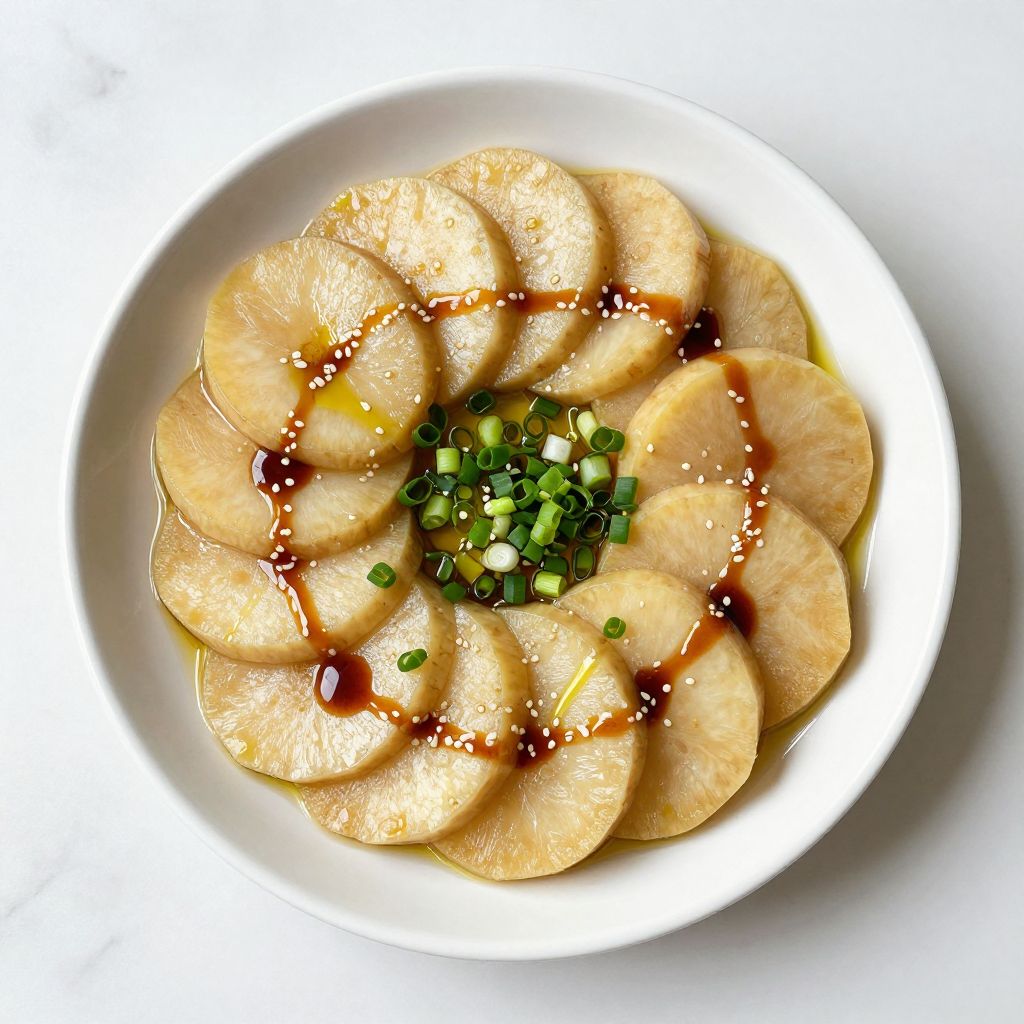
Nagaimo Recipe
Ingredients
Equipment
Method
- Start by peeling the nagaimo with a sharp knife.
- Slice the nagaimo into thin rounds, about 1/8 inch thick.
- Place a skillet over medium heat and add the olive oil.
- Add the sliced nagaimo to the skillet in a single layer.
- Sprinkle salt and pepper over the nagaimo.
- Cook for about 7-10 minutes, flipping halfway through.
- Once tender, drizzle with soy sauce and sesame oil.
- Remove from heat and garnish with chopped scallions.