
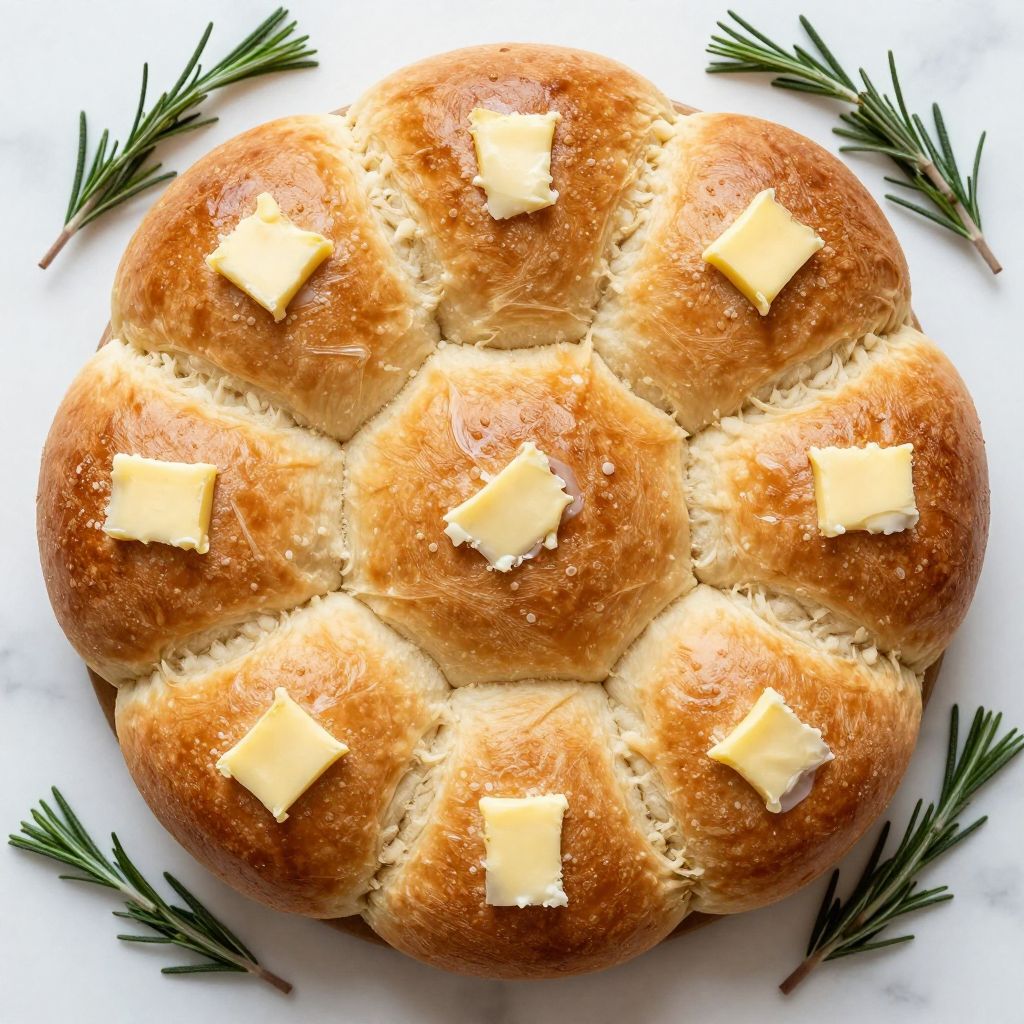
Picture this: you’re in a cozy kitchen, the scent of warm bread wafting through the air, and the promise of fresh Italian rolls just a few steps away. This Italian Roll Recipe is not just about baking; it’s about creating a comforting experience that brings people together. These rolls are soft, slightly chewy, and have a golden crust that makes them irresistible. They’re perfect for sandwiches or as an accompaniment to your favorite pasta dishes. Let’s gather our ingredients and dive into this delightful baking adventure.
Why You’ll Love This Recipe
These Italian rolls are a must-try for any bread lover. With their fluffy texture and amazing aroma, they’ll quickly become a favorite.
- Perfectly soft texture that melts in your mouth.
- Versatile for sandwiches, soups, or as a side.
- Simple ingredients that you probably already have.
- Great for meal prep or freezing for later.
- Impressive enough to serve at gatherings.
My Experience Making This Recipe
The first time I made these rolls, my kitchen felt like a bakery. The dough rose beautifully, and the smell of baking bread was pure bliss.
When I pulled them out of the oven, the golden-brown crust and soft interior made my heart skip a beat. My family devoured them in minutes, asking for more.
Recipe Overview
- Recipe Name: Italian Rolls
- Servings: 12 rolls
- Prep Time: 20 minutes
- Cook Time: 25 minutes
- Total Time: 45 minutes
- Course: Bread
- Cuisine: Italian
- Calories per Serving: 150
Equipment You Will Need
- Large mixing bowl
- Measuring cups and spoons
- Wooden spoon or dough whisk
- Plastic wrap or kitchen towel
- Baking sheet
- Parchment paper (optional)
- Oven
Ingredients for Italian Rolls
- 4 cups all-purpose flour
- 1 packet (2 ¼ teaspoons) active dry yeast
- 1 ½ cups warm water (110°F)
- 2 tablespoons sugar
- 2 teaspoons salt
- 2 tablespoons olive oil
How to Make Italian Rolls
Step 1: Activate the Yeast
In a small bowl, mix the warm water, sugar, and yeast. Let it sit for about 5-10 minutes until frothy; this ensures the yeast is alive and kicking.
Step 2: Combine Dry Ingredients
In a large mixing bowl, combine the flour and salt. This step distributes the salt evenly, which is crucial for flavor.
Step 3: Mix Wet Ingredients
Add the activated yeast mixture and olive oil to the dry ingredients. Stir until a rough dough forms; this prevents overworking the dough at this stage.
Step 4: Knead the Dough
Transfer the dough to a floured surface and knead for about 8-10 minutes. This develops gluten, giving the rolls their structure.
Step 5: First Rise
Place the dough in a greased bowl and cover with plastic wrap or a kitchen towel. Let it rise in a warm place for about 1 hour, or until doubled in size.
Step 6: Shape the Rolls
Once risen, punch down the dough to release air. Divide it into 12 equal pieces and shape each into a ball; this helps create a nice round shape.
Step 7: Second Rise
Place the shaped rolls on a baking sheet lined with parchment paper. Cover and let them rise for another 30 minutes; this ensures they are fluffy.
Step 8: Bake the Rolls
Preheat your oven to 375°F (190°C). Bake the rolls for 20-25 minutes until golden brown; the golden color means they are fully cooked through.
Pro Tip: For an extra crispy crust, place a small oven-safe dish of water in the oven while baking.
Tips for the Best Italian Rolls
- Use fresh yeast for better rising power.
- Ensure your water is warm, not hot, to protect the yeast.
- Don’t rush the rising process; it’s key for texture.
- For added flavor, incorporate herbs like rosemary or garlic.
- Brush with melted butter right after baking for a lovely sheen.
Common Mistakes to Avoid
- Using cold water; it can kill the yeast and prevent rising.
- Not kneading enough; under-kneaded dough can lead to dense rolls.
- Slicing into rolls too soon; they need to cool to maintain texture.
- Skipping the second rise; this can make them tough.
Serving Suggestions
These Italian rolls are versatile and pair well with various dishes. Enjoy them fresh out of the oven, or use them for sandwiches.
- Serve with marinara sauce for a tasty appetizer.
- Use them to make meatball subs.
- Pair them with a hearty soup.
- Enjoy with butter and jam for breakfast.
Variations to Try
- Add cheese for a cheesy pull-apart roll experience.
- Incorporate olive tapenade for a Mediterranean twist.
- Mix in sun-dried tomatoes for a burst of flavor.
- Try whole wheat flour for a healthier option.
Dietary Adaptations
- Gluten-free: Use a gluten-free flour blend for a similar texture.
- Dairy-free: The recipe is already dairy-free; just ensure the flour does not contain dairy.
- Vegan: Substitute olive oil for melted vegan butter if desired.
- Low-carb/keto: Use almond flour and adjust the yeast accordingly.
Storage and Reheating
Refrigerator
Store leftover rolls in an airtight container for up to 3 days.
- Reheat in the oven at 350°F for about 5-10 minutes.
Freezer
Freeze rolls in a zip-top bag for up to 3 months.
- Thaw overnight in the refrigerator before reheating.
Reheating
For best results, reheat frozen rolls in the oven for a few minutes.
- This helps maintain their texture and crust.
Nutrition Information
| Nutrient | Amount |
|---|---|
| Calories | 150 |
| Total Fat | 3g |
| Saturated Fat | 0.5g |
| Carbohydrates | 28g |
| Fiber | 1g |
| Sugar | 1g |
| Protein | 5g |
| Sodium | 150mg |
| Cholesterol | 0mg |
Nutrition values may vary based on ingredient brands and quantities used.
Frequently Asked Questions
Can I use instant yeast instead of active dry yeast?
Absolutely! Just mix it directly with the flour without proofing.
How can I make these rolls ahead of time?
You can prepare the dough a day in advance and refrigerate it after the first rise.
Can I freeze the dough before baking?
Yes, you can freeze the shaped rolls before the second rise; just let them thaw before baking.
Why are my rolls dense?
Dense rolls often result from under-kneading or not allowing enough time to rise.
What can I serve with these rolls?
They pair well with soups, salads, or can be used for sandwiches.
Final Thoughts
Making these Italian rolls at home is a delightful experience that fills your kitchen with warmth. I encourage you to try this recipe and enjoy the delicious result.
Looking for more tasty treats? Check out my Italian Meringue Recipe or try making a classic Pizza Rustica for your next gathering!
Italian Rolls
Ingredients
Equipment
Method
- In a small bowl, mix the warm water, sugar, and yeast. Let it sit for about 5-10 minutes until frothy.
- In a large mixing bowl, combine the flour and salt.
- Add the activated yeast mixture and olive oil to the dry ingredients. Stir until a rough dough forms.
- Transfer the dough to a floured surface and knead for about 8-10 minutes.
- Place the dough in a greased bowl and cover with plastic wrap or a kitchen towel. Let it rise for about 1 hour, or until doubled in size.
- Once risen, punch down the dough to release air. Divide it into 12 equal pieces and shape each into a ball.
- Place the shaped rolls on a baking sheet lined with parchment paper. Cover and let them rise for another 30 minutes.
- Preheat your oven to 375°F (190°C). Bake the rolls for 20-25 minutes until golden brown.