
Picture this: a busy afternoon, a rumbling tummy, and a craving for something sweet yet wholesome. That’s the moment I discovered the magic of Homemade Protein Bars, a delightful treat that’s not just filling but also packed with nutrients. These bars are perfect for a quick snack or a post-workout boost, offering a satisfying blend of flavors and textures. Plus, they’re incredibly easy to make, allowing you to customize them to suit your taste. Let’s dive into how you can whip up your own batch!
Why You’ll Love This Recipe
This recipe is a must-try for anyone looking to enjoy a healthy snack at home.
- Quick to prepare with minimal cleanup.
- Customizable with your favorite ingredients.
- Perfect for on-the-go snacking or meal prep.
- Offers a great balance of protein and carbs.
- Can be stored for weeks, so you always have a healthy option on hand.
My Experience Making This Recipe
The first time I made these protein bars, my kitchen was filled with the sweet aroma of peanut butter and vanilla. I couldn’t resist sneaking a taste before they even chilled!
When I shared them with friends, they were amazed at how delicious homemade bars could be. Everyone loved the chewy texture, and I felt proud knowing exactly what went into them.
Recipe Overview
- Recipe Name: Homemade Protein Bars
- Servings: 10 bars
- Prep Time: 15 minutes
- Cook Time: 0 minutes
- Total Time: 15 minutes
- Course: Snack
- Cuisine: American
- Calories per Serving: 200
Equipment You Will Need
- Mixing bowl
- Measuring cups and spoons
- Spatula
- Baking pan (8×8 inch)
- Parchment paper
Ingredients for Homemade Protein Bars
- 1 cup rolled oats
- 1/2 cup protein powder (vanilla or chocolate)
- 1/2 cup peanut butter (or almond butter)
- 1/4 cup honey (or maple syrup)
- 1/4 cup chocolate chips (optional)
- 1/4 cup chopped nuts (optional)
Ingredient Notes and Substitutions
- Rolled oats: They provide a chewy texture and are a great source of fiber. Instant oats can be used, but the texture will be different.
- Protein powder: This adds protein and helps bind the bars. If you prefer, you can use a plant-based protein powder.
- Peanut butter: It offers creaminess and flavor. Sunflower seed butter is a great nut-free alternative.
- Honey: This acts as a natural sweetener. Agave syrup can be a vegan substitute.
- Chocolate chips: They add sweetness and indulgence. You can skip them or use dried fruits instead for a healthier option.
How to Make Homemade Protein Bars
Step 1: Prepare the Baking Pan
Line an 8×8 inch baking pan with parchment paper, leaving some overhang on the sides. This will make removing the bars much easier later.
Step 2: Combine Dry Ingredients
In a mixing bowl, combine the rolled oats and protein powder. This ensures an even distribution of flavors and nutrients.
Step 3: Mix Wet Ingredients
In another bowl, mix the peanut butter and honey until smooth. This step helps blend the ingredients seamlessly.
Step 4: Combine Wet and Dry Ingredients
Pour the wet mixture into the dry mixture, and stir until everything is well combined. You want a thick and sticky dough.
Step 5: Add Extras
If desired, fold in chocolate chips and nuts. These add flavor and texture, making your bars even more enjoyable.
Step 6: Press the Mixture Into the Pan
Transfer the mixture to the prepared baking pan, pressing it down firmly. This ensures that the bars hold together once set.
Step 7: Chill the Bars
Refrigerate the pan for at least 1 hour to let the bars firm up. Chilling is crucial for achieving the right texture.
Step 8: Cut into Bars
Once chilled, lift the mixture out using the parchment overhang and cut into bars. This is where the excitement builds as you see your creation!
Pro Tip: For a more intense flavor, try adding a pinch of salt to the wet ingredients.
Tips for the Best Homemade Protein Bars
- Make sure to press the mixture firmly into the pan for better structure.
- Experiment with different nut butters for unique flavors.
- Store the bars in an airtight container for optimal freshness.
- Try adding spices like cinnamon for an extra flavor kick.
- For a chewy texture, avoid overcooking or leaving them out too long.
Common Mistakes to Avoid
- Not pressing the mixture firmly enough can result in crumbly bars.
- Skipping the chilling step can lead to soft and messy bars.
- Using too much liquid can make them overly sticky.
- Overmixing can cause the bars to become tough.
Serving Suggestions
These protein bars are great on their own but can be enhanced with a few pairings.
- Pair with a banana for a quick breakfast.
- Serve alongside a smoothie for a balanced snack.
- Enjoy with a dollop of yogurt for a creamy contrast.
- Try crumbling them over oatmeal for added texture.
Variations to Try
- Add dried fruits like cranberries for a tart touch.
- Mix in seeds like chia or flax for added crunch.
- Use cocoa powder instead of protein powder for a chocolatey twist.
- Incorporate spices like nutmeg or ginger for seasonal flavors.
Dietary Adaptations
- Gluten-free: Use certified gluten-free oats.
- Dairy-free: Ensure your protein powder is dairy-free.
- Vegan: Substitute honey with maple syrup.
- Low-carb/keto: Use a low-carb protein powder and reduce honey or use a sugar-free syrup.
Storage and Reheating
Refrigerator
Store the bars in an airtight container in the refrigerator for up to 2 weeks.
- Keep them wrapped in parchment for easy access.
- Make sure they are completely cooled before storing.
Freezer
These bars freeze wonderfully for up to 3 months.
- Wrap each bar individually in plastic wrap.
- Place them in a freezer-safe bag for extra protection.
Reheating
To enjoy them warm, microwave for 10-15 seconds.
- Be careful not to overheat, as they can become too soft.
Nutrition Information
| Nutrient | Amount |
|---|---|
| Calories | 200 |
| Total Fat | 9g |
| Saturated Fat | 2g |
| Carbohydrates | 23g |
| Fiber | 3g |
| Sugar | 8g |
| Protein | 10g |
| Sodium | 150mg |
| Cholesterol | 0mg |
Nutrition values may vary based on specific ingredients used.
Frequently Asked Questions
Can I use a different type of protein powder?
Absolutely! You can use any flavor of protein powder you prefer, just keep in mind it may change the taste.
How long can I store these bars?
They can last up to 2 weeks in the refrigerator and about 3 months in the freezer.
Can I make these bars without nuts?
Yes! You can easily leave out nuts or substitute them with seeds to keep the crunch.
What if my mixture is too dry?
If it’s too dry, add a little more peanut butter or honey until you reach the desired consistency.
Can I make these bars vegan?
Yes, just replace honey with maple syrup and ensure your protein powder is plant-based.
Final Thoughts
Making your own protein bars is not just rewarding; it’s a fun way to take control of your snacks. With endless combinations, you can create a bar that tickles your taste buds and keeps you energized.
So gather your ingredients and give this recipe a try. You might just find yourself hooked and looking for new flavor combinations!
If you enjoyed this recipe, be sure to check out my protein brownies recipe or try these delicious protein cookies for more healthy snacking options.
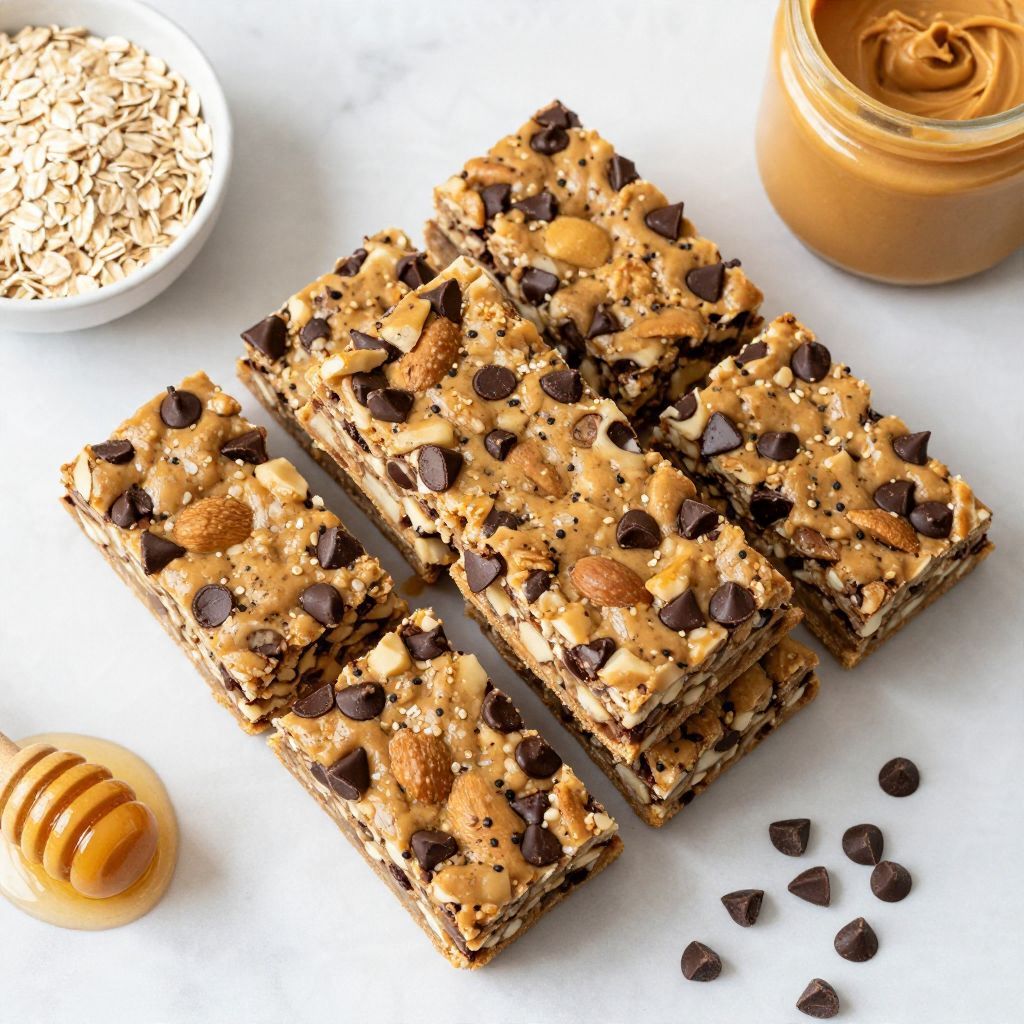
Homemade Protein Bars
Ingredients
Equipment
Method
- Line an 8x8 inch baking pan with parchment paper, leaving some overhang on the sides.
- In a mixing bowl, combine the rolled oats and protein powder.
- In another bowl, mix the peanut butter and honey until smooth.
- Pour the wet mixture into the dry mixture, and stir until well combined.
- Fold in chocolate chips and nuts if desired.
- Transfer the mixture to the prepared baking pan, pressing down firmly.
- Refrigerate the pan for at least 1 hour to let the bars firm up.
- Once chilled, lift the mixture out using the parchment overhang and cut into bars.