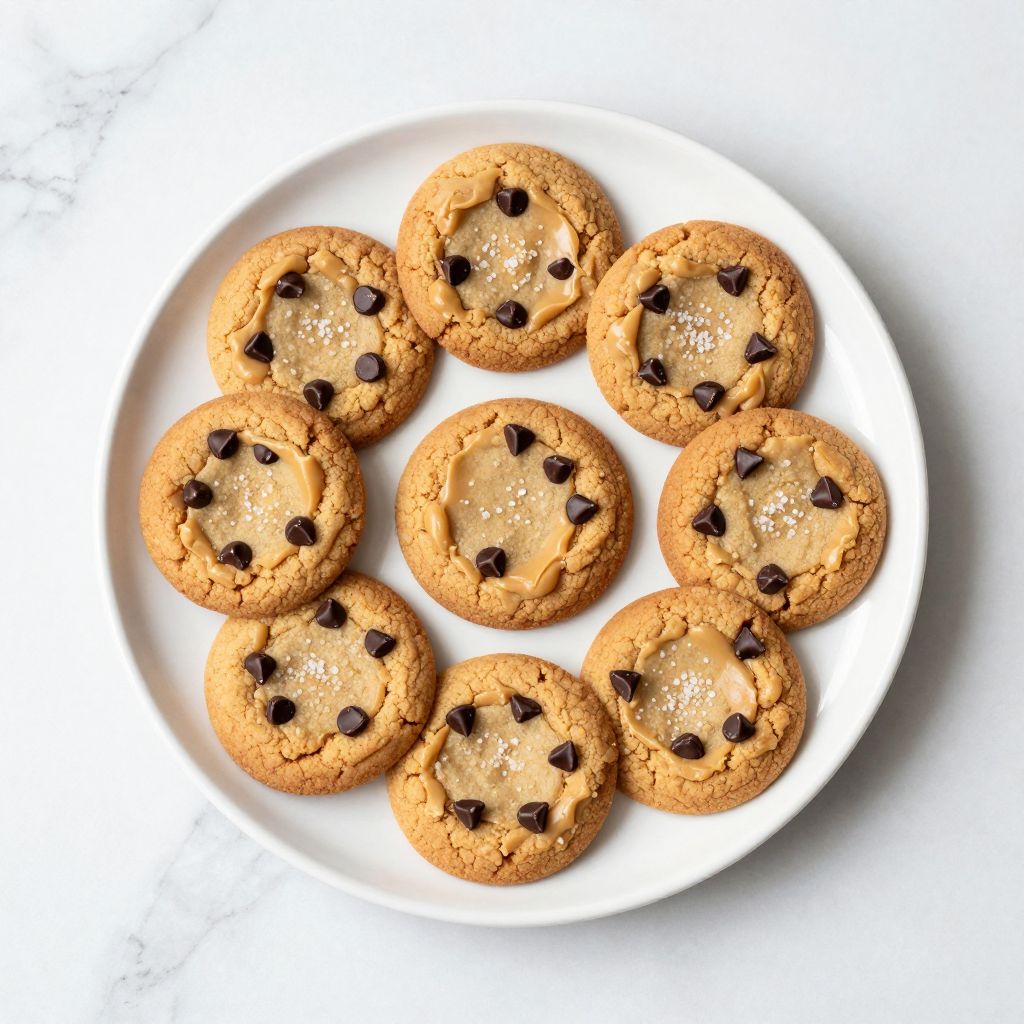
There’s something deeply satisfying about biting into a cookie that tastes indulgent but actually fuels your muscles instead of just spiking your blood sugar. Protein cookies hit that sweet spot between dessert and nutrition, making them the perfect solution for anyone who wants to enjoy a treat without abandoning their fitness goals.
These cookies deliver serious protein content without tasting like cardboard, and they come together faster than you’d expect. You’ll get chewy, tender cookies loaded with protein powder that actually taste like a homemade treat, not a supplement bar in disguise.
Why You’ll Love This Recipe
This recipe checks every box for cookies that taste amazing and deliver real nutritional benefits. You get a simple process, customizable flavors, and results that satisfy both your sweet tooth and your fitness routine.
- High protein content makes these filling enough to be a genuine snack or light breakfast
- Takes under 30 minutes from mixing bowl to finished cookies
- Works with any flavor of protein powder, so you can switch it up constantly
- No weird aftertaste or gritty texture that plagues most protein baking
- Kid-approved and adult-approved, which is rare in the health food world
My Experience Making This Recipe
I stumbled onto this recipe during a phase where I was tired of the same protein bar every afternoon. The first batch came out warm and chewy, and I immediately understood why people get obsessed with homemade protein cookies.
My gym buddies demolished half the batch before I could even get them into containers for the week. The vanilla protein powder version stayed in rotation for months, but I’ve since branched into chocolate, peanut butter, and even a wild blueberry matcha combo.
What shocked me most was how normal these taste compared to store-bought protein snacks. They don’t feel like a compromise or a guilt-free substitution; they taste like legitimately good cookies that happen to be packed with protein.
Recipe Overview
- Recipe Name: Protein Cookies
- Servings: 12 cookies
- Prep Time: 10 minutes
- Cook Time: 12 minutes
- Total Time: 22 minutes
- Course: Snack or Dessert
- Cuisine: American
- Calories per Serving: 145
Equipment You Will Need
- Mixing bowl
- Whisk
- Measuring cups and spoons
- Baking sheet
- Parchment paper
- Cookie scoop or spoon
- Oven
- Cooling rack
Ingredients for Protein Cookies
- 1 cup natural peanut butter or almond butter
- 3/4 cup vanilla protein powder
- 1/3 cup honey or maple syrup
- 1 egg
- 1 teaspoon vanilla extract
- 1/2 teaspoon baking soda
- 1/4 teaspoon sea salt
- 1/2 cup dark chocolate chips optional but recommended
Ingredient Notes and Substitutions
- Natural peanut butter provides healthy fats and binds the dough together without requiring flour. You can swap this for almond butter or sunflower seed butter if you have allergies, though the texture will be slightly lighter.
- Vanilla protein powder is the backbone of these cookies’ protein content and mild sweetness. Chocolate protein powder works beautifully, but avoid flavored varieties like birthday cake that can taste artificial.
- Honey acts as a natural binder and sweetener that keeps cookies moist without refined sugar. Maple syrup or agave nectar work fine, though they’ll change the flavor profile slightly.
- The egg provides structure and helps cookies hold together during baking. You can use a flax egg (1 tablespoon ground flax plus 3 tablespoons water) for vegan cookies, but they’ll be less chewy.
- Baking soda creates lift and helps cookies spread evenly in the oven. Don’t skip this or your cookies will be dense and cake-like.
- Dark chocolate chips add richness and a touch of cocoa flavor without being essential. Omit them for cleaner macros, or use white chocolate chips for a different flavor direction.
How to Make Protein Cookies
Step 1: Preheat Your Oven
Set your oven to 350 degrees Fahrenheit and line a baking sheet with parchment paper. This prevents sticking and makes cleanup effortless while ensuring even heat circulation around each cookie.
Step 2: Combine Wet Ingredients
Pour the peanut butter, honey, and egg into your mixing bowl and whisk until fully blended. The mixture should look smooth and well-integrated with no streaks of peanut butter remaining, which ensures even distribution of fat throughout the dough.
Step 3: Add Vanilla Extract
Pour in the vanilla extract and whisk for about 10 seconds to incorporate it evenly. This small step prevents vanilla from clumping in one spot and ensures every cookie has the same subtle vanilla flavor.
Step 4: Measure and Add Protein Powder
Slowly add the protein powder while whisking constantly to prevent lumps from forming. This gradual incorporation is crucial because protein powder clumps easily when it hits wet ingredients all at once.
Step 5: Add Baking Soda and Salt
Sprinkle the baking soda and salt over the mixture and whisk until no streaks of dry ingredients remain. These two ingredients might seem small, but baking soda creates the rise that makes cookies tender, and salt enhances all the flavors.
Step 6: Fold in Chocolate Chips
Gently stir in the chocolate chips with a spatula or spoon until evenly distributed throughout the dough. This folding motion preserves the airy texture you built by whisking while ensuring chocolate in every bite.
Step 7: Scoop and Shape Cookies
Using a cookie scoop or spoon, drop dough onto your prepared baking sheet, spacing each cookie about 2 inches apart. Cookie dough spreads slightly during baking, so adequate spacing prevents cookies from merging into one giant mass.
Step 8: Bake Until Golden
Place the baking sheet in your preheated oven for 12 minutes, watching until the edges turn light golden brown. The center should still look slightly underdone when you pull them out, because cookies continue cooking on the hot pan after leaving the oven.
Step 9: Cool on the Pan
Let cookies rest on the baking sheet for 5 minutes without moving them. This waiting period allows the structure to set so you can move them to a cooling rack without them falling apart.
Step 10: Transfer to Cooling Rack
Use a spatula to carefully transfer each cookie to a cooling rack and let them cool completely. Complete cooling firms up the texture and lets you taste the true flavor without the heat masking subtle notes.
Pro Tip: Don’t overbake these cookies; they should look slightly underdone when you remove them from the oven because the residual heat from the pan continues cooking them as they cool.
Tips for the Best Protein Cookies
- Use natural peanut butter without added sugar or oils, which keeps the cookie texture light and prevents greasiness. Stir your peanut butter before measuring to distribute the natural oils evenly.
- Don’t skip whisking the wet ingredients; this incorporates air that makes cookies fluffy instead of dense. A good 30 seconds of whisking makes a noticeable difference in texture.
- Pull cookies from the oven when the edges are golden but the center still looks soft; they’ll firm up as they cool. This timing creates that perfect balance between chewy center and slightly crisp edges.
- Store cooled cookies in an airtight container at room temperature for up to 5 days. The honey in the dough keeps them moist longer than typical cookies.
- Experiment with different protein powder flavors to create variety throughout the week. Chocolate, birthday cake, and salted caramel all work beautifully with this base recipe.
- If your dough feels too sticky, refrigerate it for 15 minutes before scooping. Cold dough holds its shape better and creates cookies with better definition.
Common Mistakes to Avoid
- Overmixing the dry ingredients after adding protein powder creates a dense, tough cookie with a gritty texture. Mix just until no visible streaks remain.
- Using flavored protein powder with sweetened additives makes cookies overly sweet and can create an artificial aftertaste. Stick with plain vanilla or chocolate varieties.
- Baking cookies at too high a temperature browns the outside before the inside cooks through, leaving you with burnt edges and a raw center. Stick to 350 degrees.
- Packing cookies into storage containers while still warm traps steam and creates a soggy texture. Let them cool completely first.
- Measuring protein powder by scooping directly from the container compacts the powder and throws off your ratios, resulting in dry cookies. Spoon powder into your measuring cup and level it off.
Serving Suggestions
These cookies work beautifully as a post-workout snack paired with cold milk or a protein shake. You can also grab them for breakfast alongside coffee, pack them for work snacks, or crumble them into yogurt for added texture.
- Pair with unsweetened almond milk for a high-protein snack
- Serve alongside Greek yogurt with berries for a breakfast upgrade
- Pack two cookies with a banana for a convenient pre-gym snack
- Crumble into oatmeal for added protein and chocolate flavor
- Enjoy one cookie with black coffee as an afternoon pick-me-up
Variations to Try
- Chocolate Peanut Butter: Replace vanilla protein powder with chocolate, and add 2 tablespoons cocoa powder to intensify the chocolate flavor while keeping protein content high.
- Maple Walnut: Use maple syrup instead of honey and fold in chopped walnuts for a nuttier, more complex flavor that pairs beautifully with vanilla protein.
- Almond Joy: Use almond butter instead of peanut butter, add unsweetened shredded coconut, and use chocolate chips for a tropical twist that tastes like the classic candy bar.
- Birthday Cake: Add 1/2 teaspoon almond extract and sprinkles to the dough for a fun variation, though be cautious with sweetened sprinkles to avoid excess sugar.
- Banana Bread: Mash one ripe banana into the wet ingredients and reduce honey to 1/4 cup, then add cinnamon and nutmeg for a warm spice profile that mimics banana bread.
Dietary Adaptations
- Gluten-free: This recipe is naturally gluten-free, but ensure your protein powder and chocolate chips don’t contain hidden gluten from processing.
- Dairy-free: Use dairy-free chocolate chips and ensure your protein powder contains no milk ingredients for a fully dairy-free cookie.
- Vegan: Replace the egg with a flax egg and use vegan protein powder, though the texture will be slightly less chewy than the original.
- Low-carb or Keto: Replace honey with erythritol and use almond butter to reduce carbs significantly, creating a lower-carb cookie with similar macros.
Storage and Reheating
Refrigerator
Store cooled cookies in an airtight container on a shelf away from heat or light. They stay fresh and chewy for up to 5 days in the refrigerator.
- Transfer to airtight container after cooling completely
- Place parchment paper between layers to prevent sticking
- Check for any moisture buildup and remove condensation if needed
Freezer
These cookies freeze exceptionally well and maintain their texture for up to 2 months. Thaw them at room temperature for 20 minutes before eating.
- Layer cookies with parchment paper in a freezer-safe container
- Label the container with the date so you remember when you baked them
- Thaw at room temperature rather than in the microwave to prevent mushiness
Reheating
You can enjoy these cookies straight from the fridge or freezer, but warming them slightly brings back freshly-baked texture. Pop a cookie in the microwave for 15 seconds or warm it in a 300-degree oven for 5 minutes.
- Microwave for 15 seconds to warm without overdrying
- Oven warming at 300 degrees for 5 minutes restores closer to fresh-baked quality
- Don’t microwave for longer than 15 seconds or cookies become tough
Nutrition Information
| Nutrient | Amount |
|---|---|
| Calories | 145 |
| Total Fat | 8g |
| Saturated Fat | 2g |
| Carbohydrates | 12g |
| Fiber | 2g |
| Sugar | 9g |
| Protein | 8g |
| Sodium | 185mg |
| Cholesterol | 16mg |
These values are estimates based on standard ingredients and may vary slightly depending on your specific brands and exact measurements. Always verify nutritional information if you have specific dietary tracking needs.
Frequently Asked Questions
Can I make these cookies without protein powder?
You could substitute with almond flour or coconut flour, but the cookies will lose their high-protein benefit and the texture will change significantly. The protein powder is really what makes these special, so I’d recommend sticking with it or trying a different cookie recipe if you want to skip it.
How do I prevent my cookies from spreading too thin?
Chill your dough for 15 minutes before scooping or use a cookie scoop to create uniform portions that hold their shape better. Cold dough doesn’t spread as aggressively in the oven and produces cookies with better definition.
What if my dough is too sticky to scoop?
Pop the mixing bowl in the refrigerator for 15 minutes to firm up the dough slightly. If it’s still sticky after chilling, you might have used natural peanut butter with extra oil; stir that oil back in next time.
Can I make these cookies dairy-free?
Yes, just swap the chocolate chips for dairy-free varieties and check that your protein powder contains no milk ingredients. Everything else in the recipe is naturally dairy-free.
How long do these cookies stay fresh?
In an airtight container at room temperature, they stay fresh and chewy for up to 5 days. In the refrigerator, they last about 5 days as well, and in the freezer they maintain quality for up to 2 months.
Can I use different types of protein powder?
Absolutely, vanilla and chocolate work best, but I’ve had success with birthday cake, salted caramel, and even unflavored protein powder. Just avoid overly sweetened varieties that make cookies cloyingly sweet.
Final Thoughts
Making your own protein cookies transforms snack time from a guilt-ridden indulgence into something that actually supports your fitness goals. These cookies taste genuinely delicious, come together quickly, and prove that healthy eating doesn’t mean sacrificing treats.
Grab your ingredients this week and give this recipe a shot; I bet you’ll understand immediately why these became a staple in my kitchen. The combination of chewy texture, real protein content, and versatile flavor options makes these cookies something you’ll want to make again and again.
Protein Cookies
Ingredients
Equipment
Method
- Set your oven to 350 degrees Fahrenheit and line a baking sheet with parchment paper.
- Pour the peanut butter, honey, and egg into your mixing bowl and whisk until fully blended and smooth with no streaks of peanut butter remaining.
- Pour in the vanilla extract and whisk for about 10 seconds to incorporate it evenly.
- Slowly add the protein powder while whisking constantly to prevent lumps from forming.
- Sprinkle the baking soda and salt over the mixture and whisk until no streaks of dry ingredients remain.
- Gently stir in the chocolate chips with a spatula or spoon until evenly distributed throughout the dough.
- Using a cookie scoop or spoon, drop dough onto your prepared baking sheet, spacing each cookie about 2 inches apart.
- Place the baking sheet in your preheated oven for 12 minutes, watching until the edges turn light golden brown. The center should still look slightly underdone when you pull them out.
- Let cookies rest on the baking sheet for 5 minutes without moving them.
- Use a spatula to carefully transfer each cookie to a cooling rack and let them cool completely.