
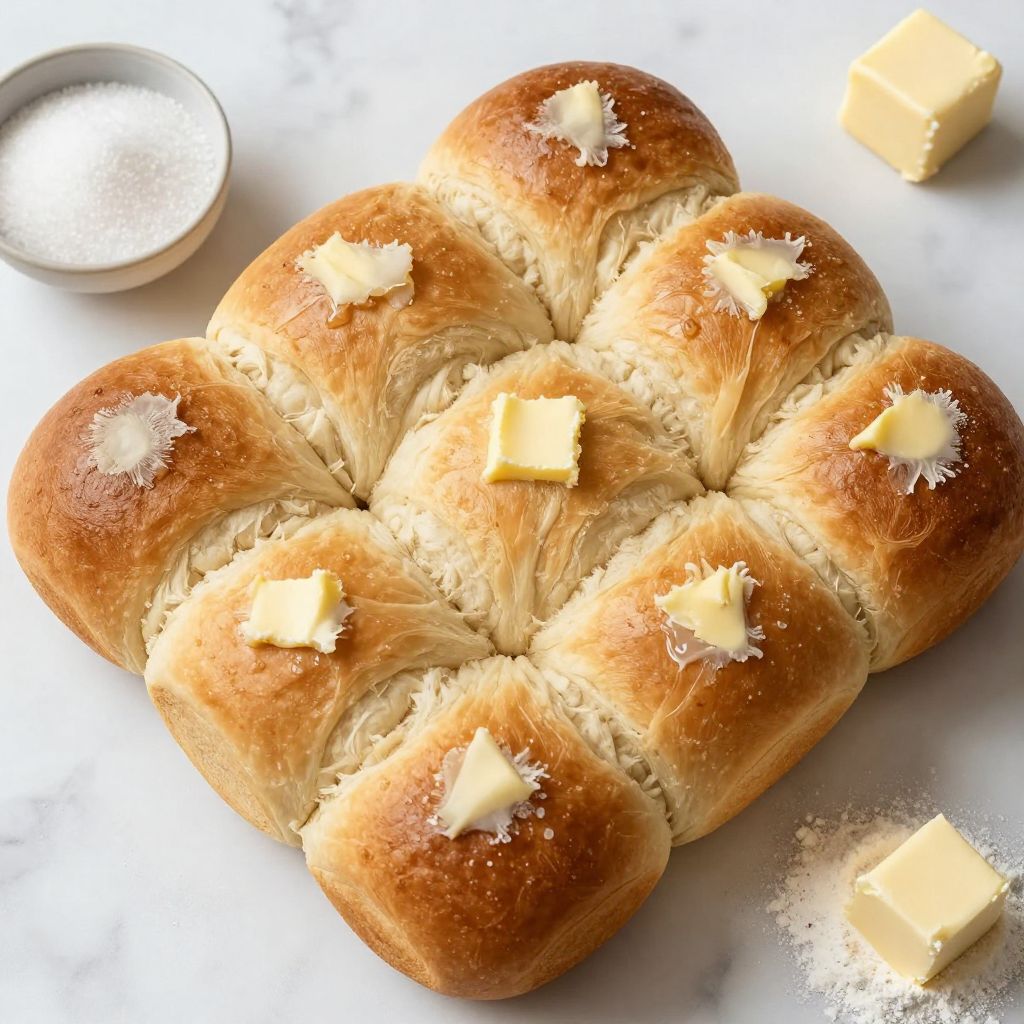
Imagine the warm, yeasty aroma wafting through your kitchen, inviting everyone to gather around the table. Bread Machine Rolls are not just a side dish; they are a celebration of comfort, perfect for any meal or occasion. With their soft, fluffy texture and buttery flavor, these rolls are simple to make and a delightful addition to your dining experience. Whether you are a busy parent or a novice baker, you’ll appreciate how easily these rolls come together in a bread machine. Let’s roll up our sleeves and get started!
Why You’ll Love This Recipe
These rolls are a must-try for their simplicity and taste.
- Perfectly soft and fluffy texture that melts in your mouth.
- Quick and easy preparation thanks to the bread machine.
- Great for family dinners, holidays, or just because.
- Versatile enough to pair with any dish.
- Homemade rolls that will impress your guests.
My Experience Making This Recipe
The first time I made these rolls, my kitchen was filled with the delightful scent of fresh bread. As they baked, I could hardly wait for the moment I pulled them out of the machine.
When I finally took a bite, the soft texture and buttery flavor made me feel like a baking pro. My family devoured them in minutes, leaving me feeling accomplished and ready to make another batch.
Recipe Overview
- Recipe Name: Bread Machine Rolls
- Servings: 12 rolls
- Prep Time: 10 minutes
- Cook Time: 2 hours
- Total Time: 2 hours 10 minutes
- Course: Side Dish
- Cuisine: American
- Calories per Serving: 150
Equipment You Will Need
- Bread machine
- Measuring cups
- Measuring spoons
- Mixing spoon
- Baking sheet
- Kitchen towel
Ingredients for Bread Machine Rolls
- 1 cup warm water (110°F to 115°F)
- 1/4 cup granulated sugar
- 2 tablespoons unsalted butter, softened
- 1 teaspoon salt
- 3 cups bread flour
- 1 tablespoon active dry yeast
Ingredient Notes and Substitutions
- Warm Water: Activates the yeast for proper rising. You can use milk for a richer flavor.
- Granulated Sugar: Helps with browning and adds sweetness. Honey can be a great substitute.
- Unsalted Butter: Adds flavor and moisture. Coconut oil can work well if you prefer dairy-free.
- Salt: Enhances flavor. If you’re watching sodium, use less or omit it.
- Bread Flour: Provides structure. All-purpose flour can be used but may yield a slightly different texture.
- Active Dry Yeast: Responsible for rising. Instant yeast can be used without changing the amount.
How to Make Bread Machine Rolls
Step 1: Prepare the Ingredients
Gather all your ingredients and tools to ensure a smooth baking process. This makes it easier to measure and mix everything quickly.
Step 2: Add Ingredients to the Bread Machine
Pour the warm water into the bread machine pan first. This helps dissolve the sugar and activate the yeast properly.
Step 3: Mix in Sugar and Butter
Add the sugar and softened butter to the warm water. Stir gently with a spoon to combine and let it sit for a few minutes to ensure the yeast activates.
Step 4: Add Dry Ingredients
Next, add the salt, bread flour, and yeast to the mixture. Make sure to layer them properly, as the yeast should not come into direct contact with the salt until mixing.
Step 5: Select the Dough Setting
Close the bread machine lid and select the dough setting. This typically takes about an hour and a half, allowing the dough to rise beautifully.
Step 6: Shape the Rolls
Once the dough cycle is complete, remove it from the machine and place it on a floured surface. Divide the dough into 12 equal pieces and shape them into balls.
Step 7: Let the Rolls Rise
Place the shaped rolls onto a baking sheet lined with parchment paper. Cover them with a kitchen towel and let them rise for 30 minutes until they double in size.
Step 8: Bake the Rolls
Preheat your oven to 375°F (190°C). Bake the rolls for about 15 to 20 minutes, until golden brown. The aroma will be irresistible!
Pro Tip: Brush the rolls with melted butter right after baking for an extra touch of flavor and shine.
Tips for the Best Bread Machine Rolls
- Make sure your water is the right temperature to activate the yeast.
- Don’t skip the rising time; it’s crucial for fluffy rolls.
- For a golden crust, brush the rolls with milk before baking.
- Experiment with adding herbs or cheese for a flavor twist.
- Keep the dough covered during rising to prevent it from drying out.
Common Mistakes to Avoid
- Using water that is too hot can kill the yeast, preventing rising.
- Not measuring flour correctly may lead to dense rolls.
- Skipping the rising time results in flat, hard rolls.
- Adding salt directly on top of the yeast can inhibit its activation.
Serving Suggestions
These rolls shine best alongside a hearty meal or as a snack on their own. Here are some pairing ideas:
- Serve with a rich stew or soup.
- Pair with a fresh salad for a light lunch.
- Enjoy with butter and jam for breakfast.
- Use them as sliders or sandwich rolls.
Variations to Try
- Add garlic to the dough for a savory twist.
- Incorporate cheese for a cheesy roll experience.
- Mix in herbs like rosemary or thyme for added flavor.
- Top with seeds like sesame or poppy before baking.
Dietary Adaptations
- Gluten-Free: Substitute with a gluten-free flour blend for a similar texture.
- Dairy-Free: Replace butter with a dairy-free alternative like coconut oil.
- Vegan: Use plant-based butter and ensure sugar is vegan-friendly.
- Low-Carb/Keto: Use almond flour and adjust the yeast for a low-carb option.
Storage and Reheating
Refrigerator
Store leftover rolls in an airtight container for up to 3 days.
- Wrap each roll in plastic wrap for freshness.
- Reheat in the microwave for a few seconds before serving.
Freezer
These rolls freeze beautifully for later enjoyment.
- Place cooled rolls in a freezer-safe bag or container.
- They can be frozen for up to 3 months.
Reheating
Reheat frozen rolls in the oven for best results.
- Preheat to 350°F (175°C) and bake for 10-15 minutes.
- Microwave for speed, but they may lose some texture.
Nutrition Information
| Nutrient | Amount |
|---|---|
| Calories | 150 |
| Total Fat | 4g |
| Saturated Fat | 2g |
| Carbohydrates | 24g |
| Fiber | 1g |
| Sugar | 3g |
| Protein | 4g |
| Sodium | 150mg |
| Cholesterol | 10mg |
This information is approximate and can vary based on specific ingredient brands used.
Frequently Asked Questions
Can I use all-purpose flour instead of bread flour?
Yes, but the texture may be slightly different; bread flour gives a better rise.
Can I make the dough ahead of time?
Absolutely! You can prepare the dough and refrigerate it for up to 24 hours before shaping and baking.
How do I store these rolls?
Store them in an airtight container at room temperature for up to three days or freeze them for longer storage.
Why are my rolls dense?
This might be due to too much flour, insufficient rising time, or expired yeast. Make sure to measure carefully!
Can I add herbs or spices?
Yes! Feel free to experiment by adding your favorite herbs or spices to customize the flavor.
Final Thoughts
Making Bread Machine Rolls is a rewarding experience that fills your kitchen with warmth. I encourage you to give this recipe a try and watch as your family gathers around, eager for a taste.
For more delicious bread ideas, explore my Honey Wheat Bread Recipe or indulge in some sweet Caramel Rolls. Happy baking!
Bread Machine Rolls
Ingredients
Equipment
Method
- Pour the warm water into the bread machine pan.
- Add the sugar and softened butter to the warm water.
- Stir gently with a spoon to combine and let sit for a few minutes.
- Add the salt, bread flour, and yeast to the mixture.
- Close the bread machine lid and select the dough setting.
- Once the dough cycle is complete, remove it from the machine.
- Place the dough on a floured surface and divide into 12 equal pieces.
- Shape each piece into a ball and place on a baking sheet.
- Cover the rolls with a kitchen towel and let rise for 30 minutes.
- Preheat the oven to 375°F (190°C) and bake for 15-20 minutes until golden brown.
- Optional: Brush with melted butter immediately after baking.