
Picture this: a beautifully golden, crispy onion, petals perfectly fanned out, waiting to be devoured. The Baked Blooming Onion isn’t just a dish; it’s a showstopper that brings the fun of a restaurant appetizer right to your kitchen. With its savory flavors and satisfying crunch, this recipe will surely impress your guests while keeping your waistline in check. It’s a delightful, healthier twist on a classic favorite that’s perfect for game day, parties, or just a cozy night in. Let’s get started on this delicious adventure!
Why You’ll Love This Recipe
This recipe is a fantastic way to enjoy a classic appetizer without the guilt. It combines flavor, crunch, and a stunning presentation.
- Healthier alternative to deep-fried onions.
- Easy to make with simple ingredients.
- Perfect for sharing or enjoying solo.
- Versatile seasoning options to suit any taste.
- Impressive presentation that wows guests.
My Experience Making This Recipe
The first time I made this Baked Blooming Onion, I was shocked at how easy it was. As the aroma filled my kitchen, I couldn’t wait to see the final result.
When I pulled it out of the oven, it was a sight to behold. The crispy petals and golden-brown edges were met with rave reviews from my family, making it a new favorite!
Recipe Overview
- Recipe Name: Baked Blooming Onion
- Servings: 4
- Prep Time: 15 minutes
- Cook Time: 45 minutes
- Total Time: 1 hour
- Course: Appetizer
- Cuisine: American
- Calories per Serving: 210
Equipment You Will Need
- Cutting board
- Sharp knife
- Baking sheet
- Parchment paper
- Mixing bowl
- Brush for oil
Ingredients for Baked Blooming Onion
- 1 large onion
- 1 cup breadcrumbs
- 1/2 cup all-purpose flour
- 1/2 cup milk
- 2 large eggs
- 1 teaspoon garlic powder
- 1 teaspoon paprika
- 1/2 teaspoon salt
- 1/4 teaspoon black pepper
- 2 tablespoons olive oil
Ingredient Notes and Substitutions
- Onion: A large onion provides the best shape. Vidalia or sweet onions work well as substitutes.
- Breadcrumbs: Adds crunch and texture. You can use panko for extra crispiness or gluten-free options if needed.
- All-purpose flour: Helps the breading stick. Almond flour can be a low-carb alternative.
- Milk: Adds moisture to the batter. Plant-based milk works great for dairy-free options.
- Olive oil: Helps achieve a golden color. Any cooking oil can be used, but olive oil adds flavor.
How to Make Baked Blooming Onion
Step 1: Prepare the Onion
Start by peeling the onion and cutting off the top and bottom. This creates a stable base and allows the petals to open up nicely.
Step 2: Cut the Onion
Make vertical cuts into the onion, about 1/2 inch apart, stopping before you reach the bottom. This allows the petals to bloom while baking.
Step 3: Soak the Onion
Soak the cut onion in cold water for about 30 minutes. This helps it open up more and removes some of the bitterness.
Step 4: Preheat the Oven
Preheat your oven to 400°F (200°C). A hot oven ensures a crispy finish to your onion.
Step 5: Prepare the Breading
In a mixing bowl, combine breadcrumbs, garlic powder, paprika, salt, and pepper. This blend gives the onion a delicious flavor.
Step 6: Dredge the Onion
Dip the soaked onion into the flour, then into the milk and beaten eggs, and finally coat it with the breadcrumb mixture. Each layer adds texture and flavor.
Step 7: Bake the Onion
Place the onion on a baking sheet lined with parchment paper and drizzle with olive oil. Baking it at the right temperature will help it crisp up beautifully.
Step 8: Enjoy!
Bake for about 45 minutes or until golden brown. Serve warm with your favorite dipping sauce, and watch it disappear!
Pro Tip: Make sure to cut the onion evenly for even cooking and blooming.
Tips for the Best Baked Blooming Onion
- Use a sweet onion for a milder flavor that balances the spices.
- Don’t skip the soaking step; it enhances the onion’s texture.
- Experiment with different spices in the breadcrumb mixture for unique flavors.
- For extra crunch, consider adding grated Parmesan cheese to the breadcrumb mix.
- Brush the onion with oil generously to achieve a golden color.
Common Mistakes to Avoid
- Not cutting deep enough into the onion can prevent proper blooming.
- Skipping the soaking step may result in a bitter taste.
- Using low-quality breadcrumbs can lead to a soggy texture.
- Overcrowding the baking sheet can cause uneven cooking.
Serving Suggestions
This dish pairs well with a variety of sauces and sides. Here are some pairing ideas:
- Spicy ranch or garlic aioli for dipping.
- Fresh vegetable platter for a crunchy contrast.
- A crisp green salad for a refreshing side.
- Beer or a light cocktail to complement the flavors.
Variations to Try
- Add cheese between the onion layers for a gooey surprise.
- Use different spices like cayenne for some heat.
- Try a savory herb blend for an aromatic twist.
- Coat the onion in crushed tortilla chips for a Mexican flair.
Dietary Adaptations
- Gluten-free: Use gluten-free breadcrumbs and flour.
- Dairy-free: Substitute milk with almond or oat milk.
- Vegan: Replace eggs with a flax egg or aquafaba.
- Low-carb/Keto: Use almond flour and crushed pork rinds instead of breadcrumbs.
Storage and Reheating
Refrigerator
Store any leftovers in an airtight container in the fridge.
- They will keep for up to 3 days.
- Reheat in the oven for the best texture.
Freezer
For longer storage, freeze the baked onion.
- Wrap it tightly in plastic wrap or foil.
- It can be frozen for up to a month.
Reheating
Reheat in a preheated oven at 375°F (190°C) until heated through.
- This helps regain some of the original crunch.
Nutrition Information
| Nutrient | Amount |
|---|---|
| Calories | 210 |
| Total Fat | 8g |
| Saturated Fat | 1g |
| Carbohydrates | 32g |
| Fiber | 2g |
| Sugar | 2g |
| Protein | 5g |
| Sodium | 300mg |
| Cholesterol | 70mg |
This nutritional information is approximate and can vary based on specific ingredients used.
Frequently Asked Questions
Can I make this ahead of time?
Yes, you can prep the onion and coat it in breadcrumbs a few hours in advance before baking.
Can I use a different type of onion?
Absolutely! Sweet onions work best, but any large onion can be used for a different flavor profile.
What if my onion doesn’t bloom properly?
This can happen if the cuts are not deep enough or if the onion is too old. Make sure to cut evenly and use a fresh onion.
Can I freeze the baked onion?
Yes, you can freeze it after baking. Just wrap it well and reheat when you are ready to enjoy it.
How can I add more flavor to the coating?
You can add various spices, herbs, or even cheese to the breadcrumb mixture to enhance the flavor.
Final Thoughts
Making a Baked Blooming Onion is a fun and rewarding experience that delivers great taste and beautiful presentation. Whether you’re serving it at a gathering or enjoying it on a quiet night, this recipe is sure to please.
So why not give it a try? You might just find your new favorite dish to impress friends and family. And while you’re here, check out my other delicious recipes like Blooming Onion Sauce and Corn Pone for even more tasty ideas!
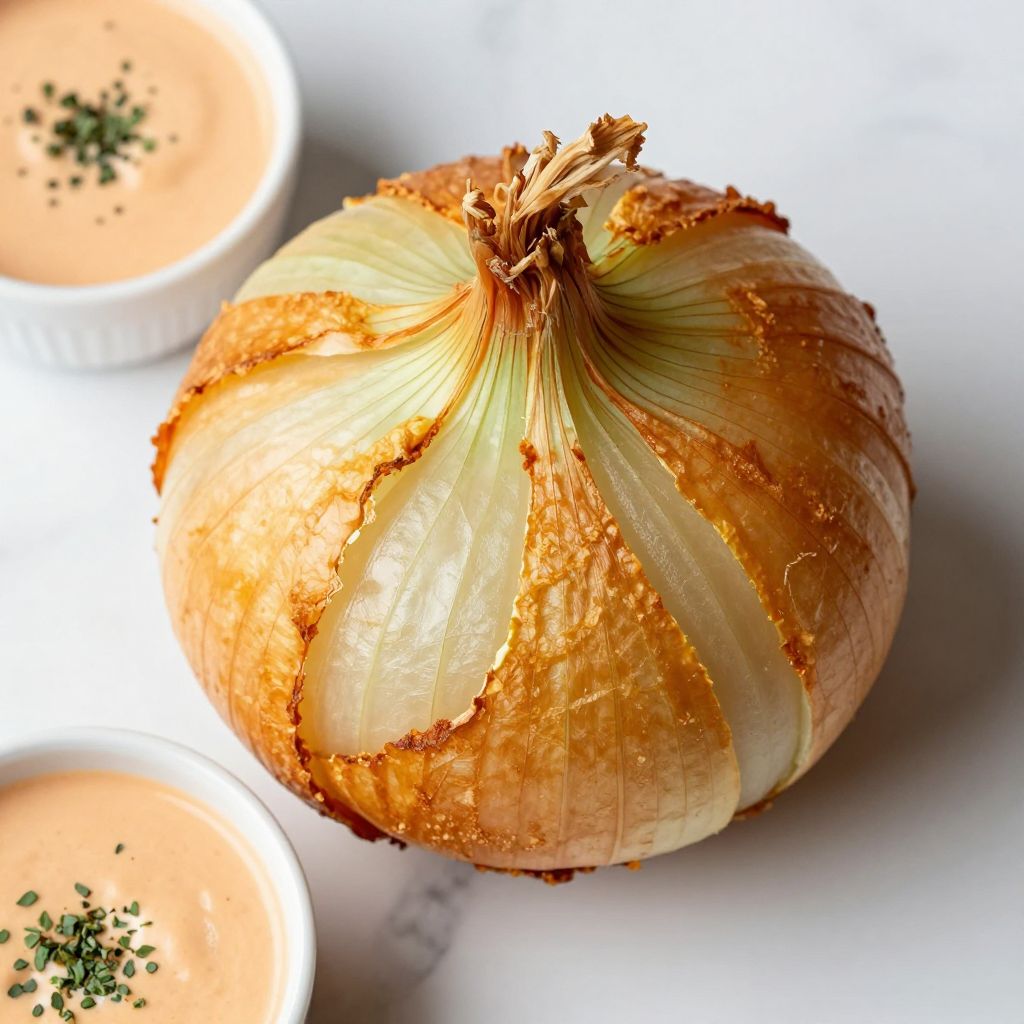
Baked Blooming Onion
Ingredients
Equipment
Method
- Peel the onion and cut off the top and bottom to create a stable base.
- Make vertical cuts into the onion, about 1/2 inch apart, stopping before you reach the bottom.
- Soak the cut onion in cold water for about 30 minutes.
- Preheat your oven to 400°F (200°C).
- In a mixing bowl, combine breadcrumbs, garlic powder, paprika, salt, and pepper.
- Dip the soaked onion into the flour, then into the milk and beaten eggs, and finally coat it with the breadcrumb mixture.
- Place the onion on a baking sheet lined with parchment paper and drizzle with olive oil.
- Bake for about 45 minutes or until golden brown.
- Serve warm with your favorite dipping sauce.