
There’s something incredibly satisfying about that rich, chocolatey aroma wafting through your kitchen as you whip up a batch of Chocolate Whey Protein treats. This recipe is a delightful way to enjoy a sweet indulgence while packing in some serious nutrition, making it perfect for busy parents and fitness enthusiasts alike. With its creamy texture and decadent flavor, you’ll feel like you’re indulging without any guilt. Plus, it’s super versatile and easy to make, so you can enjoy it in many ways. Let’s dive into the ingredients and get started!
Why You’ll Love This Recipe
This recipe is a must-try for anyone looking to add a delicious protein boost to their day.
- Rich chocolate flavor that satisfies your sweet tooth.
- Quick and easy to prepare, perfect for on-the-go snacking.
- Customizable with various mix-ins or toppings.
- Packed with protein to fuel your day.
- Perfect for breakfast, snacks, or post-workout recovery.
My Experience Making This Recipe
I first tried this Chocolate Whey Protein recipe during a busy week when I needed quick, nutritious snacks. The moment I blended the ingredients together, the smooth chocolate scent filled my kitchen, making it hard to resist tasting the batter.
When I took my first bite, I felt a wave of satisfaction wash over me. The combination of flavors was spot on, and I loved how easy it was to prepare. My family devoured them, and I knew I had found a winner.
Recipe Overview
- Recipe Name: Chocolate Whey Protein
- Servings: 12
- Prep Time: 10 minutes
- Cook Time: 20 minutes
- Total Time: 30 minutes
- Course: Snack
- Cuisine: American
- Calories per Serving: 150
Equipment You Will Need
- Mixing bowl
- Whisk or electric mixer
- Measuring cups and spoons
- Baking dish or muffin tin
- Parchment paper (optional)
Ingredients for Chocolate Whey Protein
- 1 cup chocolate whey protein powder
- 1/2 cup rolled oats
- 1/2 cup almond milk (or any milk of choice)
- 1/4 cup natural peanut butter (or nut butter of choice)
- 1/4 cup honey or maple syrup
- 1/2 teaspoon vanilla extract
- 1/4 teaspoon salt
- 1/2 cup dark chocolate chips (optional)
Ingredient Notes and Substitutions
- Chocolate whey protein powder: This adds flavor and protein. You can substitute with a plant-based protein powder if preferred.
- Rolled oats: They provide texture and fiber. Quick oats can work as a substitute.
- Almond milk: This keeps the recipe dairy-free. Any milk works, including cow’s or oat milk.
- Natural peanut butter: It adds creaminess and flavor. Almond or sunflower seed butter can be used instead.
- Honey or maple syrup: This acts as a natural sweetener. Agave syrup or stevia can be alternatives.
How to Make Chocolate Whey Protein
Step 1: Preheat the Oven
Start by preheating your oven to 350°F (175°C). This ensures even baking and that your treats rise perfectly.
Step 2: Prepare the Baking Dish
Grease your baking dish or line it with parchment paper. This prevents sticking and makes cleanup a breeze.
Step 3: Combine Dry Ingredients
In a mixing bowl, combine the chocolate whey protein powder, rolled oats, and salt. This helps evenly distribute the flavors and nutrients.
Step 4: Mix Wet Ingredients
In another bowl, whisk together the almond milk, peanut butter, honey, and vanilla extract. This creates a smooth mixture that blends well with the dry ingredients.
Step 5: Combine Wet and Dry Mixtures
Pour the wet mixture into the dry ingredients and stir until just combined. Overmixing can lead to a dense texture, which we want to avoid.
Step 6: Fold in Chocolate Chips
If using, gently fold in the dark chocolate chips. They add an extra layer of indulgence and richness.
Step 7: Pour into Baking Dish
Transfer the batter into your prepared baking dish, spreading it evenly. This ensures uniform cooking and texture throughout.
Step 8: Bake
Bake in the preheated oven for 20 minutes or until a toothpick comes out clean. This step is crucial; overbaking can dry out your treats.
Pro Tip: Let them cool completely before cutting; they will firm up and be easier to handle!
Tips for the Best Chocolate Whey Protein
- Use high-quality protein powder for the best flavor and texture.
- Don’t skip the cooling time; it makes a big difference in how they hold together.
- Experiment with different nut butters for varied flavor profiles.
- Add nuts or seeds for extra crunch and nutrition.
- Store any leftovers in an airtight container to maintain freshness.
Common Mistakes to Avoid
- Overmixing the batter can lead to a tough texture.
- Not measuring your ingredients accurately can throw off the balance.
- Skipping the cooling time will make cutting difficult.
- Using low-quality protein powder can result in an off taste.
Serving Suggestions
These treats are delicious on their own, but you can elevate them even more.
- Serve with a dollop of Greek yogurt for added creaminess.
- Pair with fresh fruit like bananas or berries for a colorful plate.
- Enjoy with a glass of almond milk for a complete snack.
- Top with a drizzle of melted dark chocolate for extra indulgence.
Variations to Try
- Add shredded coconut for a tropical twist.
- Incorporate spices like cinnamon or nutmeg for depth of flavor.
- Mix in protein-packed chia seeds for added health benefits.
- Swap chocolate chips for dried fruit for a chewy texture.
Dietary Adaptations
- Gluten-free: Use certified gluten-free oats.
- Dairy-free: Stick with plant-based milk and nut butter.
- Vegan: Replace honey with maple syrup or agave.
- Low-carb/Keto: Use a low-carb sweetener and omit oats.
Storage and Reheating
Refrigerator
Store the protein treats in an airtight container in the refrigerator.
- They will last about a week.
Freezer
You can freeze these treats for longer storage.
- Wrap them individually and store in a freezer bag.
- They will keep for up to three months.
Reheating
When ready to enjoy, simply thaw in the fridge overnight or warm briefly in the microwave.
- Microwave for 10-15 seconds for the best results.
Nutrition Information
| Nutrient | Amount |
|---|---|
| Calories | 150 |
| Total Fat | 6g |
| Saturated Fat | 1g |
| Carbohydrates | 18g |
| Fiber | 2g |
| Sugar | 5g |
| Protein | 10g |
| Sodium | 150mg |
| Cholesterol | 0mg |
This nutritional information is approximate and may vary based on specific ingredients used.
Frequently Asked Questions
Can I use a different type of protein powder?
Yes, you can use any flavor of protein powder, but it may alter the final taste.
Can I make this recipe ahead of time?
Absolutely! These treats store well and are great for meal prep.
How should I store the leftovers?
Keep them in an airtight container in the fridge for up to a week.
What if the texture is too dry?
If the batter seems dry, a splash of milk can help bring it together.
Can I add other flavors?
Definitely! Experiment with different extracts or spices to find your favorite combination.
Final Thoughts
Making Chocolate Whey Protein treats is a fantastic way to enjoy a sweet, nutritious snack that fits into your busy lifestyle. I hope you give this recipe a try and savor every bite.
For more delicious protein-packed inspiration, check out my recipes for protein brownies and protein cookies. Happy cooking!
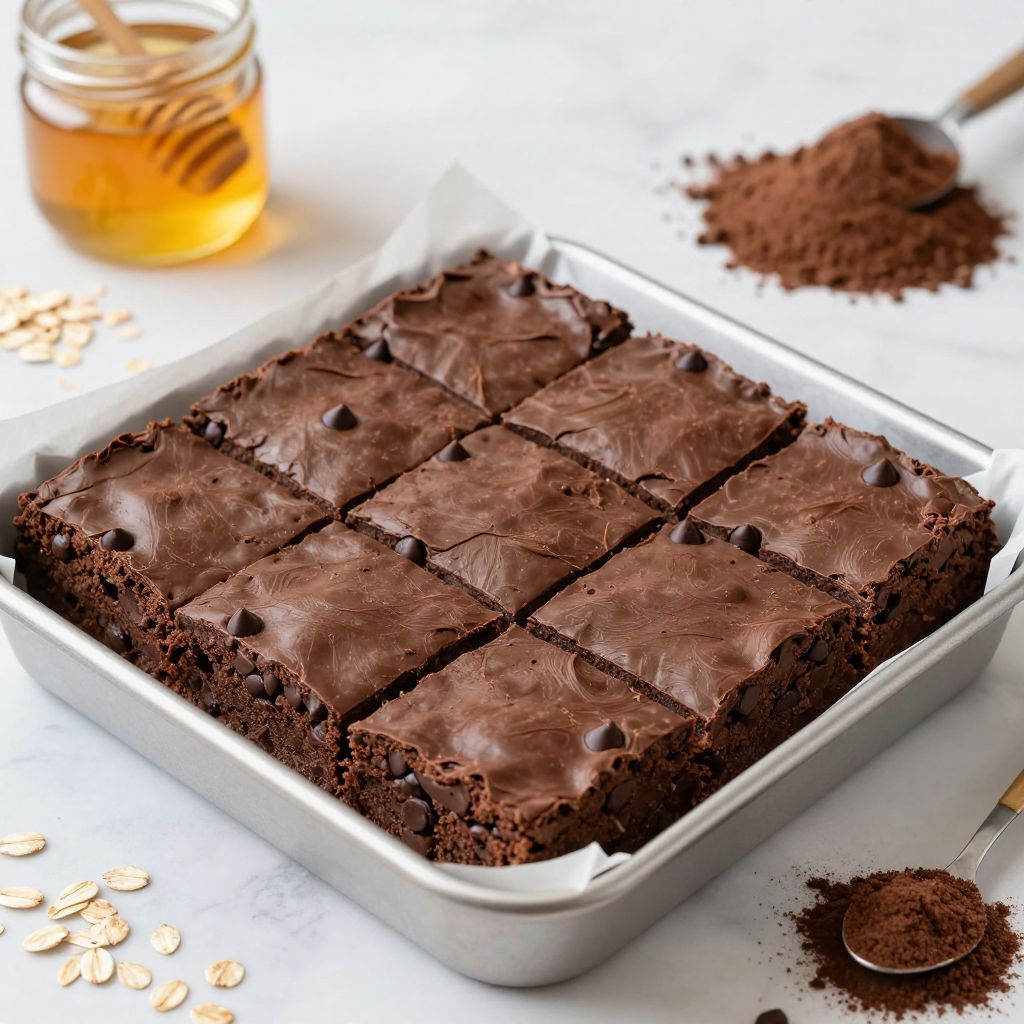
Chocolate Whey Protein
Ingredients
Equipment
Method
- Preheat the oven to 350°F (175°C).
- Grease your baking dish or line it with parchment paper.
- In a mixing bowl, combine the chocolate whey protein powder, rolled oats, and salt.
- In another bowl, whisk together the almond milk, peanut butter, honey, and vanilla extract.
- Pour the wet mixture into the dry ingredients and stir until just combined.
- If using, gently fold in the dark chocolate chips.
- Transfer the batter into your prepared baking dish, spreading it evenly.
- Bake in the preheated oven for 20 minutes or until a toothpick comes out clean.
- Let them cool completely before cutting.