
Picture this: a soft, warm rice ball cradling a spicy tuna filling that bursts with flavor. This Spicy Tuna Onigiri is not just a meal; it’s an experience that transports you to a cozy Japanese kitchen, perfect for a quick lunch or a delightful snack.
What makes this recipe special is its balance of textures—the chewiness of the rice and the creaminess of the tuna. It’s versatile too; you can easily customize the spice level to suit your taste. Ready to craft these tasty treats? Let’s gather our ingredients and get started!
Why You’ll Love This Recipe
This recipe brings joy in every bite, combining delicious flavors with simple preparation.
- Quick to prepare, perfect for busy days.
- Customizable spice levels to suit any palate.
- A fantastic way to use leftover rice.
- Great for meal prep or on-the-go snacking.
- Fun to make with kids or friends!
My Experience Making This Recipe
When I first tried making onigiri, I was pleasantly surprised at how satisfying it was to shape the rice into little triangles. The aroma of the spicy tuna filling made my kitchen feel like a sushi bar.
Every bite was a delightful blend of textures and flavors, and my family couldn’t get enough. Watching them enjoy something I made from scratch felt incredibly rewarding.
Recipe Overview
- Recipe Name: Spicy Tuna Onigiri
- Servings: 4
- Prep Time: 15 minutes
- Cook Time: 20 minutes
- Total Time: 35 minutes
- Course: Snack
- Cuisine: Japanese
- Calories per Serving: 250
Equipment You Will Need
- Rice cooker or pot
- Mixing bowl
- Spoon or spatula
- Plastic wrap
- Sharp knife (for cutting)
Ingredients for Spicy Tuna Onigiri
- 2 cups sushi rice
- 2 1/2 cups water
- 1 can (5 oz) tuna, drained
- 2 tablespoons mayonnaise
- 1 tablespoon sriracha sauce (or more to taste)
- 1 teaspoon soy sauce
- 1 teaspoon sesame oil
- Salt to taste
- Nori sheets (optional, for wrapping)
Ingredient Notes and Substitutions
- Sushi rice: This rice is sticky, perfect for shaping. You can use short-grain rice as a substitute.
- Tuna: Canned tuna is convenient and tasty. Fresh tuna can be used but requires more preparation.
- Mayonnaise: Adds creaminess to the filling. Vegan mayo works for a plant-based option.
- Sriracha: Gives the kick. Use any hot sauce you prefer for different heat levels.
- Nori sheets: Great for wrapping the onigiri. Skip if you prefer them plain.
How to Make Spicy Tuna Onigiri
Step 1: Prepare the Rice
Rinse the sushi rice under cold water until the water runs clear. This removes excess starch and helps achieve the perfect texture.
Step 2: Cook the Rice
Combine the rinsed rice and water in your rice cooker or pot. Cook according to the appliance instructions or bring to a boil, then simmer for 15 minutes.
Step 3: Let the Rice Cool
Once cooked, let the rice sit for about 10 minutes. This allows it to firm up slightly, making it easier to shape.
Step 4: Prepare the Tuna Filling
In a mixing bowl, combine the drained tuna, mayonnaise, sriracha, soy sauce, and sesame oil. Mix until well blended, adjusting heat to your liking.
Step 5: Season the Rice
Once the rice has cooled a bit, season with salt to taste. This enhances the flavor and balances the spiciness of the filling.
Step 6: Shape the Onigiri
Wet your hands to prevent sticking. Take a handful of rice, flatten it slightly, and place a spoonful of the tuna mixture in the center. Mold the rice around the filling to form a triangle.
Step 7: Wrap with Nori (Optional)
If using nori, cut it into strips and wrap around the base of the onigiri. This adds flavor and makes it easier to hold.
Step 8: Serve and Enjoy!
Your spicy tuna onigiri is ready to be enjoyed! Serve them immediately or pack them for later.
Pro Tip: Make sure your hands are wet when shaping the rice; it prevents sticking and makes the process smoother.
Tips for the Best Spicy Tuna Onigiri
- Use freshly cooked rice for the best texture; day-old rice can be too dry.
- Adjust the sriracha to control the heat; start with less if you’re unsure.
- Experiment with fillings; avocado or cucumber can add a refreshing touch.
- Wrap onigiri in plastic wrap to help maintain shape if not eaten immediately.
- Garnish with sesame seeds for added flavor and visual appeal!
Common Mistakes to Avoid
- Not rinsing the rice: This can lead to overly sticky onigiri.
- Using cold rice: Cold rice is harder to shape; warm rice molds better.
- Skipping seasoning: Unseasoned rice lacks flavor; don’t forget salt.
- Overfilling: Too much filling can make shaping difficult; be moderate.
- Not wetting hands: This will lead to a sticky mess; remember to wet your hands!
Serving Suggestions
These onigiri are fantastic on their own but can be paired with other dishes for a complete meal.
- Serve with miso soup for a comforting touch.
- Pair with pickled vegetables for a crunchy contrast.
- Enjoy with a side of edamame for added protein.
- Serve with soy sauce for dipping if you like it extra savory.
Variations to Try
- Try a spicy salmon filling for a different flavor profile.
- Use cooked shrimp instead of tuna for a seafood twist.
- Add chopped veggies like cucumber or carrots for crunch.
- Try a teriyaki chicken filling for a hearty option.
- Make it vegetarian with a tofu and avocado filling.
Dietary Adaptations
- Gluten-free: Ensure soy sauce is gluten-free.
- Dairy-free: Use vegan mayo for a dairy-free option.
- Vegan/Vegetarian: Substitute tuna with mashed avocado or tofu.
- Low-carb/Keto: Use cauliflower rice instead of sushi rice.
Storage and Reheating
Refrigerator
Store onigiri in an airtight container in the fridge for up to 2 days.
- Place parchment paper between layers to prevent sticking.
- Consume within a day for the best texture.
Freezer
Onigiri can be frozen, but the texture may change upon thawing.
- Wrap individually in plastic wrap before freezing.
- Thaw in the refrigerator before eating.
Reheating
Reheat in the microwave for about 30 seconds, wrapped in a damp paper towel.
- This keeps them moist and prevents drying out.
- Enjoy warm for the best flavor experience.
Nutrition Information
| Nutrient | Amount |
|---|---|
| Calories | 250 |
| Total Fat | 10g |
| Saturated Fat | 1g |
| Carbohydrates | 30g |
| Fiber | 1g |
| Sugar | 1g |
| Protein | 10g |
| Sodium | 500mg |
| Cholesterol | 15mg |
Nutrition values are approximate and can vary based on ingredients used.
Frequently Asked Questions
Can I use brown rice instead of sushi rice?
Yes, but it will change the texture and flavor, making it less sticky.
Can I make these ahead of time?
Absolutely! Just store them in the fridge and enjoy within two days.
How do I store leftovers?
Keep them in an airtight container in the fridge to maintain freshness.
What if my onigiri falls apart?
This can happen if the rice is too cold or not packed tightly enough. Ensure it’s warm and compact when shaping.
Can I add other flavors to the rice?
Definitely! A splash of rice vinegar or mirin can enhance the flavor.
Final Thoughts
Making your own Spicy Tuna Onigiri is not just fun, but rewarding. Each bite is a delightful combination of flavors and textures that I promise will keep you coming back for more.
So, roll up your sleeves and give this recipe a try! And if you’re looking for more culinary inspiration, check out my Seared Ahi Tuna Recipe or whip up a delicious Tuna Burger!
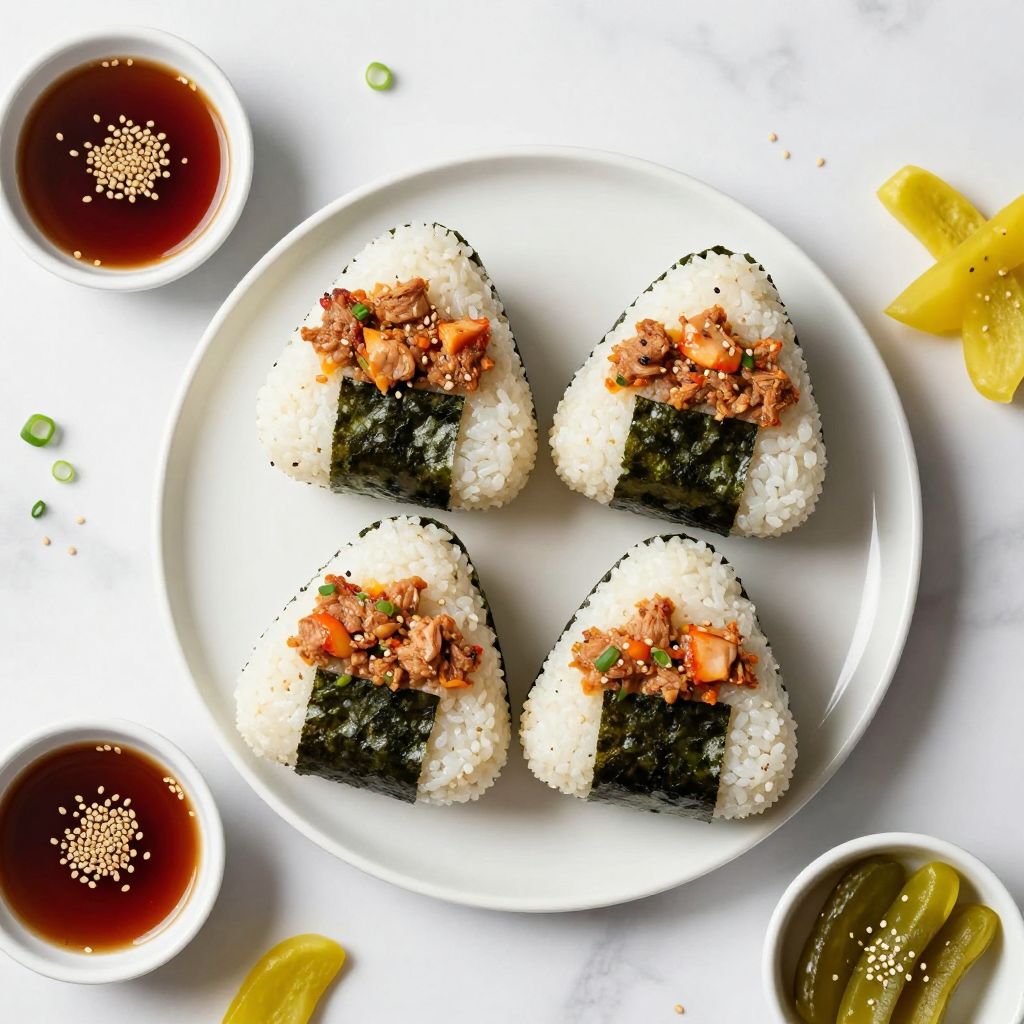
Spicy Tuna Onigiri
Ingredients
Equipment
Method
- Rinse the sushi rice under cold water until the water runs clear.
- Combine the rinsed rice and water in your rice cooker or pot. Cook according to the appliance instructions or bring to a boil, then simmer for 15 minutes.
- Once cooked, let the rice sit for about 10 minutes to firm up.
- In a mixing bowl, combine the drained tuna, mayonnaise, sriracha, soy sauce, and sesame oil. Mix until well blended.
- Once the rice has cooled a bit, season with salt to taste.
- Wet your hands and take a handful of rice, flatten it slightly, and place a spoonful of the tuna mixture in the center. Mold the rice around the filling to form a triangle.
- If using nori, cut it into strips and wrap around the base of the onigiri.
- Serve immediately or pack for later.