
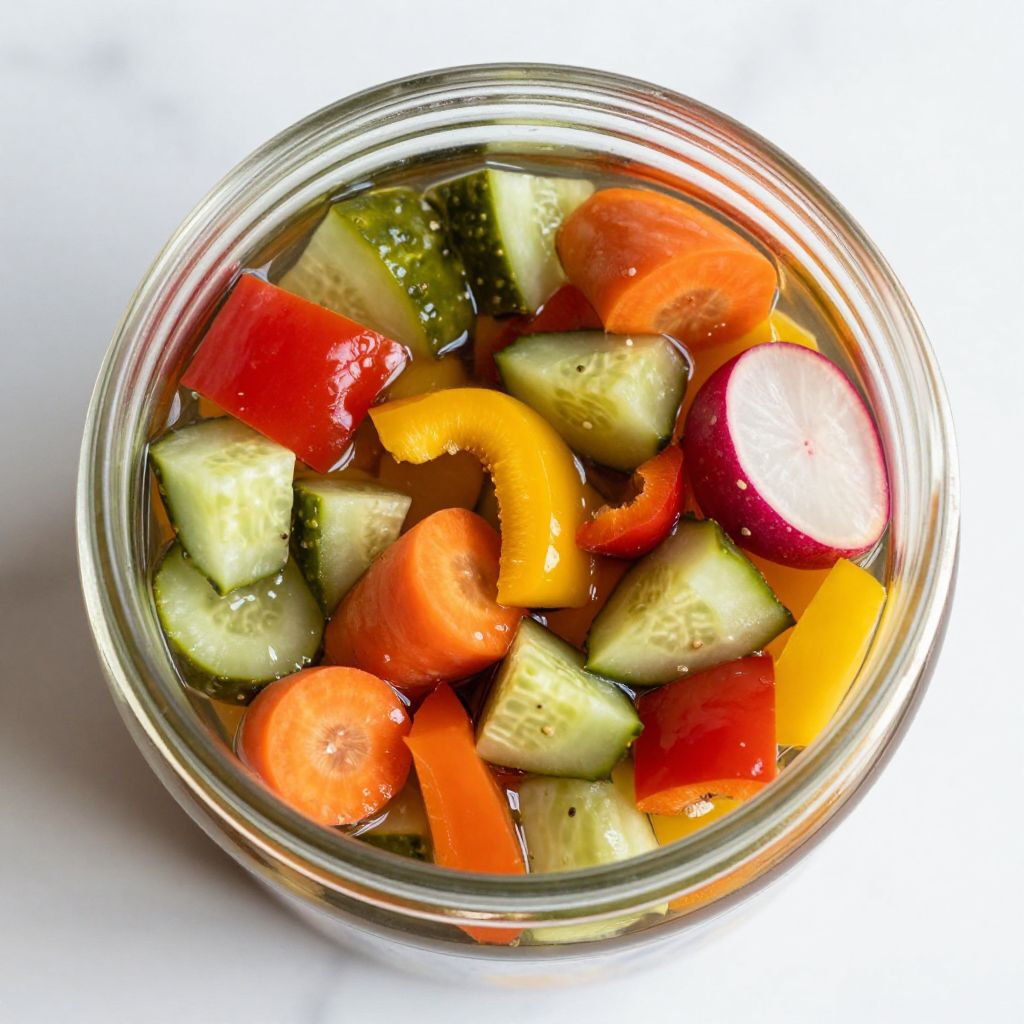
Picture this: a jar of colorful, tangy vegetables sitting on your kitchen counter, ready to add a delightful crunch to your meals. That’s the magic of Turshi, a beloved pickled dish that’s not just a side but a vibrant flavor booster. It’s perfect for those busy weeknights or when you want to impress guests with something homemade. The combination of fresh vegetables and a tangy brine makes it a versatile addition to any dish. Now, let’s dive into how to create this delicious recipe!
Why You’ll Love This Recipe
This Turshi recipe is a must-try for any food lover.
- Simple to prepare and requires minimal cooking.
- Packed with flavor and a crunchy texture that brightens up any meal.
- Customizable with your favorite vegetables and spices.
- Perfect for meal prep and can be stored for weeks.
My Experience Making This Recipe
Making Turshi in my kitchen is always a joy. The vibrant colors of the vegetables alone make it feel like a celebration.
As I sliced the cucumbers, carrots, and bell peppers, the fresh aromas wafted through the air, making me eager to taste this tangy treat. Plus, my family couldn’t resist sneaking spoonfuls from the jar as it chilled!
Recipe Overview
- Recipe Name: Turshi
- Servings: 6
- Prep Time: 20 minutes
- Cook Time: 5 minutes
- Total Time: 25 minutes
- Course: Side Dish
- Cuisine: Middle Eastern
- Calories per Serving: 50
Equipment You Will Need
- Large mixing bowl
- Saucepan
- Jar with a lid for storage
- Cutting board
- Knife
Ingredients for Turshi
- 2 cups of diced cucumbers
- 1 cup of sliced carrots
- 1 cup of diced bell peppers (any color)
- 1 cup of sliced radishes
- 2 cups of water
- 1 cup of white vinegar
- 1 tablespoon of salt
- 1 tablespoon of sugar
- 1 teaspoon of black peppercorns
- 1 teaspoon of mustard seeds
- 1 teaspoon of coriander seeds
Ingredient Notes and Substitutions
- Cucumbers: They add a refreshing crunch. You can substitute with zucchini if needed.
- Carrots: They provide sweetness and color. You can use parsnips for a different flavor.
- Bell peppers: They add a sweet and tangy flavor. Any color works, or you can use jalapeños for heat.
- Radishes: They bring a peppery bite. You may swap them for turnips if preferred.
How to Make Turshi
Step 1: Prepare the Vegetables
Start by washing all your vegetables thoroughly. This ensures they are clean and ready for pickling.
Step 2: Cut the Vegetables
Dice the cucumbers, slice the carrots, bell peppers, and radishes. Uniform sizes help them pickle evenly.
Step 3: Combine the Vegetables
In a large mixing bowl, combine all the chopped vegetables. This allows you to see how colorful your mixture is!
Step 4: Prepare the Brine
In a saucepan, mix together water, vinegar, salt, and sugar. Heat the mixture until the salt and sugar dissolve completely.
Step 5: Add Spices
Add black peppercorns, mustard seeds, and coriander seeds to the brine. This adds a depth of flavor that is key to a great Turshi.
Step 6: Pour the Brine
Carefully pour the hot brine over the vegetables in the bowl. This step is crucial for infusing the flavors.
Step 7: Let it Cool
Allow the mixture to cool to room temperature. This helps the vegetables absorb the brine without cooking them.
Step 8: Store in the Jar
Transfer the cooled mixture into a jar and seal it tightly. Refrigerate it for at least 24 hours before enjoying.
Pro Tip: Letting the Turshi sit for a few days enhances its flavor even more!
Tips for the Best Turshi
- Always use fresh vegetables for the best taste and texture.
- Adjust the spice levels according to your preference.
- Keep the jar in the fridge to maintain freshness.
- Experiment with different vegetables for variety.
- Allow the flavors to meld by letting it sit longer before serving.
Common Mistakes to Avoid
- Skipping the cooling step can make mushy vegetables.
- Not using enough salt can lead to bland pickles.
- Using old vegetables affects flavor and crunch.
- Not refrigerating after preparation can spoil the mix.
Serving Suggestions
Serve your Turshi alongside grilled meats, in sandwiches, or on a charcuterie board. It adds a delightful zing to any dish.
- With grilled chicken or beef
- In a fresh salad
- On a cheese platter
- In wraps or pitas
Variations to Try
- Use cauliflower or green beans for a crunchy twist.
- Add garlic cloves for a robust flavor.
- Incorporate dill for a herby note.
- Try different vinegars like apple cider for a unique taste.
Dietary Adaptations
- Gluten-free: This recipe is naturally gluten-free.
- Dairy-free: No dairy ingredients are used.
- Vegan/Vegetarian: Perfect for all diets.
- Low-carb/Keto: Great for a low-carb lifestyle due to the vegetable base.
Storage and Reheating
Refrigerator
Store the Turshi in the refrigerator for up to two weeks.
- Ensure the jar is tightly sealed.
- Keep it away from light to maintain color and flavor.
Freezer
Freezing is not recommended as it affects texture.
- Pickled vegetables do not freeze well.
Reheating
No reheating is necessary, as Turshi is enjoyed cold or at room temperature.
- Simply serve straight from the fridge.
Nutrition Information
| Nutrient | Amount |
|---|---|
| Calories | 50 |
| Total Fat | 0g |
| Saturated Fat | 0g |
| Carbohydrates | 12g |
| Fiber | 2g |
| Sugar | 4g |
| Protein | 1g |
| Sodium | 200mg |
| Cholesterol | 0mg |
This nutritional information is approximate and can vary based on ingredient brands and preparation methods.
Frequently Asked Questions
Can I make Turshi ahead of time?
Yes, Turshi can be made a few days in advance for better flavor development.
Can I use other types of vinegar?
Absolutely! Apple cider vinegar or rice vinegar can be great alternatives.
How long can Turshi be stored?
It can be stored in the refrigerator for up to two weeks.
What if my vegetables become soft?
Soft vegetables may indicate they were not fresh or overcooked in the brine.
Can I add more spices to the brine?
Definitely! Feel free to customize the spices to your taste.
Final Thoughts
Now that you know how to make Turshi, you can enjoy a burst of flavor in every bite. This dish not only adds zing to your meals but also brings a delightful crunch that everyone will appreciate.
Don’t hesitate to explore more beauty and nail-related topics like pickled shrimp recipe or stuffed grape leaves recipe. Happy cooking!
Turshi
Ingredients
Equipment
Method
- Start by washing all your vegetables thoroughly.
- Dice the cucumbers, slice the carrots, bell peppers, and radishes.
- In a large mixing bowl, combine all the chopped vegetables.
- In a saucepan, mix together water, vinegar, salt, and sugar. Heat until the salt and sugar dissolve.
- Add black peppercorns, mustard seeds, and coriander seeds to the brine.
- Carefully pour the hot brine over the vegetables in the bowl.
- Allow the mixture to cool to room temperature.
- Transfer the cooled mixture into a jar and seal tightly. Refrigerate for at least 24 hours.