
Nothing beats the smell of fresh strawberries bubbling away on the stove, filling your kitchen with pure summer in a jar.
Strawberry preserves are one of those timeless recipes that deliver restaurant-quality results from your own home, with just a handful of ingredients and a little patience.
This recipe yields thick, glossy preserves with a perfect balance of fruity sweetness and subtle tartness that tastes incredible on warm toast, swirled into yogurt, or tucked into pastries.
Whether you are a canning novice or a seasoned kitchen pro, this straightforward method transforms fresh strawberries into a preserve you will actually want to make again and again.
Why You’ll Love This Recipe
Homemade preserves blow store-bought versions out of the water when it comes to flavor and control over sweetness. You can taste the real fruit, not just sugar with berry flavoring.
- Uses just four simple ingredients: strawberries, sugar, lemon juice, and butter.
- Ready in under an hour from start to finish, with minimal hands-on time.
- Creates a thick, spreadable consistency that clings perfectly to toast without running off.
- Works beautifully with both fresh and slightly overripe strawberries.
- Keeps for months in your pantry, giving you instant summer flavor in the middle of winter.
My Experience Making This Recipe
I made this recipe on a Saturday morning when a farmer’s market haul left me with more strawberries than I could eat fresh. My kitchen smelled so incredible that my partner kept wandering in asking when breakfast would be ready.
The whole process felt surprisingly meditative, watching the fruit break down and the liquid reduce into something glossy and jewel-like. My first batch set up perfectly, and I immediately made two more because my neighbors kept smelling it and asking for jars.
What surprised me most was how much the lemon juice brightened the flavor without making it taste sour, and how the butter smoothed out any harshness. I have gone through three jars in two months, and people have actually asked me to make it for them as gifts.
Recipe Overview
- Recipe Name: Strawberry Preserves
- Servings: Makes about 4 cups (eight 8-oz jars)
- Prep Time: 15 minutes
- Cook Time: 35-45 minutes
- Total Time: 50-60 minutes
- Course: Condiment
- Cuisine: American
- Calories per Serving: 50 per tablespoon
Equipment You Will Need
- Large stainless steel pot (at least 5-quart capacity)
- Wooden spoon for stirring
- Candy/deep-fry thermometer (optional but helpful)
- Fine mesh strainer
- Measuring cups and spoons
- Cutting board and sharp knife
- Glass jars with lids (8-oz mason jars work perfectly)
- Ladle
- Canning funnel (optional but useful)
- Large bowl for macerating berries
Ingredients for Strawberry Preserves
- 4 pounds fresh strawberries, hulled and halved
- 3 cups granulated sugar
- 3 tablespoons fresh lemon juice
- 2 tablespoons unsalted butter
Ingredient Notes and Substitutions
- Fresh strawberries: Choose ripe berries with deep red color and a sweet smell; they contain more natural pectin which helps the preserves set. If using frozen strawberries, thaw them completely and drain excess liquid before using.
- Granulated sugar: Regular white sugar works best for preserves and gives you control over sweetness levels. You can swap it for honey (use 2 1/4 cups) for a different flavor profile, though the texture may be slightly different and it will set less firmly.
- Fresh lemon juice: The acid helps the preserves set and brightens the strawberry flavor significantly. Bottled lemon juice works in a pinch, but fresh juice delivers better flavor and more reliable setting.
- Unsalted butter: This reduces foam during cooking and creates a smoother texture. Salted butter works fine but adds extra sodium you may not want.
How to Make Strawberry Preserves
Step 1: Prepare and Measure Your Strawberries
Hull your strawberries by removing the green tops and any white core, then slice each berry in half lengthwise. Halving rather than crushing the berries helps them hold their shape and keeps the preserves looking beautiful rather than like a dark puree.
Step 2: Macerate the Berries Overnight
Combine the halved strawberries with the sugar in a large bowl, then cover and refrigerate for at least 8 hours or overnight. This step lets the sugar draw out the berry juice, which creates a richer flavor and reduces cooking time significantly.
Step 3: Transfer to Your Pot
Pour the strawberries and all accumulated juices into your large stainless steel pot, then stir gently to combine. Stainless steel conducts heat evenly and prevents unwanted chemical reactions with acidic fruits that can discolor your preserve.
Step 4: Add Lemon Juice and Butter
Stir in the fresh lemon juice and add the butter, pressing it down into the fruit mixture. The lemon juice activates pectin for better setting, while the butter reduces foam that forms as the mixture heats.
Step 5: Heat to a Rolling Boil
Set your heat to medium-high and bring the mixture to a rolling boil, stirring occasionally to prevent sticking on the bottom. Once it reaches a full rolling boil, increase the heat to high and stop stirring to allow the rapid evaporation that creates a thick preserve.
Step 6: Monitor the Temperature
If you have a candy thermometer, insert it into the mixture without letting it touch the pot bottom, and watch for the temperature to reach 220 degrees Fahrenheit (or 104 degrees Celsius). This temperature indicates that enough water has evaporated and the mixture has the right ratio of solids to liquid for proper setting.
Step 7: Perform the Plate Test
While waiting for temperature, chill a small plate in your freezer. When you think the preserve might be done, drop a small spoonful onto the cold plate and wait 30 seconds; if it wrinkles when you push it with your finger, it has reached the right consistency.
Step 8: Remove from Heat and Skim
Once your preserve reaches 220 degrees and passes the plate test, remove from heat immediately. Use a spoon to skim off any foam that has accumulated on the surface, which helps create a cleaner, more professional appearance in the jar.
Step 9: Cool Slightly Before Jarring
Let the preserve cool for about 5 minutes in the pot, which allows the fruit pieces to settle and distribute more evenly throughout the gel. Pour into clean, sterilized jars using a ladle and canning funnel, filling to within 1/4 inch of the rim.
Step 10: Seal the Jars
Place the lids on the jars and screw the bands on until they are snug but not overly tight. If you are using traditional canning methods, process the jars in a boiling water bath for 10 minutes; for refrigerator storage, simply cool completely at room temperature and store in the fridge.
Pro Tip: The preserve will continue to set as it cools, so do not worry if it seems slightly loose when you first jar it; it firms up significantly in the next 24 hours.
Tips for the Best Strawberry Preserves
- Use a mix of ripe and slightly underripe berries if possible, since underripe fruit contains more natural pectin for better setting. If your strawberries are all very soft and ripe, consider adding 1/4 teaspoon of powdered pectin dissolved in a tablespoon of water during the final minute of cooking.
- Do not skip the overnight maceration step, as it truly makes a difference in flavor depth and reduces cooking time. The fruit releases its own juice, which means less added liquid and a more concentrated berry flavor.
- Stop stirring once the mixture reaches a rolling boil, since stirring introduces air bubbles and can prevent proper setting. Resist the urge to mess with it; high heat and patience do the heavy lifting here.
- Use a wide, heavy-bottomed pot rather than a narrow one, since the larger surface area helps water evaporate faster. This means shorter cooking time and better color retention in your finished preserve.
- Chill your testing plate in the freezer before you start cooking, so you can perform accurate plate tests without wasting time waiting for a room-temperature plate to cool. Having this ready helps you catch the exact moment when the preserve is done.
Common Mistakes to Avoid
- Using overripe or moldy strawberries will result in mushy preserves with weak flavor and poor setting. Always inspect your berries and discard any that are soft, mushy, or have any mold spots.
- Skipping the maceration step means you will need longer cooking time and risk caramelizing the fruit instead of preserving its bright flavor. This step is not optional if you want the best results.
- Adding water to the mixture is unnecessary and dilutes flavor, making it harder for the preserve to set properly. Trust the juice the berries release on their own during maceration.
- Cooking past the 220-degree mark creates an overly thick, rubbery preserve that does not spread easily. Pull it off heat as soon as it hits the target temperature to avoid overcooking.
- Filling jars that are not completely clean or sterilized invites mold and spoilage. Always wash jars in hot soapy water and either run them through the dishwasher or boil them for 10 minutes before filling.
Serving Suggestions
Strawberry preserves work beautifully in countless applications beyond simple toast, from breakfast pastries to afternoon desserts. Here are some creative ways to use your homemade batch.
- Spread generously over warm buttered toast, English muffins, or bagels for an instant classic breakfast.
- Swirl into Greek yogurt or vanilla ice cream for a simple but elegant dessert with a fruit compote texture.
- Fill thumbprint cookies, shortbread sandwiches, or laminated pastry dough for bakery-quality treats.
- Layer with whipped cream and sponge cake to create an impressive strawberry shortcake without the mess of fresh berries.
- Mix into cream cheese for an easy spread that transforms a cheese board or bagel breakfast.
Variations to Try
- Strawberry-Rhubarb Preserves: Replace 1 pound of strawberries with 1 pound of fresh rhubarb, cut into 1/4-inch pieces; the rhubarb adds tartness and a subtle floral note that deepens the fruit flavor.
- Strawberry-Vanilla Preserves: Add 1 vanilla bean, split lengthwise and scraped, or 1 teaspoon of vanilla extract during the final minute of cooking for a sophisticated, perfumed quality.
- Strawberry-Balsamic Preserves: Stir in 2 tablespoons of aged balsamic vinegar after removing from heat for complexity and subtle sweetness that works wonderfully with cheese.
- Strawberry-Black Pepper Preserves: Add 1/4 teaspoon of freshly ground black pepper during cooking for a warming spice that highlights rather than masks the strawberry flavor.
- Lower-Sugar Strawberry Preserves: Use 2 1/4 cups of sugar instead of 3 cups for a less sweet preserve, though you may need to add 1/4 teaspoon of powdered pectin to ensure proper setting.
Dietary Adaptations
- Gluten-Free: This recipe is naturally gluten-free as written, containing no flour or grains; simply verify that any added ingredients like pectin come from certified gluten-free sources.
- Dairy-Free: Omit the butter entirely or replace it with coconut oil in equal amounts; the preserve will set just fine without it, though you may see slightly more foam.
- Vegan: This recipe is already vegan, containing only fruit, sugar, lemon juice, and butter, which you can replace with vegan butter or omit completely.
- Low-Carb/Keto: Replace sugar with a combination of monk fruit sweetener and erythritol in equal amounts, using about 2 1/4 cups total; you will definitely need to add pectin to achieve setting, since these sweeteners behave differently than sugar.
Storage and Reheating
Refrigerator
Properly sealed jars of preserve keep in the refrigerator for up to 3 weeks once opened. Store in an airtight container or jar to prevent absorption of other food odors and to maintain the preserve’s texture.
- Keep unopened jars in a cool, dark pantry shelf for up to one year.
- Once opened, keep the jar sealed between uses and always use a clean spoon to prevent contamination.
Freezer
Strawberry preserves freeze beautifully for up to 6 months in airtight containers or freezer bags. Leave a little headspace in the container to allow for expansion as the preserve freezes.
- Thaw overnight in the refrigerator before using.
- Frozen preserves work wonderfully for cooking or baking applications where texture matters less.
Reheating
Preserve rarely needs reheating, but if you prefer it warm, gently heat in a small saucepan over low heat for a few minutes. Do not microwave, as it can cause splattering and uneven heating that damages the fruit pieces.
- Stir occasionally to ensure even heating.
- Warm preserves pair beautifully with vanilla ice cream or warm pastries.
Nutrition Information
| Nutrient | Amount |
|---|---|
| Calories | 50 |
| Total Fat | 0.3 g |
| Saturated Fat | 0.1 g |
| Carbohydrates | 12.5 g |
| Fiber | 0.3 g |
| Sugar | 11.8 g |
| Protein | 0.1 g |
| Sodium | 2 mg |
| Cholesterol | 0.1 mg |
These values are per tablespoon serving and are based on standard USDA data for the ingredients listed. Individual preserves may vary slightly depending on your specific strawberry variety and sugar content.
Frequently Asked Questions
Why didn’t my preserve set properly?
The most common reason is not reaching 220 degrees Fahrenheit or removing the preserve from heat too early. Try the plate test again next time and do not trust cooking time alone, since altitude and humidity affect evaporation rates significantly.
Can I make this recipe without maceration?
Yes, you can skip the overnight step and cook immediately, though you will need to cook for 50 to 60 minutes instead of 35 to 45 minutes. Your preserve will still taste great, but the flavor will be slightly less concentrated.
What if I do not have a candy thermometer?
The plate test works perfectly without a thermometer and is actually how jam makers have tested doneness for generations. Chill a plate in the freezer and test after about 35 minutes of boiling.
Can I double or triple this recipe?
Yes, you can scale the recipe up, but do not exceed 8 pounds of fruit at a time or the preserves will cook unevenly. If you need more, simply make multiple batches rather than one giant pot.
What causes that odd, foamy layer on top of the preserve?
Foam is created from air bubbles trapped in the fruit as it heats and breaks down, and is completely normal. Skim it off before jarring for a cleaner appearance, or you can leave it if you do not mind the rustic look.
How long does homemade preserve actually last?
Properly sealed and processed jars last for one year in a cool, dark pantry, while opened jars last about three weeks in the refrigerator. Freezing extends the life to six months with zero quality loss.
Final Thoughts
Making strawberry preserves at home connects you to generations of home cooks who transformed seasonal fruit into year-round joy. This recipe proves that you do not need special skills or complicated ingredients to create something truly special.
Pull out a jar of your homemade preserve on a winter morning, spread it on warm toast, and taste pure summer in every bite. Your kitchen will smell incredible, your friends will beg for jars, and you will wonder why you ever bought store-bought preserves again.
Explore more fruit preserves and condiments to expand your homemade pantry. Try our strawberry pie filling recipe for another delicious way to use fresh strawberries, or venture into peach preserves recipe when stone fruit season arrives. Your kitchen deserves to be filled with homemade goodness.
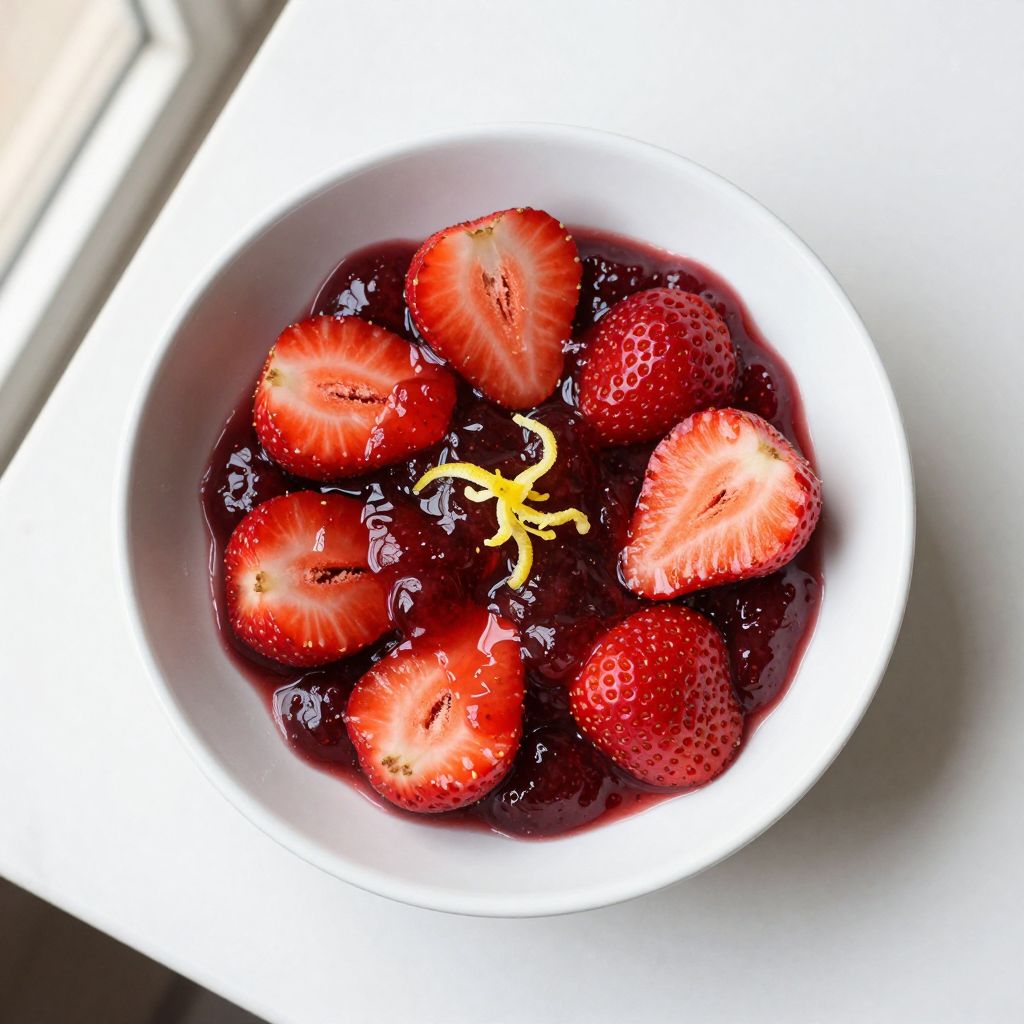
Strawberry Preserves
Ingredients
Equipment
Method
- Hull your strawberries by removing the green tops and any white core, then slice each berry in half lengthwise.
- Combine the halved strawberries with the granulated sugar in a large bowl, cover, and refrigerate for at least 8 hours or overnight to macerate.
- Pour the strawberries and all accumulated juices into the large stainless steel pot and stir gently to combine.
- Stir in the fresh lemon juice and add the unsalted butter, pressing it down into the fruit mixture.
- Set heat to medium-high and bring the mixture to a rolling boil, stirring occasionally; once boiling, increase heat to high and stop stirring to allow rapid evaporation.
- If using a candy thermometer, clip it to the side of the pot without touching the bottom and heat the preserves to 220°F (104°C).
- Perform the plate test by dropping a spoonful of preserves onto a chilled plate, waiting 30 seconds, and checking for a slight wrinkle when pushed.
- Remove the pot from heat as soon as the mixture reaches 220°F and passes the plate test, then skim off any foam from the surface.
- Let the preserves cool in the pot for about 5 minutes, then use a ladle and canning funnel to fill sterilized jars, leaving 1/4 inch of headspace.
- Seal jars with lids and bands; process in a boiling water bath for 10 minutes for shelf storage or cool completely at room temperature for refrigerator storage.