There’s something magical about the smell of peaches bubbling away on the stove, transforming into glossy, jewel-toned preserves that taste like summer in a jar. I still remember my grandmother’s kitchen on a hot August afternoon, the windows steaming and the counter lined with mason jars waiting to be filled with liquid gold. Homemade peach preserves are so much better than anything you’ll find at the grocery store because you control the sweetness, texture, and flavor with your own two hands.
This recipe is straightforward enough for a first-timer yet rewarding enough to become your go-to preserve for the season. You’ll love the natural peach flavor that shines through, the perfect balance of sweet and tart, and the fact that you can spread it on toast, swirl it into yogurt, or use it in baking without guilt. Best of all, one batch fills your pantry with jars of homemade goodness that make incredible gifts.
Why You’ll Love This Recipe
This peach preserves recipe delivers everything a preserve should: vibrant color, natural fruit flavor, and a texture that’s neither too runny nor too stiff.
- Uses just four basic ingredients: peaches, sugar, lemon juice, and optional pectin for foolproof results
- Ready to eat in about 45 minutes from start to finish
- No special canning equipment needed if you prefer to refrigerate your jars
- Makes roughly six 8-ounce jars, perfect for gifts or stockpiling for your family
- Works beautifully in desserts, on breakfast pastries, or straight from the spoon
My Experience Making This Recipe
The first time I made this, I was intimidated by the whole canning process and convinced I’d end up with peach soup instead of preserves. I decided to skip the pectin and trust my instincts about the setting point, checking it obsessively with a candy thermometer until I hit 220 degrees Fahrenheit.
The result was so good that my neighbor could smell it from her porch and showed up uninvited with a coffee mug, clearly ready to beg for a jar. I’ve made it at least a dozen times since, sometimes with added vanilla, sometimes with a hint of cardamom, and every batch has been solid.
What struck me most was how the kitchen transforms during the cooking process: the fruit breaks down, the liquid becomes thick and glossy, and the color deepens into something that looks professionally made. My kids actually asked if I bought it from a fancy shop, which is the highest compliment I’ve ever received in this kitchen.
Recipe Overview
- Recipe Name: Homemade Peach Preserves
- Servings: Makes about 6 jars (8 ounces each)
- Prep Time: 15 minutes
- Cook Time: 30 minutes
- Total Time: 45 minutes
- Course: Condiment or Spread
- Cuisine: American
- Calories per Serving: 50 calories per tablespoon
Equipment You Will Need
- Large stainless steel pot (at least 6-quart capacity)
- Cutting board and sharp chef’s knife
- Wooden spoon or silicone spatula for stirring
- Candy thermometer (highly recommended but optional)
- Canning jars with lids (8-ounce or 16-ounce size)
- Jar funnel (optional but helpful)
- Ladle for transferring preserves
- Fine mesh sieve or chinois (optional, for straining out pulp if you prefer a smoother preserve)
Ingredients for Peach Preserves
- Fresh peaches: 4 pounds (about 12 medium peaches), peeled, pitted, and roughly chopped
- Granulated sugar: 3 cups
- Fresh lemon juice: 1/4 cup (about 2 lemons)
- Powdered pectin: 2 tablespoons (optional, for guaranteed set; omit if you prefer a looser, more rustic consistency)
- Water: 1/4 cup (only if using pectin)
Ingredient Notes and Substitutions
- Fresh peaches: Ripe, fragrant peaches are the star here, and they deliver natural pectin and flavor that frozen or canned peaches cannot replicate. If fresh peaches aren’t available, you can use 4 pounds of frozen peaches (thawed and drained) or six 15-ounce cans of peach halves, though the flavor will be less vibrant and you may need to reduce the cooking time slightly.
- Granulated sugar: Regular white sugar is essential for proper setting and preservation, as it dissolves evenly and doesn’t add competing flavors. You can substitute with organic cane sugar (same amount) with no real difference, but do not use honey or agave as a 1:1 swap because they behave differently during cooking and may prevent proper setting.
- Fresh lemon juice: Lemon juice balances the sweetness and adds natural pectin, which helps the preserves set. Bottled lemon juice works if fresh is not available, using the same amount, though fresh always tastes brighter.
- Powdered pectin: Pectin guarantees a firm set and removes guesswork, making this recipe perfect for beginners. If you omit it, simply cook the mixture until it reaches 220 degrees Fahrenheit or passes the wrinkle test on a cold plate, accepting that the result may be slightly softer.
How to Make Peach Preserves
Step 1: Prepare Your Peaches
Bring a large pot of water to a boil and carefully submerge your peaches for 30 to 60 seconds, then transfer them to an ice bath using a slotted spoon. The hot water softens the skin just enough to slip off easily without cooking the fruit, and the ice bath stops the cooking process instantly so you retain the peaches’ bright color and firm texture.
Once cooled, slip the skins off with your fingers or a paring knife, slice the peaches in half along the natural seam, remove the pit, and roughly chop the flesh into bite-sized pieces. You should have about 4 pounds of prepared peach flesh ready to go.
Step 2: Combine Peaches and Lemon Juice
Place your chopped peaches into a large stainless steel pot and add the fresh lemon juice, stirring well to distribute the juice evenly throughout the fruit. The lemon juice lowers the pH of the mixture, which is crucial for both flavor and food safety, and it also boosts the natural pectin content to help everything set properly.
Step 3: Mix the Pectin (If Using)
If you’re using powdered pectin, whisk it together with the 1/4 cup of water in a small bowl until no lumps remain. Adding the pectin to water first prevents it from clumping when it hits the hot fruit, ensuring an even distribution that sets your preserves uniformly.
Pour this mixture into the pot with the peaches and lemon juice, stirring constantly for about one minute until everything is well combined. You’ll see the mixture thicken slightly as the pectin hydrates.
Step 4: Add the Sugar
Add all 3 cups of sugar to the pot and stir constantly until every grain dissolves into the fruit mixture, which should take about two minutes over medium heat. The sugar dissolves faster and more evenly if you stir consistently, preventing any crystallization later on.
Once the sugar is completely dissolved and you see no grains remaining at the bottom of the pot, increase the heat to medium-high and bring the mixture to a rolling boil. A rolling boil is one where the bubbles break the surface forcefully and cannot be stirred down, and it’s essential for proper pectin activation and setting.
Step 5: Cook to Setting Point
Let the mixture boil hard for 15 to 20 minutes, stirring occasionally to prevent scorching on the bottom of the pot. If you have a candy thermometer, clip it to the side of the pot and watch for 220 degrees Fahrenheit, which signals that the water has evaporated enough and the preserves are ready to set.
If you don’t have a thermometer, use the wrinkle test: place a small spoonful of the hot mixture on a chilled plate (keep one in the freezer for this purpose), let it cool for 30 seconds, then push it with your finger. If it wrinkles and doesn’t flow back together, you’ve reached setting point; if it’s still liquid, keep cooking and test again every minute or two.
Step 6: Skim Foam and Test
Remove the pot from heat and let it sit for one minute, then use a slotted spoon to skim off any white or pink foam that has accumulated on the surface. This foam is harmless but can make your finished preserves look cloudy if left in, so removing it gives you a clearer, more professional appearance.
Do a final wrinkle test on your cold plate to confirm the preserve has set to your liking. If it’s still too loose, return it to a boil for another minute or two and test again.
Step 7: Prepare Your Jars
While the preserves are cooking, run your mason jars and lids through the hottest cycle of your dishwasher or hand-wash them in very hot soapy water and rinse well. Hot, clean jars prevent cracking when you fill them with hot preserves, and they’re already sterilized and ready to seal.
If you’re doing traditional water bath canning, process the jars in a hot water bath for 10 minutes after filling; if you’re just refrigerating your jars (totally fine), simply ensure they’re dry before filling.
Step 8: Fill and Seal the Jars
Using a ladle and jar funnel, carefully pour the hot preserves into your hot jars, leaving about 1/4 inch of headspace at the top (the space between the preserve and the rim). Leaving headspace allows for expansion as the preserves cool and ensures a proper seal.
Wipe the rims clean with a damp cloth to remove any drips, place the hot lids on top, and screw on the metal rings finger-tight (snug but not cranked down hard). As the jars cool, the preserves contract and the lids seal with a satisfying pop if you’re canning, or they simply seal as the contents cool if you’re refrigerating.
Pro Tip: Don’t skip the wrinkle test, even if you’re using pectin; every pot, stove, and batch of fruit behaves slightly differently, and this one-minute test is the difference between perfect preserves and runny jam.
Tips for the Best Peach Preserves
- Use peaches that are ripe but still firm, with a sweet fragrance; overripe peaches break down into mush and underripe ones lack flavor and natural pectin. Smell the peach before you buy it, and if it doesn’t smell like anything, it won’t taste like much either.
- Don’t skip the lemon juice even though you might think the peaches are sweet enough; lemon brightens the flavor, prevents spoilage, and aids setting, making it non-negotiable. A quarter cup in a four-pound batch is the right balance.
- Invest in a candy thermometer if you plan to make preserves regularly; it removes all guesswork and gives you confidence that you’ve hit setting point. They’re inexpensive and available at any kitchen supply store.
- Stir the preserve occasionally during cooking but not constantly; excessive stirring incorporates air and makes the mixture foam excessively, while no stirring risks scorching on the bottom. A stir every minute or two is ideal.
- If your preserves turn out softer than you hoped, don’t stress; they’ll still taste delicious on yogurt, in pastries, or in a thumbprint cookie. Next time, cook for an extra two to three minutes before checking setting point.
- Store sealed jars in a cool, dark place away from direct sunlight; light degrades the color and quality of preserves over time. A pantry shelf or closed cabinet is perfect.
Common Mistakes to Avoid
- Using underripe or mealy peaches that lack flavor and natural pectin, which results in a preserve that tastes flat and doesn’t set properly. Always choose fragrant, firm-ripe peaches from peak season (typically June through August in most regions).
- Skipping the ice bath after blanching, so the peach skins don’t slip off cleanly and you waste time fighting with them. The ice bath is a one-minute step that saves frustration.
- Not letting the mixture reach a true rolling boil before timing your cook, so the fruit never concentrates enough to set. A rolling boil is non-negotiable; if your heat is too low, increase it.
- Overfilling the jars or not cleaning the rims, which leads to improper sealing and potential mold growth later. Always leave 1/4 inch headspace and wipe rims with a clean, damp cloth before sealing.
- Opening the jars before they’ve cooled completely, which breaks the seal and lets bacteria in. Let sealed jars sit undisturbed at room temperature for at least 12 hours before storing them.
Serving Suggestions
Peach preserves shine on buttered toast for breakfast, but their uses extend far beyond the morning table. Spread them on pancakes and waffles, layer them into yogurt for a fancy parfait, or dollop them onto vanilla ice cream for an instant dessert.
- Spread on warm buttered biscuits or croissants for a simple breakfast or snack
- Swirl into plain Greek yogurt with granola for a quick breakfast bowl
- Use as a filling for thumbprint cookies, rugelach, or linzer torte
- Pair with soft cheeses like brie or goat cheese on a charcuterie board
- Brush over baked ham in the last few minutes of cooking for a glossy, sweet glaze
Variations to Try
- Peach and Vanilla Preserves: Add one split vanilla bean (seeds scraped into the pot) or one teaspoon of vanilla extract at the end of cooking for a warm, aromatic depth. The vanilla complements peach beautifully without overpowering it.
- Peach and Cardamom Preserves: Toast one teaspoon of cardamom pods in a dry skillet for two minutes, crush them lightly, and add to the pot with the peaches. Cardamom adds an exotic, slightly floral note that pairs surprisingly well with summer peaches.
- Peach and Ginger Preserves: Finely mince or grate two tablespoons of fresh ginger and add it with the peaches for a bright, slightly spicy kick. This version is incredible on roasted ham or swirled into oatmeal on a cold morning.
- Peach and Bourbon Preserves: Stir in two tablespoons of bourbon whiskey or brandy after removing the pot from heat for an adult-friendly version. The alcohol cooks off, leaving only warmth and depth behind.
- Chunky Peach Preserves: Skip the chopping step and quarter the peaches instead, leaving larger pieces intact for a rustic, chunky texture. This style takes about five extra minutes to cook but delivers a completely different eating experience.
Dietary Adaptations
- Lower Sugar Version: Replace up to one cup of granulated sugar with monk fruit sweetener or erythritol and increase the pectin to three tablespoons to ensure setting. This reduces calories but may slightly affect flavor and texture, and the preserves may be less glossy.
- Gluten-Free: This recipe is naturally gluten-free; just verify that your pectin is not cross-contaminated in processing, and avoid adding any thickening agents made from wheat. All other ingredients contain no gluten.
- Vegan and Vegetarian: Peach preserves are already vegan and vegetarian in this form. Just double-check that your pectin source is plant-based and not derived from bone char processing if these details matter to your dietary choices.
- Low-Carb or Keto Adaptation: Replace the three cups of sugar with three cups of a low-carb sweetener blend like erythritol mixed with monk fruit and increase pectin to four tablespoons for proper setting. Be aware that taste and texture will shift noticeably, and the preserves may crystallize over time.
Storage and Reheating
Refrigerator
Sealed jars of peach preserves last up to three weeks in the refrigerator once opened, stored in an airtight container or with the original lid tightly sealed. Unopened canned jars that have sealed properly (showing a concave lid) will last up to one year in a cool, dark pantry.
- Store in the coldest part of your refrigerator, away from the door where temperature fluctuates
- Always use a clean spoon when removing preserves from the jar to prevent contamination
- Transfer opened jars to smaller containers to minimize air exposure if you’re storing for longer than a week
Freezer
Peach preserves freeze beautifully for up to one year in freezer-safe containers, making this an excellent way to save summer peaches for winter use. Leave at least one inch of headspace in the container to account for expansion as they freeze.
- Pour cooled preserves into ice cube trays for easy portioning; pop out frozen cubes and store in a freezer bag
- Label containers with the date and contents before freezing to track storage time
- Thaw overnight in the refrigerator before using
Reheating
Peach preserves don’t typically need reheating since they’re eaten cold or at room temperature, but if you want them warm for pouring over ice cream, simply heat gently in a small saucepan over low heat until they reach your preferred temperature. Never microwave preserves in the jar, as they heat unevenly and can splatter.
- Transfer to a small saucepan and warm over low heat for one to two minutes, stirring gently
- If frozen, thaw in the refrigerator overnight first, then warm as above
- Stir in one teaspoon of water if the preserves seem too thick after heating
Nutrition Information
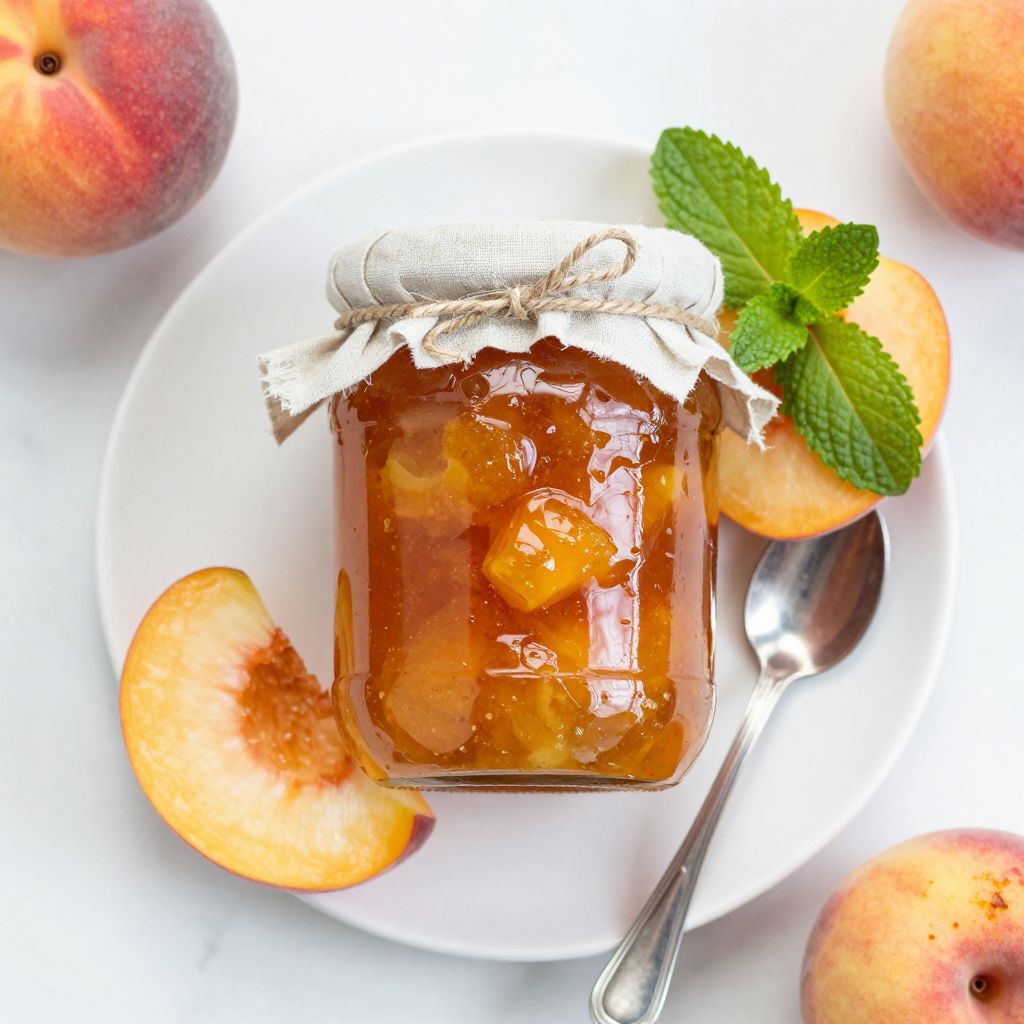
Homemade Peach Preserves
Ingredients
Equipment
Method
- Bring a large pot of water to a boil and carefully submerge peaches for 30 to 60 seconds, then transfer them to an ice bath using a slotted spoon. Once cooled, slip the skins off with your fingers or a paring knife, slice the peaches in half, remove the pit, and roughly chop the flesh into bite-sized pieces.
- Place chopped peaches into a large stainless steel pot and add the fresh lemon juice, stirring well to distribute the juice evenly throughout the fruit.
- If using powdered pectin, whisk it together with the 1/4 cup of water in a small bowl until no lumps remain. Pour this mixture into the pot with the peaches and lemon juice, stirring constantly for about one minute until everything is well combined.
- Add all 3 cups of sugar to the pot and stir constantly over medium heat until every grain dissolves, about 2 minutes. Once sugar is completely dissolved, increase heat to medium-high and bring the mixture to a rolling boil.
- Let the mixture boil hard for 15 to 20 minutes, stirring occasionally to prevent scorching. Watch for 220°F on a candy thermometer, or use the wrinkle test: place a small spoonful of hot mixture on a chilled plate, let cool for 30 seconds, then push with your finger. If it wrinkles and doesn't flow back together, you've reached setting point.
- Remove the pot from heat and let sit for one minute, then use a slotted spoon to skim off any white or pink foam that has accumulated on the surface. Do a final wrinkle test to confirm the preserve has set to your liking.
- While preserves are cooking, run mason jars and lids through the hottest cycle of your dishwasher or hand-wash them in very hot soapy water and rinse well.
- Using a ladle and jar funnel, carefully pour the hot preserves into hot jars, leaving about 1/4 inch of headspace at the top. Wipe the rims clean with a damp cloth, place the hot lids on top, and screw on the metal rings finger-tight. Let jars cool at room temperature for at least 12 hours.