
Imagine biting into a golden-brown croquette, its crispy exterior giving way to a creamy, flavorful filling that transports you straight to Spain. Spanish Croquettes are not just a snack, they are a culinary hug, perfect for any occasion. With their rich flavors and delightful textures, they are a crowd-pleaser at parties or a cozy weeknight treat. Plus, they’re versatile enough to fill with anything from classic ham to savory cheese. Let’s gather our ingredients and dive into this delightful recipe!
Why You’ll Love This Recipe
This recipe captures the essence of Spanish cuisine in every bite.
- Perfectly crispy on the outside and creamy on the inside.
- Versatile fillings allow for endless creativity.
- Great for appetizers or a main dish.
- Can be made ahead and frozen for convenience.
My Experience Making This Recipe
Making these croquettes is always a fun adventure in my kitchen. The aroma of sautéing onions and garlic fills the air, making it impossible to resist snacking before they even hit the oil.
When I served them at my last gathering, they disappeared faster than I could say “¿Quieres un croqueta?” Everyone loved them, and I couldn’t help but feel a bit like a culinary hero.
Recipe Overview
- Recipe Name: Spanish Croquettes
- Servings: 4-6
- Prep Time: 30 minutes
- Cook Time: 20 minutes
- Total Time: 50 minutes
- Course: Appetizer
- Cuisine: Spanish
- Calories per Serving: Approximately 250
Equipment You Will Need
- Large skillet
- Mixing bowl
- Whisk
- Cookie sheet
- Deep fryer or heavy pot for frying
- Slotted spoon
- Paper towels
Ingredients for Spanish Croquettes
- 2 tablespoons olive oil
- 1 small onion, finely chopped
- 2 cloves garlic, minced
- 1 cup cooked ham, finely chopped
- 1/4 cup all-purpose flour
- 1 cup milk
- 1/4 teaspoon nutmeg
- Salt and pepper to taste
- 1 cup breadcrumbs
- 2 eggs, beaten
- Vegetable oil for frying
Ingredient Notes and Substitutions
- Olive oil: Adds a rich flavor; you can use vegetable oil if desired.
- Onion: Provides sweetness; shallots can be a nice alternative.
- Ham: Classic filling; you can substitute with chicken or mushrooms for a different taste.
- All-purpose flour: Thickens the mixture; cornstarch can work as a gluten-free option.
- Milk: Makes the filling creamy; almond milk is a good dairy-free alternative.
How to Make Spanish Croquettes
Step 1: Sauté the Aromatics
Heat the olive oil in a large skillet over medium heat. Sauté the onion until translucent, then add the garlic and cook until fragrant.
Step 2: Add the Ham
Stir in the chopped ham and cook for another minute. This step enhances the flavor profile by allowing the ham to caramelize slightly.
Step 3: Create the Roux
Sprinkle the flour over the mixture and stir well. This roux will help thicken the filling and give it a nice texture.
Step 4: Pour in the Milk
Gradually whisk in the milk, stirring constantly. This will create a smooth, creamy mixture that holds together when cooled.
Step 5: Season the Mixture
Add nutmeg, salt, and pepper to taste. These spices will elevate the flavor, giving it that comforting, homey feel.
Step 6: Cool the Mixture
Remove the skillet from heat and let the mixture cool for at least 30 minutes. Cooling is essential for shaping the croquettes easily.
Step 7: Shape the Croquettes
Once cooled, form the mixture into small cylinders or balls. This is where you can get creative with the size and shape.
Step 8: Coat and Fry
Dip each croquette in the beaten eggs, then roll in breadcrumbs. Fry in hot oil until golden brown, about 3-4 minutes, ensuring they are crispy and delicious.
Pro Tip: If you want to make these ahead of time, shape and freeze the croquettes before frying. Just fry them directly from frozen, adding a minute or two to the cooking time.
Tips for the Best Spanish Croquettes
- Use day-old bread for breadcrumbs for a better texture.
- Do not overcrowd the frying pan; it reduces the temperature and makes them soggy.
- Let the filling cool completely for easier shaping.
- Experiment with different fillings like cheese or vegetables.
- Serve with a dipping sauce for an extra flavor boost.
Common Mistakes to Avoid
- Not allowing the filling to cool enough; it makes shaping hard.
- Skipping the breadcrumb step; this is crucial for that crispy outer layer.
- Frying at too low a temperature; it leads to greasy croquettes.
- Overhandling the mixture; it can make the croquettes tough.
Serving Suggestions
These croquettes shine when paired with a fresh salad or a side of aioli for dipping. Try these delicious companions:
- Garlic aioli
- Mixed greens salad
- Tomato salsa
- Patatas bravas
Variations to Try
- Cheese Croquettes: Replace ham with your favorite cheese for a melty delight.
- Mushroom Croquettes: Use sautéed mushrooms for a rich, earthy flavor.
- Seafood Croquettes: Incorporate shrimp or fish for a coastal twist.
- Vegetable Croquettes: Fill with cooked spinach or zucchini for a healthier option.
Dietary Adaptations
- Gluten-free: Use gluten-free flour and breadcrumbs for a safe alternative.
- Dairy-free: Substitute milk with almond or oat milk and use dairy-free margarine.
- Vegan: Replace eggs with a flaxseed mixture and use plant-based fillings.
- Low-carb/Keto: Use almond flour and cheese instead of breadcrumbs.
Storage and Reheating
Refrigerator
Store leftover croquettes in an airtight container for up to 3 days.
- Reheat in the oven to regain crispiness.
- Do not microwave, as it will make them soggy.
Freezer
Freeze uncooked croquettes on a baking sheet, then transfer to a bag once solid. They can be kept for up to 2 months.
- Fry straight from frozen for best results.
Reheating
To reheat cooked croquettes, place them in a preheated oven at 375°F until warmed through, about 10-15 minutes.
- Check for crispiness to ensure they do not become mushy.
Nutrition Information
| Nutrient | Amount |
|---|---|
| Calories | 250 |
| Total Fat | 15g |
| Saturated Fat | 3g |
| Carbohydrates | 20g |
| Fiber | 1g |
| Sugar | 1g |
| Protein | 8g |
| Sodium | 400mg |
| Cholesterol | 50mg |
Nutrition values may vary based on specific ingredients and portion sizes.
Frequently Asked Questions
Can I make these croquettes ahead of time?
Absolutely! You can prepare the filling and shape the croquettes in advance. Just freeze them before frying.
Can I substitute the ham?
Yes, feel free to use cooked chicken, mushrooms, or even cheese as a substitute for the ham.
How do I store leftover croquettes?
Store them in an airtight container in the refrigerator for up to 3 days or freeze them for longer storage.
Why are my croquettes falling apart?
This can happen if the filling is too warm or if you haven’t used enough flour to bind it together.
Can I bake these instead of frying?
Yes, baking is an option, but they won’t be as crispy. Brush with oil and bake at 400°F until golden.
Final Thoughts
Now that you have the secrets to making irresistible Spanish Croquettes, I hope you give them a try soon. They truly bring a taste of Spain to your home, making any meal feel special.
Don’t hesitate to explore more delicious recipes like corn pone or potato balls. Happy cooking!
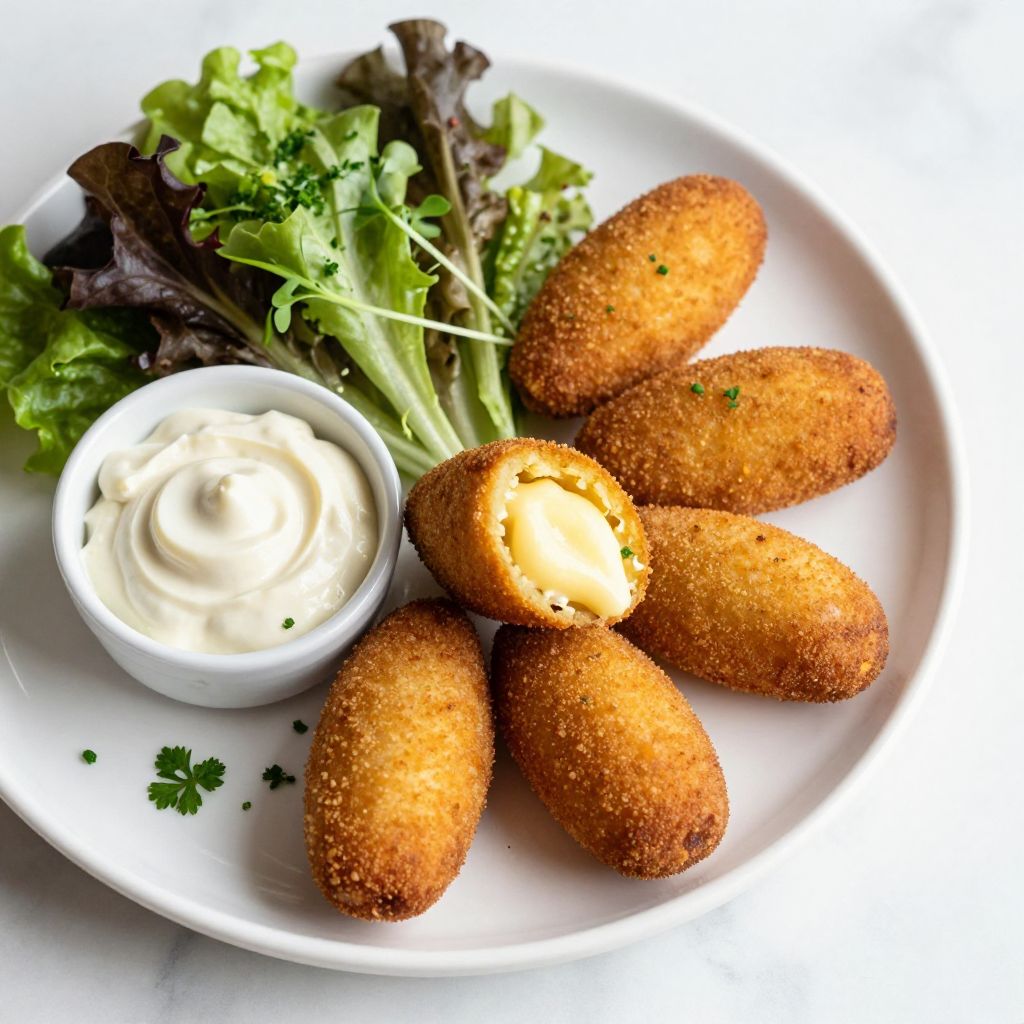
Spanish Croquettes
Ingredients
Equipment
Method
- Heat the olive oil in a large skillet over medium heat.
- Sauté the onion until translucent, then add the garlic and cook until fragrant.
- Stir in the chopped ham and cook for another minute.
- Sprinkle the flour over the mixture and stir well.
- Gradually whisk in the milk, stirring constantly.
- Add nutmeg, salt, and pepper to taste.
- Remove the skillet from heat and let the mixture cool for at least 30 minutes.
- Once cooled, form the mixture into small cylinders or balls.
- Dip each croquette in the beaten eggs, then roll in breadcrumbs.
- Fry in hot oil until golden brown, about 3-4 minutes.