
There’s something magical about a dessert small enough to enjoy in just a few bites, yet rich enough to feel like an indulgence. Small cheesecake delivers that perfect balance of creamy filling, buttery crust, and pure satisfaction without the commitment of a full-sized cake.
These individual cheesecakes are ideal for home cooks who want bakery-quality results without the fuss. They bake faster than traditional cheesecake, require no water bath, and come out silky smooth every single time.
What makes this recipe truly special is its simplicity paired with professional-looking results that impress guests or brighten your own week. Each small cheesecake stays moist, creamy, and crack-free thanks to a few smart techniques you’ll discover below.
Why You’ll Love This Recipe
This small cheesecake recipe checks every box for the home baker seeking something elegant yet achievable. The results taste like you spent hours in the kitchen when you actually invested minimal effort.
- Bakes in under 25 minutes with no water bath required
- Creamy, lump-free texture that rivals any fancy bakery
- Makes 4 individual servings, perfect for portion control
- Can be topped with fresh berries, fruit coulis, or chocolate ganache
- Comes together in less than 15 minutes of hands-on prep
My Experience Making This Recipe
I first tried making small cheesecakes to solve a real problem: I wanted cheesecake without a massive leftovers situation. After a few attempts at scaling down traditional recipes, I realized the magic was in ditching the water bath entirely and baking at a slightly lower temperature.
The first batch emerged from the oven with a gentle wobble in the center and zero cracks on the surface. When I sliced into one, the filling was impossibly creamy, almost mousse-like but with that signature tang and richness only cream cheese delivers.
My partner devoured one immediately, then asked if I could freeze a couple for later cravings. That’s when I knew this recipe had staying power.
Recipe Overview
- Recipe Name: Small Cheesecake
- Servings: 4 individual cheesecakes
- Prep Time: 15 minutes
- Cook Time: 24 minutes
- Total Time: 39 minutes, plus 2 hours chilling
- Course: Dessert
- Cuisine: American
- Calories per Serving: 385
Equipment You Will Need
- 4-ounce ramekins or small baking dishes
- Large mixing bowl
- Hand mixer or whisk
- Measuring cups and spoons
- Food processor (optional, for crushing graham crackers)
- Baking sheet
- Oven thermometer (optional but helpful)
Ingredients for Small Cheesecake
For the Crust
- 1 cup graham cracker crumbs
- 3 tablespoons melted butter
- 2 tablespoons granulated sugar
- 1/4 teaspoon salt
For the Filling
- 8 ounces cream cheese, softened to room temperature
- 1/4 cup granulated sugar
- 1 large egg
- 2 tablespoons sour cream
- 1/2 teaspoon vanilla extract
- 1/4 teaspoon fresh lemon juice
- Pinch of salt
Ingredient Notes and Substitutions
- Cream cheese: It provides the signature tang and creamy texture that defines cheesecake. Neufchatel cheese works as a lighter substitute, though the flavor will be slightly less rich.
- Graham cracker crumbs: They create a traditional, slightly sweet crust that contrasts beautifully with the filling. Digestive biscuits or vanilla wafer crumbs offer a different flavor but work equally well.
- Sour cream: It adds tang and prevents the filling from being one-dimensional sweet. Plain Greek yogurt can replace it, but reduce the amount to 1.5 tablespoons since it’s thicker.
- Egg: It binds the filling and creates the custard-like texture that bakes through without curdling. You cannot omit it, but you can use pasteurized eggs if food safety is a concern.
- Lemon juice: It brightens the filling and adds subtle depth without making the cheesecake taste lemony. Almond extract or an extra quarter-teaspoon vanilla works if you prefer a different flavor note.
How to Make Small Cheesecake
Step 1: Preheat and Prepare Ramekins
Preheat your oven to 325 degrees Fahrenheit. Arrange four ramekins on a baking sheet and set aside.
This temperature is lower than traditional cheesecake baking (which often uses 350 or higher) because small cheesecakes bake so quickly that high heat can cause the tops to brown before the centers set properly.
Step 2: Make the Crust Mixture
Combine 1 cup graham cracker crumbs, 3 tablespoons melted butter, 2 tablespoons granulated sugar, and 1/4 teaspoon salt in a small bowl. Stir until the mixture resembles wet sand.
The butter distribution matters here because it helps the crumbs bind together without being overly compressed, keeping the crust light rather than dense.
Step 3: Press the Crust into Ramekins
Divide the crust mixture evenly among the four ramekins, pressing gently with the back of a spoon. Leave roughly one-quarter inch of space at the top of each ramekin for the filling.
Pressing too hard creates a tough, compact crust, so use a light hand even though it feels counterintuitive.
Step 4: Beat the Cream Cheese
In a large bowl, beat 8 ounces softened cream cheese with a hand mixer on medium speed for about 2 minutes until it becomes light and fluffy. Scrape down the sides of the bowl with a spatula halfway through.
Beating the cream cheese incorporates air and breaks up any lumps, which is the secret to silky smooth filling without grainy texture.
Step 5: Add Sugar and Mix
Add 1/4 cup granulated sugar to the cream cheese and beat on medium speed for another 1 to 2 minutes until fully combined. The mixture should look pale and creamy.
Don’t skip this step even though it seems redundant; the extra mixing time ensures the sugar fully dissolves, preventing grittiness in the final texture.
Step 6: Incorporate Remaining Filling Ingredients
Add 1 large egg, 2 tablespoons sour cream, 1/2 teaspoon vanilla extract, 1/4 teaspoon fresh lemon juice, and a pinch of salt. Beat on low speed just until everything is combined, about 30 seconds.
Overmixing at this stage can whip too much air into the batter, which leads to cracks as the cheesecakes cool and that air collapses.
Step 7: Divide Filling Among Ramekins
Pour the filling mixture evenly over the crusts, filling each ramekin until nearly full. Tap the baking sheet gently on the counter a couple of times to release any air bubbles trapped in the filling.
Those trapped bubbles can create cracks during baking, so this step is worth the extra 20 seconds of attention.
Step 8: Bake Until Set with Slight Wobble
Place the baking sheet in the preheated 325-degree oven and bake for 22 to 24 minutes. The centers should have just a tiny wobble when you gently shake the pan, and the edges should be set.
Overbaking causes the edges to pull away from the ramekins and creates that signature cheesecake crack. Slight underbaking results in custard-like centers that firm up beautifully as they cool.
Step 9: Cool Completely at Room Temperature
Remove the cheesecakes from the oven and let them sit on the baking sheet for 30 minutes at room temperature. This gradual cooling prevents the thermal shock that causes cracking.
It feels like you’re doing nothing during this step, but you’re actually preventing disaster and protecting your hard work.
Step 10: Refrigerate Until Fully Chilled
Transfer the ramekins to the refrigerator and chill for at least 2 hours, or up to overnight. The cheesecakes firm up and develop their final silky texture as they chill.
Cold cheesecake also slices cleaner and tastes richer than room temperature cheesecake, making this waiting period absolutely worth it.
Pro Tip: Room temperature cream cheese is non-negotiable for smooth filling without lumps, so pull it out of the refrigerator at least 30 minutes before mixing.
Tips for the Best Small Cheesecake
- Use a kitchen thermometer to confirm your oven sits at exactly 325 degrees, since even 10 degrees off can change the baking time and texture.
- If you can’t find 4-ounce ramekins, 5-ounce or 6-ounce ramekins work fine; just add a minute or two to the baking time.
- Line your baking sheet with parchment paper to make cleanup effortless and prevent the bottoms from browning too quickly.
- Make the filling just before you plan to bake so the mixture stays cool and doesn’t start setting prematurely.
- Avoid opening the oven door while the cheesecakes bake, as the temperature fluctuation can shock the delicate custard and trigger cracking.
Common Mistakes to Avoid
- Using cold cream cheese causes lumps that no amount of beating can smooth out, resulting in grainy texture that no one wants.
- Overmixing the batter after adding the egg whips in excess air, which collapses during cooling and creates unsightly cracks.
- Baking at too high a temperature browns the tops too quickly while leaving the centers underbaked and custard-like (though some prefer this, it’s unpredictable).
- Skipping the 30-minute room temperature cool allows rapid cooling that shocks the structure and causes cracking.
- Pressing the crust too firmly compacts it into a dense, hard layer that distracts from the silky filling.
Serving Suggestions
These small cheesecakes shine with toppings that complement their creamy richness. Fresh fruit, bright sauces, and simple garnishes elevate them from simple dessert to elegant finale.
- Top with fresh berries and a drizzle of honey or berry coulis for bright acidity
- Add a spoonful of chocolate ganache and crushed pistachios for richness and crunch
- Serve alongside espresso or strong black coffee for a sophisticated pairing
- Dust with graham cracker crumbs mixed with cinnamon for extra crust texture
- Pair with a small glass of dessert wine or sweet sherry
Variations to Try
- Chocolate Cheesecake: Fold 2 tablespoons unsweetened cocoa powder into the filling before baking for deep chocolate flavor without heaviness.
- Salted Caramel Cheesecake: Drizzle a teaspoon of salted caramel sauce onto the filling before baking and another drizzle on top after cooling.
- New York Style: Omit the sour cream and increase the cream cheese to 9 ounces for a denser, tangier filling that tastes more like classic New York cheesecake.
- Strawberry Cheesecake: Spread a thin layer of strawberry jam on the crust before adding the filling, then top with fresh strawberry slices after chilling.
- Earl Grey Tea Cheesecake: Steep 1 Earl Grey tea bag in 2 tablespoons hot water, let cool, and add the strained liquid to the filling for floral complexity.
Dietary Adaptations
- Gluten-Free: Substitute gluten-free graham crackers or almond flour for the standard crumbs, adjusting butter slightly if using almond flour since it absorbs differently.
- Dairy-Free: Use dairy-free cream cheese and coconut yogurt in place of sour cream, though the flavor and texture will shift noticeably toward coconut.
- Vegan: Swap cream cheese for cashew-based vegan cream cheese and use a flax egg (1 tablespoon ground flaxseed plus 3 tablespoons water) instead of the egg.
- Low-Carb or Keto: Replace sugar with erythritol or monk fruit sweetener in equal amounts, and use almond flour mixed with butter for the crust to reduce carbs significantly.
Storage and Reheating
Refrigerator
Covered cheesecakes last up to 5 days in the refrigerator in their ramekins or transferred to an airtight container. The texture stays silky and cold throughout this window.
- Cover with plastic wrap or store in a sealed container to prevent odor absorption from the fridge
- Don’t unwrap until you’re ready to eat to minimize exposure to air and moisture
Freezer
These cheesecakes freeze beautifully for up to 3 months, making them ideal for baking ahead. Freeze them in their ramekins or transfer to a freezer-safe container after they’ve chilled completely.
- Wrap individual ramekins tightly with plastic wrap and place in a freezer bag for extra protection
- Label with the date so you remember when you made them
- Thaw in the refrigerator for 4 hours before serving to prevent condensation on the surface
Reheating
These are best enjoyed cold straight from the refrigerator, as cheesecake loses its silky texture when warmed. Never microwave cheesecake, as this creates rubbery texture and uneven heating.
- Let frozen cheesecakes thaw in the refrigerator rather than at room temperature to prevent condensation
- Serve chilled with toppings added just before eating so they stay fresh and bright
Nutrition Information
| Nutrient | Amount |
|---|---|
| Calories | 385 |
| Total Fat | 28g |
| Saturated Fat | 16g |
| Carbohydrates | 32g |
| Fiber | 0g |
| Sugar | 26g |
| Protein | 6g |
| Sodium | 285mg |
| Cholesterol | 68mg |
These values are approximate and calculated based on standard ingredients and portion sizes. Individual nutrition will vary depending on specific brands and any toppings or modifications you add.
Frequently Asked Questions
Can I make these cheesecakes without an oven?
You could make no-bake cheesecake using whipped cream and gelatin, but it won’t have the same custard-like texture as baked cheesecake. If you lack an oven, that’s the best alternative, though the final result differs noticeably.
How far ahead can I make these cheesecakes?
You can bake them up to 5 days in advance and keep them covered in the refrigerator, or freeze them for up to 3 months. Both options work beautifully, though thawing frozen cheesecake takes 4 hours in the fridge.
What if my cheesecake cracks?
Cracks don’t affect flavor, only appearance, so you can cover them with fruit, sauce, or whipped cream. If you want to prevent cracks in future batches, make sure your cream cheese is room temperature, avoid overmixing, and allow slow cooling at room temperature before refrigeration.
Can I use a springform pan instead of ramekins?
Yes, though you’ll need to increase all ingredients by roughly 4 times and bake for 30 to 35 minutes instead of 24. You’ll also lose the individual presentation unless you slice the larger cheesecake after chilling.
Why is my filling lumpy?
Lumpy filling usually comes from cold cream cheese that didn’t blend smoothly into the sugar. Always soften cream cheese to room temperature before mixing, and beat it for at least 2 minutes until light and fluffy.
Can I add flavorings to the filling?
Absolutely, you can add almond extract, maple syrup, coffee liqueur, or other flavorings in small amounts (start with half a teaspoon to taste). Just avoid adding too much liquid, which can affect the baking time and texture.
Final Thoughts
Small cheesecake proves that elegant desserts don’t require complicated techniques or hours in the kitchen. These individual cakes come together in under 40 minutes of total time, yet taste like a professional bakery created them.
Make a batch this week, chill them overnight, and enjoy one whenever you need a moment of indulgence. Your friends and family will think you’re a dessert genius, and honestly, they won’t be wrong.
If you loved this recipe, explore more cheesecake variations on the blog. Try our cherry cheesecake recipe for a tangy fruit twist, or discover our banana cheesecake recipe for tropical richness.
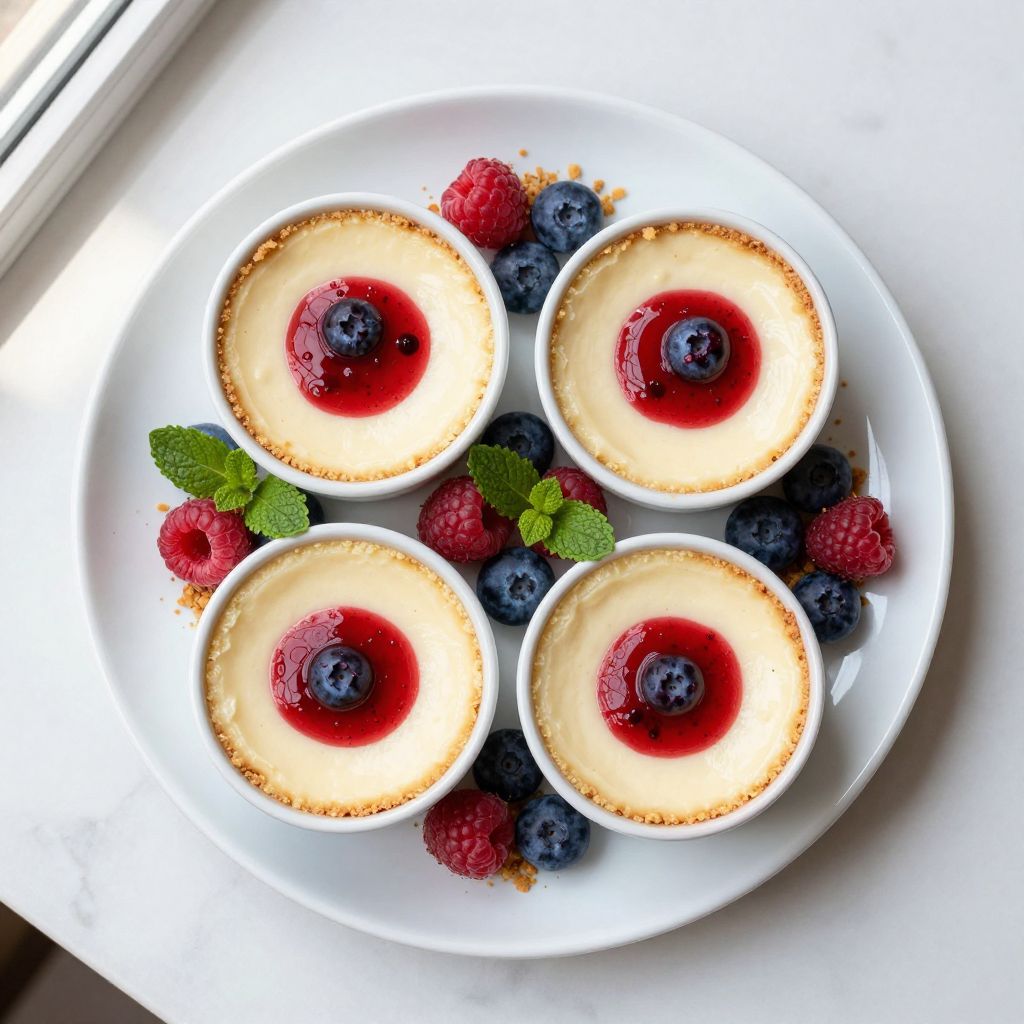
Small Cheesecakes
Ingredients
Equipment
Method
- Preheat your oven to 325°F (163°C) and arrange four ramekins on a baking sheet.
- Combine graham cracker crumbs, melted butter, sugar, and salt in a bowl until mixture resembles wet sand.
- Divide the crust mixture evenly among ramekins and press gently to form a thin layer, leaving 1/4 inch at the top.
- In a large bowl, beat cream cheese with a hand mixer on medium speed for 2 minutes until smooth and fluffy.
- Add granulated sugar and beat for 1 to 2 minutes until pale and creamy.
- Add egg, sour cream, vanilla extract, lemon juice, and a pinch of salt; beat on low speed until just combined, about 30 seconds.
- Spoon the filling into ramekins over the crust and tap the baking sheet to release any air bubbles.
- Bake at 325°F (163°C) for 22 to 24 minutes, until the edges are set and centers wobble slightly.
- Cool cheesecakes on the baking sheet at room temperature for 30 minutes to prevent cracking.
- Refrigerate the cheesecakes for at least 2 hours or up to overnight until fully chilled before serving.