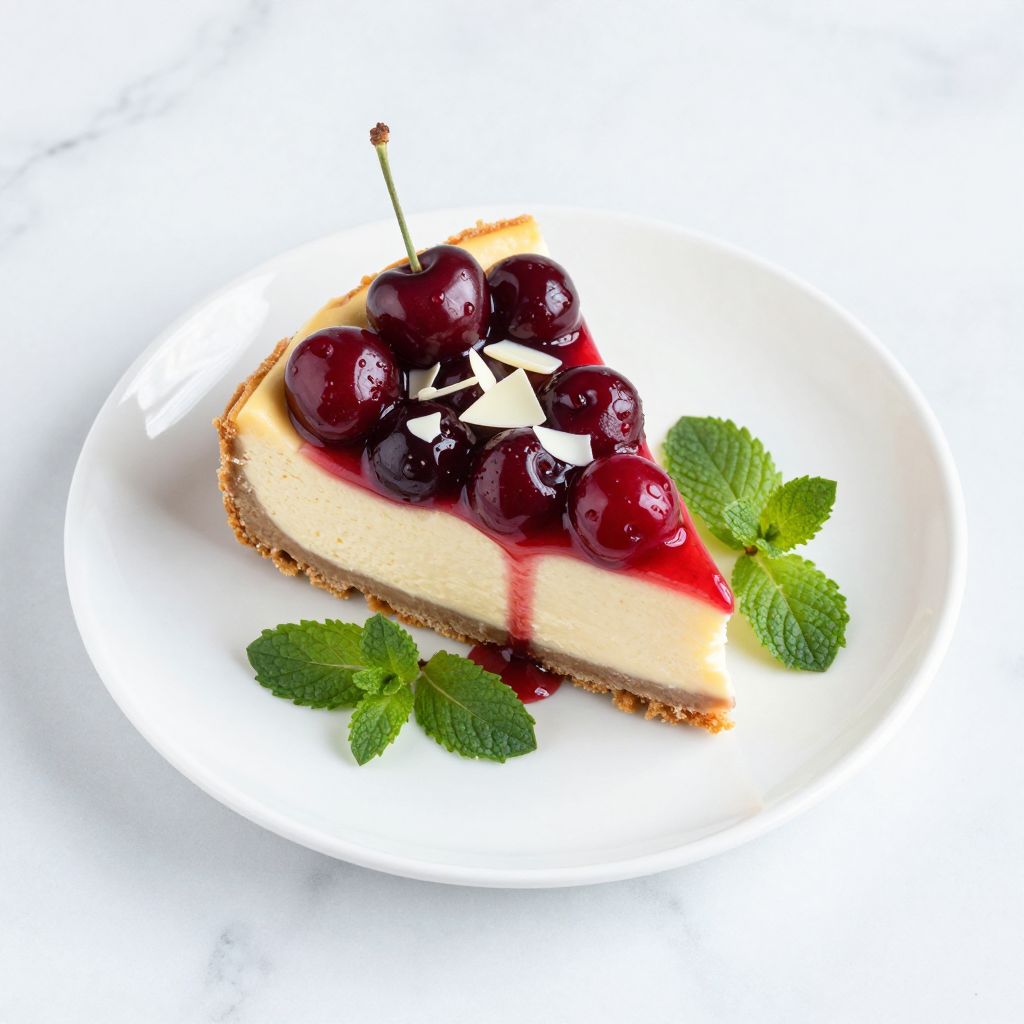
Cherry cheesecake delivers rich, creamy indulgence topped with glossy, tart cherries that make every celebration feel special. This classic dessert combines a buttery graham cracker crust with silky cream cheese filling and a vibrant cherry topping that looks as stunning as it tastes. Whether you’re planning a holiday dinner or just craving something extraordinary, this recipe creates bakery-quality results right in your own kitchen.
The process is simpler than you might think. With the right techniques and a bit of patience, you’ll create a dessert that earns compliments every single time.
Why You’ll Love This Recipe
This cherry cheesecake balances creamy richness with bright fruit flavor in a way that feels both comforting and elegant. The texture is smooth without being heavy, and the cherry topping adds just the right amount of sweetness and color.
- No water bath required, which simplifies the baking process significantly
- Make-ahead friendly so you can prepare it a day or two before serving
- Feeds a crowd with generous slices that satisfy without overwhelming
- Uses straightforward ingredients you can find at any grocery store
- Looks impressive enough for special occasions but easy enough for casual gatherings
My Experience Making This Recipe
The first time I pulled this cheesecake from the oven, I worried about cracks on the surface. Then I learned that gentle cooling prevents most issues, and even if a crack appears, the cherry topping covers it beautifully.
My family requests this dessert for every birthday now. The combination of tangy cream cheese with sweet-tart cherries wins over even people who claim they don’t like cheesecake.
The hardest part is waiting for it to chill completely before serving. That patience pays off with clean slices and perfectly set filling that holds its shape on the plate.
Recipe Overview
- Recipe Name: Cherry Cheesecake
- Servings: 12 slices
- Prep Time: 25 minutes
- Cook Time: 55 minutes
- Total Time: 5 hours 20 minutes (includes cooling and chilling)
- Course: Dessert
- Cuisine: American
- Calories per Serving: 385
Equipment You Will Need
- 9-inch springform pan
- Electric mixer (stand or hand mixer)
- Food processor or plastic bag with rolling pin for crushing crackers
- Large mixing bowl
- Medium mixing bowl
- Rubber spatula
- Measuring cups and spoons
- Small saucepan for cherry topping
Ingredients for Cherry Cheesecake
For the Crust
- 1 and 3/4 cups graham cracker crumbs (about 12 full crackers)
- 1/4 cup granulated sugar
- 6 tablespoons unsalted butter, melted
For the Filling
- 32 ounces cream cheese (four 8-ounce blocks), softened to room temperature
- 1 cup granulated sugar
- 1 cup sour cream, room temperature
- 4 large eggs, room temperature
- 2 teaspoons vanilla extract
- 1 tablespoon all-purpose flour
- 1/4 teaspoon salt
For the Cherry Topping
- 21 ounces cherry pie filling (one can)
- 1/2 teaspoon almond extract
- 1 tablespoon lemon juice
Ingredient Notes and Substitutions
- Cream cheese: Full-fat brick-style cream cheese creates the richest, smoothest texture. Avoid using low-fat or whipped versions, as they contain too much moisture and won’t set properly.
- Sour cream: This adds tanginess and keeps the filling creamy without being too dense. You can substitute with full-fat Greek yogurt, though the flavor will be slightly different.
- Graham cracker crumbs: These provide the classic cheesecake base with mild sweetness and crunch. Swap with vanilla wafer crumbs or digestive biscuits for a similar result.
- Cherry pie filling: Canned filling saves time and delivers consistent results with thickened syrup. Fresh cherries work too, but you’ll need to cook them with sugar and cornstarch to create the right consistency.
- Almond extract: This amplifies the cherry flavor beautifully with just a small amount. If you don’t have it, vanilla extract works fine, though you’ll miss that subtle nuttiness.
How to Make Cherry Cheesecake
Step 1: Prepare the Pan and Preheat
Preheat your oven to 325°F and wrap the outside of your springform pan with aluminum foil from the bottom up the sides. This prevents any butter from leaking out during baking. Grease the inside of the pan lightly with butter or cooking spray.
Step 2: Make the Crust
Combine graham cracker crumbs, sugar, and melted butter in a medium bowl until the mixture resembles wet sand. Press this mixture firmly into the bottom of your prepared pan, using the bottom of a measuring cup to create an even, compact layer. Bake for 10 minutes, then remove and let it cool while you prepare the filling.
Step 3: Beat the Cream Cheese
Beat the softened cream cheese in a large bowl with an electric mixer on medium speed for 2 to 3 minutes until completely smooth and fluffy. Scrape down the sides of the bowl frequently to avoid lumps. This step is critical because any lumps now will stay in your finished cheesecake.
Step 4: Add Sugar and Sour Cream
Add the sugar to the cream cheese and beat for another 2 minutes until well combined. Mix in the sour cream, flour, salt, and vanilla extract on low speed until just incorporated. Overbeating at this stage incorporates too much air, which can cause cracks during baking.
Step 5: Incorporate the Eggs
Add eggs one at a time, beating on low speed after each addition until just combined. Stop mixing as soon as the yellow streaks disappear. Overmixing eggs creates too much air and a puffy texture that collapses as it cools.
Step 6: Pour and Smooth
Pour the filling over the cooled crust and smooth the top with a spatula. Tap the pan gently on the counter a few times to release any air bubbles trapped in the batter. This creates a denser, creamier texture without holes.
Step 7: Bake the Cheesecake
Place the pan on the center rack and bake for 50 to 55 minutes. The cheesecake is done when the edges are set but the center still jiggles slightly when you gently shake the pan. The residual heat will finish cooking the center as it cools, preventing that dreaded rubbery texture.
Step 8: Cool Gradually
Turn off the oven and crack the door open about 4 inches. Let the cheesecake sit in the cooling oven for 1 hour. This gradual temperature change prevents sudden contraction that causes cracks.
Step 9: Chill Completely
Remove the cheesecake from the oven and let it cool to room temperature on a wire rack, about 1 hour. Cover with plastic wrap and refrigerate for at least 4 hours or overnight. Cheesecake must be completely cold to slice cleanly and develop its best flavor.
Step 10: Prepare the Cherry Topping
Combine cherry pie filling, almond extract, and lemon juice in a small saucepan over medium heat. Stir gently and cook for 3 to 4 minutes until the mixture is warmed through and glossy. Let it cool for 10 minutes, then spread it over the chilled cheesecake just before serving.
Pro Tip: Always run a thin knife around the edge of the cheesecake before releasing the springform pan. This prevents the sides from sticking and tearing as the cheesecake naturally contracts during cooling.
Tips for the Best Cherry Cheesecake
- Bring all dairy ingredients to room temperature before starting. Cold ingredients don’t blend smoothly and create a lumpy filling that never fully smooths out.
- Use a light hand when mixing after adding the eggs. Excessive beating incorporates air that expands during baking and creates cracks as it deflates.
- Check for doneness by looking for a slight jiggle in the center. An instant-read thermometer should register 150°F in the center for perfect texture.
- Clean your knife between each slice by dipping it in hot water and wiping it dry. This creates clean cuts with smooth edges instead of dragging filling.
- Apply the cherry topping just before serving rather than hours ahead. This prevents the juices from soaking into the cheesecake and making the top soggy.
- Let the cheesecake sit at room temperature for 20 minutes before slicing. Slightly softened cheesecake cuts more easily and tastes better than ice-cold slices.
Common Mistakes to Avoid
- Using cold cream cheese creates lumps that never fully incorporate, leaving you with a grainy texture instead of silky smoothness.
- Overbaking the cheesecake results in a dry, cracked top and rubbery texture that loses that signature creaminess.
- Opening the oven door frequently during baking causes temperature fluctuations that lead to uneven cooking and surface cracks.
- Skipping the gradual cooling process creates thermal shock that causes the top to crack as the cheesecake contracts too quickly.
- Cutting into warm cheesecake makes the filling ooze out instead of holding its shape, ruining the presentation.
Serving Suggestions
This cheesecake shines as a standalone dessert, but adding complementary flavors takes it to another level. The creamy base pairs beautifully with both light and rich accompaniments.
- Serve with a dollop of fresh whipped cream and a sprinkle of chocolate shavings for added decadence
- Add a scoop of vanilla ice cream alongside warm slices for a temperature contrast that highlights the creamy filling
- Pair with hot coffee or espresso to cut through the richness and balance the sweetness
- Drizzle with chocolate sauce or caramel for guests who want extra indulgence
- Garnish individual slices with fresh mint leaves for a pop of color and a subtle herbal note
Variations to Try
- Swap cherry topping for blueberry pie filling mixed with lemon zest for a brighter, more summery flavor profile.
- Add 1/2 cup of mini chocolate chips to the filling for a cherry-chocolate combination that tastes like a sundae.
- Use chocolate graham crackers or crushed Oreos for the crust to create a cookies-and-cream base with cherry contrast.
- Mix 1/4 cup of amaretto liqueur into the filling for an adults-only version with deeper almond notes.
- Top with fresh cherries that you’ve pitted and macerated in sugar for 30 minutes instead of canned filling for a lighter, fresher taste.
Dietary Adaptations
- Gluten-free: Replace graham crackers with gluten-free graham crackers or almond flour mixed with melted butter and sugar. The texture stays crisp and buttery.
- Dairy-free: Use dairy-free cream cheese and coconut cream in place of sour cream, though the flavor will be noticeably different and slightly less tangy.
- Vegetarian: This recipe is already vegetarian-friendly as written with no modifications needed.
- Low-carb: Replace the sugar with erythritol and use almond flour crust instead of graham crackers, though you’ll need to skip the sugary cherry topping or make a sugar-free version.
Storage and Reheating
Refrigerator
Store covered cheesecake in the refrigerator for up to 5 days. Cover tightly with plastic wrap or store in an airtight container to prevent it from absorbing other food odors.
- Keep the cheesecake in its springform pan with the ring attached if serving over several days
- Store individual slices wrapped separately for easy grab-and-go portions
Freezer
Freeze cheesecake for up to 2 months with excellent results. Wrap the entire cheesecake or individual slices tightly in plastic wrap, then in aluminum foil to prevent freezer burn.
- Freeze the cheesecake without the cherry topping for best texture
- Thaw overnight in the refrigerator before adding topping and serving
- Individual frozen slices thaw in about 2 hours at room temperature
Reheating
Cheesecake tastes best served cold or at room temperature. Reheating changes the texture and isn’t recommended.
- Let refrigerated slices sit at room temperature for 20 minutes before serving for the best flavor
- Never microwave cheesecake, as it will melt the filling and ruin the texture
Nutrition Information
| Nutrient | Amount |
|---|---|
| Calories | 385 |
| Total Fat | 24g |
| Saturated Fat | 14g |
| Carbohydrates | 36g |
| Fiber | 1g |
| Sugar | 28g |
| Protein | 7g |
| Sodium | 285mg |
| Cholesterol | 115mg |
Nutritional values are approximate and will vary based on specific brands and measurements used. This information is provided as a general guide and should not replace professional dietary advice.
Frequently Asked Questions
Can I use fresh cherries instead of canned pie filling?
Absolutely, but you’ll need to cook them with sugar and cornstarch to thicken the juices. Combine 2 cups pitted fresh cherries with 1/2 cup sugar, 2 tablespoons cornstarch, and 1/4 cup water in a saucepan, then simmer until thick.
How do I prevent cracks in my cheesecake?
Avoid overbeating the batter after adding eggs, bake at a lower temperature, and cool the cheesecake gradually in the oven with the door cracked. These steps minimize the temperature shock that causes cracking.
Can I make this cheesecake ahead of time?
Yes, cheesecake actually tastes better the next day after the flavors have time to develop. Make it up to 2 days ahead and store it covered in the refrigerator, adding the cherry topping just before serving.
Why is my cheesecake runny in the center?
The cheesecake wasn’t baked long enough or wasn’t chilled for the full time. The center should jiggle slightly when done baking, then it firms up completely during the 4-hour minimum chill time.
Can I make mini cheesecakes instead of one large one?
Yes, use a muffin tin lined with cupcake liners and reduce the baking time to 18 to 22 minutes. The cooling process remains the same, but individual cheesecakes chill faster in about 2 hours.
What causes a grainy texture in cheesecake?
Grainy texture usually comes from cold cream cheese that wasn’t fully softened or from overbaking. Always use room-temperature ingredients and remove the cheesecake when the center still jiggles slightly.
Final Thoughts
Cherry cheesecake transforms simple ingredients into something memorable that brings people together around the table. The combination of creamy filling, buttery crust, and bright cherry topping creates a dessert that satisfies without being overly complicated.
Give this recipe a try for your next gathering and watch it disappear. The compliments you’ll receive make every minute of prep time worth the effort.
Cherry Cheesecake
Ingredients
Equipment
Method
- Preheat your oven to 325°F and wrap the outside of your springform pan with aluminum foil from the bottom up the sides. Grease the inside of the pan lightly with butter or cooking spray.
- Combine graham cracker crumbs, sugar, and melted butter in a medium bowl until the mixture resembles wet sand. Press this mixture firmly into the bottom of your prepared pan, using the bottom of a measuring cup to create an even, compact layer.
- Bake the crust for 10 minutes, then remove and let it cool while you prepare the filling.
- Beat the softened cream cheese in a large bowl with an electric mixer on medium speed for 2 to 3 minutes until completely smooth and fluffy. Scrape down the sides of the bowl frequently to avoid lumps.
- Add the sugar to the cream cheese and beat for another 2 minutes until well combined. Mix in the sour cream, flour, salt, and vanilla extract on low speed until just incorporated.
- Add eggs one at a time, beating on low speed after each addition until just combined. Stop mixing as soon as the yellow streaks disappear.
- Pour the filling over the cooled crust and smooth the top with a spatula. Tap the pan gently on the counter a few times to release any air bubbles trapped in the batter.
- Place the pan on the center rack and bake for 50 to 55 minutes. The cheesecake is done when the edges are set but the center still jiggles slightly when you gently shake the pan.
- Turn off the oven and crack the door open about 4 inches. Let the cheesecake sit in the cooling oven for 1 hour.
- Remove the cheesecake from the oven and let it cool to room temperature on a wire rack, about 1 hour. Cover with plastic wrap and refrigerate for at least 4 hours or overnight.
- Combine cherry pie filling, almond extract, and lemon juice in a small saucepan over medium heat. Stir gently and cook for 3 to 4 minutes until the mixture is warmed through and glossy. Let it cool for 10 minutes, then spread it over the chilled cheesecake just before serving.