
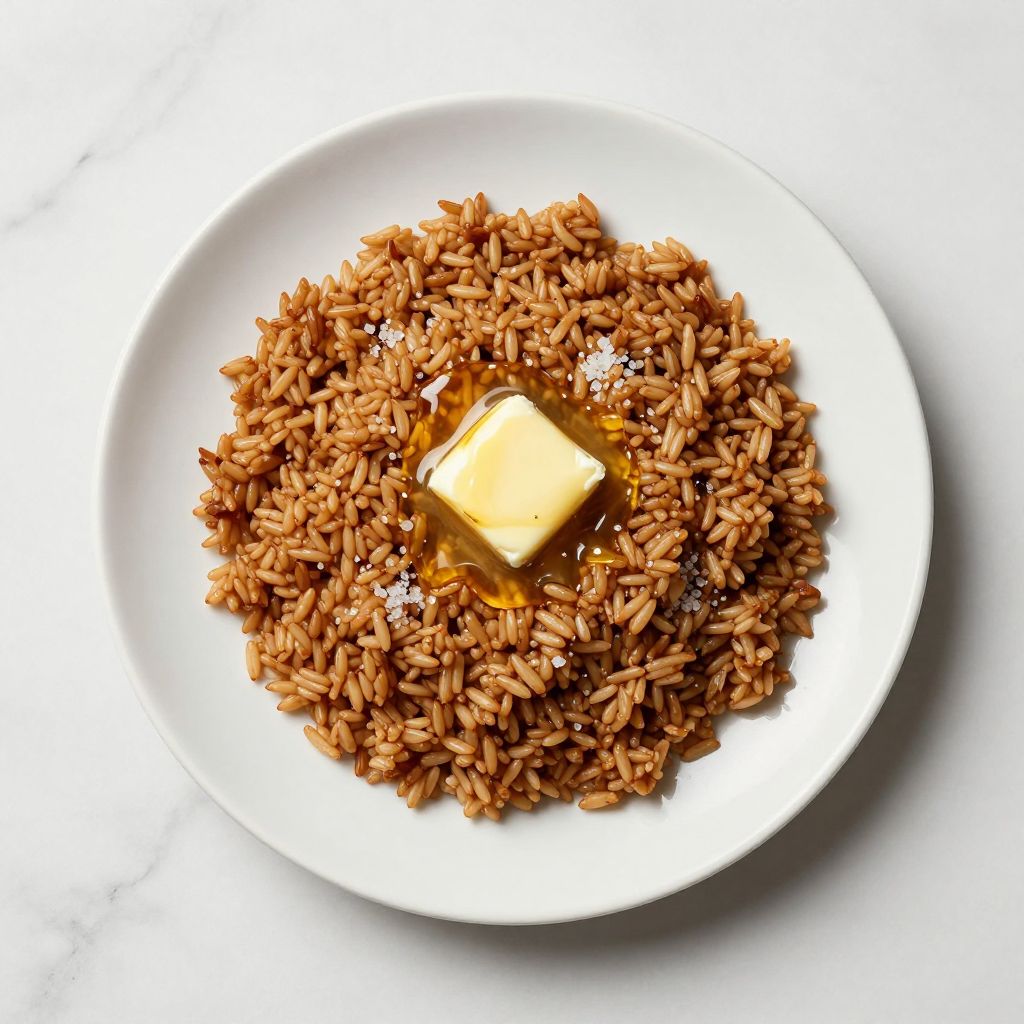
There’s something deeply satisfying about opening the Instant Pot lid to find perfectly fluffy brown rice waiting for you, no fussing required.
Brown rice used to intimidate me because stovetop cooking felt unpredictable, with burnt bottoms and undercooked centers ruining my dinner plans. The Instant Pot brown rice recipe changed everything by using pressure cooking to lock in moisture and cook the grains evenly in under 30 minutes total.
This method delivers nutty, tender rice with a slight chew every single time, and once you nail the water-to-rice ratio, you’ll never go back to guessing.
Why You’ll Love This Recipe
This recipe removes all the guesswork from cooking brown rice while delivering restaurant-quality results in your kitchen.
- Perfectly cooked brown rice in 22 minutes from start to finish
- Foolproof water-to-rice ratio that works every time
- No stirring, no monitoring, no burnt pots to clean
- Makes enough for meal prep or feeding a family
- Works with any Instant Pot model or electric pressure cooker
My Experience Making This Recipe
I started testing this recipe out of pure frustration after burning brown rice three times on the stove in one month. My first Instant Pot attempt turned out perfectly fluffy rice, and my partner actually asked if I had ordered takeout rice instead of making it.
Since then, I’ve made this batch at least twice a month for meal prep bowls, stir-fries, and rice salads. The texture comes out creamy on the outside and slightly firm in the center, with that distinctive nutty flavor that makes brown rice worth the extra cook time.
Friends who thought they hated brown rice changed their minds after tasting my Instant Pot version. It’s become my go-to side dish because I can set it and forget it while prepping vegetables or proteins.
Recipe Overview
- Recipe Name: Instant Pot Brown Rice
- Servings: 6 servings
- Prep Time: 5 minutes
- Cook Time: 22 minutes
- Total Time: 27 minutes
- Course: Side Dish
- Cuisine: International
- Calories per Serving: 215 calories
Equipment You Will Need
- Instant Pot (6-quart or 8-quart)
- Measuring cups
- Measuring spoons
- Fork or wooden spoon for fluffing
- Colander (optional, for rinsing)
- Serving spoon or rice paddle
Ingredients for Instant Pot Brown Rice
- 2 cups brown rice (long-grain or short-grain)
- 3 cups water or vegetable broth
- 1 teaspoon salt
- 1 tablespoon butter (optional, for richness)
Ingredient Notes and Substitutions
- Brown Rice: Brown rice takes longer to cook than white rice because the bran layer remains intact. You can substitute white rice using a 1:1 water ratio and reducing cook time to 4 minutes, though you’ll lose the nutty flavor and nutritional benefits.
- Water: Water is the standard choice, but vegetable broth or chicken broth adds extra flavor without changing texture. Broth works equally well and creates a more savory rice dish.
- Salt: Salt enhances the natural nutty taste of brown rice. You can omit it for a completely plain base, though the rice will taste noticeably flat.
- Butter: Butter adds richness and prevents the rice from sticking together. You can skip it entirely for a dairy-free version, but the rice won’t be quite as luxurious.
How to Make Instant Pot Brown Rice
Step 1: Measure and Rinse the Brown Rice
Pour 2 cups of brown rice into a fine-mesh colander and rinse under cold water for about 1 minute, swirling gently with your fingers. Rinsing removes surface starch and dust, which helps the rice cook more evenly and prevents a gummy texture.
Step 2: Add Rice to the Instant Pot
Place the rinsed brown rice directly into the Instant Pot’s inner stainless steel pot. Don’t use any cooking spray or oil at this stage, as it can interfere with the pressure seal.
Step 3: Pour in Water and Salt
Add 3 cups of water and 1 teaspoon of salt to the pot with the rice. The water-to-rice ratio of 1.5 parts water to 1 part rice is essential for achieving perfectly cooked brown rice without mushiness or dryness.
Step 4: Stir and Close the Lid
Give the mixture a quick stir to combine the salt and ensure the rice isn’t clumping together. Close the Instant Pot lid securely and make sure the valve is set to “sealing” rather than “venting,” which is critical for building pressure.
Step 5: Set Pressure Cooking Time
Press the “Pressure Cook” or “Manual” button and set the time to 22 minutes on high pressure. This duration cooks the brown rice completely while maintaining a slight bite and preventing mushiness.
Step 6: Let Pressure Build Naturally
Once you hit start, the pot takes about 10 minutes to build pressure before cooking begins. Resist the urge to open it; this preheat phase is part of the cooking process.
Step 7: Complete Natural Pressure Release
When the timer beeps, let the pot sit undisturbed for 10 minutes to allow pressure to release naturally. Natural release is crucial for brown rice because quick release can make the grains split and become mushy.
Step 8: Fluff and Serve
After 10 minutes of natural release, carefully open the valve to release any remaining steam. Use a fork to gently fluff the rice, breaking up any clumps, then serve immediately while warm.
Pro Tip: If you forget to set the pot to “sealing,” it will never build pressure and you’ll end up with crunchy rice. Always double-check that little valve before you walk away.
Tips for the Best Instant Pot Brown Rice
- Rinse your rice before cooking to remove excess starch and achieve a fluffier texture with less stickiness.
- Don’t skip the natural pressure release period, as quick release can cause the rice to split and turn mushy.
- Use the 1.5:1 water-to-rice ratio every time, and you’ll have predictable results regardless of rice brand.
- If your rice comes out too wet, you may have added too much water or failed to seal properly; if it’s too dry, use an extra quarter cup of water next time.
- Let the rice rest in the pot for 2-3 minutes after fluffing before serving, which helps it firm up slightly.
- Add butter or oil only after cooking is complete to avoid interfering with the pressure seal and cooking process.
Common Mistakes to Avoid
- Forgetting to set the valve to “sealing” results in no pressure building and crunchy, undercooked rice that’s inedible.
- Using quick pressure release instead of natural release causes the rice grains to split from sudden pressure change, creating a mushy texture.
- Cooking brown rice on low pressure instead of high pressure extends the cook time unnecessarily and can produce inconsistent results.
- Opening the lid before the full natural release period ends releases pressure too quickly and stops the carryover cooking that finishes the rice.
- Not rinsing the rice beforehand leads to a starchy, gummy pot of rice that clumps together unappealingly.
Serving Suggestions
Instant Pot brown rice works as a versatile base for endless meal combinations and pairs beautifully with proteins and vegetables. Serve it warm for maximum flavor, or chill it for grain bowls and salads.
- Top with grilled chicken, sauteed broccoli, and teriyaki sauce for a quick weeknight dinner
- Mix with black beans, corn, peppers, and cilantro lime dressing for a burrito bowl
- Pair with a rich curry and serve as an absorbent bed for sauce
- Toss with roasted vegetables, feta cheese, and balsamic vinaigrette for a hearty salad
- Serve alongside grilled fish and roasted asparagus for an elegant plate
Variations to Try
- Coconut Brown Rice: Replace half the water with canned coconut milk for a creamy, tropical rice that pairs well with Thai and Asian dishes.
- Garlic and Herb Brown Rice: Add 3 minced garlic cloves and 1 teaspoon dried Italian herbs to the water before cooking for aromatic, seasoned rice.
- Vegetable Broth Brown Rice: Use vegetable or chicken broth instead of water to add savory depth and complexity to the finished rice.
- Butter and Parmesan Brown Rice: Stir in 2 tablespoons butter and 1/4 cup grated Parmesan cheese immediately after fluffing for a rich, umami-packed side.
- Wild Rice Blend: Mix 1 cup brown rice with 1 cup wild rice and increase water to 3.5 cups for a heartier texture and nuttier flavor.
Dietary Adaptations
- Gluten-Free: Brown rice is naturally gluten-free, so this recipe needs no changes; just verify your broth is gluten-free if using it instead of water.
- Dairy-Free: Simply omit the butter or use a dairy-free butter substitute; the rice cooks perfectly without any fat added.
- Vegan: This recipe is already vegan; use vegetable broth instead of chicken broth and skip the butter for a completely plant-based dish.
- Low-Carb or Keto: Brown rice is too high in carbohydrates for strict keto plans; substitute cauliflower rice instead, though cooking method differs significantly.
Storage and Reheating
Refrigerator
Let the cooked rice cool to room temperature, then transfer it to an airtight container and refrigerate for up to 5 days. Cold brown rice works perfectly for grain bowls, salads, and fried rice applications.
- Store in shallow containers to speed up cooling and prevent condensation
- Keep away from strong-smelling foods to prevent odor absorption
Freezer
Spread cooled rice on a baking sheet, freeze for 2 hours, then transfer to freezer bags for up to 3 months. Freezing in a single layer first prevents clumping and allows you to grab portions as needed.
- Use freezer bags with the date written on them for easy tracking
- Leave 1/2 inch headspace in bags to allow for expansion
Reheating
Add 1-2 tablespoons of water per cup of rice, cover, and microwave for 2-3 minutes until steaming, or reheat on the stovetop over medium heat with a splash of water. The added water restores moisture that evaporates during storage.
- Stir occasionally while reheating for even temperature distribution
- Avoid reheating in the Instant Pot, as the texture suffers from a second pressure cooking
Nutrition Information
| Nutrient | Amount |
|---|---|
| Calories | 215 kcal |
| Total Fat | 2 g |
| Saturated Fat | 0.5 g |
| Carbohydrates | 45 g |
| Fiber | 4 g |
| Sugar | 0.5 g |
| Protein | 5 g |
| Sodium | 390 mg |
| Cholesterol | 0 mg |
Nutritional values are approximate and based on USDA data for cooked brown rice. Actual values vary depending on rice brand and cooking liquid used.
Frequently Asked Questions
Can I use short-grain brown rice instead of long-grain?
Yes, short-grain brown rice works perfectly with this same recipe and water ratio. Short-grain varieties cook slightly faster but produce creamier rice with more starch, which some people prefer for certain dishes.
What happens if I accidentally use quick release instead of natural release?
Quick release causes rapid pressure drop, which makes the rice grains split and turn mushy from the sudden expansion. You’ll end up with broken, soupy rice instead of intact fluffy grains, so always use the 10-minute natural release.
Can I make this recipe in advance and reheat it?
Absolutely, brown rice reheats beautifully in the microwave or on the stovetop with a splash of water added back. You can refrigerate it for 5 days or freeze it for up to 3 months, making it ideal for meal prep.
Why did my rice turn out mushy?
Mushiness usually happens from using too much water, using quick release, or cooking twice as long as needed. Make sure you use exactly 3 cups water for 2 cups rice and always use the full natural pressure release period.
Can I cook different amounts of rice using this same ratio?
Yes, the 1.5:1 water-to-rice ratio works for any quantity as long as you don’t fill the pot more than two-thirds full. Always maintain the same 22-minute cook time on high pressure for consistent results.
Final Thoughts
Once you master this Instant Pot brown rice recipe, you’ll wonder why you ever stressed about cooking it on the stove. The pressure cooker removes all the variables and delivers perfectly cooked rice every single time, which is exactly what busy home cooks need.
Give this recipe a try this week, and you’ll be adding brown rice to your meal prep rotation permanently. Your future self will thank you when you have batch-cooked rice ready to transform into quick dinners all week long.
Explore More Rice Recipes
Now that you’ve mastered brown rice in the Instant Pot, expand your rice-cooking skills with other varieties and preparations.
Try making Arborio rice for creamy risottos, or explore the flavors in a seasoned rice recipe that brings bold spices to your table. Both techniques pair beautifully with your newfound pressure cooking confidence.
Instant Pot Brown Rice
Ingredients
Equipment
Method
- Pour 2 cups of brown rice into a fine-mesh colander and rinse under cold water for about 1 minute, swirling gently with your fingers.
- Place the rinsed brown rice into the Instant Pot inner pot.
- Add 3 cups of water or vegetable broth and 1 teaspoon of salt to the pot.
- Stir to combine the salt and separate any clumps of rice.
- Close the Instant Pot lid and set the valve to sealing.
- Press the Pressure Cook or Manual button and set to high pressure for 22 minutes.
- Allow a 10-minute natural pressure release after cooking completes.
- Carefully open the valve to release any remaining steam, then fluff the rice with a fork and serve.