
The aroma of butter and garlic hitting hot rice is one of those kitchen moments that stops you in your tracks. Seasoned rice transforms a humble grain into something that tastes like you spent hours fussing when you really invested maybe twenty minutes of actual work.
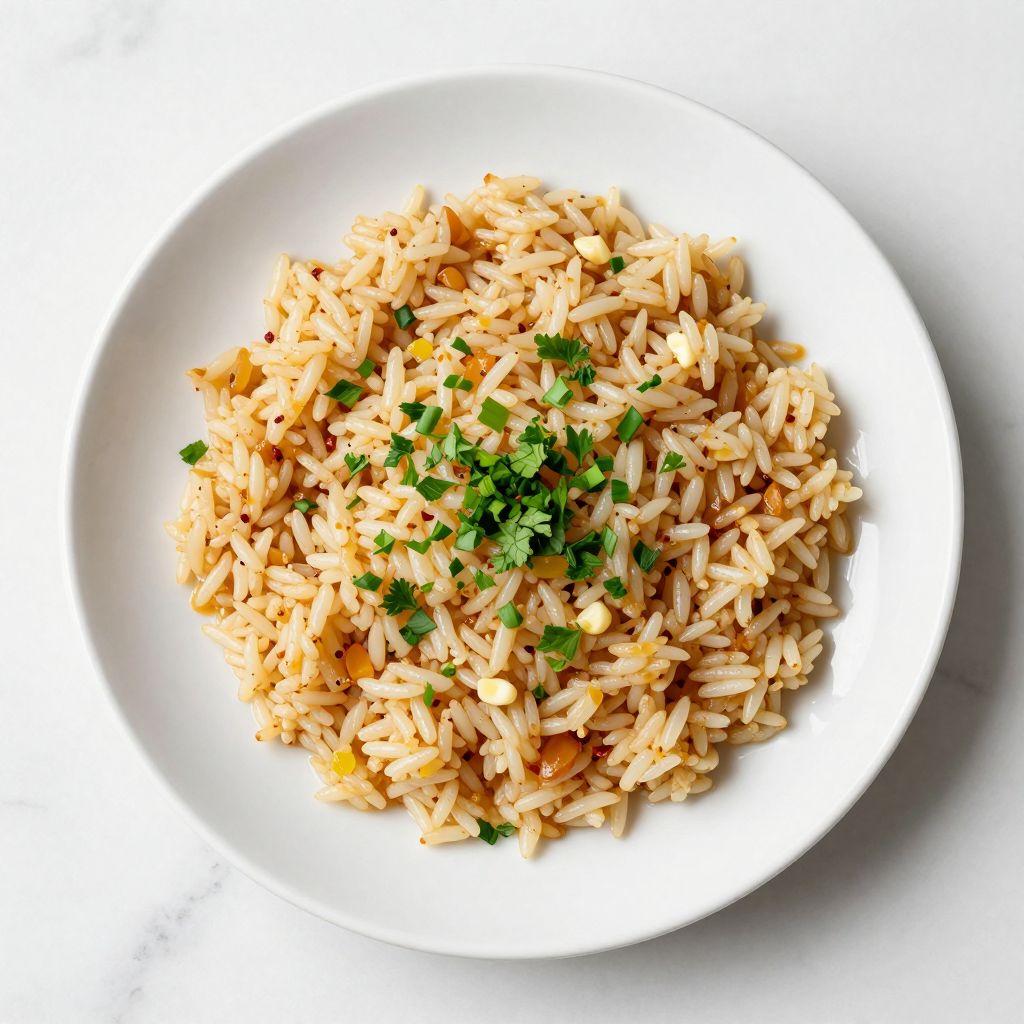
This recipe delivers fluffy, flavorful rice that works as a side dish or a base for countless meals. What makes it special is the layering of flavor at different stages: toasting the rice first, blooming aromatics in butter, and finishing with fresh herbs that brighten everything.
Whether you’re cooking for a weeknight dinner or feeding a crowd, seasoned rice adapts beautifully and never disappoints. The best part is how foolproof it becomes once you understand the method.
Why You’ll Love This Recipe
This dish checks every box you need from a reliable side dish. You get restaurant-quality flavor with zero fussiness, and it pairs with virtually any protein or vegetable you throw at it.
- Fluffy, separate grains every single time when you follow the toasting step
- Loaded with garlic, butter, and herbs for flavor that rivals takeout
- Ready in under 30 minutes from start to finish
- Reheats beautifully and makes great leftovers for quick lunches
- Naturally gluten-free and easily customizable for different diets
My Experience Making This Recipe
I started making seasoned rice this way after a cooking class where the instructor toasted the rice grains in butter before adding liquid. I was skeptical until I tasted the difference: deeper, nuttier flavor and noticeably better texture.
The first time I made it for my family, my daughter asked if we’d ordered from a restaurant. That single question convinced me this method was worth repeating.
Now I make it at least twice a week, sometimes with white rice, sometimes with brown. Every version comes out great when you respect the toasting step and don’t skip the rest period after cooking.
Recipe Overview
- Recipe Name: Seasoned Rice
- Servings: 4 to 6
- Prep Time: 10 minutes
- Cook Time: 18 minutes
- Total Time: 28 minutes
- Course: Side Dish
- Cuisine: American
- Calories per Serving: 245 calories
Equipment You Will Need
- Large saucepan with a lid
- Wooden spoon for stirring
- Measuring cups and spoons
- Fork for fluffing rice
- Knife for mincing garlic and chopping herbs
- Cutting board
Ingredients for Seasoned Rice
- 2 tablespoons unsalted butter
- 3 cloves garlic, minced
- 1.5 cups long-grain white rice or jasmine rice, uncooked
- 2.5 cups chicken or vegetable broth
- 0.5 teaspoon salt
- 0.25 teaspoon black pepper
- 0.25 teaspoon garlic powder
- 2 tablespoons fresh parsley, chopped
- 1 tablespoon fresh chives or green onion, chopped
- Optional: 1/4 teaspoon red pepper flakes for a subtle kick
Ingredient Notes and Substitutions
- Long-grain white rice: This variety produces separate, fluffy grains and absorbs liquid evenly. If you prefer brown rice, increase the liquid to 3 cups and cooking time to 35 minutes.
- Butter: Real butter creates rich flavor and helps toast the rice evenly. Olive oil works as a substitute but creates a lighter, less luxurious taste.
- Chicken broth: This adds savory depth to the rice. Vegetable broth works equally well for a lighter option with nearly identical results.
- Fresh garlic: Minced fresh garlic delivers the sharpest flavor and aroma. Jarred garlic is convenient but less punchy, so use an extra half teaspoon if you go this route.
- Fresh herbs: Parsley and chives brighten the finished dish with fresh flavor. Cilantro, dill, or tarragon each create a different flavor profile that works beautifully.
How to Make Seasoned Rice
Step 1: Rinse the Rice
Place the rice in a fine-mesh strainer and rinse under cool running water for about 30 seconds, stirring gently with your fingers. This removes surface starch and prevents the rice from becoming gummy or clumpy during cooking.
Step 2: Melt Butter and Toast Garlic
Melt the butter in a large saucepan over medium heat and add the minced garlic. Cook for about 1 minute until fragrant and slightly golden, stirring constantly so it doesn’t burn and develop a bitter taste.
Step 3: Add and Toast the Rice
Pour the rinsed rice into the pan with the garlic and butter, stirring constantly for 2 to 3 minutes. The rice grains will become slightly translucent and smell toasted and nutty, which means they’re developing deeper flavor before the liquid hits them.
Step 4: Pour in the Broth
Carefully pour the broth into the pan, stirring once to distribute the rice evenly. The broth will sizzle and bubble, which is exactly what you want, so don’t be alarmed by the initial activity.
Step 5: Add Seasonings
Add the salt, black pepper, and garlic powder to the pan and stir to combine. These seasonings disperse throughout the liquid and ensure every grain of rice picks up consistent flavor.
Step 6: Bring to a Boil and Cover
Increase the heat to medium-high and let the broth come to a rolling boil, which takes 2 to 3 minutes. Once boiling, reduce the heat to low, place the lid on the pan, and set a timer for 15 minutes.
Step 7: Let Rice Cook Undisturbed
Do not lift the lid or stir the rice while it cooks, even if you’re curious. The steam trapped under the lid is doing the work, and opening it lets precious moisture escape and extends cooking time.
Step 8: Rest and Fluff
After 15 minutes, remove the pan from heat but leave the lid on for 5 minutes to allow residual heat to finish cooking any grains that need it. Then remove the lid and use a fork to gently fluff the rice, breaking up any clumps and separating the grains.
Step 9: Finish with Fresh Herbs
Stir in the chopped parsley and chives just before serving, adding brightness and freshness to each bite. The herbs should be added at the very end so they retain their color and flavor.
Pro Tip: Toasting the rice in butter before adding liquid is the secret to fluffy, separate grains with deeper flavor. Do not skip this step, and do not stir the rice while it cooks.
Tips for the Best Seasoned Rice
- Use a saucepan with a tight-fitting lid so steam stays trapped and cooks the rice evenly throughout.
- Toast the rice for the full 2 to 3 minutes even though it seems long, as this makes a noticeable difference in texture and flavor.
- Measure your liquid accurately by using the absorption method: 1.5 cups rice typically needs 2.5 cups liquid, but this ratio shifts if you switch rice varieties.
- Let the rice rest for 5 minutes after cooking to absorb remaining moisture and firm up slightly, making it easier to fluff without breaking grains.
- Taste and adjust seasonings after fluffing, as some broth varieties are saltier than others and you may need to add a pinch more salt or pepper.
- Make extra and freeze it for quick weeknight sides or a base for fried rice later in the week.
Common Mistakes to Avoid
- Skipping the rinse step results in starchy, sticky rice that clumps together instead of separating into fluffy grains.
- Not toasting the rice first creates rice that tastes flat and one-dimensional compared to the deeper, nuttier flavor you get from toasting.
- Lifting the lid too often lets steam escape and disrupts the cooking process, leading to undercooked grains or uneven cooking throughout the pan.
- Using boiling broth instead of room-temperature broth can shock the rice and create uneven cooking, so pull your broth from the pantry, not from a kettle.
- Forgetting the rest period after cooking means the rice stays slightly wet and falls apart when you fluff it, so set a timer and wait those 5 minutes.
Serving Suggestions
Seasoned rice shines as a side dish for virtually any protein, from roasted chicken to grilled fish to slow-cooked beef. It also works as a base for grain bowls, a filling for stuffed peppers, or even reheated and fried for quick fried rice.
- Serve alongside grilled lemon herb chicken and roasted broccoli for a complete weeknight meal
- Pair with slow-cooked pulled pork and black beans for a casual family dinner
- Use as the base for a grain bowl with roasted vegetables, a protein, and a drizzle of tahini dressing
- Combine with sauteed shrimp and peas for a quick stir-fry inspired dish
- Spoon alongside baked salmon and asparagus for an elegant dinner that comes together in 30 minutes
Variations to Try
- Cilantro Lime Rice: Substitute cilantro for parsley, squeeze fresh lime juice over the finished rice, and add a tiny pinch of cumin for a Mexican-inspired version that pairs beautifully with tacos and beans.
- Coconut Rice: Replace half the broth with coconut milk and add a teaspoon of fish sauce for subtle sweetness and depth that complements Southeast Asian dishes.
- Brown Butter Sage Rice: Let the butter brown longer in Step 2 until it smells nutty, and swap the herbs for fresh sage for an earthy, elegant side dish.
- Saffron Rice: Add a pinch of saffron threads steeped in warm broth for a luxurious color and subtle floral note that elevates the dish for special occasions.
- Vegetable Rice: Stir in finely diced carrots, celery, and peas during the toasting step for a vegetable-studded version that becomes a complete side on its own.
Dietary Adaptations
- Gluten-Free: This recipe is naturally gluten-free as long as you use certified gluten-free broth, as some commercial broths contain hidden gluten.
- Dairy-Free: Replace the butter with olive oil or coconut oil for a dairy-free version that loses slight richness but gains a lighter, cleaner flavor.
- Vegan: Use vegetable broth and olive oil instead of butter and chicken broth, keeping all other ingredients the same for a fully plant-based side.
- Low-Carb/Keto: Substitute cauliflower rice for regular rice and reduce the broth to 1 cup, cooking uncovered for 5 to 7 minutes instead of 15 for a low-carb alternative.
Storage and Reheating
Refrigerator
Store cooled seasoned rice in an airtight container for up to 4 days. The rice firms up slightly when cold but becomes fluffy again when reheated.
- Let the rice cool to room temperature before sealing the container to prevent condensation and mushiness
- Store in portions if you plan to reheat only what you need
Freezer
Seasoned rice freezes beautifully for up to 3 months when stored properly. Spread cooled rice on a baking sheet, freeze until solid, then transfer to freezer bags to prevent clumping.
- Flatten the freezer bag so rice defrosts and reheats quickly
- Label with the date so you know when you made it
Reheating
Thaw frozen rice in the refrigerator overnight, or reheat directly from frozen using one of these methods. The key is adding a tiny bit of moisture back into the rice so it doesn’t dry out.
- Stovetop: Place rice in a pan over medium heat with a tablespoon of water or broth per cup of rice, stirring occasionally for 3 to 5 minutes until steaming
- Microwave: Transfer rice to a microwave-safe container, sprinkle with a tablespoon of water per cup, cover loosely, and microwave on high for 1 to 2 minutes
- Oven: Spread rice in a baking dish, add a splash of water or broth, cover with foil, and warm at 325 degrees for 10 to 15 minutes
Nutrition Information
| Nutrient | Amount |
|---|---|
| Calories | 245 |
| Total Fat | 5g |
| Saturated Fat | 3g |
| Carbohydrates | 45g |
| Fiber | 1g |
| Sugar | 0g |
| Protein | 5g |
| Sodium | 520mg |
| Cholesterol | 8mg |
These values are approximate and based on using chicken broth and serving 5 people. The sodium content may vary depending on the broth you choose, so check the label if you are watching your sodium intake.
Frequently Asked Questions
Can I make this recipe with brown rice?
Yes, brown rice works beautifully with this method, but you need to increase the liquid to 3 cups and extend the cooking time to 35 to 40 minutes. The texture will be slightly chewier, which many people prefer for its nutty flavor.
Why is my rice turning out mushy?
Mushy rice usually means too much liquid or too long cooking time, or you lifted the lid during cooking and let steam escape. Make sure you measure the liquid accurately and resist the urge to peek at the rice.
Can I make this in advance and reheat it?
Absolutely, this is one of the best things about this recipe. Cook it the night before, store it in the refrigerator, and reheat it gently on the stovetop with a splash of water or broth.
What type of rice works best for this recipe?
Long-grain white rice and jasmine rice both produce consistently fluffy, separate grains with excellent results. Basmati rice also works well if you prefer its subtle aromatic flavor.
Can I use vegetable broth instead of chicken broth?
Yes, vegetable broth creates equally delicious rice with a slightly lighter flavor. The cooking method and time stay exactly the same, so you lose nothing except the depth from chicken broth.
What if I don’t have fresh herbs on hand?
You can skip the fresh herbs entirely and the rice will still taste great, or substitute 1 teaspoon of dried parsley mixed into the cooking liquid. Fresh herbs add brightness that dried herbs cannot match, but the dish works either way.
Final Thoughts
Seasoned rice transforms into restaurant-quality side dish when you understand the toasting step and respect the no-peeking rule while it cooks. This recipe proves that simple ingredients in the right order create something far greater than the sum of their parts.
Make this rice this week and taste how real flavor comes together in under 30 minutes. You’ll find yourself returning to this method again and again.
Seasoned Rice
Ingredients
Equipment
Method
- Place the rice in a fine-mesh strainer and rinse under cool running water for about 30 seconds, stirring gently with your fingers to remove surface starch.
- Melt the butter in a large saucepan over medium heat and add the minced garlic. Cook for about 1 minute until fragrant and slightly golden, stirring constantly so it doesn't burn.
- Pour the rinsed rice into the pan with the garlic and butter, stirring constantly for 2 to 3 minutes until the rice grains become slightly translucent and smell toasted and nutty.
- Carefully pour the broth into the pan, stirring once to distribute the rice evenly.
- Add the salt, black pepper, and garlic powder to the pan and stir to combine.
- Increase the heat to medium-high and let the broth come to a rolling boil, which takes 2 to 3 minutes. Once boiling, reduce the heat to low and place the lid on the pan.
- Set a timer for 15 minutes and do not lift the lid or stir the rice while it cooks.
- After 15 minutes, remove the pan from heat but leave the lid on for 5 minutes to allow residual heat to finish cooking.
- Remove the lid and use a fork to gently fluff the rice, breaking up any clumps and separating the grains.
- Stir in the chopped parsley and chives just before serving.