
The smell of peppers charring under high heat is one of those kitchen moments that instantly makes you feel like you know what you’re doing, even if you’re just standing there watching them blacken.
Roasted peppers are the kind of recipe that transforms something ordinary into something that tastes like you spent hours in the kitchen, when really you just needed a hot oven and patience. They’re sweet, smoky, and impossibly tender, making them perfect as a side dish, a sandwich filling, or straight from the jar as a snack.
What makes this recipe special is how few ingredients you actually need and how the roasting process unlocks flavors that raw peppers simply can’t deliver. The result is versatile enough to work in pasta, grain bowls, antipasto platters, or alongside grilled meat and fish.
Why You’ll Love This Recipe
This recipe delivers restaurant-quality results with minimal effort and a short ingredient list that you probably already have on hand.
- Minimal ingredients and prep work required
- Bold, naturally sweet flavor with a hint of char
- Works as a side, appetizer, or main course component
- Stores well for quick weeknight meals
- Naturally vegan and gluten-free
My Experience Making This Recipe
The first time I made roasted peppers, I was intimidated by the charring step and nearly pulled them out too early. Once I let them blacken properly under the broiler, I understood why every Italian grandmother swears by this method.
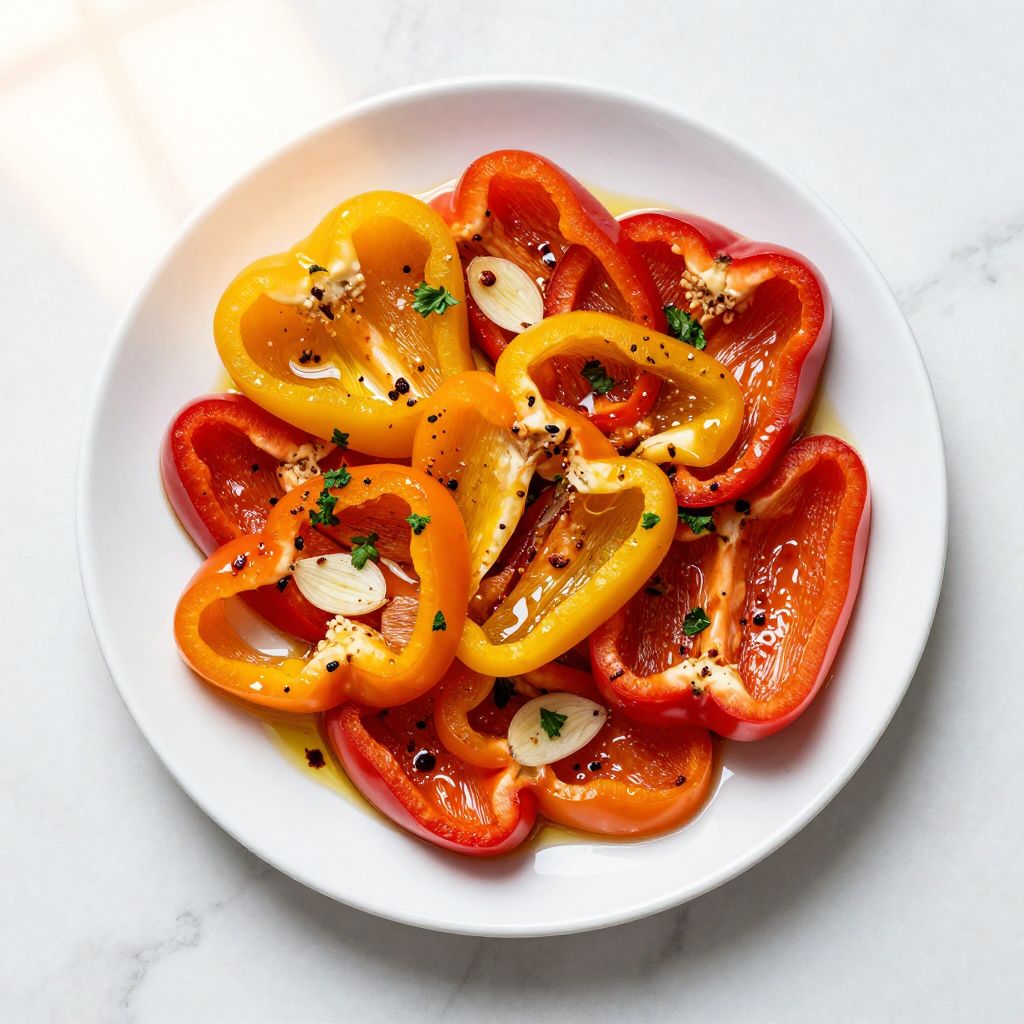
The peppers I made for a dinner party sat in a covered bowl while their skins steamed loose, and when I peeled them, the skin came away so easily I felt like I’d cracked some secret code. My guests treated the simple plate of roasted peppers with garlic and olive oil like it was fine dining, which honestly made my entire week.
I’ve since made these peppers at least twenty times, and they’ve become my go-to recipe when I want something impressive without stress. The flavor only improves when they sit in the fridge for a day, so I often make a big batch and use them throughout the week.
Recipe Overview
- Recipe Name: Roasted Peppers
- Servings: 4 to 6 servings
- Prep Time: 10 minutes
- Cook Time: 25 to 30 minutes
- Total Time: 40 minutes
- Course: Side Dish or Appetizer
- Cuisine: Mediterranean
- Calories per Serving: 80
Equipment You Will Need
- Baking sheet or cast iron skillet
- Aluminum foil or parchment paper
- Tongs
- Cutting board
- Sharp knife
- Bowl with lid or plastic wrap
- Broiler or oven preheated to 450 degrees Fahrenheit
Ingredients for Roasted Peppers
- 4 large bell peppers (red, yellow, orange, or a mix)
- 3 tablespoons olive oil
- 4 cloves garlic, sliced thin
- 1 teaspoon salt
- 1/2 teaspoon black pepper
- 1 tablespoon balsamic vinegar
- 1 tablespoon fresh parsley, chopped (optional)
- Red pepper flakes (optional, to taste)
Ingredient Notes and Substitutions
- Bell Peppers: Red, yellow, and orange peppers are sweeter than green ones and work best here. You can use green peppers, but expect a slightly sharper flavor and adjust expectations accordingly.
- Olive Oil: Extra virgin olive oil brings better flavor, but regular olive oil works and costs less. High-heat oils like avocado oil also work if you prefer.
- Garlic: Fresh garlic is best, but 1/2 teaspoon of garlic powder can substitute if you’re in a pinch. The flavor will be less bright but still pleasant.
- Balsamic Vinegar: Red wine vinegar or sherry vinegar offer similar acidity with slightly different flavor profiles. Skip the vinegar entirely if you prefer a sweeter result.
- Fresh Herbs: Basil, oregano, or thyme work beautifully instead of parsley. Use about 1 teaspoon dried herb or 1 tablespoon fresh chopped.
How to Make Roasted Peppers
Step 1: Prepare Your Workspace
Line your baking sheet with aluminum foil or parchment paper to make cleanup easy and prevent the peppers from sticking. This simple step saves you from scrubbing burnt pepper skin off your pan later.
Step 2: Wash and Dry the Peppers
Rinse the peppers under cool running water and pat them completely dry with a clean kitchen towel. Dry peppers will char more evenly than wet ones, and the dry surface helps the heat transfer properly.
Step 3: Arrange Peppers on the Baking Sheet
Place the whole peppers directly on the prepared baking sheet, spacing them about an inch apart so hot air can circulate around each one. Crowding the pan will steam the peppers instead of char them, so give them room to breathe.
Step 4: Set Your Broiler to High
Position your oven rack about 4 inches from the broiler element and preheat to high heat for about 5 minutes. The high, direct heat is essential for charring the skin quickly without cooking the flesh too much.
Step 5: Broil the Peppers
Place the baking sheet under the broiler and watch carefully, rotating the peppers every 5 to 7 minutes using tongs until all sides are deeply charred and blackened, about 25 to 30 minutes total. The peppers should be about 75 percent black, which means the flesh underneath is getting tender while the skin separates from the meat.
Step 6: Steam the Peppers
Transfer the charred peppers to a covered bowl or a baking sheet covered tightly with aluminum foil and let them sit for 10 minutes. The steam trapped inside loosens the skin from the flesh, making peeling much easier.
Step 7: Peel Away the Charred Skin
Once the peppers are cool enough to handle, gently rub away the blackened skin with your fingertips or a paper towel. Don’t rinse them under water unless absolutely necessary, since rinsing washes away flavor; simply rub the skin away dry.
Step 8: Remove the Core and Seeds
Cut each pepper in half lengthwise and remove the core and any remaining seeds by hand or with a knife. Rinse your fingers as needed, but try to keep water contact minimal to preserve the smoky flavor.
Step 9: Slice and Season
Cut the peeled peppers into thick strips or bite-sized pieces, depending on how you plan to use them. Arrange them in a serving bowl or storage container, then drizzle with olive oil, scatter the sliced garlic on top, and season with salt, black pepper, and balsamic vinegar.
Step 10: Let Them Rest
Allow the peppers to sit at room temperature for at least 15 minutes before serving so the flavors meld together. They taste even better after a few hours or overnight in the refrigerator, as the garlic and vinegar continue to penetrate the soft flesh.
Pro Tip: Don’t skip the steaming step after roasting. This single action transforms the peeling from frustrating to effortless and makes all the difference in the final texture and flavor.
Tips for the Best Roasted Peppers
- Choose peppers that are similar in size so they cook evenly in the same amount of time. If you have size variation, place the larger ones closer to the heat source.
- Char the peppers until the skin is at least 75 percent blackened for the sweetest flavor and easiest peeling. Undercharred peppers will taste raw and the skin will be difficult to remove.
- Save the liquid that collects in the bowl while the peppers steam and drizzle it over the finished dish. This liquid contains concentrated flavor and enhances the final result.
- Layer the peeled peppers with garlic and olive oil and let them marinate for at least an hour before serving. This resting time allows the flavors to marry and become more complex.
- Use a broiler instead of a stovetop flame if you have access to one, since it provides more even, controllable heat. A charcoal or gas grill also works beautifully if you’re cooking outdoors.
- Make a double batch and store the extra in the freezer for quick additions to pastas, sandwiches, and grain bowls. Roasted peppers keep their flavor and texture well when frozen.
Common Mistakes to Avoid
- Not charring the peppers dark enough results in skin that doesn’t separate easily and a less developed flavor. Push yourself to let them blacken more than you think necessary.
- Skipping the steaming step forces you to peel under running water, which washes away the delicious smoky flavor you worked to develop. The brief steam is what makes peeling painless and keeps the taste intact.
- Peeling the skin while the peppers are still too hot will burn your fingers and cause the tender flesh to tear. Wait until they’re cool enough to handle comfortably, usually about 10 minutes.
- Using green peppers instead of red or yellow peppers gives a slightly bitter, less sweet result that doesn’t match the restaurant-style version you’re aiming for. Stick with sweeter varieties when possible.
- Storing the peppers without oil or in a dry container causes them to dry out quickly. Keep them submerged in olive oil in a sealed container to maintain moisture and flavor.
Serving Suggestions
Roasted peppers are endlessly versatile and work as an appetizer, side dish, or main course component. Serve them at room temperature or chilled, depending on your preference and the season.
- Arrange on a board with fresh mozzarella, crusty bread, and cured meats for an effortless appetizer platter
- Layer into sandwiches or wraps with hummus, feta, and fresh greens for a Mediterranean-inspired lunch
- Stir into pasta with garlic, olive oil, and red pepper flakes for a simple but elegant main course
- Add to grain bowls with quinoa, chickpeas, and tahini dressing for a filling vegetarian meal
- Serve alongside grilled chicken, fish, or lamb as a bright, flavorful side dish
Variations to Try
- Marinated with Herbs: Add fresh basil, oregano, or thyme to the finished peppers for a more herbaceous flavor. The fresh herbs complement the smoky peppers and work beautifully in Mediterranean dishes.
- Spicy Version: Increase the red pepper flakes or add sliced fresh chili peppers to the oil for heat. This transforms the sweet, mild roasted peppers into something with serious kick.
- With Pine Nuts and Raisins: Toast 1/4 cup pine nuts and mix with 2 tablespoons of raisins, then toss with the roasted peppers for a sweet and savory combination. This variation is traditional in Sicilian cuisine.
- Anchovy and Caper Version: Chop 4 anchovy fillets and 2 tablespoons of capers and stir into the finished peppers for a briny, umami-rich flavor. This works especially well as part of an antipasto spread.
- Roasted with Other Vegetables: Add sliced zucchini, eggplant, or tomatoes to the pan and roast together for a more substantial side dish. The cooking time may need adjustment based on the vegetables you choose.
Dietary Adaptations
- Gluten-Free: This recipe is naturally gluten-free and requires no modifications. Verify that any store-bought ingredients like balsamic vinegar are certified gluten-free if you’re sensitive.
- Dairy-Free: This recipe contains no dairy and is suitable for all dairy-free diets without any changes. All the fat comes from olive oil, which adds richness naturally.
- Vegan and Vegetarian: Roasted peppers are completely plant-based and work perfectly for both vegan and vegetarian diets. No substitutions are necessary.
- Low-Carb and Keto: Roasted peppers fit into low-carb diets with about 6 grams of net carbs per serving. The recipe works perfectly as written for keto diets when served without bread or grains.
Storage and Reheating
Refrigerator
Store roasted peppers in an airtight container submerged in olive oil to maintain moisture and prevent oxidation. They’ll keep for up to 5 days in the refrigerator.
- Keep them fully covered with oil to prevent drying out
- Store in glass containers if possible for best flavor preservation
- Label the container with the date so you remember when you made them
Freezer
Roasted peppers freeze beautifully for up to 3 months when stored properly. Layer them with parchment paper in a freezer-safe container or zip-top bag to prevent sticking.
- Drain excess oil before freezing to prevent rancidity over time
- Flatten the bag so the peppers freeze individually for easy portioning
- Thaw in the refrigerator overnight before using
Reheating
Roasted peppers taste best served at room temperature or chilled, but you can warm them gently if needed. Place them in a skillet over low heat with a splash of olive oil and warm through, about 3 to 5 minutes.
- Never microwave roasted peppers, as they become tough and lose their tender texture
- Add them directly to hot pasta or soup without additional heating for the best results
- If reheating, do so on the stovetop over very gentle heat to preserve texture
Nutrition Information
| Nutrient | Amount |
|---|---|
| Calories | 80 |
| Total Fat | 7 grams |
| Saturated Fat | 1 gram |
| Carbohydrates | 6 grams |
| Fiber | 1 gram |
| Sugar | 4 grams |
| Protein | 1 gram |
| Sodium | 280 milligrams |
| Cholesterol | 0 milligrams |
The nutritional information above is calculated per serving based on 5 servings. Individual results may vary based on specific brands and preparation methods.
Roasted Peppers
Ingredients
Equipment
Method
- Step 1: Line a baking sheet with aluminum foil or parchment paper to make cleanup easy.
- Step 2: Rinse the peppers under cool running water and pat them completely dry with a kitchen towel.
- Step 3: Preheat your broiler to high heat for 5 minutes and position the oven rack about 4 inches from the broiler element.
- Step 4: Arrange the whole peppers on the prepared baking sheet, spacing them about 1 inch apart.
- Step 5: Broil the peppers for 25 to 30 minutes, rotating every 5 to 7 minutes with tongs, until about 75% of the skin is blackened.
- Step 6: Transfer the charred peppers to a bowl and cover tightly with a lid or foil to steam for 10 minutes.
- Step 7: Once cool enough to handle, gently peel away the blackened skin using your fingers or a paper towel without rinsing.
- Step 8: Cut each pepper in half lengthwise and remove the core and seeds.
- Step 9: Slice the peeled peppers into strips, place them in a serving bowl, drizzle with olive oil, scatter sliced garlic, and season with salt, black pepper, and balsamic vinegar.
- Step 10: Let the peppers rest at room temperature for at least 15 minutes before serving to allow the flavors to meld.