Hummus without tahini is a game-changer when you want that creamy, garlicky chickpea dip but don’t have tahini on hand or prefer a lighter flavor. This simplified version uses olive oil and a few clever tricks to create the same silky texture and addictive taste you crave. Perfect for snacking, meal prep, or last-minute entertaining, this recipe proves you don’t need specialty ingredients to make restaurant-quality hummus at home.
Ready to whip up the easiest appetizer you’ll make all week? Let’s get blending.
Why You’ll Love This Recipe
This tahini-free hummus delivers all the creamy satisfaction without the sesame paste, making it perfect for those with allergies or anyone who finds tahini too bitter. The result is a lighter, brighter dip that lets the chickpeas and garlic shine.
- Ready in under 10 minutes with minimal prep and cleanup
- Uses pantry staples you probably already have in your kitchen
- Costs a fraction of store-bought hummus and tastes fresher
- Naturally vegan, gluten-free, and allergy-friendly without tahini
- Incredibly versatile for customizing with your favorite flavors
My Experience Making This Recipe
I stumbled onto this recipe during a weekend when I desperately wanted hummus but had zero tahini in the pantry. The first batch surprised me with how creamy it turned out, and my husband actually preferred it to the traditional version I usually make.
The key moment came when I added the ice-cold water while blending. Watching the hummus transform from a thick paste into a cloud-like dip felt like kitchen magic.
I brought this to a potluck the following week, and three people asked for the recipe. Nobody even realized the tahini was missing until I mentioned it.
Recipe Overview
- Recipe Name: Hummus Without Tahini
- Servings: 6
- Prep Time: 5 minutes
- Cook Time: 0 minutes
- Total Time: 5 minutes
- Course: Appetizer, Snack
- Cuisine: Middle Eastern
- Calories per Serving: 145
Equipment You Will Need
- Food processor or high-speed blender
- Can opener
- Measuring cups and spoons
- Rubber spatula
- Serving bowl
- Strainer or colander
Ingredients for Hummus Without Tahini
- 2 cans (15 ounces each) chickpeas, drained and rinsed
- 1/4 cup extra virgin olive oil, plus more for drizzling
- 1/4 cup fresh lemon juice (about 2 lemons)
- 2 cloves garlic, peeled
- 1/2 teaspoon ground cumin
- 1/2 teaspoon salt, or to taste
- 1/4 teaspoon paprika
- 1/4 cup ice-cold water, plus more as needed
- Pinch of cayenne pepper (optional)
Ingredient Notes and Substitutions
- Chickpeas: These provide the protein-rich base and creamy texture when blended. You can substitute with cooked dried chickpeas (about 3 cups) for a slightly firmer texture.
- Extra virgin olive oil: This replaces tahini’s richness and adds fruity depth to the hummus. Avocado oil or neutral vegetable oil works but sacrifices some flavor complexity.
- Lemon juice: Fresh lemon juice brightens the flavors and balances the earthiness of chickpeas. Bottled lemon juice works in a pinch but lacks the fresh zing.
- Garlic: Raw garlic gives hummus its signature bite and aromatic punch. Roasted garlic creates a sweeter, mellower version if raw feels too sharp.
- Cumin: This spice adds warmth and authentic Middle Eastern flavor. Ground coriander can substitute if you prefer a citrusy note instead.
- Ice-cold water: Cold water helps create an ultra-smooth, airy texture during blending. Room temperature water works but produces a denser consistency.
How to Make Hummus Without Tahini
Step 1: Prepare the Chickpeas
Drain and rinse the chickpeas thoroughly under cold water to remove excess sodium and the slightly metallic canned taste. For an even smoother hummus, take the extra time to peel the skins off the chickpeas by gently squeezing them between your fingers.
This step isn’t strictly necessary, but it creates a restaurant-quality silky texture. The skins slip right off when the chickpeas are wet, making the process faster than you’d think.
Step 2: Blend the Garlic and Lemon
Add the garlic cloves and lemon juice to your food processor and pulse about 10 times until the garlic is finely minced. This step breaks down the garlic first so it distributes evenly throughout the hummus instead of leaving harsh chunks.
Let this mixture sit for a minute or two while you gather the remaining ingredients. The lemon juice will mellow the raw garlic bite slightly.
Step 3: Add the Chickpeas and Spices
Add the drained chickpeas, cumin, salt, paprika, and cayenne pepper (if using) to the food processor. Pulse about 15 times to break down the chickpeas into a coarse, crumbly mixture.
Scrape down the sides of the bowl with your spatula to ensure everything gets evenly incorporated. You want all the chickpeas broken up before adding the liquids.
Step 4: Stream in the Olive Oil
With the food processor running, slowly drizzle in the olive oil through the feed tube over about 30 seconds. This gradual addition emulsifies the oil with the chickpeas, creating a creamy base similar to how mayonnaise forms.
The mixture will start to look paste-like and stick together at this point. That’s exactly what you want before adding the water.
Step 5: Add the Cold Water
With the processor still running, pour in the ice-cold water in a steady stream. Continue processing for 2 to 3 minutes without stopping, scraping down the sides once halfway through.
The cold water is the secret to achieving that ultra-creamy, almost whipped texture. You’ll notice the hummus becoming lighter in color and fluffier in consistency as it blends.
Step 6: Adjust Consistency and Seasoning
Stop the processor and taste your hummus. Add more salt, lemon juice, or garlic according to your preference.
If the hummus is too thick, add cold water one tablespoon at a time while blending until you reach your desired consistency. The hummus will firm up slightly when refrigerated, so err on the side of slightly thinner.
Step 7: Final Blend
Run the food processor for one final minute to ensure everything is completely smooth and well combined. The longer you blend, the creamier the texture becomes.
Scrape down the sides one last time and give it a few final pulses. You’re looking for a texture that’s silky and spreadable, not stiff or grainy.
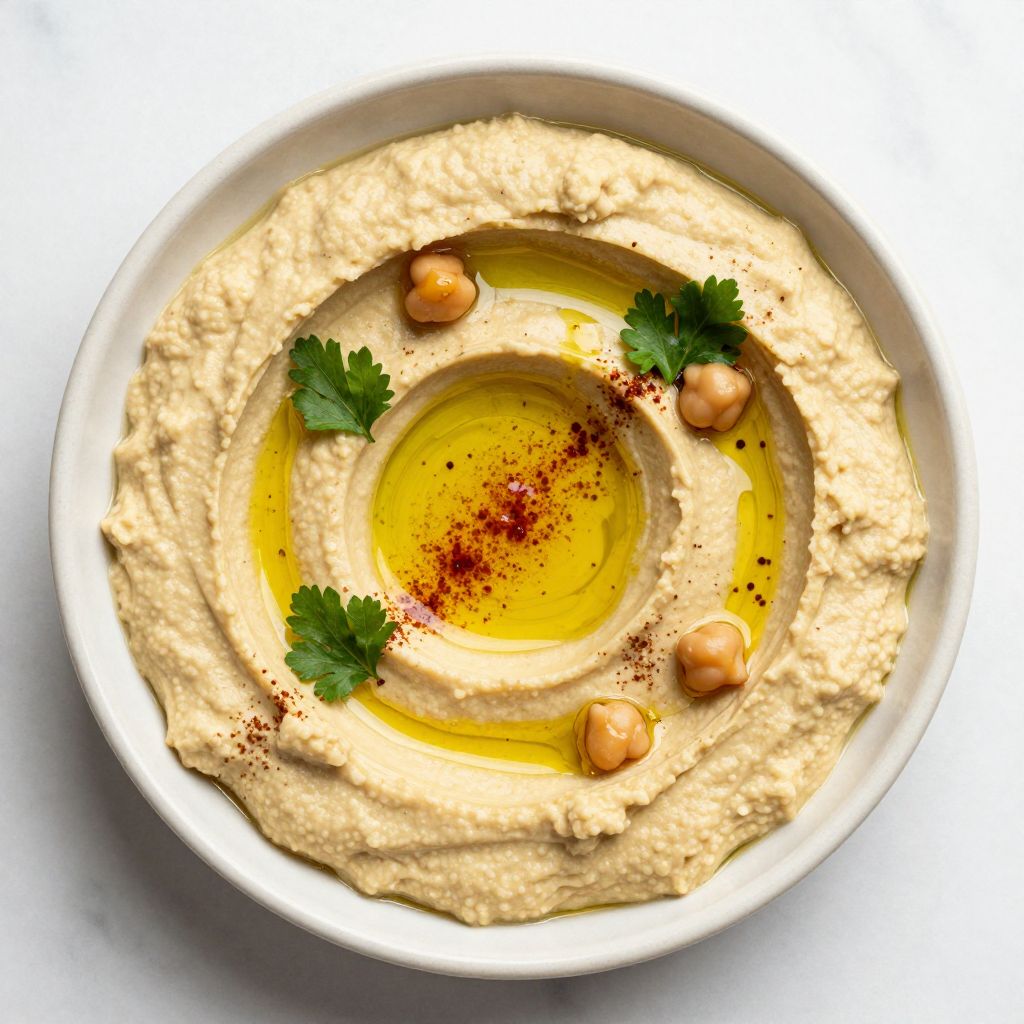
Step 8: Serve and Garnish
Transfer the hummus to your serving bowl using a rubber spatula to get every last bit. Create a shallow well in the center with the back of a spoon and drizzle with extra virgin olive oil.
Sprinkle with additional paprika, a pinch of cumin, or fresh herbs like parsley or cilantro. Serve immediately or refrigerate until ready to use.
Pro Tip: For the absolute creamiest hummus, add a tablespoon of plain Greek yogurt or a splash of aquafaba (the liquid from the chickpea can) along with the olive oil. This adds extra body and makes the texture impossibly smooth without tahini.
Tips for the Best Hummus Without Tahini
- Use high-quality olive oil since it’s the star ingredient replacing tahini. A fruity, peppery oil adds incredible depth and richness to the final dip.
- Taste your chickpeas before blending and choose a brand with a mild, creamy flavor. Some canned chickpeas taste metallic or overly salty, which affects your hummus.
- Blend longer than you think necessary for ultra-smooth results. Three to four minutes of continuous processing makes a huge difference in creaminess.
- Add roasted red peppers, sun-dried tomatoes, or herbs directly to the food processor for instant flavor variations. This transforms plain hummus into something special with zero extra effort.
- Let the hummus rest in the refrigerator for at least 30 minutes before serving. The flavors meld together and the texture firms up to the perfect dipping consistency.
- Reserve a few whole chickpeas and some olive oil for garnishing. A traditional presentation with chickpeas in the center well looks impressive and adds texture contrast.
Common Mistakes to Avoid
- Using warm or room temperature water instead of ice-cold water produces a dense, heavy hummus. Cold water whips air into the mixture, creating that signature light texture.
- Not blending long enough leaves you with grainy, paste-like hummus instead of a silky dip. Give your food processor the full few minutes it needs to work its magic.
- Adding all the liquid at once instead of streaming it in prevents proper emulsification. The gradual addition creates a creamier, more stable texture.
- Skipping the garlic and lemon blending step first leaves you with harsh garlic chunks. Processing these ingredients first distributes the flavors evenly throughout.
- Over-salting at the beginning before tasting means you can’t adjust later. Start with less salt than you think you need and build up to your preference.
Serving Suggestions
This versatile hummus works beautifully as a dip, spread, or even a sauce for grain bowls and wraps. Serve it with warm pita bread, crunchy vegetables, or use it as a base for Mediterranean-inspired meals.
- Fresh vegetable crudité including carrots, cucumbers, bell peppers, and cherry tomatoes
- Warm pita bread, naan, or toasted flatbread cut into wedges
- Spread on sandwiches or wraps instead of mayonnaise for a healthier, more flavorful option
- As a base for grain bowls topped with roasted vegetables, falafel, and pickled onions
- Alongside olives, feta cheese, and stuffed grape leaves for a Mediterranean mezze platter
Variations to Try
- Roasted Red Pepper Hummus: Add half a cup of jarred roasted red peppers to the food processor for a sweet, smoky flavor. The vibrant red color makes this version especially Instagram-worthy.
- Herb Garden Hummus: Blend in a cup of fresh herbs like cilantro, parsley, or basil for a bright green, ultra-fresh version. This works beautifully as a spring or summer variation.
- Spicy Jalapeño Hummus: Add one seeded jalapeño pepper and an extra pinch of cayenne for a kick. The heat plays nicely against the creamy chickpeas and creates an addictive balance.
- Caramelized Onion Hummus: Stir in a quarter cup of caramelized onions after blending for sweet, savory depth. This version pairs exceptionally well with grilled meats.
- Sun-Dried Tomato Hummus: Blend in a third cup of oil-packed sun-dried tomatoes for intense umami flavor. The tomatoes add both richness and a slightly tangy sweetness.
Dietary Adaptations
- Gluten-Free: This recipe is naturally gluten-free as written, but always check your spice labels for potential cross-contamination. Serve with gluten-free crackers or vegetables instead of pita bread.
- Dairy-Free: The recipe contains no dairy products, making it suitable for lactose-intolerant individuals without any modifications needed. Skip the Greek yogurt variation if you’re strictly dairy-free.
- Vegan: This hummus is completely plant-based and vegan-friendly without any substitutions required. The tahini-free version is actually more accessible for strict vegans since some tahini is processed with bone char.
- Low-Carb/Keto: Replace chickpeas with steamed and cooled cauliflower florets for a low-carb mock hummus. You’ll lose some protein but gain a lighter, veggie-forward dip that still satisfies.
Storage and Reheating
Refrigerator
Store hummus in an airtight container with a thin layer of olive oil poured over the top to prevent drying and oxidation. This keeps it fresh and creamy for up to 7 days.
- Always use a clean spoon to scoop out portions to prevent bacterial contamination
- Stir before serving as the oil may separate slightly during storage
- The flavors actually improve after 24 hours as everything melds together
Freezer
Hummus freezes surprisingly well for up to 3 months, though the texture may be slightly grainier after thawing. Freeze in portion-sized containers or ice cube trays for easy single servings.
- Leave space at the top of containers as hummus expands slightly when frozen
- Label with the date and flavor variation if you’re freezing multiple batches
- Thaw overnight in the refrigerator rather than at room temperature for food safety
Reheating
Hummus is traditionally served cold or at room temperature, so reheating isn’t typically necessary. If you prefer it slightly warm, let it sit at room temperature for 30 minutes before serving.
- Never microwave hummus as it separates and becomes oily
- Stir in a tablespoon of cold water if the texture seems too thick after refrigeration
- Refresh the flavors with a squeeze of fresh lemon juice and a drizzle of olive oil before serving
Nutrition Information
| Nutrient | Amount |
|---|---|
| Calories | 145 |
| Total Fat | 9g |
| Saturated Fat | 1g |
| Carbohydrates | 13g |
| Fiber | 4g |
| Sugar | 2g |
| Protein | 4g |
| Sodium | 295mg |
| Cholesterol | 0mg |
Nutritional values are approximate and calculated based on standard ingredient measurements. Actual values may vary depending on specific brands used and portion sizes.
Frequently Asked Questions
Can I use dried chickpeas instead of canned?
Absolutely, and many people prefer the flavor and texture of home-cooked chickpeas. Soak one cup of dried chickpeas overnight, then cook until very tender (softer than you’d want for salads), and use about three cups of cooked chickpeas in place of the canned.
How can I make this hummus ahead for a party?
Make the hummus up to three days in advance and store it covered in the refrigerator. Wait to add the garnishes until just before serving so the olive oil stays glossy and the paprika stays vibrant on top.
Why is my hummus grainy instead of smooth?
You likely didn’t blend long enough or your chickpeas weren’t soft enough to begin with. Blend for a full three to four minutes, and if using dried chickpeas, make sure they’re cooked until they practically mash between your fingers.
Can I reduce the oil to make this lighter?
You can cut the olive oil down to two tablespoons, but you’ll need to compensate with extra water or add a few tablespoons of Greek yogurt or aquafaba. The texture won’t be quite as rich, but it will still be creamy and delicious.
What can I do if my hummus tastes too bitter?
Bitterness usually comes from too much raw garlic or lemon pith. Balance it by adding a pinch of sugar or honey, more olive oil for richness, or a tablespoon of Greek yogurt to mellow the sharp flavors.
Is hummus without tahini healthier than traditional hummus?
Not necessarily healthier, just different nutritionally. You lose some calcium and additional healthy fats from sesame seeds, but you also reduce calories slightly and avoid sesame allergens.
Can I make this in a regular blender instead of a food processor?
Yes, but you may need to stop and scrape down the sides more frequently. Add the liquids first, then the chickpeas and other ingredients to help everything move around the blades more easily.
Final Thoughts
This tahini-free hummus proves that you don’t need specialty ingredients to create something absolutely delicious and satisfying. The simplicity of
Hummus Without Tahini
Ingredients
Equipment
Method
- Drain and rinse the chickpeas thoroughly under cold water to remove excess sodium. For an even smoother hummus, peel the skins off the chickpeas by gently squeezing them between your fingers.
- Add the garlic cloves and lemon juice to your food processor and pulse about 10 times until the garlic is finely minced. Let this mixture sit for a minute or two while you gather the remaining ingredients.
- Add the drained chickpeas, cumin, salt, paprika, and cayenne pepper (if using) to the food processor. Pulse about 15 times to break down the chickpeas into a coarse, crumbly mixture. Scrape down the sides of the bowl with your spatula.
- With the food processor running, slowly drizzle in the olive oil through the feed tube over about 30 seconds to emulsify the oil with the chickpeas, creating a creamy base.
- With the processor still running, pour in the ice-cold water in a steady stream. Continue processing for 2 to 3 minutes without stopping, scraping down the sides once halfway through.
- Stop the processor and taste your hummus. Add more salt, lemon juice, or garlic according to your preference. If the hummus is too thick, add cold water one tablespoon at a time while blending until you reach your desired consistency.
- Run the food processor for one final minute to ensure everything is completely smooth and well combined. Scrape down the sides one last time and give it a few final pulses.
- Transfer the hummus to your serving bowl using a rubber spatula. Create a shallow well in the center with the back of a spoon and drizzle with extra virgin olive oil. Sprinkle with additional paprika, a pinch of cumin, or fresh herbs. Serve immediately or refrigerate until ready to use.