There is something almost magical about that moment when you pull a bubbling fruit crumble from the oven, its golden topping crackling with buttery promise. Crumble topping transforms ordinary fruit into an extraordinary dessert, and once you master this recipe, you will never buy a premade version again.
This recipe produces a perfectly balanced topping with crispy edges, tender middles, and those irresistible clusters that everyone fights over. Whether you pile it over tart apples, juicy berries, or even a savory vegetable bake, this versatile topping delivers every single time.
I have tested countless ratios of flour, butter, and sugar to land on this formula. The secret lies in keeping everything cold and resisting the urge to overmix, which gives you that rustic, textured finish rather than a flat, dense layer.
Why You Will Love This Recipe
This crumble topping recipe earns a permanent spot in your kitchen arsenal for good reason. It solves the eternal problem of soggy, sad toppings that lose their crunch before dessert even hits the table.
- Ready in under 10 minutes with just 5 simple pantry ingredients
- Creates those coveted chunky clusters with crispy and tender textures in every bite
- Works beautifully on sweet fruit desserts and savory dishes alike
- Freezes perfectly so you can have homemade crumble topping on demand
- Easily customizable with oats, nuts, spices, or alternative flours
My Experience Making This Recipe
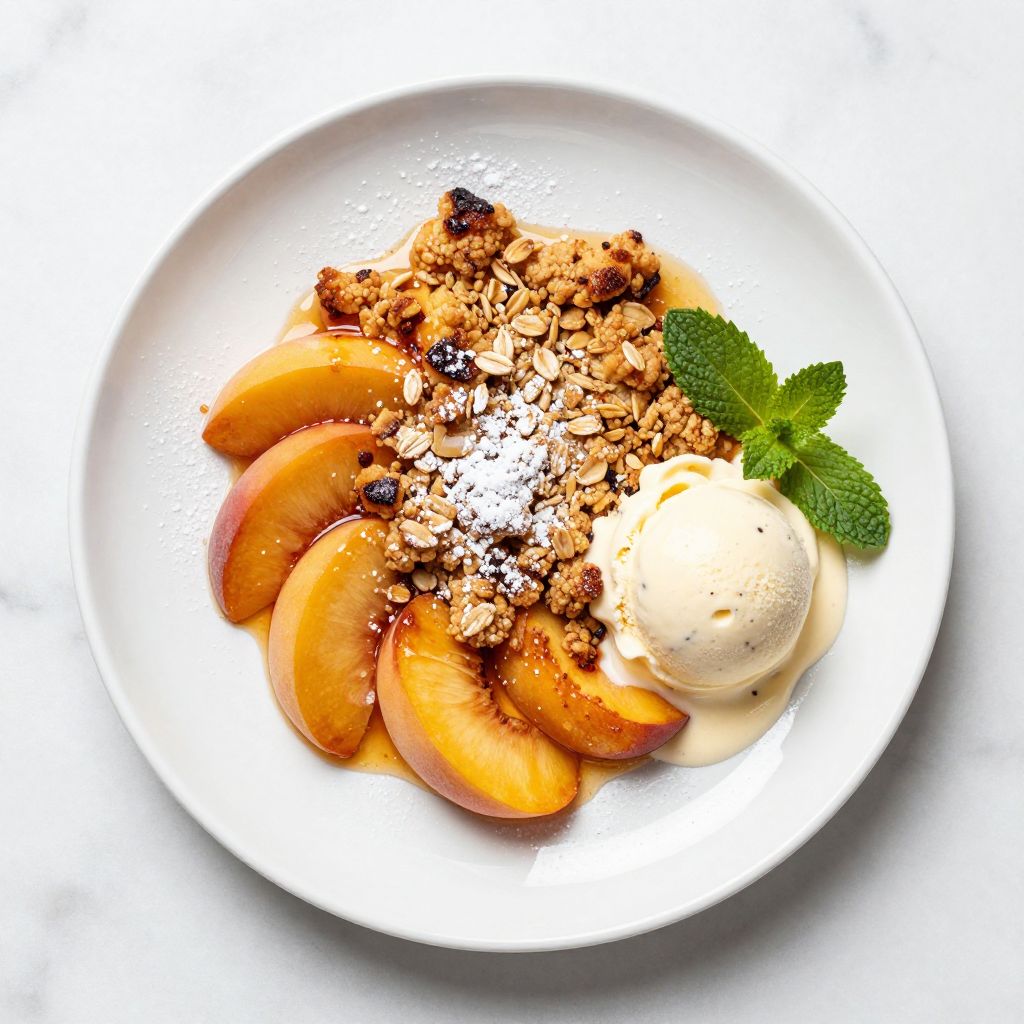
I first made this crumble topping on a rainy Sunday when a basket of overripe peaches demanded attention. The kitchen filled with the warm scent of butter and brown sugar as I rubbed the mixture together, watching it transform into perfect irregular clumps.
My family devoured the peach crumble within hours, scraping the dish for every last golden bit. The topping stayed crisp even the next day, which rarely happens with most recipes I have tried.
Since then, I have made this topping at least fifty times with consistent results. It has become my go to for last minute desserts when unexpected guests arrive or when I need to use up seasonal fruit quickly.
Recipe Overview
- Recipe Name: Classic Crumble Topping
- Servings: Enough for one 9×13 inch dish or 8 individual portions
- Prep Time: 10 minutes
- Cook Time: 30 to 40 minutes (varies by filling)
- Total Time: 40 to 50 minutes
- Course: Dessert, Topping
- Cuisine: British, American
- Calories per Serving: 185 calories
Equipment You Will Need
- Large mixing bowl
- Measuring cups and spoons
- Pastry cutter or your fingertips
- Fork for mixing
- Baking dish for your chosen filling
- Wire cooling rack
Ingredients for Crumble Topping
- 1 cup all purpose flour (120g)
- 1/2 cup cold unsalted butter (115g), cut into small cubes
- 1/2 cup light brown sugar (100g), packed
- 1/4 cup granulated sugar (50g)
- 1/4 teaspoon fine sea salt
- 1/2 cup old fashioned rolled oats (optional, for extra texture)
Ingredient Notes and Substitutions
- All purpose flour provides structure and that classic crumbly texture. Substitute with gluten free flour blend or almond flour for dietary needs.
- Cold butter creates steam pockets during baking that lead to crispy layers. Use cold coconut oil for a dairy free version, though the flavor will differ slightly.
- Brown sugar adds moisture and rich caramel notes to the topping. Coconut sugar works as a one to one swap with a deeper molasses flavor.
- Granulated sugar helps with crispiness and balances the brown sugar richness. Reduce or omit entirely if your filling is very sweet.
- Salt amplifies all the flavors and prevents the topping from tasting flat. Any fine salt works, but I prefer sea salt for its clean taste.
- Rolled oats add rustic texture and nutty flavor while extending the topping. Use certified gluten free oats if needed or skip them entirely.
How to Make Crumble Topping
Step 1: Chill Your Butter
Cut cold butter into small half inch cubes and return them to the refrigerator for at least 10 minutes. Cold butter is absolutely critical because it creates distinct pockets of fat that turn into crispy, flaky layers during baking.
Step 2: Combine the Dry Ingredients
Add the flour, brown sugar, granulated sugar, and salt to a large mixing bowl. Whisk everything together until evenly distributed, breaking up any brown sugar clumps with your fingers.
Step 3: Add the Cold Butter
Scatter the chilled butter cubes over the flour mixture. Toss them lightly to coat each piece with flour, which prevents them from sticking together.
Step 4: Work the Butter Into the Flour
Using your fingertips or a pastry cutter, work the butter into the flour by pressing and rubbing the mixture together. You want a shaggy texture with pieces ranging from pea sized to almond sized, which creates that varied crumbly texture everyone loves.
Step 5: Add the Oats
If using oats, fold them in gently with a fork until just combined. Avoid overworking at this stage because you want to preserve those beautiful irregular clumps.
Step 6: Create Clusters
Squeeze handfuls of the mixture gently to form loose clusters, then break them apart over your filling. This technique guarantees you get those chunky, craggy pieces that bake into golden deliciousness rather than a uniform sandy texture.
Step 7: Top Your Filling
Scatter the crumble topping evenly over your prepared fruit or filling, leaving some gaps for steam to escape. Pile it slightly higher in the center since it will spread and settle during baking.
Step 8: Bake Until Golden
Bake at 375F (190C) for 30 to 40 minutes until the topping turns deep golden brown and the filling bubbles at the edges. The bubbling indicates the fruit has released its juices and started to thicken, which prevents a watery dessert.
Pro Tip: For extra crispy clusters, place the formed crumble topping on a baking sheet and freeze for 15 minutes before adding it to your filling. The colder topping takes longer to melt, allowing more time for the exterior to crisp before the butter fully melts into the mixture.
Tips for the Best Crumble Topping
- Keep every ingredient cold, especially the butter, to achieve maximum crispiness and defined texture.
- Never skip the salt, even in sweet recipes, because it makes all the other flavors pop.
- Leave the mixture shaggy and uneven since uniform textures bake into flat, dense toppings.
- Squeeze the mixture into clumps before scattering to guarantee chunky pieces after baking.
- Do not open the oven during the first 25 minutes or the topping may sink or become soggy.
- Let the crumble rest for at least 10 minutes after baking so the filling can set properly.
Common Mistakes to Avoid
- Using softened or melted butter results in a greasy, flat topping without any crispy texture.
- Overmixing the dough activates gluten and creates a tough, cookie like layer instead of tender crumbles.
- Making the pieces too small causes the topping to bake into a dense crust rather than separate clusters.
- Underbaking leaves you with a pale, soft topping that turns soggy within minutes of serving.
- Packing the topping down compresses those air pockets and eliminates the crumbly texture entirely.
Serving Suggestions
A warm crumble begs for something creamy to balance its buttery crunch. Serve it fresh from the oven when the contrast between hot filling and cold topping is most dramatic.
- Vanilla bean ice cream melting into pools alongside the warm fruit
- Freshly whipped cream with a splash of vanilla extract
- Warm custard sauce poured generously over each portion
- Greek yogurt for a lighter breakfast or brunch option
- Creme fraiche for a tangy, sophisticated twist
Variations to Try
- Nutty Crumble: Add 1/2 cup chopped pecans, walnuts, or almonds for extra crunch and earthy depth.
- Spiced Crumble: Mix in 1 teaspoon cinnamon, 1/4 teaspoon nutmeg, and a pinch of ginger for warm autumn vibes.
- Coconut Crumble: Replace 1/4 cup flour with shredded coconut for tropical flavor that pairs beautifully with mango or pineapple.
- Brown Butter Crumble: Brown the butter first, chill it until solid, then proceed as usual for intense nutty, caramel notes.
- Savory Herb Crumble: Omit the sugars, add 1/4 cup parmesan and fresh thyme for topping vegetable gratins.
Dietary Adaptations
- Gluten Free: Use a one to one gluten free flour blend and certified gluten free oats. The texture remains excellent with minimal difference.
- Dairy Free: Substitute cold coconut oil or vegan butter for the dairy butter. Coconut oil creates a slightly crispier result.
- Vegan: Combine the dairy free adaptation above with your favorite plant based filling for a fully vegan dessert.
- Low Carb: Replace flour with almond flour, use a granulated sweetener substitute, and skip the oats. The texture differs but satisfies the crumble craving.
Storage and Reheating
Refrigerator
Unbaked crumble topping keeps beautifully in the refrigerator, ready whenever inspiration strikes.
- Store in an airtight container for up to 5 days
- Let it come to room temperature for 10 minutes before using
- Baked crumble keeps covered for 3 to 4 days
Freezer
Freezing unbaked crumble topping is a brilliant meal prep strategy for busy weeks.
- Freeze in a single layer on a baking sheet, then transfer to a freezer bag
- Keeps for up to 3 months without quality loss
- Use directly from frozen, adding 5 to 10 minutes to baking time
Reheating
Reviving leftover baked crumble requires a bit of care to restore that crispy top.
- Reheat individual portions in a 350F oven for 10 to 15 minutes
- Avoid the microwave, which turns the topping soggy
- A toaster oven works perfectly for single servings
Nutrition Information
| Nutrient | Amount |
|---|---|
| Calories | 185 |
| Total Fat | 11g |
| Saturated Fat | 7g |
| Carbohydrates | 21g |
| Fiber | 1g |
| Sugar | 10g |
| Protein | 2g |
| Sodium | 75mg |
| Cholesterol | 27mg |
Nutritional values are estimates based on the topping only, without filling. Actual values will vary based on specific ingredients and portion sizes.
Frequently Asked Questions
Can I make crumble topping ahead of time?
Absolutely, and I actually recommend it. Prepare the topping up to 5 days ahead and refrigerate, or freeze for up to 3 months for ultimate convenience.
Why is my crumble topping not crispy?
The most common culprits are warm butter, overbaking, or a filling that released too much liquid. Next time, use colder butter and consider pre cooking watery fruits briefly.
Can I use this topping on savory dishes?
Yes, simply omit the sugars and add savory elements like parmesan, herbs, or spices. It works wonderfully on vegetable gratins and baked mac and cheese.
How do I know when the crumble is done baking?
Look for a deep golden brown color on top and active bubbling around the edges of your filling. Pale topping means more time is needed.
Can I double this recipe?
This recipe scales perfectly for larger gatherings or meal prep batches. Simply double all ingredients and follow the same technique.
Final Thoughts
A great crumble topping recipe belongs in every home cook’s repertoire, and this one delivers reliably delicious results with minimal effort. Once you experience that perfect balance of buttery crispness and tender clusters, store bought versions simply cannot compete.
Grab some seasonal fruit, mix up a batch of this topping, and discover how satisfying homemade crumble can be. Your kitchen will smell incredible, your family will be impressed, and you will wonder why you ever waited so long to make it from scratch.
Classic Crumble Topping
Ingredients
Equipment
Method
- Cut cold butter into small half inch cubes and return them to the refrigerator for at least 10 minutes to ensure they stay cold.
- Add the flour, brown sugar, granulated sugar, and salt to a large mixing bowl. Whisk everything together until evenly distributed, breaking up any brown sugar clumps with your fingers.
- Scatter the chilled butter cubes over the flour mixture. Toss them lightly to coat each piece with flour, which prevents them from sticking together.
- Using your fingertips or a pastry cutter, work the butter into the flour by pressing and rubbing the mixture together until you have a shaggy texture with pieces ranging from pea sized to almond sized.
- If using oats, fold them in gently with a fork until just combined. Avoid overworking to preserve the irregular clumps.
- Squeeze handfuls of the mixture gently to form loose clusters, then break them apart over your filling to create chunky, craggy pieces.
- Scatter the crumble topping evenly over your prepared fruit or filling, leaving some gaps for steam to escape. Pile it slightly higher in the center.
- Bake at 375F (190C) for 30 to 40 minutes until the topping turns deep golden brown and the filling bubbles at the edges.
- Let the crumble rest for at least 10 minutes after baking so the filling can set properly before serving.