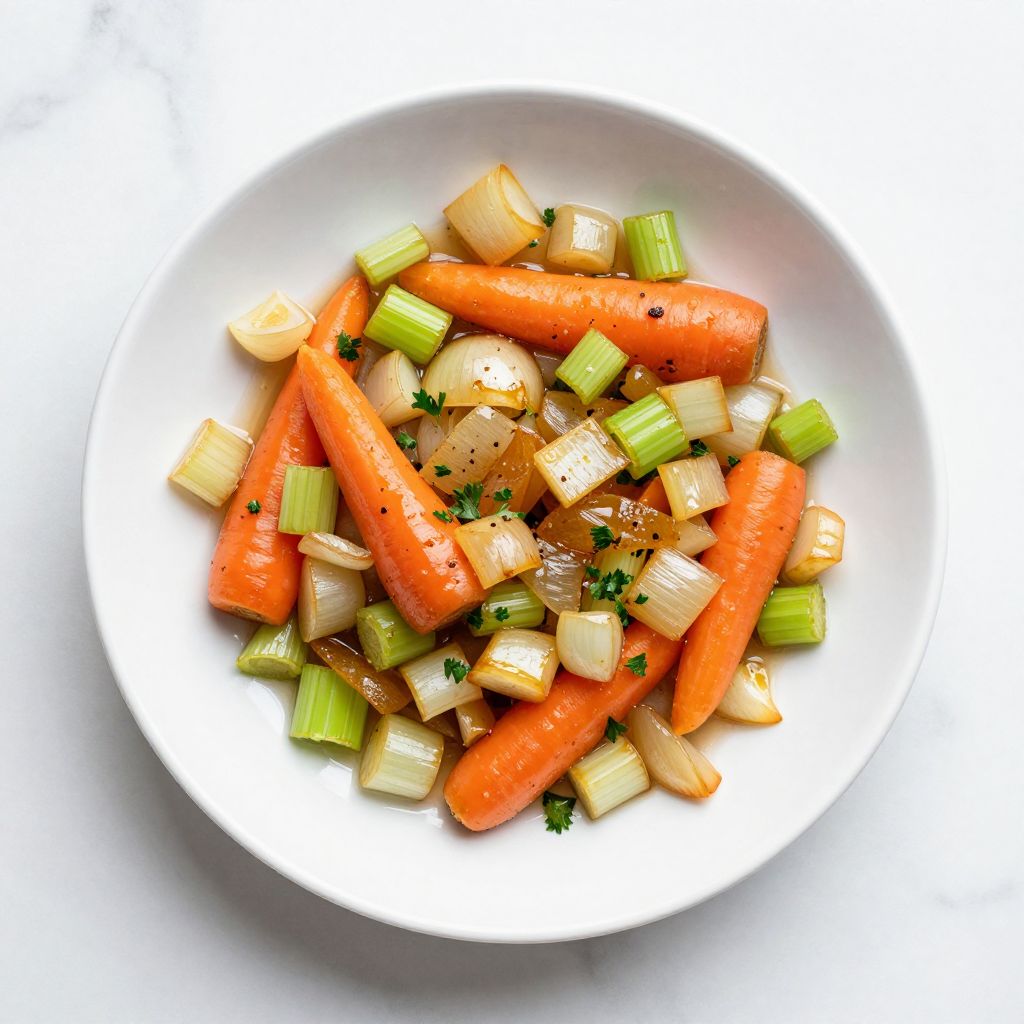
The smell of onions, celery, and carrots hitting a hot pan is the sound of French cooking coming alive in your kitchen. Mirepoix is that humble flavor foundation that chefs have relied on for centuries, and once you master it, you’ll find yourself building countless soups, stews, and sauces on top of it.
This isn’t a dish you serve alone, but rather the secret weapon that makes your cooking taste like it came from a real kitchen instead of a recipe card. It takes about 15 minutes from start to finish, requires just three basic vegetables, and unlocks flavors in your food that seem almost impossible to achieve otherwise.
Why You’ll Love This Recipe
Mirepoix is the foundation that separates home cooking from restaurant-quality meals.
- Builds depth and complexity into soups, stews, and braised dishes with minimal effort
- Uses just three everyday vegetables you likely already have on hand
- Takes about 15 minutes and requires only basic knife skills
- Freezes beautifully, so you can batch-prep and store for weeks
- Opens doors to countless classic French and international recipes
My Experience Making This Recipe
The first time I made mirepoix intentionally, I was trying to copy a restaurant soup that had been haunting me for weeks. I bought a cookbook, found out about this ratio, and realized how obvious it seemed once I understood the concept.
What struck me most was how quickly those vegetables transformed from raw chunks into something golden and fragrant, almost sweet. My kitchen filled with this warm, savory aroma that made everything else I cooked that day taste better.
Now I prep mirepoix at least twice a month, usually on Sunday afternoons when I have a quiet hour to chop vegetables. Having it ready in the freezer means I can turn a can of beans or some leftover chicken into something that tastes like real food instead of a shortcut.
Recipe Overview
- Recipe Name: Classic French Mirepoix
- Servings: Makes about 3 cups (base for 4 to 6 servings of finished dish)
- Prep Time: 15 minutes
- Cook Time: 10 to 12 minutes
- Total Time: 25 to 27 minutes
- Course: Base/Foundation
- Cuisine: French
- Calories per Serving: 45 (per 1/2 cup serving)
Equipment You Will Need
- Sharp chef’s knife or vegetable knife
- Cutting board
- Large skillet or heavy-bottomed pan
- Wooden spoon or silicone spatula
- Measuring cups and spoons
- Small bowl (optional, for holding prepped vegetables)
Ingredients for Mirepoix
- 2 medium yellow onions, peeled and diced into 1/4-inch pieces
- 3 medium carrots, peeled and diced into 1/4-inch pieces
- 2 stalks celery, trimmed and diced into 1/4-inch pieces
- 2 tablespoons unsalted butter
- 1/2 teaspoon fine sea salt
- 1/4 teaspoon freshly cracked black pepper
Ingredient Notes and Substitutions
- Onions: Onions provide sweetness and aromatic depth as they cook down and caramelize slightly. If you only have red or sweet onions, use them, though the flavor will be slightly different and less traditional.
- Carrots: Carrots add natural sweetness and color to your base. You can substitute with parsnips for an earthier twist, though this changes the flavor profile noticeably.
- Celery: Celery brings herbal notes and slight bitterness that balance the sweetness from onions and carrots. Fennel bulb works as a substitute but will add a slight licorice note.
- Butter: Butter carries flavors and prevents sticking while building browning. Olive oil, vegetable oil, or bacon fat all work well as substitutes depending on your finished dish.
- Salt and pepper: These season the base and allow natural flavors to emerge. Taste and adjust after cooking rather than adding too much upfront.
How to Make Mirepoix
Step 1: Prepare Your Vegetables
Peel your onions, carrots, and celery, then rinse them under cold water and pat dry with paper towels. Wet vegetables are harder to cut cleanly and can slip on the cutting board, so drying them properly makes prep safer and faster.
Step 2: Dice the Onions
Slice each onion in half from root to tip, then place the flat side down on your cutting board for stability. Make horizontal cuts parallel to the board about 1/4-inch apart, then slice vertically to create small, uniform dice pieces.
Step 3: Dice the Carrots
Cut each carrot on the bias at a slight angle, creating thin planks about 1/4-inch thick. Stack these planks and cut them into thin strips, then rotate 90 degrees and cut across to create small cubes.
Step 4: Dice the Celery
Trim the ends of your celery stalks and discard any brown or damaged spots on the outer layer. Cut them lengthwise into thin strips, then chop across to create 1/4-inch dice that matches your onions and carrots.
Step 5: Heat Your Pan and Add Butter
Place a large skillet over medium-high heat and add your butter, letting it melt until it just stops foaming. This takes about 1 to 2 minutes and signals that the pan is ready to accept your vegetables.
Step 6: Add the Onions First
Pour the diced onions into the hot butter and stir well, making sure every piece gets coated. Let them cook for about 3 to 4 minutes without stirring too much, allowing them to soften and start picking up color.
Step 7: Add Carrots and Celery
Add your diced carrots and celery to the pan, stirring to combine with the softened onions. The vegetables will release moisture and create steam, which is exactly what you want as they cook down together.
Step 8: Cook Until Softened and Lightly Caramelized
Stir occasionally and let the mixture cook for 6 to 8 more minutes, until all the vegetables are completely tender and the edges start to take on a light golden color. The onions should be mostly transparent, and the whole pan should smell sweet and savory.
Step 9: Season and Taste
Add your salt and pepper, stir well, and let it cook for another 30 seconds. Taste a small spoonful and adjust seasoning as needed before using your mirepoix in your chosen recipe.
Pro Tip: Make mirepoix in larger batches and freeze it in ice cube trays or small containers so you always have flavor base ready when inspiration strikes.
Tips for the Best Mirepoix
- Keep your vegetable pieces roughly the same size so they cook evenly and you don’t end up with mushy onions and crunchy carrots.
- Don’t skip the browning step; those golden edges add a subtle caramelized sweetness that plain cooked vegetables can’t match.
- Use medium-high heat but don’t let the pan get smoking hot, as this can burn the vegetables and create bitter flavors.
- Chop all your vegetables before you start cooking so you’re not scrambling to prep while things are already in the pan.
- Save your vegetable scraps in the freezer and make stock with them; the aromatics from mirepoix make incredible homemade broth.
- Taste and adjust seasoning after cooking rather than before, since the salt concentration changes as vegetables release their moisture.
Common Mistakes to Avoid
- Cutting vegetables too large: Oversized pieces won’t cook evenly and won’t break down properly to build flavor into your dish.
- Cooking on too high heat: This can burn the vegetables before they soften, creating bitter, acrid flavors instead of sweet, savory ones.
- Adding vegetables all at once: Onions need a head start to soften and release their sweetness before the other vegetables join the party.
- Skipping the salt: A small pinch of salt while cooking helps vegetables release their moisture and intensifies their natural flavors.
- Not letting it cool before freezing: Hot mirepoix creates condensation and ice crystals that damage texture; let it cool completely first.
Serving Suggestions
Mirepoix isn’t meant to shine on its own, but rather to elevate everything it touches. Use your finished base as the aromatic foundation for soups, stews, braises, and classic sauces.
- Stir into chicken or vegetable soup for an instant flavor upgrade and better depth than water alone
- Use as the base for beef stew, adding it before the liquid and letting flavors meld together
- Mix into tomato sauce for pasta to build layers of flavor that taste like simmering all day
- Add to beans or lentils when braising for a rich, developed taste instead of one-note legumes
- Combine with white wine and stock to create pan sauces for roasted chicken or fish
Variations to Try
- Soffritto: The Italian version omits celery and adds garlic, creating a slightly different aromatic profile with more punch.
- Holy Trinity: The Louisiana Creole version uses onions, celery, and bell peppers instead of carrots, building a base for gumbo and jambalaya.
- White Mirepoix: Substitute parsnips, white onions, and leeks for a milder flavor used in light stocks and cream sauces.
- Bacon-Enhanced: Cook diced bacon first, then make mirepoix in the rendered fat for deeper, smokier base notes.
- Herb-Infused: Add fresh thyme, bay leaf, or parsley stems while cooking for additional herbal complexity and aroma.
Dietary Adaptations
- Gluten-Free: Mirepoix is naturally gluten-free, so no changes needed; just verify any recipes you use it in don’t contain hidden gluten.
- Dairy-Free: Substitute butter with olive oil, vegetable oil, or coconut oil in equal amounts with virtually no impact on flavor.
- Vegan/Vegetarian: Mirepoix is already plant-based, making it perfect for vegetable stocks, bean soups, and plant-forward cooking.
- Low-Carb/Keto: Mirepoix contains natural sugars from vegetables, so use smaller portions and account for carbs if strict carb-counting matters to your diet.
Storage and Reheating
Refrigerator
Store cooled mirepoix in an airtight container in the fridge where it keeps for up to 5 days. The flavors actually deepen slightly as it sits, making day-old mirepoix excellent for building deeper flavors in your finished dishes.
- Use within 5 days for best quality and food safety
- Store in glass or food-grade plastic containers with tight-fitting lids
- Keep separate from raw meats to avoid cross-contamination
Freezer
Freeze cooled mirepoix in ice cube trays, then transfer the cubes to freezer bags for long-term storage up to 3 months. This method gives you perfect portions ready to drop into soups and sauces without thawing.
- Freeze in single-layer portions for 2 to 3 hours, then transfer to freezer bags
- Label bags with the date and contents so you remember what you’ve got
- Use frozen mirepoix directly in hot liquids without thawing first
Reheating
Mirepoix doesn’t need reheating since you’ll typically use it as a base for other cooking, but if you need to warm it, use low to medium heat on the stovetop. Add a splash of water or stock if it seems dry after sitting, stirring occasionally until heated through.
- Reheat on stovetop over medium heat for about 3 to 5 minutes
- Avoid the microwave if possible, as it can make vegetables mushy
- Add to hot soups or sauces directly from the freezer
Nutrition Information
| Nutrient | Amount |
|---|---|
| Calories | 45 |
| Total Fat | 3 g |
| Saturated Fat | 2 g |
| Carbohydrates | 5 g |
| Fiber | 1 g |
| Sugar | 2 g |
| Protein | 1 g |
| Sodium | 145 mg |
| Cholesterol | 8 mg |
Nutrition values are approximate and calculated per 1/2 cup serving of finished mirepoix. Values may shift slightly based on specific vegetable sizes and the amount of butter used.
Frequently Asked Questions
Can I Use Pre-Cut Vegetables?
You can, but freshly cut vegetables taste noticeably better and release their aromatic compounds more effectively during cooking. Pre-cut vegetables have already started oxidizing and losing their oils, which impacts the final flavor.
What’s the Ratio of Vegetables in Mirepoix?
The classic French ratio is 2 parts onion, 1 part carrot, and 1 part celery by weight or volume. This 2:1:1 proportion creates balanced sweetness and aromatics without any single vegetable overpowering the others.
Can I Make Mirepoix Without Butter?
Absolutely, any neutral oil works perfectly well and creates nearly identical results. Use olive oil if you prefer, though neutral vegetable oil or even bacon fat will give excellent flavor depending on your final dish.
How Long Should Mirepoix Cook?
Total cooking time is about 10 to 12 minutes after all vegetables are in the pan, until they’re soft and lightly golden. You want them completely tender but not mushy or browned too dark, which would create bitter flavors.
Can I Freeze Mirepoix Raw?
You can freeze raw mirepoix, but cooking it first creates better flavor development and takes up less freezer space. Raw frozen vegetables won’t brown or caramelize the same way once thawed, impacting the depth of your finished dishes.
What Dishes Use Mirepoix?
Mirepoix works as a base for French onion soup, beef bourguignon, chicken stock, tomato sauce, bean soups, and countless braised dishes. Any recipe that starts with sauteing aromatic vegetables benefits from mirepoix as its foundation.
Classic French Mirepoix
Ingredients
Equipment
Method
- Peel your onions, carrots, and celery, then rinse them under cold water and pat dry with paper towels. Wet vegetables are harder to cut cleanly and can slip on the cutting board.
- Slice each onion in half from root to tip, then place the flat side down on your cutting board. Make horizontal cuts parallel to the board about 1/4-inch apart, then slice vertically to create small, uniform dice pieces.
- Cut each carrot on the bias at a slight angle, creating thin planks about 1/4-inch thick. Stack these planks and cut them into thin strips, then rotate 90 degrees and cut across to create small cubes.
- Trim the ends of your celery stalks and discard any brown or damaged spots. Cut them lengthwise into thin strips, then chop across to create 1/4-inch dice that matches your onions and carrots.
- Place a large skillet over medium-high heat and add your butter, letting it melt until it just stops foaming, about 1 to 2 minutes.
- Pour the diced onions into the hot butter and stir well, making sure every piece gets coated. Let them cook for about 3 to 4 minutes without stirring too much, allowing them to soften and start picking up color.
- Add your diced carrots and celery to the pan, stirring to combine with the softened onions.
- Stir occasionally and let the mixture cook for 6 to 8 more minutes, until all the vegetables are completely tender and the edges start to take on a light golden color. The onions should be mostly transparent.
- Add your salt and pepper, stir well, and let it cook for another 30 seconds. Taste a small spoonful and adjust seasoning as needed before using your mirepoix in your chosen recipe.
Notes
Final Thoughts
Once you understand mirepoix, you unlock a fundamental cooking skill that elevates everything you make from that point forward. It’s not magic, just organized technique and knowing exactly what your vegetables need to release their best flavors.
Start making a batch this week and freeze it for later; you’ll find yourself reaching for it constantly as you realize how many of your favorite recipes suddenly taste better. This simple skill transforms you from someone following recipes into someone building flavors with confidence and intention.