
Picture this: a warm slice of pie, the sweet-tart flavor of cherries dancing on your taste buds, and a flaky crust that crumbles just right. This Frozen Cherry Pie is a nostalgic treat that brings back memories of summer picnics and family gatherings. It’s not just easy to make, but it’s a showstopper at any gathering, combining the delightful taste of fresh cherries with a creamy filling and a buttery crust. Get ready to impress your friends and family with this delightful dessert that’s both refreshing and comforting.
Why You’ll Love This Recipe
This pie is a crowd-pleaser that you can whip up in no time.
- Quick and simple to prepare.
- Perfect balance of sweet and tart flavors.
- Can be made ahead and stored in the freezer.
- Versatile—great for any occasion.
- Delightfully creamy filling with a crispy crust.
My Experience Making This Recipe
When I first made this pie, the aroma of fresh cherries filled my kitchen, instantly transporting me to my grandmother’s house. The best part? Seeing my family’s faces light up with every bite was priceless.
Each slice was met with compliments, and I couldn’t help but feel proud. This pie truly captures the essence of summer, even in the middle of winter.
Recipe Overview
- Recipe Name: Frozen Cherry Pie
- Servings: 8
- Prep Time: 20 minutes
- Cook Time: 10 minutes
- Total Time: 30 minutes + freezing
- Course: Dessert
- Cuisine: American
- Calories per Serving: 250
Equipment You Will Need
- 9-inch pie pan
- Mixing bowls
- Whisk
- Rubber spatula
- Plastic wrap
Ingredients for Frozen Cherry Pie
- 2 cups fresh or frozen cherries, pitted
- 1 cup granulated sugar
- 1 tablespoon lemon juice
- 1/4 cup cornstarch
- 1/4 teaspoon almond extract
- 1 prepared pie crust (store-bought or homemade)
- 1 cup heavy whipping cream
- 1/2 cup powdered sugar
- 1 teaspoon vanilla extract
Ingredient Notes and Substitutions
- Cherries: Fresh cherries add a burst of flavor. You can use frozen cherries if fresh ones are out of season.
- Granulated sugar: Sweetens the filling. Brown sugar can be used for a deeper flavor.
- Lemon juice: Balances sweetness. Lime juice is a good substitute.
- Cornstarch: Thickens the filling. Arrowroot powder works well as an alternative.
- Almond extract: Adds a unique flavor. Vanilla extract can be used instead.
How to Make Frozen Cherry Pie
Step 1: Prepare the Filling
In a mixing bowl, combine the cherries, granulated sugar, lemon juice, cornstarch, and almond extract. This mixture will create a luscious filling that balances sweetness with tartness.
Step 2: Cook the Filling
Transfer the cherry mixture to a saucepan over medium heat. Cook for about 5-7 minutes, stirring occasionally until the mixture thickens and bubbles.
Step 3: Cool the Filling
Remove the saucepan from heat and allow the filling to cool completely. Cooling is crucial to prevent the crust from becoming soggy.
Step 4: Prepare the Crust
While the filling cools, place the prepared pie crust in a 9-inch pie pan. Ensure it fits well and crimp the edges for a decorative touch.
Step 5: Whip the Cream
In a separate bowl, whip the heavy cream until soft peaks form. This will create a light, airy texture that complements the cherry filling beautifully.
Step 6: Sweeten the Cream
Gradually add the powdered sugar and vanilla extract to the whipped cream. Continue to whip until stiff peaks form, adding sweetness and flavor.
Step 7: Assemble the Pie
Spread the cooled cherry filling evenly into the prepared crust. Top it with the whipped cream mixture, smoothing it out with a spatula.
Step 8: Freeze the Pie
Cover the pie with plastic wrap and place it in the freezer. Freeze for at least 4 hours, or until solid, ensuring it’s ready to serve when you need it.
Pro Tip: Let the pie sit at room temperature for about 10 minutes before slicing. This helps achieve clean cuts and enhances the flavors.
Tips for the Best Frozen Cherry Pie
- Use fresh cherries when available for the best flavor and texture.
- Let the pie cool completely before freezing to maintain the crust’s integrity.
- Consider garnishing with chocolate shavings for an elegant touch.
- Experiment with different extracts, like vanilla or lemon, to customize the flavor.
- Pair with vanilla ice cream for an indulgent dessert experience.
Common Mistakes to Avoid
- Skipping the cooling step can lead to a soggy crust.
- Overcooking the filling can make it too thick or caramelized.
- Not using enough sugar may lead to a tart filling that lacks balance.
- Rushing the freezing process can result in a pie that melts too quickly.
Serving Suggestions
This pie shines on its own, but you can elevate it further with a few additions.
- Serve with a scoop of vanilla ice cream.
- Drizzle with chocolate or caramel sauce.
- Top with fresh mint leaves for a burst of color.
- Pair with a dollop of whipped cream for extra decadence.
Variations to Try
- Add a dash of cinnamon for a warm flavor twist.
- Mix in some blueberries for a berry medley.
- Use a graham cracker crust for a different texture.
- Add a splash of bourbon to the filling for a deeper flavor.
Dietary Adaptations
- Gluten-free: Use a gluten-free pie crust alternative.
- Dairy-free: Substitute coconut cream for the whipped cream.
- Vegan: Use a vegan pie crust and replace heavy cream with whipped coconut cream.
- Low-carb/keto: Swap sugar for a keto-friendly sweetener like erythritol.
Storage and Reheating
Refrigerator
The pie can be stored in the refrigerator for up to 3 days.
- Cover tightly with plastic wrap or foil.
- Keep it chilled until ready to serve.
Freezer
This pie freezes beautifully for up to 2 months.
- Wrap tightly in plastic wrap and then in aluminum foil.
- Label with the date for your reference.
Reheating
To serve, thaw the pie in the refrigerator or at room temperature.
- Do not microwave, as it will alter the texture.
- Slice and serve cold or at room temperature.
Nutrition Information
| Nutrient | Amount |
|---|---|
| Calories | 250 |
| Total Fat | 12g |
| Saturated Fat | 7g |
| Carbohydrates | 35g |
| Fiber | 2g |
| Sugar | 20g |
| Protein | 3g |
| Sodium | 150mg |
| Cholesterol | 30mg |
This nutrition information is approximate and may vary based on specific ingredients used.
Frequently Asked Questions
Can I use frozen cherries instead of fresh?
Yes, frozen cherries work great in this recipe and are often more convenient.
Can I make this pie ahead of time?
Absolutely! This pie can be made and frozen for up to two months.
How should I store the pie?
Store the pie in the freezer for long-term storage or in the refrigerator for short-term.
What do I do if the filling is too runny?
If the filling is runny, it may not have cooked long enough. Cook it a bit more until thickened.
Can I substitute the whipping cream?
Yes, you can use coconut cream or a non-dairy whipped topping for a different option.
Final Thoughts
This Frozen Cherry Pie is a perfect blend of sweet and tart flavors, with a refreshing touch that everyone will enjoy. I encourage you to give this recipe a try; you will not be disappointed.
For more delicious cherry recipes, check out this cherry cheesecake recipe or make a tasty cherry compote to enjoy with your pie.
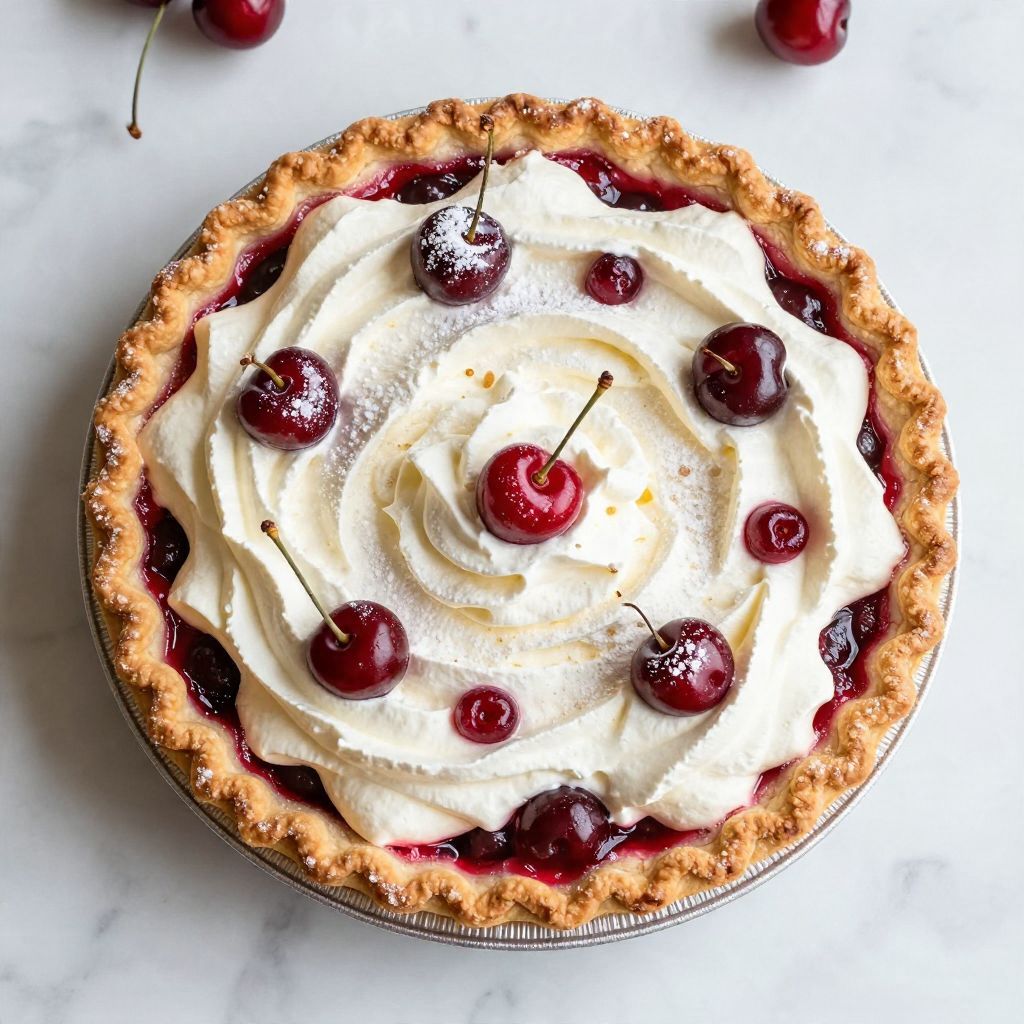
Frozen Cherry Pie
Ingredients
Equipment
Method
- In a mixing bowl, combine the cherries, granulated sugar, lemon juice, cornstarch, and almond extract.
- Transfer the cherry mixture to a saucepan over medium heat. Cook for about 5-7 minutes, stirring occasionally until the mixture thickens and bubbles.
- Remove the saucepan from heat and allow the filling to cool completely.
- Place the prepared pie crust in a 9-inch pie pan, ensuring it fits well and crimp the edges for a decorative touch.
- In a separate bowl, whip the heavy cream until soft peaks form.
- Gradually add the powdered sugar and vanilla extract to the whipped cream. Continue to whip until stiff peaks form.
- Spread the cooled cherry filling evenly into the prepared crust. Top it with the whipped cream mixture, smoothing it out with a spatula.
- Cover the pie with plastic wrap and place it in the freezer. Freeze for at least 4 hours, or until solid.