
Picture biting into a homemade Ding Dong cake still warm from the oven, that chocolate sponge giving way to creamy filling that tastes infinitely better than the packaged version you remember from childhood lunchboxes.
This recipe transforms the iconic snack cake into a showstopping dessert that combines tender chocolate cake layers with a cloud-like filling, all wrapped in a glossy chocolate coating.
The beauty of making this at home is that you control the quality of every ingredient, skip the preservatives, and create something that tastes like a luxury bakery item rather than a convenience store find.
Ready to impress your family and friends with this nostalgic-yet-elevated treat?
Why You’ll Love This Recipe
This homemade version delivers bakery-quality results with a fraction of the grocery store additives. The combination of soft cake, fluffy filling, and silky chocolate coating creates a textural experience that store-bought versions simply cannot match.
- Impressive presentation that looks far more complicated than it actually is
- Perfectly portioned individual cakes that are easy to serve at gatherings
- Completely customizable filling flavors for endless variations
- Makes enough to share while keeping some for yourself
- Tastes even better the next day when flavors fully meld together
My Experience Making This Recipe
The first time I made this, I was shocked at how simple the process actually is. The cake layers bake in minutes, and the filling whips up faster than you’d expect.
What really got me was the moment I bit into one after the chocolate coating set. That snap of the chocolate shell followed by the tender cake and creamy middle felt like opening a present.
My kids, who normally turn their noses up at homemade desserts, actually asked for seconds. That’s when I knew this recipe was worth keeping in heavy rotation.
Recipe Overview
- Recipe Name: Ding Dong Cake
- Servings: 12 cakes
- Prep Time: 25 minutes
- Cook Time: 12 minutes
- Total Time: 1 hour 45 minutes (includes cooling and setting)
- Course: Dessert
- Cuisine: American
- Calories per Serving: 285
Equipment You Will Need
- Two 6-cup muffin tins with silicone liners or paper cups
- Mixing bowls (two large, one small)
- Electric mixer or whisk
- Measuring cups and spoons
- Wooden spoon or spatula
- Sifter or fine mesh strainer
- Piping bag with medium round tip
- Cooling racks
- Shallow bowl for chocolate coating
- Fork or dipping tool
- Parchment paper for setting
Ingredients for Ding Dong Cake
For the Cake
- All-purpose flour: 1 1/2 cups
- Cocoa powder (unsweetened): 1/2 cup
- Baking soda: 1 teaspoon
- Baking powder: 1/2 teaspoon
- Salt: 1/4 teaspoon
- Granulated sugar: 1 1/4 cups
- Egg: 1 large
- Vegetable oil: 1/3 cup
- Vanilla extract: 1 teaspoon
- Hot water: 1/2 cup
For the Filling
- Butter (softened): 4 tablespoons
- Vegetable shortening: 2 tablespoons
- Powdered sugar: 1 1/2 cups
- Vanilla extract: 1 teaspoon
- Milk: 2 tablespoons
For the Chocolate Coating
- Semi-sweet chocolate chips: 1 1/2 cups
- Coconut oil or vegetable oil: 2 tablespoons
Ingredient Notes and Substitutions
- Cocoa powder: Dutch-processed cocoa creates a deeper, more sophisticated chocolate flavor compared to natural cocoa, which tastes slightly more acidic. You can swap either type, but the color and intensity will shift slightly.
- Vegetable oil: Oil keeps the cake incredibly moist and tender compared to butter, which creates a tighter crumb. If you prefer, use melted butter at a 1:1 ratio, though the cake will be slightly denser.
- Shortening in the filling: Shortening stabilizes the filling and prevents it from getting greasy at room temperature. You can use all butter, but add one extra tablespoon of powdered sugar to prevent weeping.
- Chocolate chips: Semi-sweet chocolate provides that classic snack cake flavor, but dark chocolate creates a more adult-oriented dessert with less sweetness. Milk chocolate will make it sweeter and more tender.
- Coconut oil for coating: Coconut oil creates a thinner chocolate shell that snaps when you bite it. Vegetable oil works too but won’t set quite as firmly.
How to Make Ding Dong Cake
Step 1: Preheat Your Oven and Prepare Pans
Set your oven to 350 degrees Fahrenheit and position the rack in the center. Line your muffin tins with silicone or paper liners, as this prevents sticking and makes removal much easier without damaging the delicate cakes.
Step 2: Mix Your Dry Ingredients
In a large mixing bowl, sift together the flour, cocoa powder, baking soda, baking powder, and salt. Sifting incorporates air and removes lumps, which gives you a lighter, more tender crumb in the final cake.
Step 3: Combine Wet Ingredients
In another bowl, whisk together the sugar, egg, oil, and vanilla until well combined. This mixture should look slightly pale and emulsified, which takes about one minute of whisking.
Step 4: Unite the Batters
Pour the wet ingredients into the dry ingredients and fold together gently with a spatula until just barely combined. Do not overmix here; a few small flour streaks are fine and will result in a more tender cake.
Step 5: Add Hot Water
Slowly pour the hot water into the batter while stirring gently until fully incorporated. The batter will seem thin and runny, which is exactly what you want; this creates the moist, tender crumb that makes these cakes special.
Step 6: Fill and Bake the Cakes
Divide the batter evenly among the muffin cups, filling each about three-quarters full. Bake for 10 to 12 minutes, until a toothpick inserted into the center comes out clean but not completely dry.
Step 7: Cool the Cakes
Allow the cakes to cool in the pans for 5 minutes, then turn them out onto a cooling rack to cool completely. This prevents them from continuing to bake from residual heat in the pan, which would dry them out.
Step 8: Make the Filling
In a clean bowl, beat the softened butter and shortening together for about one minute until light and fluffy. Add the powdered sugar, vanilla, and milk, then beat on medium speed for about two minutes until the filling is light, airy, and spreadable.
Step 9: Assemble the Cakes
Once the cakes are completely cooled, use a small knife to hollow out the flat bottom of each cake, creating a small well for the filling. Transfer the filling to a piping bag with a medium round tip, then pipe a generous amount of filling into each cake.
Step 10: Make the Chocolate Coating
Place the chocolate chips and coconut oil in a microwave-safe bowl and heat in thirty-second intervals, stirring between each, until completely melted and smooth. This gentle method prevents the chocolate from burning or seizing up.
Step 11: Coat the Cakes
Using a fork or dipping tool, carefully lower each cake into the warm chocolate, making sure it’s fully coated on all sides. Place it on parchment paper to set, and repeat with the remaining cakes.
Step 12: Let Chocolate Set
Allow the chocolate coating to set at room temperature for about 30 minutes, or refrigerate for 10 minutes if you’re short on time. Once set, these cakes are ready to eat and will stay fresh for up to three days.
Pro Tip: Don’t skip cooling the cakes completely before filling and coating them; warm cake will melt the filling and cause the chocolate to slip right off.
Tips for the Best Ding Dong Cake
- Use room-temperature ingredients for the filling so it whips up light and fluffy without breaking or becoming greasy.
- If your chocolate is too thick for dipping, add a bit more coconut oil one teaspoon at a time rather than using too much heat.
- Make the filling just before assembling so it stays fluffy and doesn’t over-firm in the bowl.
- If the cake sticks to the muffin liner, gently peel it away rather than trying to force the cake out.
- These cakes taste better the next day after flavors have time to meld together, making them ideal for make-ahead entertaining.
- Keep finished cakes in an airtight container at room temperature so the chocolate coating stays snappy rather than becoming sticky from moisture.
Common Mistakes to Avoid
- Overmixing the batter after adding flour. This activates gluten and creates tough, dense cakes instead of tender ones.
- Skipping the hot water in the cake batter. This sounds counterintuitive, but it’s what gives the cake its signature moist, almost fudgy texture.
- Using chocolate that’s too hot for dipping. If it’s scorching hot, it will cook the cake exterior and make it greasy.
- Filling the cakes while they’re still warm. Warm filling will soak into the cake and create a mushy interior.
- Using all-purpose flour without sifting. This packs down and creates a heavy, cakey texture instead of light and tender.
Serving Suggestions
These cakes are perfect on their own, but they shine even brighter when paired with the right accompaniments. Serve them at room temperature for the best flavor and texture, and watch them disappear from the plate.
- Alongside a cold glass of milk for that lunchbox nostalgia factor
- With a scoop of vanilla ice cream for an indulgent twist
- Dusted with powdered sugar for an elegant touch at dinner parties
- Paired with fresh strawberries or raspberries for a fruit-forward element
- With strong black coffee to balance the sweetness
Variations to Try
- Peanut Butter Ding Dong: Replace half the shortening in the filling with peanut butter for a classic combination. The nuttiness transforms this into a completely different dessert that tastes like a favorite candy bar.
- Cookies and Cream Version: Fold crushed Oreo cookies into the filling and use white chocolate for coating. This creates a modern twist that appeals to cookie lovers everywhere.
- Salted Caramel Filling: Swap the vanilla filling for homemade salted caramel and drizzle extra caramel over the chocolate coating. The salty-sweet combination elevates these from nostalgic to genuinely sophisticated.
- Dark Chocolate Decadence: Use dark chocolate chips for both the coating and add a tablespoon of dark cocoa powder to the cake batter for intensity. This appeals to adults who find the original too sweet.
- Raspberry Cream Version: Add one-quarter teaspoon of raspberry extract and a tablespoon of freeze-dried raspberries to the filling for a fruity take. This pairs beautifully with dark chocolate coating.
Dietary Adaptations
- Gluten-Free: Substitute one-to-one gluten-free flour for the all-purpose flour and add one-quarter teaspoon of xanthan gum to prevent dryness. The texture will be slightly more tender but still delicious.
- Dairy-Free: Use vegan butter and dairy-free milk in both the filling and cake, plus coconut oil for the chocolate coating. The flavor stays virtually identical, though the crumb might be slightly denser.
- Vegan: Replace the egg with one-quarter cup unsweetened applesauce and use vegan butter and plant-based milk throughout. These cakes come out moist and tender even with these swaps.
- Lower-Sugar: Use monk fruit or erythritol as one-to-one replacements for both granulated and powdered sugar throughout the recipe. The texture stays the same, though the chocolate coating may need an extra tablespoon of oil to flow smoothly.
Storage and Reheating
Refrigerator
Store these cakes in an airtight container on the counter or in the refrigerator for up to five days. They actually taste better after sitting for a day once the flavors have fully merged together.
- Keep them in an airtight container to prevent the chocolate from absorbing odors from the fridge
- Remove from the refrigerator 15 minutes before serving for optimal texture and flavor
- The filling may firm up slightly when chilled, which some people prefer
Freezer
These cakes freeze beautifully for up to three months if properly wrapped. Thaw them at room temperature for about two hours before serving.
- Wrap each cake individually in plastic wrap before placing in a freezer-safe container
- Thaw at room temperature rather than in the refrigerator to prevent condensation from making the chocolate soggy
- Do not thaw in the microwave, as this will make the filling too soft
Reheating
These cakes taste best at room temperature and don’t really need reheating. However, if you prefer them slightly warm, use a low, gentle approach.
- Microwave for 10 to 15 seconds on 50 percent power to warm without cooking the chocolate or filling
- Never use full microwave power, as this will make the chocolate melt and the filling weep
- Room temperature is actually the best serving temperature for these treats
Nutrition Information
| Nutrient | Amount |
|---|---|
| Calories | 285 |
| Total Fat | 15g |
| Saturated Fat | 5g |
| Carbohydrates | 37g |
| Fiber | 1g |
| Sugar | 28g |
| Protein | 3g |
| Sodium | 210mg |
| Cholesterol | 18mg |
These values are approximate and based on standard ingredient measurements. The exact nutrition will vary slightly based on specific brands and portion sizes.
Frequently Asked Questions
Can I make these cakes ahead of time?
Yes, you can make them up to three days ahead and store them in an airtight container at room temperature. They actually taste better the next day once the flavors have fully melded.
What if my chocolate coating cracks when I dip?
This usually happens when the chocolate is too hot or the cake is too cold. Make sure the chocolate is at around 110 degrees Fahrenheit and let the cakes sit at room temperature before dipping.
Can I use a different type of chocolate?
Absolutely, though it will change the flavor profile. Milk chocolate makes them sweeter, dark chocolate makes them more sophisticated, and white chocolate creates a completely different vibe.
Why does my filling come out grainy?
This usually means the butter was too cold or you added the powdered sugar too quickly. Make sure your butter is soft and add the sugar gradually while beating constantly.
How do I get the cakes out of the muffin tin without breaking them?
Silicone liners are your best friend here, as they flex and release the cakes easily. If using paper liners, let the cakes cool for five minutes in the pan, then gently peel the liners away.
Can I make these without muffin tins?
You can bake the cakes in a round cake pan and cut circles out with a biscuit cutter or glass, but you’ll waste some batter. Muffin tins are really the best vessel for this recipe.
Final Thoughts
Making Ding Dong cakes at home proves that you don’t need complicated techniques or exotic ingredients to create something truly special. This recipe takes one beloved snack and transforms it into something you’ll be proud to serve at any gathering.
Your friends and family will be amazed that you made these from scratch, and honestly, the satisfaction of biting into a homemade version is worth every minute in the kitchen. Try this recipe soon and prepare to become everyone’s favorite dessert maker.
If you enjoy this nostalgic homemade dessert, explore more classic American cake recipes that bring back sweet memories. Try our original German chocolate cake recipe or our Butterfinger cake recipe for more indulgent treats that taste like they came straight from grandma’s kitchen.
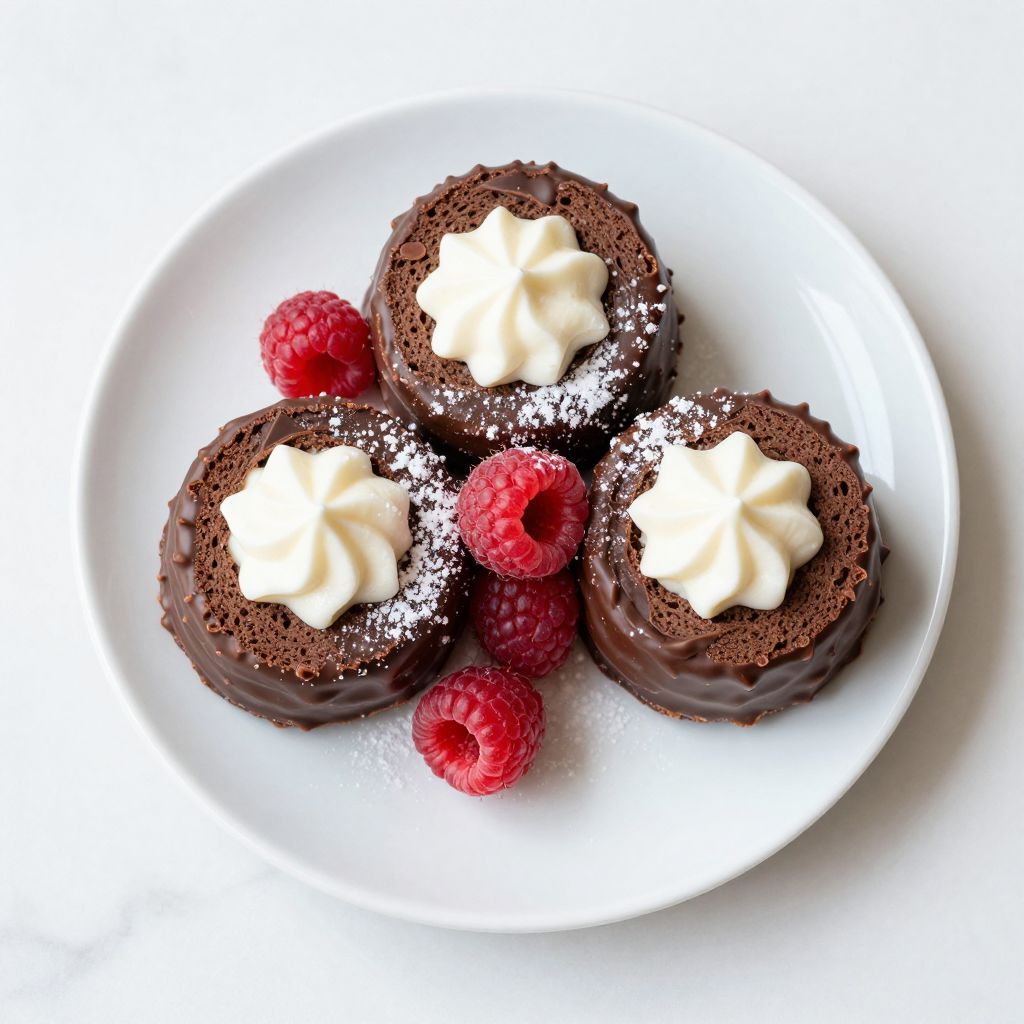
Ding Dong Cake
Ingredients
Equipment
Method
- Preheat your oven to 350°F (175°C) and position the rack in the center.
- Line two 6-cup muffin tins with silicone liners or paper cups.
- In a large bowl, sift together the flour, cocoa powder, baking soda, baking powder, and salt.
- In another bowl, whisk together the granulated sugar, egg, vegetable oil, and vanilla extract until pale and emulsified.
- Pour the wet ingredients into the dry ingredients and fold with a spatula until just combined.
- Slowly add the hot water to the batter, stirring gently until fully incorporated.
- Divide the batter evenly among the prepared muffin cups, filling each about three-quarters full.
- Bake for 10 to 12 minutes, or until a toothpick inserted into the center comes out clean.
- Let the cakes cool in the pans for 5 minutes, then transfer them to a cooling rack to cool completely.
- In a clean bowl, beat the softened butter and shortening for 1 minute until light and fluffy.
- Add the powdered sugar, vanilla extract, and milk, then beat on medium speed for 2 minutes until airy.
- Use a small knife to hollow out the bottom of each cooled cake to create a filling well.
- Fill a piping bag with the prepared filling and pipe a generous amount into each cake.
- Melt the chocolate chips and coconut oil in 30-second intervals in the microwave, stirring until smooth.
- Using a fork or dipping tool, dip each filled cake into the chocolate coating, then place on parchment paper.
- Allow the chocolate to set at room temperature for 30 minutes, or refrigerate for 10 minutes before serving.