
Picture the moment when you take a bite of a crunchy espresso bean, only to be greeted by a rich layer of velvety chocolate. That delightful experience is exactly what you’ll create with these Chocolate Covered Espresso Beans. This recipe is not just about a sweet treat; it’s about the perfect fusion of robust coffee flavor and silky chocolate that can perk you up in the best way possible. Plus, they are incredibly easy to make and make for a perfect gift or party snack!
Why You’ll Love This Recipe
These treats are irresistible for many reasons.
- Quick and straightforward to prepare.
- Perfect balance of sweet and bitter flavors.
- Great for an energy boost during the day.
- Versatile: customize with different types of chocolate.
- Perfect for gifting or as a snack.
My Experience Making This Recipe
When I first decided to make Chocolate Covered Espresso Beans, I was excited yet a bit skeptical about how well I could pull it off. As soon as the chocolate melted and mixed with the espresso beans, the aroma in my kitchen was nothing short of intoxicating.
After letting them cool, I took my first bite, and I was hooked. The satisfying crunch combined with the rich chocolate and the kick of coffee made me wish I had made a double batch!
Recipe Overview
- Recipe Name: Chocolate Covered Espresso Beans
- Servings: 4
- Prep Time: 10 minutes
- Cook Time: 15 minutes
- Total Time: 25 minutes
- Course: Snack
- Cuisine: American
- Calories per Serving: 200
Equipment You Will Need
- Medium saucepan
- Heatproof bowl
- Parchment paper
- Spoon or spatula
- Measuring cups and spoons
Ingredients for Chocolate Covered Espresso Beans
- 1 cup espresso beans
- 8 ounces dark chocolate (or milk chocolate if preferred)
- 1 teaspoon coconut oil (optional, for smoother chocolate)
Ingredient Notes and Substitutions
- Espresso beans: These give that bold coffee flavor. You can substitute with roasted coffee beans for a different taste.
- Dark chocolate: This complements the bitterness of the coffee. Milk chocolate can be used for a sweeter option.
- Coconut oil: This helps achieve a smoother consistency. You can skip it if you prefer a thicker chocolate coating.
How to Make Chocolate Covered Espresso Beans
Step 1: Prepare Your Workspace
Clear a countertop space and line a baking sheet with parchment paper. This will be where you place the chocolate-covered beans to cool.
Step 2: Melt the Chocolate
In a medium saucepan, fill it with about an inch of water and bring it to a simmer. Place a heatproof bowl on top, ensuring it doesn’t touch the water, and add the chocolate and coconut oil for melting.
Step 3: Stir Until Smooth
Gently stir the chocolate mixture until it is fully melted and smooth. This ensures even melting and prevents burning.
Step 4: Coat the Espresso Beans
Add the espresso beans to the melted chocolate. Stir thoroughly until each bean is completely coated. This is where the magic happens!
Step 5: Remove Excess Chocolate
Using a fork, lift the beans out of the chocolate, allowing excess chocolate to drip back into the bowl. This step helps create a thinner, more appealing coating.
Step 6: Place on Parchment
Transfer the coated beans to the prepared baking sheet. Space them out to prevent sticking together as they cool.
Step 7: Let Them Set
Allow the beans to cool at room temperature for about 15 minutes. If you’re in a hurry, pop them in the fridge for a quicker set.
Step 8: Store or Enjoy
Once set, transfer the beans to an airtight container. They can be enjoyed immediately or stored for later. Just try not to eat them all at once!
Pro Tip: For an added flavor twist, sprinkle sea salt over the beans just before they set!
Tips for the Best Chocolate Covered Espresso Beans
- Use high-quality chocolate for the best flavor.
- Make sure the bowl used for melting is completely dry; water can seize the chocolate.
- Experiment with different chocolate types to find your favorite combination.
- Consider adding spices like cinnamon or cayenne for an exciting flavor kick.
- Store in a cool, dry place to maintain texture and flavor.
Common Mistakes to Avoid
- Not tempering the chocolate properly can result in a dull finish. Always melt slowly and smoothly.
- Using old or stale coffee beans can lead to a lackluster flavor. Fresh beans are crucial.
- Overcrowding the baking sheet can cause the beans to stick together. Give them space to cool.
- Skipping the optional coconut oil might make the chocolate thicker than desired. Use it for a smoother coating.
Serving Suggestions
These delightful treats can be enjoyed in various ways.
- Pair them with a cup of coffee for a delightful afternoon pick-me-up.
- Serve in a decorative bowl at your next gathering.
- Use as a topping for ice cream or yogurt.
- Mix into trail mix for a sweet and caffeinated snack.
Variations to Try
- Add a sprinkle of crushed nuts for extra crunch and flavor.
- Drizzle white chocolate over the top for a beautiful presentation.
- Try using flavored chocolate, like orange or mint, for a unique twist.
- Coat with a layer of powdered sugar or cocoa powder for a different finish.
Dietary Adaptations
- Gluten-free: This recipe is naturally gluten-free, making it safe for everyone.
- Dairy-free: Use dairy-free chocolate to make it suitable for a vegan diet.
- Low-carb/keto: Use sugar-free chocolate for a low-carb version.
Storage and Reheating
Refrigerator
Store the chocolate-covered beans in an airtight container in the fridge.
- They can last up to two weeks.
- Make sure they are completely cool before sealing to avoid condensation.
Freezer
For longer storage, these beans can be frozen.
- Place in a freezer-safe container for up to three months.
- Thaw in the fridge before enjoying.
Reheating
These beans are best enjoyed at room temperature, so no reheating is necessary.
- Let them sit out for a bit before serving for the best texture.
Nutrition Information
| Nutrient | Amount |
|---|---|
| Calories | 200 |
| Total Fat | 12g |
| Saturated Fat | 7g |
| Carbohydrates | 22g |
| Fiber | 3g |
| Sugar | 14g |
| Protein | 3g |
| Sodium | 5mg |
| Cholesterol | 0mg |
This information is an estimate and can vary based on specific brands and preparation methods.
Frequently Asked Questions
Can I use regular coffee beans instead of espresso beans?
Yes, regular coffee beans can be used, but they will impart a different flavor profile.
Can I make these ahead of time?
Absolutely! They store well in an airtight container for up to two weeks.
What should I do if my chocolate seizes?
If your chocolate seizes, you can try adding a small amount of coconut oil to help smooth it out.
How should I store the chocolate covered beans?
Keep them in an airtight container in a cool, dry place or in the refrigerator for longer freshness.
Can I flavor the chocolate?
Yes, feel free to add extracts like vanilla or peppermint to the melted chocolate for a unique twist.
Final Thoughts
If you’re looking for a simple yet satisfying treat, these Chocolate Covered Espresso Beans are sure to please. They’re perfect for any coffee lover and make for a delightful snack at any time of day.
So, gather your ingredients and get started! You won’t regret creating this delicious little indulgence.
Explore more delicious recipes like Dubai chocolate recipe or warm up with a Mexican hot chocolate recipe.
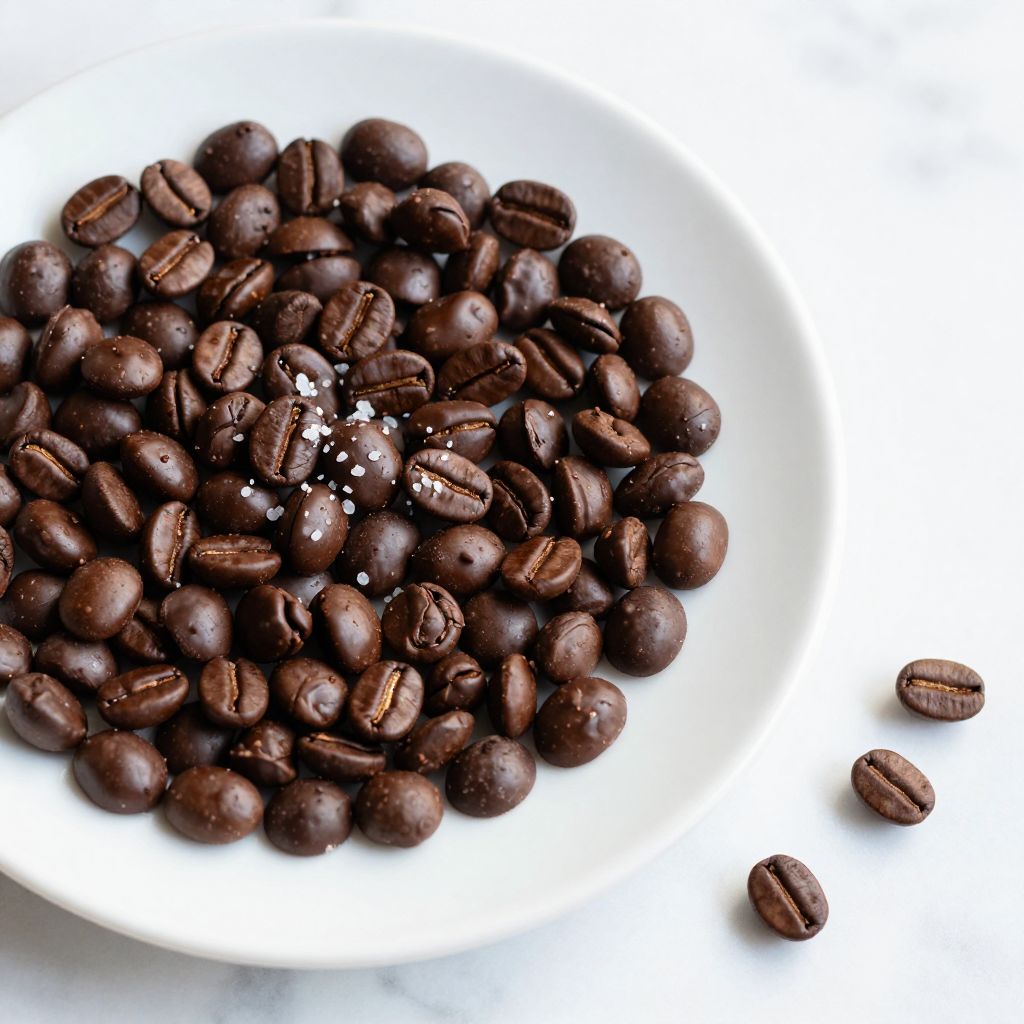
Chocolate Covered Espresso Beans
Ingredients
Equipment
Method
- Clear a countertop space and line a baking sheet with parchment paper.
- In a medium saucepan, fill it with about an inch of water and bring it to a simmer.
- Place a heatproof bowl on top, ensuring it doesn't touch the water, and add the chocolate and coconut oil for melting.
- Gently stir the chocolate mixture until it is fully melted and smooth.
- Add the espresso beans to the melted chocolate and stir thoroughly until each bean is completely coated.
- Using a fork, lift the beans out of the chocolate, allowing excess chocolate to drip back into the bowl.
- Transfer the coated beans to the prepared baking sheet, spacing them out to prevent sticking together as they cool.
- Allow the beans to cool at room temperature for about 15 minutes, or place them in the fridge for a quicker set.
- Once set, transfer the beans to an airtight container.