
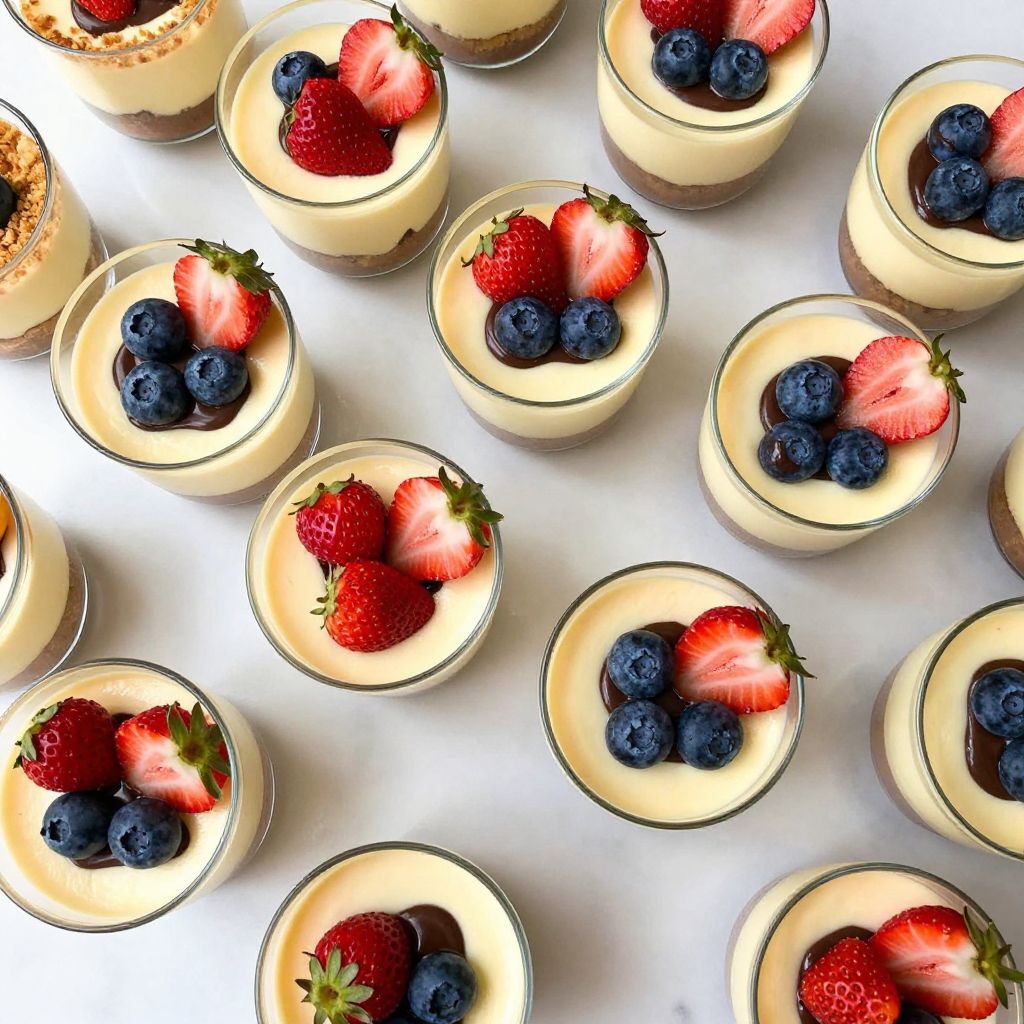
Picture this: a creamy cheesecake nestled in a cute cup, just waiting for you to dive in. The Cheesecake Cup Recipe is a delightful twist on traditional cheesecake, offering all the rich, velvety goodness without the fuss of a full cake.
These little cups are perfect for any occasion, from casual gatherings to fancy dinners. With their smooth texture and customizable toppings, they are sure to impress your guests and satisfy your sweet tooth.
Why You’ll Love This Recipe
This recipe is a showstopper for several reasons.
- Quick and easy to assemble, ideal for busy schedules.
- Versatile for various toppings, from fruits to chocolates.
- Perfect for portion control, so you can indulge without guilt.
- Great for gatherings, allowing everyone to grab their own cup.
My Experience Making This Recipe
As I whipped up these cheesecake cups, the aroma of sweet cream cheese filled my kitchen, making my mouth water. I couldn’t resist sneaking a taste before they even set, and let me tell you, it was bliss in a cup.
When I served them to my family, the delighted expressions were priceless. Each person savored their cup, and I found myself wishing I had made a double batch.
Recipe Overview
- Recipe Name: Cheesecake Cup Recipe
- Servings: 8
- Prep Time: 20 minutes
- Cook Time: 0 minutes
- Total Time: 2 hours (including chilling)
- Course: Dessert
- Cuisine: American
- Calories per Serving: 220
Equipment You Will Need
- Mixing bowl
- Electric mixer or whisk
- Measuring cups and spoons
- 8 small cups or dessert glasses
- Spatula
- Plastic wrap
Ingredients for Cheesecake Cup Recipe
- 8 oz cream cheese, softened
- 1/2 cup granulated sugar
- 1 tsp vanilla extract
- 1 cup heavy whipping cream
- 1/2 cup graham cracker crumbs
- 2 tbsp unsalted butter, melted
- Fresh fruit or chocolate, for topping
Ingredient Notes and Substitutions
- Cream cheese: This is the base, adding creaminess. You can use Neufchâtel for a lighter version.
- Granulated sugar: Provides sweetness. Substitute with powdered sugar for a smoother texture.
- Heavy whipping cream: Creates a light texture. Use coconut cream for a dairy-free option.
- Graham cracker crumbs: Adds a crunchy base. Try crushed cookies or nuts for a different flavor.
How to Make Cheesecake Cup Recipe
Step 1: Prepare the Cups
Choose your favorite small cups or dessert glasses. This adds a personal touch to your servings.
Step 2: Make the Crust
In a bowl, combine graham cracker crumbs and melted butter. This mixture will form the base, so ensure it’s well mixed and crumbly.
Step 3: Press the Crust
Evenly distribute the crust mixture into the bottom of each cup. Press it down gently; this helps it hold together when serving.
Step 4: Beat the Cream Cheese
In a separate bowl, beat the cream cheese, granulated sugar, and vanilla extract until smooth. This ensures a creamy filling without lumps.
Step 5: Whip the Cream
In another bowl, whip the heavy whipping cream until soft peaks form. This step adds lightness to your cheesecake mixture.
Step 6: Fold the Mixtures Together
Gently fold the whipped cream into the cream cheese mixture. This keeps the filling airy, making every bite light and fluffy.
Step 7: Fill the Cups
Spoon the cheesecake filling over the crust in each cup. Aim for an even layer to ensure everyone enjoys the same deliciousness.
Step 8: Chill
Cover the cups with plastic wrap and refrigerate for at least 2 hours. Chilling allows the flavors to meld and the cheesecake to set.
Pro Tip: For an extra burst of flavor, add a layer of fruit preserves or chocolate sauce on top before serving.
Tips for the Best Cheesecake Cups
- Ensure your cream cheese is at room temperature for smooth mixing.
- Don’t overmix the whipped cream to maintain its light texture.
- Experiment with flavored extracts like almond for a unique twist.
- For a fun presentation, garnish with chocolate shavings or fresh mint.
- Allow enough chilling time; this really makes a difference in texture.
Common Mistakes to Avoid
- Using cold cream cheese can lead to lumps in the filling.
- Not chilling long enough results in a runny texture.
- Overmixing the whipped cream can make it grainy.
- Skipping the crust means missing out on that delightful crunch.
Serving Suggestions
These cheesecake cups are delightful on their own, but pairing them with something extra can elevate the experience.
- Top with fresh berries for a fruity contrast.
- Serve with coffee or tea for a perfect afternoon treat.
- Pair with a light dessert wine for a sophisticated touch.
- Add a sprinkle of nuts for added crunch.
Variations to Try
- Add chocolate to the filling for a rich twist.
- Incorporate pumpkin puree for a seasonal flavor.
- Use matcha powder for a unique, earthy taste.
- Swap the graham crust for a cookie crust for a fun change.
Dietary Adaptations
- Gluten-free: Use gluten-free cookies for the crust.
- Dairy-free: Substitute cream cheese with dairy-free options.
- Vegan: Use vegan cream cheese and whipped coconut cream.
- Low-carb/keto: Replace sugar with a low-carb sweetener.
Storage and Reheating
Refrigerator
Store leftovers in an airtight container in the fridge for up to 3 days.
- Keep them covered to prevent them from drying out.
Freezer
You can freeze these cups for up to 2 months.
- Wrap each cup tightly in plastic wrap and foil to prevent freezer burn.
Reheating
Thaw in the refrigerator overnight before serving. Enjoy cold for the best texture.
Nutrition Information
| Nutrient | Amount |
|---|---|
| Calories | 220 |
| Total Fat | 18g |
| Saturated Fat | 10g |
| Carbohydrates | 15g |
| Fiber | 0g |
| Sugar | 10g |
| Protein | 3g |
| Sodium | 150mg |
| Cholesterol | 50mg |
This information is approximate and can vary based on specific ingredients used.
Frequently Asked Questions
Can I make these cheesecake cups ahead of time?
Absolutely! They can be made a day in advance, just keep them chilled until serving.
What can I substitute for whipped cream?
You can use a whipped topping or even Greek yogurt for a tangy twist.
How long can I store these cheesecake cups?
Store them in the fridge for up to 3 days, or freeze for up to 2 months.
Why is my cheesecake filling not setting?
This could be due to not chilling long enough; be patient for the flavors to meld.
Can I add flavors to the cheesecake?
Yes! Feel free to experiment with different extracts or mix-ins like chocolate chips.
Final Thoughts
Making these cheesecake cups is a delightful experience that rewards you with a delicious treat. I encourage you to try this recipe and share it with friends and family; they will be asking for seconds.
For more creative dessert ideas, be sure to check out my banana cheesecake recipe and churro cheesecake recipe. Happy baking!
Cheesecake Cup Recipe
Ingredients
Equipment
Method
- Choose your favorite small cups or dessert glasses.
- In a bowl, combine graham cracker crumbs and melted butter.
- Evenly distribute the crust mixture into the bottom of each cup and press it down gently.
- In a separate bowl, beat the cream cheese, granulated sugar, and vanilla extract until smooth.
- In another bowl, whip the heavy whipping cream until soft peaks form.
- Gently fold the whipped cream into the cream cheese mixture.
- Spoon the cheesecake filling over the crust in each cup.
- Cover the cups with plastic wrap and refrigerate for at least 2 hours.