
Picture a warm gathering where the aroma of spices fills the air, and you’ll find yourself in the heart of South Africa with a delicious dish called Chakalaka. This vibrant vegetable relish is not just a side, but a celebration of flavors, perfect for adding a zesty kick to any meal. With its mix of tomatoes, peppers, and spices, Chakalaka is versatile, quick to prepare, and bursting with flavor, making it a staple at barbecues and family dinners alike.
Why You’ll Love This Recipe
Chakalaka is a fantastic addition for anyone looking to spice up their meals.
- Quick and easy to prepare, perfect for busy weeknights.
- Packed with vegetables, making it a nutritious choice.
- Versatile as a side or a topping for meats.
- Store leftovers for a delicious meal later.
- Great for meal prep and can be customized to your taste.
My Experience Making This Recipe
The first time I made Chakalaka, my kitchen transformed into a lively space filled with the scent of sautéing onions and garlic. The vibrant colors of the vegetables made it feel like a party on my stovetop.
When I served it alongside grilled chicken, the combination was a hit. Friends and family couldn’t get enough of the zesty flavor and its perfect balance of spice.
Recipe Overview
- Recipe Name: Chakalaka
- Servings: 4-6
- Prep Time: 15 minutes
- Cook Time: 20 minutes
- Total Time: 35 minutes
- Course: Side Dish
- Cuisine: South African
- Calories per Serving: 120
Equipment You Will Need
- Large skillet or frying pan
- Cooking spoon
- Chopping board
- Knife
- Measuring cups and spoons
Ingredients for Chakalaka
- 2 tablespoons vegetable oil
- 1 onion, finely chopped
- 2 cloves garlic, minced
- 1 green bell pepper, diced
- 1 red bell pepper, diced
- 2 carrots, grated
- 1 can (14 oz) chopped tomatoes
- 1 tablespoon curry powder
- 1 teaspoon paprika
- Salt and pepper to taste
- 1 can (15 oz) baked beans (optional)
Ingredient Notes and Substitutions
- Vegetable oil: Used for sautéing; olive oil can be a great substitute.
- Onion: Adds sweetness; shallots work well if you prefer a milder flavor.
- Bell peppers: Provide color and flavor; any color peppers can be used.
- Curry powder: A key flavor; garam masala can be a delicious alternative.
- Baked beans: Add heartiness and protein; omit if you prefer a lighter dish.
How to Make Chakalaka
Step 1: Heat the Oil
In a large skillet, heat the vegetable oil over medium heat. This will help sauté the vegetables evenly.
Step 2: Sauté the Onions and Garlic
Add the chopped onion and minced garlic to the pan. Cook until the onion is translucent, about 5 minutes, to develop a sweet base flavor.
Step 3: Add the Bell Peppers
Stir in the diced green and red bell peppers. Sauté for another 3-4 minutes until they soften.
Step 4: Incorporate the Carrots
Add the grated carrots to the mixture. This will enhance the dish’s texture and sweetness.
Step 5: Stir in the Tomatoes
Pour in the can of chopped tomatoes along with their juices. This will create a rich sauce.
Step 6: Season with Spices
Add the curry powder, paprika, salt, and pepper. Stir well to combine and let the flavors meld.
Step 7: Add Baked Beans (Optional)
If using, stir in the baked beans. This step adds heartiness to your Chakalaka.
Step 8: Simmer and Serve
Let the mixture simmer for 10 minutes, stirring occasionally. This allows all the flavors to deepen.
Pro Tip: Let your Chakalaka cool before storing; it tastes even better the next day!
Tips for the Best Chakalaka
- Use fresh vegetables for the best flavor and texture.
- Adjust the spice level by adding chili peppers if you like heat.
- Experiment with different vegetable combinations like zucchini or corn.
- For a richer flavor, consider adding a splash of vinegar or lemon juice.
- Make a larger batch to serve at gatherings; it’s always a crowd-pleaser.
Common Mistakes to Avoid
- Not sautéing the onions long enough can lead to a raw flavor.
- Skipping the spices means missing out on the dish’s character.
- Overcooking the vegetables can make them mushy instead of vibrant.
- Serving it too hot can mask the flavors; let it cool slightly first.
Serving Suggestions
Chakalaka shines as a side dish, but it can also be the star of your meal.
- Serve it alongside grilled meats or boerewors.
- Use it as a topping for barbecued chicken or burgers.
- Pair it with rice or pap for a traditional South African meal.
- Add it to wraps or sandwiches for a zesty twist.
Variations to Try
- Add diced potatoes for a heartier version.
- Incorporate lentils for extra protein and texture.
- Use sweet potatoes instead of carrots for a sweeter flavor.
- Mix in some chopped spinach or kale for added greens.
Dietary Adaptations
- Gluten-free: Naturally gluten-free; just check the beans.
- Dairy-free: This recipe is dairy-free as is.
- Vegan: Perfectly fits a vegan diet, full of plant goodness.
- Low-carb/Keto: Skip the baked beans to lower carbs.
Storage and Reheating
Refrigerator
Store cooled Chakalaka in an airtight container in the fridge.
- It will last for up to 5 days.
- Reheat gently on the stovetop or microwave.
Freezer
Chakalaka can be frozen for longer storage.
- Use a freezer-safe container or bag.
- It can be frozen for up to 3 months.
Reheating
Thaw overnight in the fridge before reheating.
- Reheat on the stovetop for best texture.
- Add a splash of water if it appears too thick.
Nutrition Information
| Nutrient | Amount |
|---|---|
| Calories | 120 |
| Total Fat | 5g |
| Saturated Fat | 0.5g |
| Carbohydrates | 18g |
| Fiber | 4g |
| Sugar | 5g |
| Protein | 3g |
| Sodium | 250mg |
| Cholesterol | 0mg |
This information is approximate and can vary based on specific ingredients used.
Frequently Asked Questions
Can I make Chakalaka ahead of time?
Yes, Chakalaka tastes even better after sitting for a day, allowing the flavors to meld.
What can I substitute for curry powder?
Garam masala is a great alternative that offers a similar depth of flavor.
How do I store leftovers?
Store in an airtight container in the fridge for up to 5 days or freeze for longer storage.
Why is my Chakalaka too watery?
Make sure to let it simmer long enough to reduce the liquid. You can also add a bit of tomato paste to thicken it.
Can I add meat to Chakalaka?
Absolutely! Ground beef or chicken can be added for a heartier dish.
Final Thoughts
Chakalaka is more than just a relish; it’s a flavorful addition to your culinary repertoire. Give this delightful dish a try, and you might find it becoming a weekly favorite.
For more delicious recipes, check out my Vegetable Chakalaka Recipe and learn about the traditional Chakalaka from South Africa.
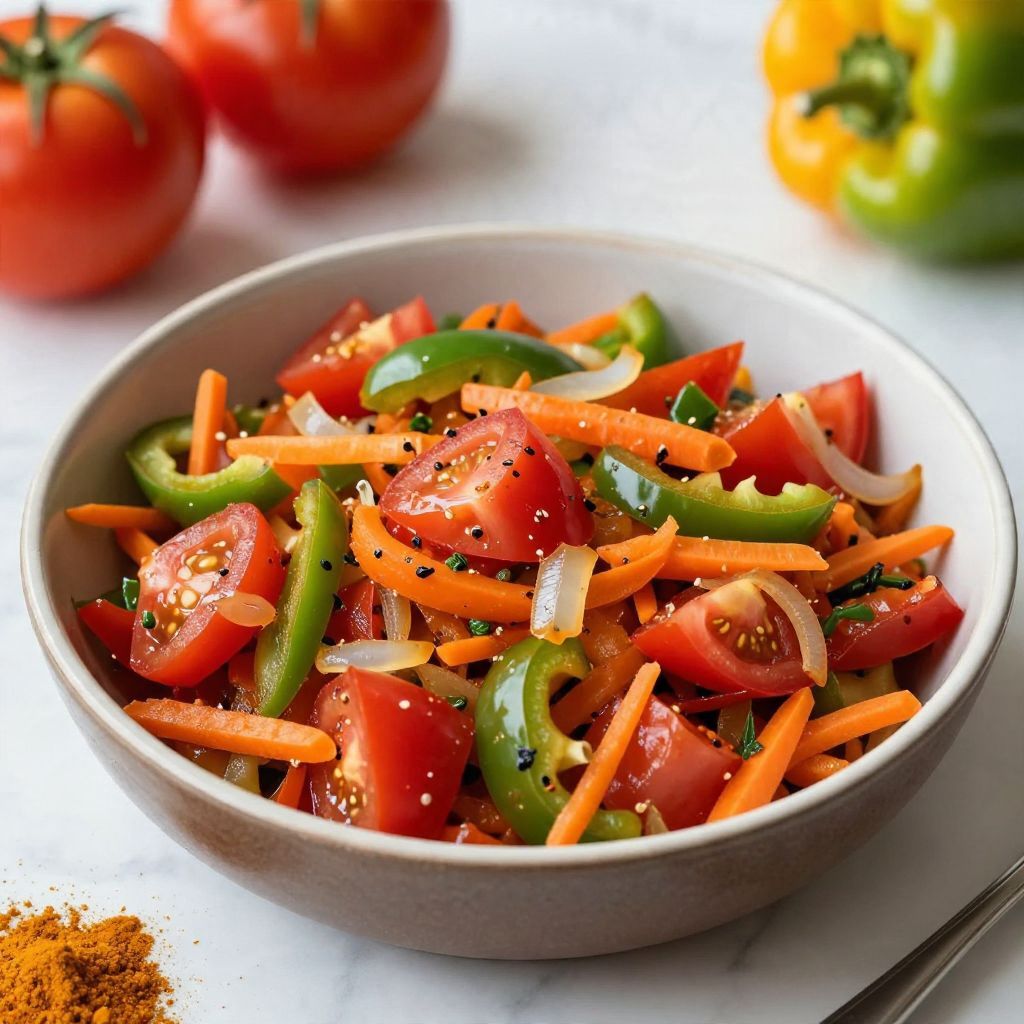
Chakalaka
Ingredients
Equipment
Method
- In a large skillet, heat the vegetable oil over medium heat.
- Add the chopped onion and minced garlic to the pan. Cook until the onion is translucent, about 5 minutes.
- Stir in the diced green and red bell peppers. Sauté for another 3-4 minutes until they soften.
- Add the grated carrots to the mixture.
- Pour in the can of chopped tomatoes along with their juices.
- Add the curry powder, paprika, salt, and pepper. Stir well to combine and let the flavors meld.
- If using, stir in the baked beans.
- Let the mixture simmer for 10 minutes, stirring occasionally.