
The sweet aroma of canned pears bubbling away on the stove brings back memories of cozy afternoons spent with family. This Canned Pears Recipe is not just about preserving fruit; it’s about creating delicious, tender pears that can elevate any dish or be enjoyed straight from the jar. With a syrupy sweetness and a tender texture, these pears are perfect for snacking, baking, or adding to salads. Let’s gather our ingredients and get started!
Why You’ll Love This Recipe
This recipe is a delightful way to savor seasonal fruit all year long.
- Simple process with just a few ingredients.
- Perfect for preserving fresh, juicy pears.
- Versatile for desserts, salads, or standalone snacks.
- Great way to reduce food waste.
- Enjoy the taste of summer, even in winter!
My Experience Making This Recipe
I remember the first time I canned pears; it was a sunny Saturday afternoon, and the kitchen filled with sweet scents. My family gathered around, eagerly waiting to taste the fruits of our labor, and the smiles on their faces were priceless.
Each jar was a burst of summer flavor that lasted well into the colder months. It felt rewarding to know we had preserved something so delicious and healthy together.
Recipe Overview
- Recipe Name: Canned Pears
- Servings: 4 pint jars
- Prep Time: 20 minutes
- Cook Time: 30 minutes
- Total Time: 50 minutes
- Course: Dessert / Snack
- Cuisine: American
- Calories per Serving: 120
Equipment You Will Need
- Canning jars with lids
- Large pot for boiling
- Jar lifter
- Funnel
- Peeler
- Knife and cutting board
- Measuring cups
Ingredients for Canned Pears
- Pears – 8 medium, ripe but firm
- Sugar – 1 cup
- Water – 4 cups
- Lemon juice – 1/4 cup
- Optional spices – cinnamon sticks or vanilla bean
Ingredient Notes and Substitutions
- Pears: Essential for sweetness and texture. You can substitute with peaches if you prefer.
- Sugar: Used for sweetness and preservation. You can use honey or a sugar substitute, but it may alter the flavor slightly.
- Water: Serves as the base for syrup. You can use fruit juice for a more flavorful syrup.
- Lemon juice: Prevents browning. Vinegar can be used as an alternative.
- Optional spices: Enhance flavor. Feel free to mix in nutmeg for a twist.
How to Make Canned Pears
Step 1: Prepare the Jars
Start by sterilizing your canning jars and lids. This prevents bacterial growth and ensures your pears stay fresh longer.
Step 2: Peel and Slice the Pears
Peel the pears and slice them into halves or quarters. This helps them fit better in the jars and makes for easier eating later.
Step 3: Make the Syrup
In a large pot, combine water and sugar, then heat until the sugar dissolves. This syrup will enhance the pears’ sweetness and preserve them.
Step 4: Add Lemon Juice
Stir in the lemon juice into the syrup. This will help maintain the beautiful color of the pears and add a slight tang.
Step 5: Pack the Pears
Carefully pack the pear slices into the hot sterilized jars. Leave about half an inch of headspace to allow for expansion during processing.
Step 6: Fill with Syrup
Pour the hot syrup over the pears in each jar, ensuring they are completely submerged. This keeps the pears from discoloring and adds flavor.
Step 7: Seal the Jars
Wipe the rims of the jars with a clean cloth to ensure a proper seal. Place the sterilized lids on top and screw on the metal bands until they are fingertip tight.
Step 8: Process the Jars
Process the jars in a boiling water bath for about 20 minutes. This ensures the jars seal properly and kills any potential bacteria.
Pro Tip: Always check the seals after processing; jars should be concave and not pop when pressed.
Tips for the Best Canned Pears
- Use ripe pears, but not overly soft, for the best texture.
- Experiment with spices in the syrup for unique flavors.
- Make sure jars and lids are properly sterilized to prevent spoilage.
- Keep your processing time accurate to ensure a good seal.
- Store jars in a cool, dark place for optimal longevity.
Common Mistakes to Avoid
- Not sterilizing jars: This can lead to spoilage.
- Overpacking the jars: Leave headspace to allow for expansion.
- Using overripe pears: They can become mushy during processing.
- Skipping the water bath: This is essential for sealing the jars properly.
- Not checking seals: A loose lid means your pears will not keep.
Serving Suggestions
Canned pears can be enjoyed in various ways, adding a touch of sweetness to any meal. Here are some delightful pairings:
- Serve over vanilla ice cream for a simple dessert.
- Add to salads for a sweet crunch.
- Use in baking to make pear tarts or pies.
- Pair with cheese for a delicious appetizer.
- Blend into smoothies for added sweetness and nutrition.
Variations to Try
- Use honey instead of sugar for a natural sweetener.
- Add a splash of brandy for a gourmet twist.
- Incorporate ginger for a spicy kick.
- Try different spices like cardamom for a unique flavor profile.
- Mix in citrus zest for a refreshing taste.
Dietary Adaptations
- Gluten-Free: This recipe is naturally gluten-free.
- Dairy-Free: No dairy is used, making it suitable for all diets.
- Vegan/Vegetarian: Suitable for both diets without any modifications.
- Low-Carb/Keto: Use sugar substitutes to create a low-carb version.
Storage and Reheating
Refrigerator
Once opened, store canned pears in the refrigerator. They are best consumed within a week.
- Transfer to an airtight container.
- Label with the date opened for reference.
Freezer
If you have excess pears, you can freeze them before canning. However, the texture may change.
- Place in freezer-safe bags or containers.
- Label and date them for easy identification.
Reheating
Reheat canned pears in a saucepan over low heat. This warms them while maintaining their texture.
- Add a splash of syrup for added flavor.
- Microwave in short intervals if desired.
Nutrition Information
| Nutrient | Amount |
|---|---|
| Calories | 120 |
| Total Fat | 0g |
| Saturated Fat | 0g |
| Carbohydrates | 30g |
| Fiber | 2g |
| Sugar | 24g |
| Protein | 1g |
| Sodium | 0mg |
| Cholesterol | 0mg |
This nutritional information is approximate and may vary based on specific ingredients used.
Frequently Asked Questions
Can I substitute another fruit for pears?
Yes, you can substitute peaches or apples, but the flavor and texture will differ.
How long can I store canned pears?
When sealed properly, they can last up to a year in a cool, dark place.
Can I make this recipe ahead of time?
Absolutely! Canned pears can be made ahead and stored for later use.
What should I do if my jars do not seal?
If jars do not seal, you can reprocess them or store them in the refrigerator and consume within a week.
Can I use less sugar?
Yes, but reducing sugar may affect flavor and preservation; consider using sugar substitutes.
Final Thoughts
Making your own canned pears is rewarding and a wonderful way to savor fresh flavors all year long. Once you try this recipe, you’ll want to keep your pantry stocked with these delightful treats.
Explore more delicious ideas like canned peaches or try baking a classic pear pie for your next dessert adventure!
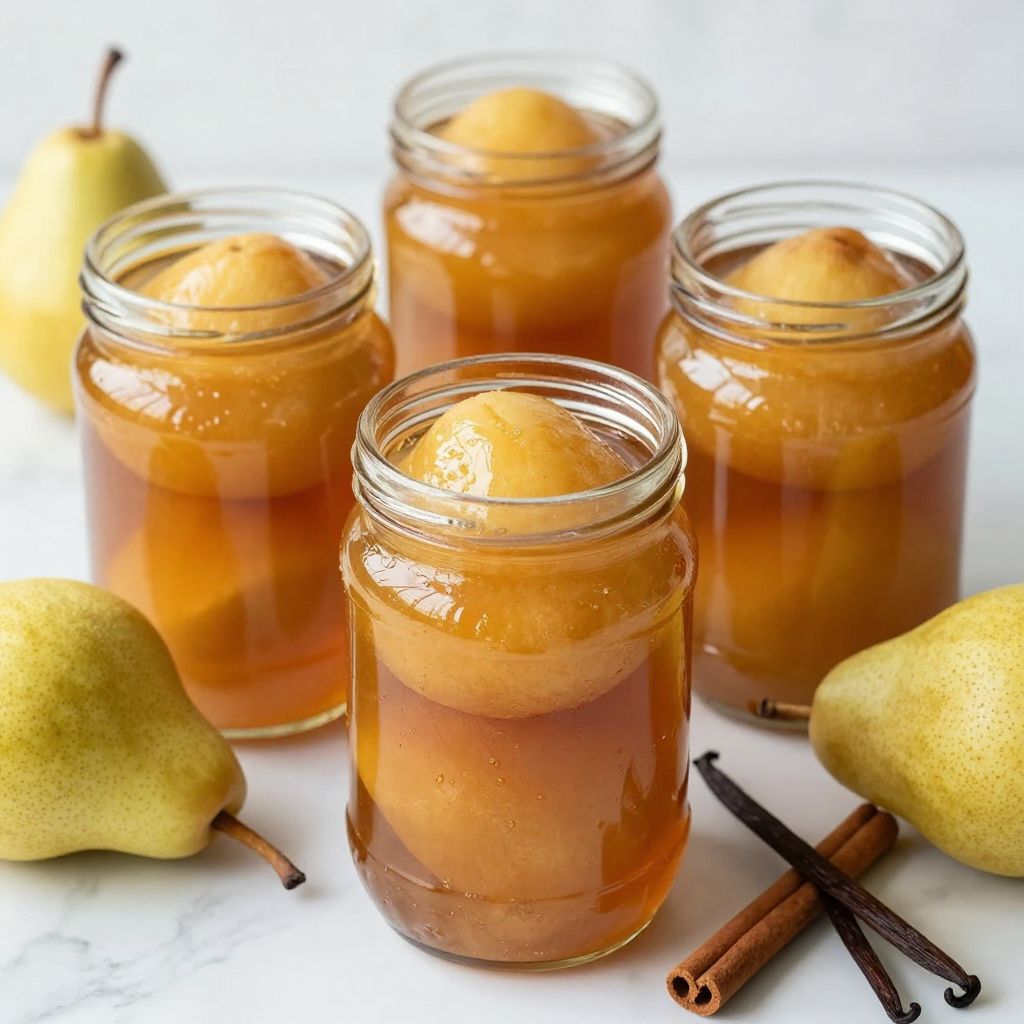
Canned Pears
Ingredients
Equipment
Method
- Sterilize your canning jars and lids.
- Peel the pears and slice them into halves or quarters.
- In a large pot, combine 4 cups of water and 1 cup of sugar, then heat until the sugar dissolves.
- Stir in 1/4 cup of lemon juice into the syrup.
- Carefully pack the pear slices into the hot sterilized jars, leaving half an inch of headspace.
- Pour the hot syrup over the pears in each jar, ensuring they are completely submerged.
- Wipe the rims of the jars with a clean cloth, place the sterilized lids on top, and screw on the metal bands until they are fingertip tight.
- Process the jars in a boiling water bath for about 20 minutes.
- Check the seals after processing; jars should be concave and not pop when pressed.