
There’s something magical about watching a handful of dried beans transform into crispy, tender sprouts right on your kitchen counter. Bean sprouts are one of those ingredients that feels restaurant-fancy but tastes even better when you’ve grown them yourself at home.
This recipe celebrates the natural crunch and fresh, delicate flavor of homegrown sprouts without fussy techniques or special equipment. Whether you’re looking for a quick side dish, a salad topper, or a stir-fry star, bean sprouts deliver texture and nutrition in minutes. They’re versatile, affordable, and packed with vitamins that you simply won’t find in their dried form.
Let me walk you through sprouting your own beans and turning them into something genuinely delicious.
Why You’ll Love This Recipe
Bean sprouts offer more than just crunch and nutrition; they bring a fresh, almost grassy brightness to any dish you add them to. This recipe teaches you the sprouting process so you can have a constant supply of living, nutrient-dense vegetables at home.
- Ready to harvest in just 3 to 5 days with minimal effort
- Packed with enzymes, vitamins, and minerals that skyrocket during sprouting
- One small batch feeds multiple meals or serves four to six people as a side
- Works with mung beans, alfalfa, broccoli seeds, or any sproutable legume
- Costs pennies compared to store-bought sprouts
My Experience Making This Recipe
The first time I sprouted beans at home, I honestly couldn’t believe how simple it was. I used a mason jar and cheesecloth, and by day three I had fresh, crunchy sprouts that tasted miles better than anything vacuum-sealed in plastic.
What surprised me most was how quickly they appeared and how much my kids enjoyed watching the transformation happen. They’d check the jar every morning, excited to see new shoots emerging, and suddenly vegetables felt like a fun science experiment instead of something I had to negotiate with them to eat.
I now keep a rotating sprouting jar going constantly, harvesting one batch while starting another. The texture stays perfectly crisp when you rinse them daily, and that fresh, alive quality makes them irresistible in salads, on tacos, or tossed into hot broth at the last second.
Recipe Overview
- Recipe Name: Homemade Bean Sprouts
- Servings: 4 to 6 people (from one sprouting batch)
- Prep Time: 5 minutes
- Sprouting Time: 3 to 5 days
- Total Time: 3 to 5 days
- Course: Side Dish, Salad Topper, Stir-Fry Base
- Cuisine: Asian-Inspired, Healthy
- Calories per Serving: 30 calories (for mung bean sprouts, 1 cup raw)
Equipment You Will Need
- One wide-mouth mason jar (quart-sized or larger)
- Cheesecloth, fine mesh screen, or sprouting lid
- Rubber band or jar ring
- Filtered or dechlorinated water
- A shelf or counter space away from direct sunlight
- A colander or fine-mesh strainer for rinsing
Ingredients for Bean Sprouts
- Mung beans, alfalfa seeds, broccoli seeds, or lentils: 2 to 3 tablespoons per jar (seeds expand significantly)
- Filtered water: for rinsing and soaking
Ingredient Notes and Substitutions
- Mung beans: The classic choice for sprouting; they grow quickly with a mild, slightly sweet flavor and satisfying crunch. Try lentils if you want denser, earthier sprouts with a firmer texture.
- Alfalfa seeds: Produce delicate, feathery sprouts with a peppery bite and are packed with nutrients. Broccoli seeds work similarly and offer a slightly sharper flavor if you want something more assertive.
- Filtered water: Removes chlorine and impurities that can slow sprouting or introduce unwanted bacteria. Tap water works in a pinch, but letting it sit uncovered overnight allows chlorine to evaporate.
How to Make Bean Sprouts
Step 1: Choose and Measure Your Seeds
Start by selecting high-quality sprouting seeds or beans from a reputable source, since you’re eating them raw. Pour 2 to 3 tablespoons of your chosen variety into a clean mason jar; they’ll expand to fill most of the jar by day three.
Step 2: Rinse the Seeds
Fill the jar halfway with cool filtered water and swirl the seeds around for a few seconds. Drain through cheesecloth or a sprouting lid, discarding any debris or damaged seeds that float to the surface.
Step 3: Soak Overnight
Add fresh filtered water to cover the seeds by about an inch, then cover the jar with cheesecloth secured by a rubber band. Let them soak at room temperature for 8 to 12 hours; soaking awakens the sprouting enzymes and softens the seed coat.
Step 4: Drain and Rinse
After soaking, drain all water through the cheesecloth, letting gravity do the work rather than agitating the seeds. Give the jar a gentle shake so excess water drains completely; any standing water invites mold or rot.
Step 5: Set Up Your Sprouting Station
Place the drained jar on a shelf or counter away from direct sunlight, tilted at a slight angle so air can circulate and any remaining moisture can drip away. A windowsill works perfectly, or any spot that stays between 65 and 75 degrees Fahrenheit.
Step 6: Rinse Daily for Three to Five Days
Every morning and evening, fill the jar with cool filtered water, swirl gently, and drain it all out through the cheesecloth. This removes metabolic waste, prevents mold growth, and keeps the sprouts hydrated; you’ll start seeing tiny white shoots emerge by day two.
Step 7: Monitor Growth and Watch for Tail Development
By day three, most mung bean sprouts show distinct white tails about a quarter-inch long, while their heads stay creamy and pale. Continue rinsing twice daily until the tails reach about half an inch to an inch long, depending on your texture preference.
Step 8: Finish with Light Exposure (Optional)
If you want sprouts with a hint of green color and extra chlorophyll, place the jar in indirect natural light for the final 8 to 12 hours of sprouting. Skip this step if you prefer pure white, tender sprouts; the choice is entirely yours and doesn’t affect flavor or nutrition significantly.
Step 9: Final Rinse and Harvest
Rinse the sprouts one last time, drain thoroughly, and spread them on a clean paper towel or cheesecloth to dry slightly before storage. Pat them gently to remove excess moisture, which keeps them fresh longer and prevents clumping in the refrigerator.
Pro Tip: Start a second jar of seeds on day two, so you always have a fresh batch ready to harvest just as the current one runs out. This rotating system means you’ll never be without homegrown sprouts and you’ll build confidence with the technique quickly.
Tips for the Best Bean Sprouts
- Use filtered water or let tap water sit uncovered overnight; chlorine slows sprouting and can introduce unwanted flavors or bacteria.
- Keep your jar tilted after draining so air flows freely and moisture doesn’t trap inside, which is the number one cause of mold.
- Rinse consistently twice daily without fail; one missed rinse can lead to smelly, spoiled batches.
- Don’t pack too many seeds into one jar; overcrowding blocks air circulation and leads to uneven sprouting or rot.
- If you notice any pink or fuzzy mold, discard the entire batch immediately and sterilize your jar with hot water before starting again.
- Harvest when sprouts reach your preferred size; longer tails mean more developed flavor but less delicate texture.
Common Mistakes to Avoid
- Using tap water without treatment can introduce chlorine, which inhibits sprouting and gives sprouts a bitter taste.
- Failing to drain water completely after rinsing creates a humid environment where mold thrives and sprouts turn slimy.
- Keeping the jar in bright sunlight prematurely causes sprouts to turn green and develop a slightly bitter edge before they’re ready.
- Skipping rinses or rinsing less frequently leads to bacterial growth and a sour, funky smell that ruins the batch.
- Buying old seeds that have lost viability results in poor germination rates and a frustrating, failed sprouting experience.
Serving Suggestions
Fresh bean sprouts are incredibly versatile and shine in both hot and cold applications. Toss them into dishes at the very end of cooking so they keep their delicate crunch, or pile them raw onto sandwiches, salads, and grain bowls.
- Stir into hot ramen, pho, or miso soup just before serving so they wilt slightly but stay crisp
- Top fresh spring rolls or lettuce wraps for extra crunch and a clean, grassy flavor
- Scatter over grain bowls with quinoa, roasted vegetables, and your favorite sauce
- Mix into slaw or salads with a vinaigrette dressing for a texture contrast
- Use as a filling in tacos, banh mi sandwiches, or Asian-style wraps
Variations to Try
- Mixed sprout blend: Combine mung beans with alfalfa seeds and broccoli seeds in one jar for varied textures and flavors; they all sprout at similar rates and create a visually interesting mix.
- Lentil sprouts: Use green or brown lentils for earthier, denser sprouts with a nuttier flavor; they take one to two days longer but offer more substance in salads.
- Radish sprouts: These peppery little powerhouses sprout quickly and pack a spicy kick perfect for tacos or Asian noodle dishes.
- Sesame-flavored sprouts: Toss finished sprouts with a light drizzle of sesame oil, soy sauce, and a pinch of sesame seeds for an umami-rich side dish.
- Spicy stir-fried sprouts: Heat oil in a wok, add sprouts with garlic and red chili flakes, and toss for 30 seconds just until they warm through but stay mostly raw and crisp.
Dietary Adaptations
- Gluten-free: All sprouts are naturally gluten-free; no substitutions needed.
- Dairy-free: Bean sprouts contain no dairy whatsoever; enjoy them confidently on any dairy-free diet.
- Vegan: Sprouts are plant-based and work perfectly in vegan cooking; they’re an excellent source of plant protein and enzymes.
- Low-carb/Keto: One cup of raw mung bean sprouts contains only 6 grams of carbs and 3 grams of fiber, making them ideal for low-carb diets.
- Nut-free: Sprouts are legume or seed-based and contain no tree nuts or peanuts, so they’re safe for nut-allergic individuals.
Storage and Reheating
Refrigerator
Store harvested sprouts in an airtight container lined with paper towels to absorb excess moisture. They’ll keep fresh and crisp for up to one week, though flavor and nutritional value peak within the first three days.
- Pat sprouts dry before storing to prevent mold growth
- Change the paper towels daily if they absorb moisture
- Use older sprouts first in cooked dishes where texture matters less
Freezer
Freezing isn’t ideal since sprouts lose their signature crunch and turn mushy when thawed. If you must freeze them, blanch them briefly in boiling water, cool in ice water, pat dry, and store in freezer bags for up to two months.
- Use frozen sprouts only in cooked dishes like soups or stir-fries
- Add them directly to hot dishes without thawing
Reheating
Fresh sprouts are best eaten raw or added to hot dishes at the very end. If you have leftover cooked sprout dishes, reheat gently in a skillet or microwave until just warmed through, about one to two minutes.
- Never boil sprouts as a reheating method; they’ll turn into mush
- Add them to hot broth or soup in the last 30 seconds before serving
Nutrition Information
| Nutrient | Amount |
|---|---|
| Calories | 30 |
| Total Fat | 0.2 g |
| Saturated Fat | 0.05 g |
| Carbohydrates | 6 g |
| Fiber | 3 g |
| Sugar | 1.2 g |
| Protein | 3.2 g |
| Sodium | 6 mg |
| Cholesterol | 0 mg |
Nutrition values are approximate and based on one cup of raw mung bean sprouts. Values vary slightly depending on the sprouting duration and seed variety used.
Frequently Asked Questions
Can I sprout seeds that aren’t labeled as sprouting seeds?
No, you should only use seeds labeled specifically for sprouting; garden seeds and bulk seeds may be treated with fungicides or other chemicals unsafe for raw consumption. Always buy from reputable sprouting suppliers to ensure safety and high germination rates.
What if my sprouts smell bad or look slimy?
Discard the entire batch immediately, as this signals bacterial contamination or mold growth that can cause illness. Sterilize your jar, start fresh, and focus on draining water completely after each rinse to prevent this issue.
Can I eat the small round seed hull that stays attached?
Yes, the hulls are completely edible and nutritious, though some people find them slightly bitter or prefer to rinse them away. If hulls bother you, gently rub the rinsed sprouts between your hands while running water over them; many hulls will float off and drain away.
How do I know when sprouts are ready to eat?
Sprouts are ready when the white tail is about half an inch to one inch long and the body feels firm and crisp, typically three to five days in. Taste one; if it has a fresh, slightly sweet flavor with good crunch, your batch is ready to harvest and eat.
Why do some seeds never sprout in my jar?
Old seeds, seeds treated with chemicals, or seeds kept in overly humid conditions lose viability and won’t germinate. Buy fresh sprouting seeds from suppliers with high turnover, store them in a cool dry place, and always soak before sprouting to maximize germination rates.
Can I use the same jar for different types of seeds without cleaning between batches?
It’s better to clean and dry the jar thoroughly between batches to avoid cross-contamination and ensure each seed variety sprouts at its ideal pace. Quick rinses with hot water are fine, but a full wash prevents flavor transfer and mold issues.
Final Thoughts
Growing your own bean sprouts at home transforms how you think about fresh vegetables and nutrition. You’ll save money, reduce packaging waste, and always have crisp, alive sprouts ready to elevate salads, soups, and sandwiches.
Start with just one small jar of mung beans and watch what grows; within days you’ll have a harvest that tastes fresher and more vibrant than anything you’ve bought at a store. Once you see how simple and rewarding the process is, you’ll likely find yourself starting multiple jars and sharing your bounty with friends and family.
If you’re looking for other fresh, sprouted, or bean-based recipes to complement your new homegrown sprouts, explore our escarole and beans recipe for a warm, hearty side dish that pairs beautifully with fresh sprouts on the side. You might also enjoy our Din Tai Fung green bean recipe for an Asian-inspired vegetable dish that works wonderfully with crispy homegrown sprouts stirred in at the last moment.
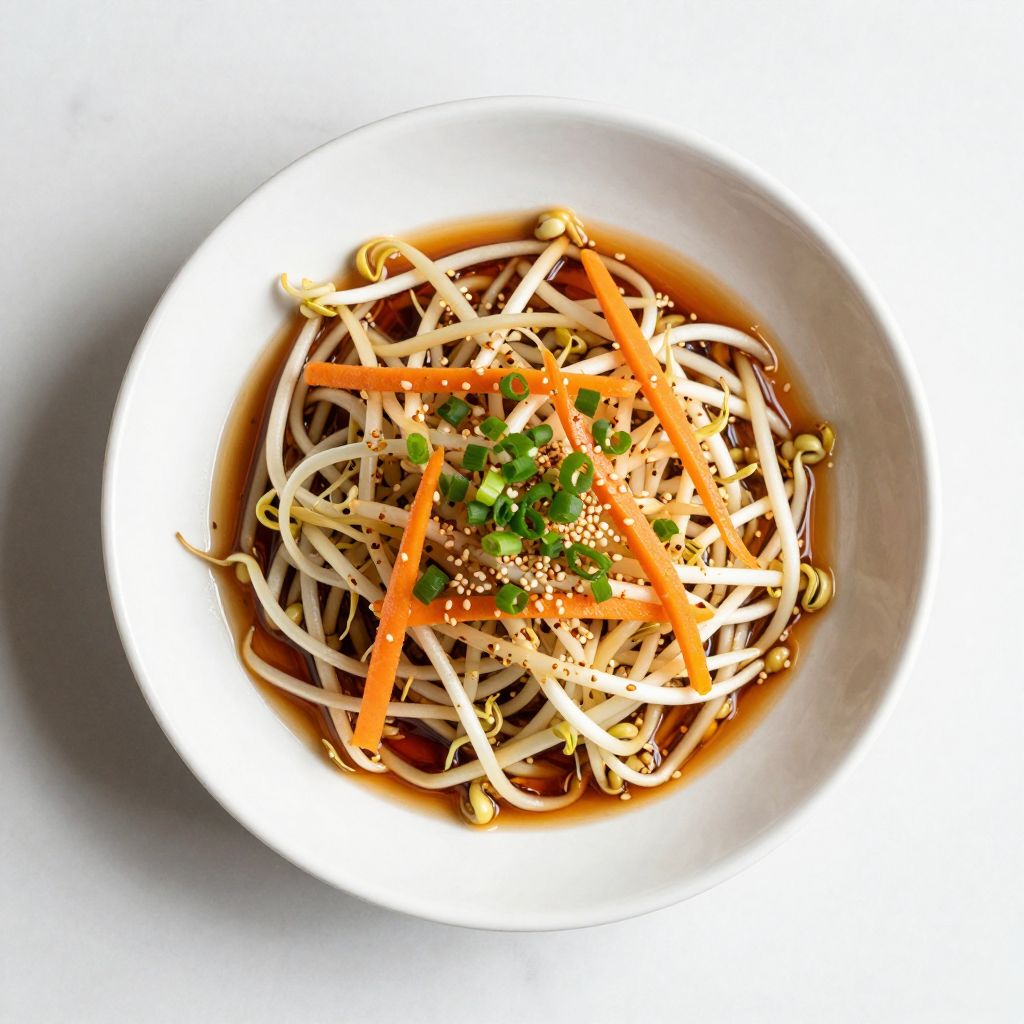
Homemade Bean Sprouts
Ingredients
Equipment
Method
- Measure 2 to 3 tablespoons of your chosen sprouting seeds and pour into a clean wide-mouth mason jar.
- Rinse the seeds by filling the jar halfway with cool filtered water, swirling gently, then draining through cheesecloth or a sprouting lid.
- Cover the seeds with fresh filtered water by about one inch, secure the jar with cheesecloth and a rubber band, and soak at room temperature for 8 to 12 hours.
- After soaking, drain all water through the cheesecloth, then gently shake the jar to remove excess moisture and prevent mold.
- Place the jar tilted at a slight angle on a shelf or counter away from direct sunlight, allowing air to circulate and water to drip out.
- Rinse the seeds twice daily (morning and evening): fill the jar with cool water, swirl gently, and drain completely.
- Continue rinsing daily for 3 to 5 days until white tails reach 1/2 to 1 inch long, checking growth and removing any floating debris.
- Optional: For a hint of green, place the jar in indirect natural light for the final 8 to 12 hours of sprouting.
- Give the sprouts a final rinse, drain thoroughly, then spread on a clean towel or paper towels to dry slightly before storing.