
There’s something magical about the creamy, luscious texture of fresh ricotta. Making your own at home not only elevates your dishes but also fills your kitchen with a comforting aroma that store-bought just can’t match.
This Homemade Ricotta Recipe is a delightful treat that’s both simple and rewarding. With just three ingredients, you’ll enjoy a fresh, rich flavor that’s perfect for spreading on toast or adding to pasta.
Why You’ll Love This Recipe
This ricotta recipe is a must-try for any cheese lover. It’s not only delicious but also incredibly versatile.
- Quick and easy to make with minimal ingredients.
- Freshness that elevates any dish.
- Customizable with herbs and spices.
- Perfect for both sweet and savory recipes.
- Great way to impress family and friends.
My Experience Making This Recipe
The first time I made ricotta, I was amazed at how simple it was. Watching the curds form and separate from the whey felt like a small miracle.
After letting it cool, I spread a generous dollop on warm bread, and the taste was out of this world. My family couldn’t believe I had made it from scratch!
Recipe Overview
- Recipe Name: Homemade Ricotta
- Servings: 2 cups
- Prep Time: 5 minutes
- Cook Time: 10 minutes
- Total Time: 15 minutes
- Course: Cheese
- Cuisine: Italian
- Calories per Serving: Approximately 300
Equipment You Will Need
- Large saucepan
- Cooking thermometer
- Wooden spoon
- Fine mesh strainer or cheesecloth
- Bowl for draining
Ingredients for Homemade Ricotta
- Whole milk – 4 cups
- Heavy cream – 1 cup
- White vinegar or lemon juice – 1/4 cup
- Salt – 1/2 teaspoon (optional)
Ingredient Notes and Substitutions
- Whole milk: This gives ricotta its creamy texture. You can use 2% milk, but the texture will be less rich.
- Heavy cream: Adds extra creaminess. You can substitute with half-and-half for a lighter version.
- White vinegar or lemon juice: This is the acid that curdles the milk. Apple cider vinegar makes a great substitute.
- Salt: Enhances flavor. You can omit it for a sweeter ricotta.
How to Make Homemade Ricotta
Step 1: Heat the Milk and Cream
Pour the whole milk and heavy cream into a large saucepan. Heat over medium heat, stirring occasionally until it reaches 190°F.
Step 2: Add the Acid
Once the milk mixture reaches temperature, remove it from heat. Stir in the white vinegar or lemon juice and let it sit for 10 minutes to allow curds to form.
Step 3: Prepare for Draining
While the curds are forming, line your fine mesh strainer with cheesecloth and place it over a bowl. This will catch the curds and let the whey drain away.
Step 4: Strain the Curds
After 10 minutes, gently pour the curdled mixture into the prepared strainer. Let it sit for about 5-10 minutes, depending on how wet you want your ricotta.
Step 5: Season the Ricotta
Once drained, transfer the ricotta to a bowl. If desired, stir in salt for added flavor.
Step 6: Cool and Store
Let the ricotta cool to room temperature. You can store it in an airtight container in the refrigerator for up to a week.
Step 7: Enjoy!
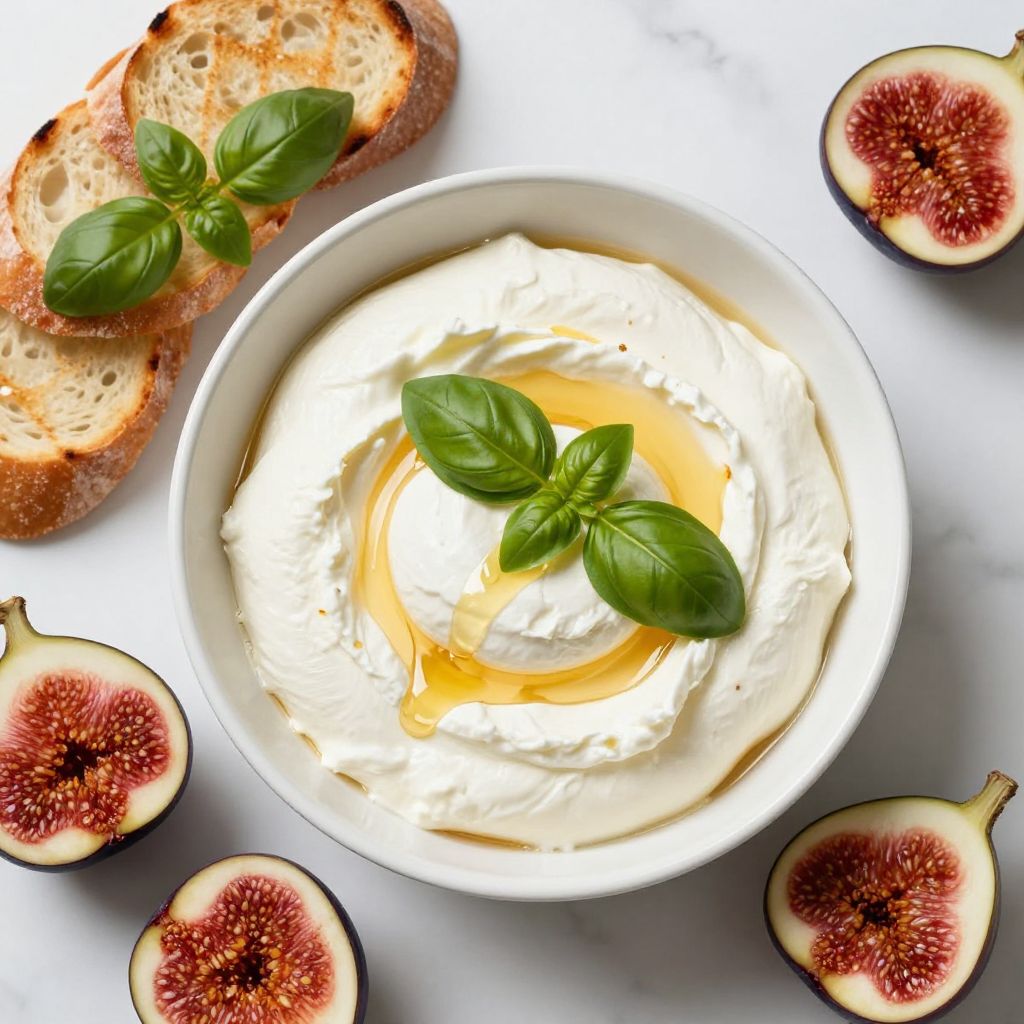
Use your homemade ricotta in your favorite recipes, or enjoy it fresh with a drizzle of honey and some fruit.
Step 8: Experiment
Feel free to mix in your favorite herbs or spices for a twist. Basil, chives, or even a pinch of nutmeg can create exciting variations!
Pro Tip: For an ultra-smooth texture, blend the ricotta with a little cream after draining.
Tips for the Best Homemade Ricotta
- Use good quality milk for the best flavor.
- Keep an eye on the temperature to avoid scorching the milk.
- Let the curds sit longer for a firmer texture.
- Don’t rush the draining process; this affects the moisture level.
- Experiment with flavors by adding herbs right after making it.
Common Mistakes to Avoid
- Not heating the milk enough: This prevents curd formation.
- Using low-fat milk: It results in a drier, less creamy ricotta.
- Skipping the draining step: Too much whey leaves you with runny ricotta.
- Overcooking the curds: This can make the ricotta grainy and tough.
Serving Suggestions
Fresh ricotta elevates any meal, whether sweet or savory. Try these pairing ideas:
- Spread on toasted baguette with honey and figs.
- Mixed into pasta dishes for creaminess.
- Layered in lasagna for added richness.
- Served with roasted vegetables or salads.
Variations to Try
- Add herbs like basil or thyme for a savory twist.
- Mix in grated lemon zest for a refreshing flavor.
- Incorporate spices like cinnamon or nutmeg for sweet dishes.
- Stir in garlic and olive oil for a Mediterranean dip.
Dietary Adaptations
- Gluten-free: This recipe is naturally gluten-free.
- Dairy-free: Use nut milk and a dairy-free thickener, but results may vary.
- Vegan: Substitute with tofu and nutritional yeast, though texture changes.
- Low-carb/keto: This ricotta is low in carbs due to minimal ingredients.
Storage and Reheating
Refrigerator
Store ricotta in an airtight container in the fridge. Enjoy within a week for the best quality.
- Keep it covered to prevent drying out.
- Label the container with the date made.
Freezer
You can freeze ricotta for longer storage. It may alter the texture but is still usable.
- Freeze in small portions for easy use later.
- Thaw in the refrigerator before using.
Reheating
To reheat, gently warm ricotta on the stove or in the microwave. Stir to restore creaminess.
- Microwave in short bursts to avoid overheating.
- Add a splash of cream if it seems dry.
Nutrition Information
| Nutrient | Amount |
|---|---|
| Calories | 300 |
| Total Fat | 22g |
| Saturated Fat | 14g |
| Carbohydrates | 6g |
| Fiber | 0g |
| Sugar | 4g |
| Protein | 16g |
| Sodium | 150mg |
| Cholesterol | 80mg |
This nutritional information is an estimate and may vary based on specific ingredients used.
Frequently Asked Questions
Can I use low-fat milk?
While you can, using low-fat milk results in a drier ricotta. Whole milk is recommended for creaminess.
Can I make ricotta ahead of time?
Yes, ricotta can be made a day in advance. Just store it in the fridge until you’re ready to use it.
How should I store leftover ricotta?
Keep it in an airtight container in the refrigerator. Use it within a week for the best quality.
Why is my ricotta grainy?
This can happen if the milk is overheated or curds are overcooked. Keep an eye on the temperature.
What can I add to ricotta for flavor?
Herbs, spices, and even sweeteners like honey can enhance its flavor. Get creative with your favorites!
Final Thoughts
Making your own ricotta is a delightful kitchen adventure that pays off deliciously. I encourage you to give this recipe a try; you might just find yourself never wanting to buy store-bought again.
For more delightful recipes, check out my whipped ricotta recipe or explore the creamy goodness of cottage cheese mousse!
Homemade Ricotta
Ingredients
Equipment
Method
- Pour the whole milk and heavy cream into a large saucepan. Heat over medium heat, stirring occasionally until it reaches 190°F.
- Once the milk mixture reaches temperature, remove it from heat. Stir in the white vinegar or lemon juice and let it sit for 10 minutes to allow curds to form.
- While the curds are forming, line your fine mesh strainer with cheesecloth and place it over a bowl.
- After 10 minutes, gently pour the curdled mixture into the prepared strainer. Let it sit for about 5-10 minutes, depending on how wet you want your ricotta.
- Once drained, transfer the ricotta to a bowl. If desired, stir in salt for added flavor.
- Let the ricotta cool to room temperature.
- Store it in an airtight container in the refrigerator for up to a week.
- Enjoy your homemade ricotta in your favorite recipes or fresh with honey and fruit.