
Picture this: a quick snack that is not only delicious but also packs a protein punch. These No Bake Protein Balls are a lifesaver for busy days, satisfying cravings while keeping your energy levels up. They’re chewy, nutty, and just sweet enough to feel like a treat without the guilt. Plus, they come together in minutes, making them perfect for meal prep or a post-workout boost. Let’s jump into how to whip up these little energy bites!
Why You’ll Love This Recipe
These protein balls are a delightful blend of flavor and convenience.
- Quick and easy to make with no baking required.
- Customizable with your favorite mix-ins.
- Perfect for meal prep and on-the-go snacking.
- Healthy alternative to store-bought snacks.
- Great for kids and adults alike!
My Experience Making This Recipe
Every time I make these protein balls, I’m amazed at how simple and satisfying they are. My kids love rolling them into little balls, which makes it a fun family activity.
They disappear quickly, so I find myself making a double batch more often than not. The combination of nut butter and oats creates a texture that is both chewy and hearty — you can’t just eat one!
Recipe Overview
- Recipe Name: No Bake Protein Balls
- Servings: 12 balls
- Prep Time: 15 minutes
- Cook Time: 0 minutes
- Total Time: 15 minutes
- Course: Snack
- Cuisine: American
- Calories per Serving: 100
Equipment You Will Need
- Mixing bowl
- Measuring cups and spoons
- Spatula or wooden spoon
- Baking sheet or plate
- Parchment paper (optional)
Ingredients for No Bake Protein Balls
- 1 cup rolled oats
- 1/2 cup nut butter (peanut, almond, or cashew)
- 1/3 cup honey or maple syrup
- 1/2 cup protein powder (vanilla or chocolate)
- 1/4 cup mini chocolate chips or dried fruit (optional)
- 1/2 teaspoon vanilla extract
Ingredient Notes and Substitutions
- Rolled oats: These provide a chewy texture and fiber. Quick oats can be used if that’s what you have on hand.
- Nut butter: It binds the ingredients and adds healthy fats. Sunflower seed butter is a great nut-free alternative.
- Honey or maple syrup: This sweetens the balls naturally. Agave syrup works as a vegan substitute.
- Protein powder: This boosts the protein content. You can skip it for a lower protein version.
- Mini chocolate chips or dried fruit: These add flavor and texture. Feel free to use nuts or seeds instead.
How to Make No Bake Protein Balls
Step 1: Gather Your Ingredients
Start by measuring out all your ingredients. This ensures you have everything on hand and makes mixing easier.
Step 2: Mix the Dry Ingredients
In a mixing bowl, combine the rolled oats, protein powder, and any dry mix-ins like chocolate chips or dried fruit. This helps distribute the flavors evenly before adding wet ingredients.
Step 3: Add the Nut Butter and Sweetener
Add the nut butter and honey (or maple syrup) to the dry mixture. This will create a sticky texture that holds everything together.
Step 4: Incorporate the Vanilla
Pour in the vanilla extract and mix everything thoroughly. Vanilla enhances the overall flavor profile of your protein balls.
Step 5: Mix Until Well Combined
Use a spatula or wooden spoon to stir until all ingredients are fully incorporated. It should be a thick, sticky mixture that forms a ball.
Step 6: Roll Into Balls
With your hands, take small portions of the mixture and roll them into balls about 1 inch in diameter. This is where the magic happens and you get to enjoy a little messy fun!
Step 7: Chill the Balls
Place the rolled balls on a baking sheet or plate lined with parchment paper. Chill in the refrigerator for at least 30 minutes to firm up.
Step 8: Store and Enjoy
Once chilled, transfer the protein balls to an airtight container. They are now ready for snacking anytime you need a quick energy boost!
Pro Tip: For a flavor twist, try adding a sprinkle of cinnamon or a tablespoon of chia seeds to the mixture!
Tips for the Best No Bake Protein Balls
- Use fresh ingredients, especially nut butter, for the best flavor.
- Adjust sweetness by adding more or less honey/maple syrup based on your taste.
- Chill the mixture for a few minutes before rolling for easier handling.
- Experiment with different protein powders to find your favorite flavor.
- Store in the fridge for optimal freshness; they last longer that way!
Common Mistakes to Avoid
- Not measuring your ingredients accurately can affect the texture.
- Using old or dry oats may lead to a less enjoyable chew.
- Skipping the refrigeration step can result in soft, crumbly balls.
- Overmixing can make the mixture too tough, leading to a hard texture.
- Neglecting to customize flavors means you miss out on fun variations.
Serving Suggestions
These protein balls make a great snack on their own, but they can pair wonderfully with other foods.
- Enjoy with a piece of fruit like an apple or banana for a balanced snack.
- Pair with yogurt for a wholesome breakfast or dessert.
- Serve alongside a smoothie for an extra protein boost.
- Add to a lunchbox for a healthy treat during the day.
Variations to Try
- Add coconut flakes for a tropical twist and added texture.
- Incorporate chia seeds for extra nutrition and crunch.
- Switch to peanut butter powder for a lower fat option.
- Use cocoa powder instead of protein powder for a chocolatey treat.
- Mix in nuts for added crunch and healthy fats.
Dietary Adaptations
- Gluten-free: Use certified gluten-free oats for this recipe.
- Dairy-free: Choose a plant-based protein powder and nut butter.
- Vegan: Replace honey with maple syrup or agave for a vegan-friendly option.
- Low-carb/Keto: Use a low-carb sweetener and adjust oats accordingly.
Storage and Reheating
Refrigerator
Store the protein balls in an airtight container in the refrigerator.
- They can last up to one week.
- Keep them separate with parchment paper to avoid sticking.
Freezer
To extend their shelf life, you can freeze the protein balls.
- Place them in a single layer in a freezer-safe container.
- They can last up to three months in the freezer.
Reheating
No need to reheat these; they are best enjoyed chilled or at room temperature.
- Just take out what you need and enjoy!
Nutrition Information
| Nutrient | Amount |
|---|---|
| Calories | 100 |
| Total Fat | 5g |
| Saturated Fat | 1g |
| Carbohydrates | 12g |
| Fiber | 2g |
| Sugar | 4g |
| Protein | 4g |
| Sodium | 50mg |
| Cholesterol | 0mg |
This nutritional information is approximate and can vary based on specific ingredients used.
Frequently Asked Questions
Can I use a different type of protein powder?
Absolutely! You can use any flavor you enjoy, just keep in mind it may alter the taste.
Can I make these ahead of time?
Yes, they store well in the fridge or freezer, making them perfect for meal prep!
How should I store them?
Keep them in an airtight container in the refrigerator for up to a week or freeze for up to three months.
What if my mixture is too dry?
If the mixture feels crumbly, add a bit more nut butter or honey until it holds together.
Can I add other flavors or ingredients?
Definitely! Feel free to experiment with spices, different nut butters, or even protein bars.
Final Thoughts
Making these No Bake Protein Balls has never been easier or more enjoyable. I encourage you to get creative and make them your own!
Snack smarter and explore more delightful recipes. Check out my protein cookies recipe and protein brownies recipe for more delicious options!
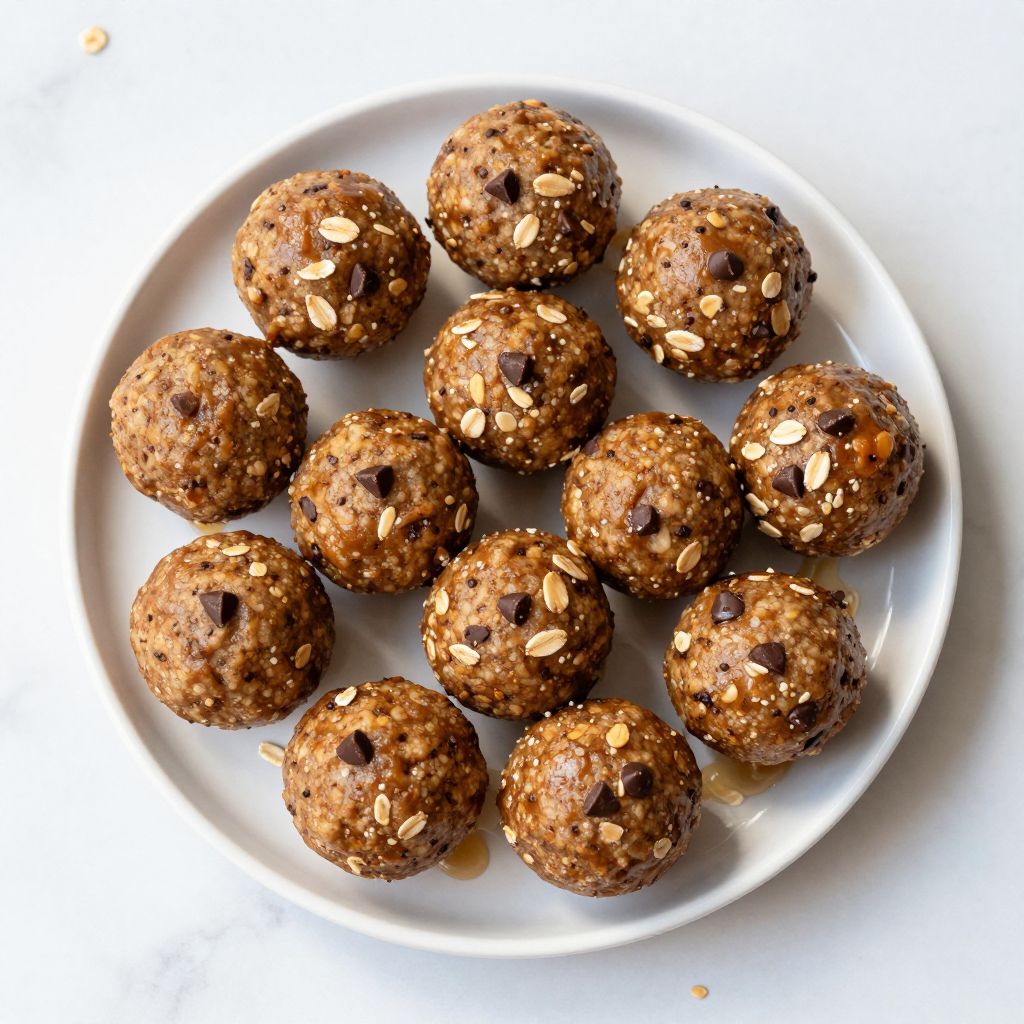
No Bake Protein Balls
Ingredients
Equipment
Method
- Measure out all your ingredients into a mixing bowl.
- In a mixing bowl, combine the rolled oats, protein powder, and any dry mix-ins like chocolate chips or dried fruit.
- Add the nut butter and honey (or maple syrup) to the dry mixture.
- Pour in the vanilla extract and mix everything thoroughly.
- Stir until all ingredients are fully incorporated.
- With your hands, take small portions of the mixture and roll them into 1-inch balls.
- Place the rolled balls on a baking sheet or plate lined with parchment paper.
- Chill in the refrigerator for at least 30 minutes.
- Once chilled, transfer the protein balls to an airtight container.