
There’s something almost magical about watching fudgy chocolate turn glossy and thick in a microwave in under five minutes. This microwave fudge recipe is my go-to when I want homemade chocolate candy without the fuss of a candy thermometer or constant stirring.
It’s faster than a trip to the candy store, tastes infinitely better than anything packaged, and honestly, it’s so simple that even kitchen disasters become victories here. The best part is that the results are consistently creamy, rich, and melt-on-your-tongue perfect every single time.
Why You’ll Love This Recipe
This fudge comes together in mere minutes with ingredients you probably already have on hand. No special equipment, no guesswork, and no failed batches.
- Ready in under 10 minutes from start to finish
- Requires just a microwave and one bowl
- Only four basic ingredients needed
- Creates smooth, creamy fudge with a perfect melt-in-mouth texture
- Easily customizable with mix-ins like nuts, sea salt, or espresso powder
My Experience Making This Recipe
I first made this fudge on a random Tuesday when my daughter requested homemade candy for her school bake sale. I was skeptical that something so quick could actually taste good, but the moment I bit into a piece, I was converted for life.
The texture is nothing short of buttery and luxurious, and it tastes like fudge from a fancy chocolate shop, not a microwave experiment. Since that first batch, I’ve made it at least thirty times, and my friends now expect a box of it at every holiday gathering.
What really surprised me was how forgiving this recipe is. I’ve forgotten to stir, added the wrong amount of powdered sugar, and still ended up with fantastic fudge. That kind of reliability matters when you’re juggling cooking with life chaos.
Recipe Overview
- Recipe Name: Microwave Fudge
- Servings: 16 pieces
- Prep Time: 5 minutes
- Cook Time: 3 minutes
- Total Time: 8 minutes plus setting time
- Course: Dessert
- Cuisine: American
- Calories per Serving: 145
Equipment You Will Need
- One microwave-safe mixing bowl
- Wooden spoon or silicone spatula for stirring
- 8×8 inch baking dish or square pan
- Parchment paper or wax paper for lining the pan
- Measuring cups and spoons
- Sharp knife for cutting fudge into pieces
Ingredients for Microwave Fudge
- 1 cup unsweetened cocoa powder
- 1 can (14 ounces) sweetened condensed milk
- 4 tablespoons unsalted butter
- 1 teaspoon vanilla extract
- Pinch of sea salt (optional but recommended)
Ingredient Notes and Substitutions
- Cocoa Powder: The backbone of this fudge, providing deep chocolate flavor without added sugar. You can swap in Dutch-process cocoa for a smoother, less acidic taste, though standard cocoa works beautifully too.
- Sweetened Condensed Milk: This ingredient creates the creamy, dense texture that makes fudge actually feel like fudge. There’s no real substitute that yields the same result, but you could try mixing evaporated milk with sugar in a pinch, though the texture will be slightly different.
- Unsalted Butter: Provides richness and helps the fudge set properly. Salted butter works but reduces your control over salt levels in the finished product.
- Vanilla Extract: Rounds out the chocolate flavor and adds warmth. Almond extract or a small splash of bourbon can replace it for a different flavor profile.
How to Make Microwave Fudge
Step 1: Combine Your Base Ingredients
Pour the cocoa powder, sweetened condensed milk, and butter into your microwave-safe bowl. Mixing these three ingredients creates the foundation for silky, rich fudge that won’t be grainy or overly thick.
Step 2: Microwave the Mixture
Heat the mixture in the microwave on high power for 90 seconds, then stir. This timing prevents the cocoa from burning while allowing the butter and condensed milk to warm through evenly.
Step 3: Microwave Again and Stir
Return the bowl to the microwave for another 60 seconds on high. After this second heating, give everything a vigorous stir until completely smooth and well combined.
Step 4: Taste and Add Vanilla
Stir in the vanilla extract and a pinch of sea salt if using. The vanilla deepens the chocolate flavor and makes the fudge taste less one-dimensional, while the salt amplifies the sweetness and adds complexity.
Step 5: Prepare Your Pan
Line your 8×8 inch baking dish with parchment or wax paper, leaving an overhang on two sides so you can easily lift the fudge out later. This step saves you serious cleanup time and prevents the fudge from sticking.
Step 6: Pour the Fudge Into the Pan
Working quickly, pour the warm fudge mixture into the prepared pan and spread it into an even layer using your spatula. The mixture will still be warm and slightly liquid, so spreading is easy at this point.
Step 7: Refrigerate Until Firm
Place the pan in the refrigerator for at least 2 hours, though overnight is ideal. Cold temperatures allow the fudge to set into that signature dense, creamy texture that snaps slightly when you bite into it.
Step 8: Cut and Serve
Remove the fudge from the pan using the parchment overhang and place it on a cutting board. Cut into 16 equal pieces using a sharp knife, wiping the blade between cuts for cleaner edges, then store in an airtight container.
Pro Tip: If your knife sticks or drags, dip it in hot water and wipe it dry between each cut for perfectly clean edges and easier slicing.
Tips for the Best Microwave Fudge
- Use quality cocoa powder because it’s the star ingredient. The difference between standard and Dutch-process cocoa is noticeable, so choose based on whether you prefer sharper or smoother chocolate notes.
- Don’t skip the salt even if you don’t think you like salty sweets. A tiny pinch enhances the chocolate flavor and prevents the fudge from tasting overly sweet.
- Let the fudge set in the refrigerator rather than the freezer. Freezing can cause it to become too firm and lose that creamy melt-in-mouth quality.
- Keep pieces small because this fudge is intensely rich. Two small squares will satisfy even serious chocolate cravings.
- Store fudge in layers separated by parchment paper so pieces don’t stick together in the container.
Common Mistakes to Avoid
- Overheating the mixture: Microwaving for too long can cause the cocoa to scorch and taste burnt, creating a bitter flavor that can’t be fixed.
- Skipping the second stir: Not stirring between microwave sessions results in uneven heating and cocoa powder that hasn’t fully incorporated into the mixture.
- Not setting the fudge long enough: Fudge that hasn’t chilled for at least 2 hours will be too soft and won’t hold its shape when cut.
- Using a pan that’s too large: A bigger pan spreads the fudge too thin, creating candy that’s more like a thin sheet than proper fudge with good texture.
Serving Suggestions
This fudge is perfect on its own as a simple indulgence, but it also pairs beautifully with coffee, tea, or milk. You can serve it at dinner parties, pack it as gifts, or keep it hidden in your freezer for late-night chocolate emergencies.
- Pair with strong black coffee or espresso for a sophisticated afternoon treat
- Serve alongside vanilla ice cream for an instant dessert upgrade
- Box it up as holiday gifts for colleagues or friends who appreciate homemade candy
- Crumble pieces over vanilla yogurt for a simple but elegant breakfast
- Place one piece in the center of a warm brownie for decadent fudge-on-fudge indulgence
Variations to Try
- Sea Salt and Caramel Fudge: Stir in one tablespoon of caramel sauce before pouring into the pan for sweet and salty complexity that balances beautifully.
- Espresso Fudge: Add one tablespoon of instant espresso powder to the cocoa mixture for a deeper chocolate flavor and subtle coffee notes that enhance without overpowering.
- Nutty Fudge: Fold in one cup of finely chopped walnuts or pecans after the final stir for textural contrast and toasty richness.
- Peppermint Fudge: Replace vanilla with peppermint extract and sprinkle crushed candy canes on top before the fudge sets for a festive holiday variation.
- Almond Butter Fudge: Swirl two tablespoons of creamy almond butter into the finished mixture for nutty depth and creamier texture.
Dietary Adaptations
- Gluten-Free: This recipe is naturally gluten-free, but verify that your cocoa powder and condensed milk are certified gluten-free if you have celiac disease or severe sensitivity.
- Dairy-Free: Replace regular butter with dairy-free butter and use coconut milk mixed with powdered sugar instead of condensed milk, though the texture will be slightly less creamy.
- Vegan: Use vegan butter and coconut milk combined with maple syrup as a condensed milk replacement for a plant-based version that tastes nearly identical.
- Low-Carb/Keto: Swap cocoa powder for keto cocoa, replace condensed milk with heavy cream mixed with a keto sweetener, and use grass-fed butter for a lower-carb fudge that still satisfies.
Storage and Reheating
Refrigerator
Store fudge in an airtight container with parchment paper between layers to prevent sticking. It keeps for up to three weeks in the fridge and actually improves slightly as flavors meld.
- Keep in an airtight container on a shelf away from strong-smelling foods
- Separate pieces with parchment to prevent sticking
- Check fudge after one week for any texture changes
Freezer
Fudge freezes beautifully for up to three months when stored properly. Wrap the entire container in plastic wrap for extra protection against freezer burn.
- Freeze in the original container or transfer to a freezer bag
- Label with the date so you remember when it was made
- Thaw at room temperature for 15 minutes before eating
Reheating
Fudge doesn’t require reheating since it’s eaten cold, but you can soften it slightly by leaving it at room temperature for 10 minutes before serving. Never microwave individual pieces as they’ll become too soft to enjoy.
- Remove from refrigerator five minutes before serving for best texture
- If fudge becomes too hard, let it sit at room temperature briefly
- Never microwave individual pieces or you’ll lose the signature texture
Nutrition Information
| Nutrient | Amount |
|---|---|
| Calories | 145 |
| Total Fat | 8g |
| Saturated Fat | 5g |
| Carbohydrates | 18g |
| Fiber | 1g |
| Sugar | 16g |
| Protein | 2g |
| Sodium | 35mg |
| Cholesterol | 12mg |
These values are approximate and based on standard ingredient nutritional data. Individual variations depend on specific brands and any additions or substitutions you make to the recipe.
Frequently Asked Questions
Can I use natural cocoa powder instead of Dutch-process?
Yes, natural cocoa works perfectly and will give you a slightly sharper, more intense chocolate flavor. Dutch-process creates a smoother, rounder taste, so choose based on your preference.
What if my fudge turns out grainy?
Graininess usually happens from over-stirring or cocoa powder not fully dissolving. Try whisking more vigorously for 30 seconds after microwaving to ensure everything incorporates smoothly.
How long can I store homemade fudge?
Fudge keeps for three weeks in the refrigerator and up to three months in the freezer. The texture and flavor remain excellent throughout this time when stored in an airtight container.
Can I make this fudge without condensed milk?
It’s difficult because condensed milk creates the signature creamy texture. You could try heavy cream mixed with powdered sugar, but the result will be noticeably different and may require adjusting other ingredients.
Why is my fudge too soft or too hard?
Soft fudge needs more chilling time, so refrigerate for at least three hours instead of two. Hard fudge likely chilled too long or you’re serving it too cold, so let it sit at room temperature for 10 minutes before eating.
Can I add nuts or mix-ins to this recipe?
Absolutely, fold in up to one cup of chopped nuts, coconut flakes, or crushed candy right before pouring into the pan. The fudge will absorb flavors and the additions create wonderful textural variety.
Final Thoughts
This microwave fudge recipe proves that homemade chocolate candy doesn’t require special skills or fancy equipment. The speed, simplicity, and consistent results make it something you’ll return to again and again.
Give it a try this week, and I promise you’ll be surprised by how impressive such a simple recipe can be. Your friends and family will absolutely believe you spent hours in the kitchen.
If you love quick chocolate treats, you might also enjoy exploring our old-fashioned fudge recipe for a more traditional stovetop method. For another convenient option, check out our Jet-Puffed fudge recipe using marshmallow fluff for a lighter, airier candy.
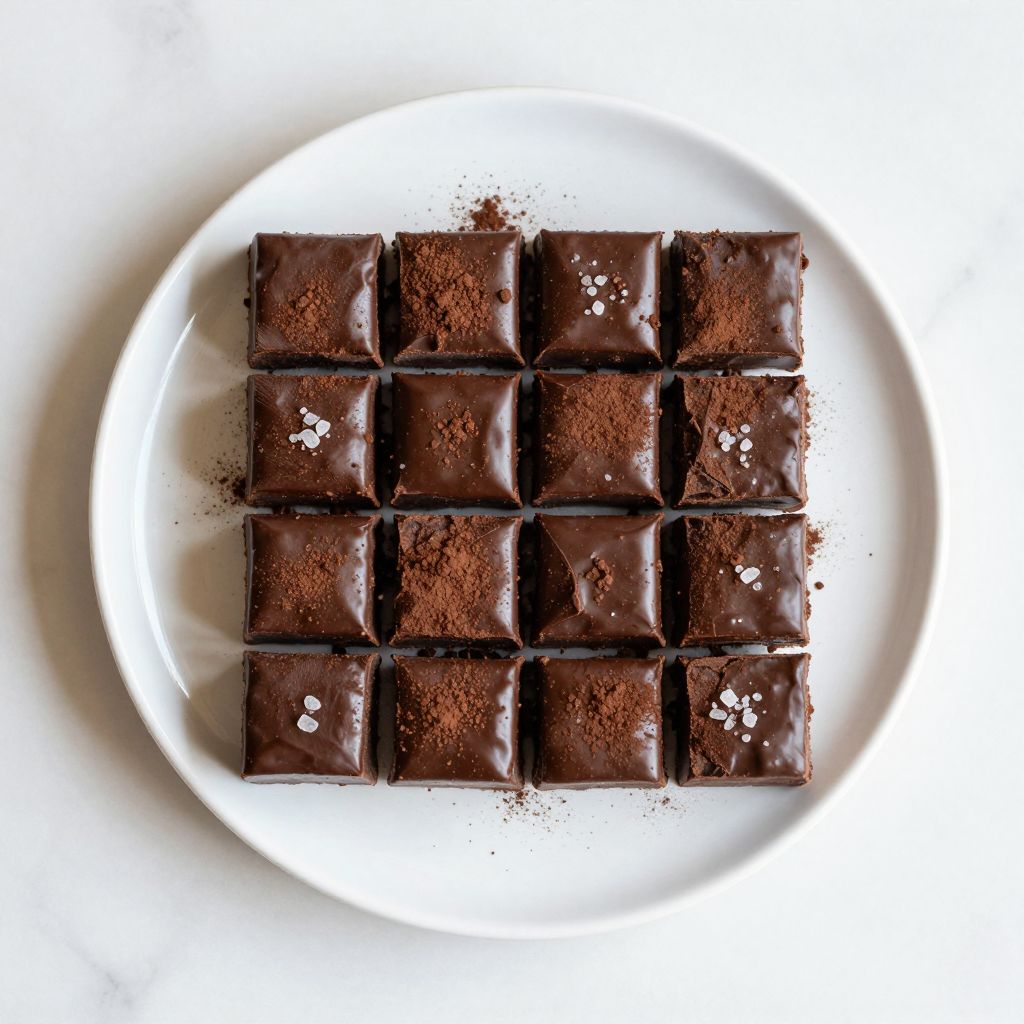
Microwave Fudge
Ingredients
Equipment
Method
- Pour the cocoa powder, sweetened condensed milk, and butter into a microwave-safe mixing bowl and stir to combine.
- Microwave the mixture on high power for 90 seconds, then stir until smooth.
- Return the bowl to the microwave and heat on high power for another 60 seconds, then stir vigorously until fully combined.
- Stir in the vanilla extract and a pinch of sea salt, if using, until well incorporated.
- Line an 8x8 inch baking dish with parchment or wax paper, leaving an overhang on two sides.
- Quickly pour the warm fudge mixture into the prepared pan and spread into an even layer with a spatula.
- Refrigerate the pan for at least 2 hours, or overnight for best results, until the fudge is firm.
- Lift the set fudge from the pan using the parchment overhang and cut into 16 equal pieces with a sharp knife, wiping the blade between cuts.