
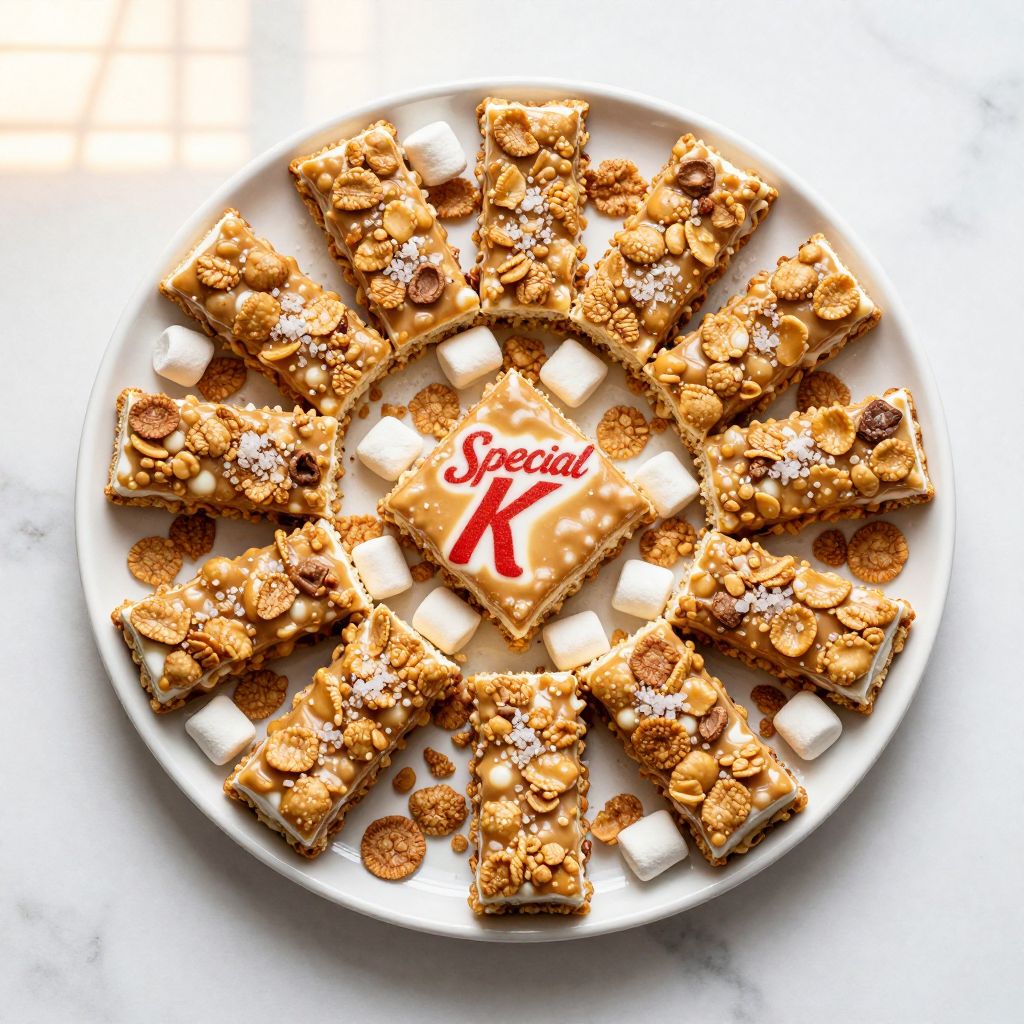
The smell of crispy cereal and melted marshmallow wafting through your kitchen takes you straight back to childhood, doesn’t it? Special K bars are that perfect no-bake treat that tastes like nostalgia but comes together faster than you’d expect.
These bars deliver the satisfying crunch of toasted cereal mixed with gooey marshmallow, all held together with a touch of butter and a hint of vanilla. They’re the kind of recipe that makes you look like a dessert wizard when really you just melted a few ingredients and pressed them into a pan.
Whether you’re baking for a bake sale, need a quick dessert for unexpected guests, or just want something sweet that doesn’t require an oven, this recipe works every single time. Let’s make some bars that’ll disappear faster than you can say “seconds, please.”
Why You’ll Love This Recipe
These bars hit all the marks for a crowd-pleasing treat that works in almost any situation. You’ll have them ready in under 30 minutes with minimal cleanup.
- No oven required, just a stovetop and a 9×13 inch baking pan
- Takes less than 10 minutes of actual hands-on time
- The texture is perfectly crispy on the outside with a chewy marshmallow center
- Endlessly customizable with mix-ins and toppings
- Keeps for days when stored properly, making it perfect for meal prep
My Experience Making This Recipe
I first made these bars for a school fundraiser and watched them sell out in the first 20 minutes. The combination of familiar cereal and sweet marshmallow just works, and people who claim they don’t have a sweet tooth always come back for seconds.
What struck me most was how foolproof the method really is. Even when I got distracted and left the marshmallow melting a bit longer than ideal, the bars still turned out perfectly.
My kids now request these instead of store-bought candy, and honestly, I love that they think homemade treats are better. That’s the real win here.
Recipe Overview
- Recipe Name: Special K Bars
- Servings: 24 bars
- Prep Time: 10 minutes
- Cook Time: 5 minutes
- Total Time: 15 minutes plus 30 minutes chilling
- Course: Dessert
- Cuisine: American
- Calories per Serving: 85
Equipment You Will Need
- 9×13 inch baking pan
- Parchment paper
- Medium saucepan
- Wooden spoon
- Measuring cups and spoons
- Spatula
Ingredients for Special K Bars
- 3 tablespoons butter
- 4 cups mini marshmallows
- 4 cups Special K cereal
- 1 teaspoon vanilla extract
- 1/4 teaspoon salt
Ingredient Notes and Substitutions
- Butter provides the fat needed to help the marshmallow coat the cereal evenly. If you’re out of butter, use coconut oil or vegetable oil for a similar result, though the flavor will shift slightly.
- Mini marshmallows melt faster and distribute more evenly than large ones. Regular marshmallows work but require more stirring and careful attention to avoid lumps.
- Special K cereal gives these bars their signature crunch and light flavor. Rice Krispies, Frosted Flakes, or even Corn Flakes work as substitutes, though you’ll get a different texture and sweetness level.
- Vanilla extract adds a subtle depth that makes the marshmallow taste richer. You can skip it entirely, or swap it for almond extract for a different flavor direction.
- Salt balances the sweetness and brings out the other flavors. Don’t skip this small amount, as it makes a real difference in how the bars taste.
How to Make Special K Bars
Step 1: Line Your Pan
Line your 9×13 inch baking pan with parchment paper, leaving some overhang on the sides. This makes it incredibly easy to lift the finished bars out of the pan and cut them cleanly without breaking.
Step 2: Measure the Cereal
Pour 4 cups of Special K cereal into a large bowl and set it aside. Measuring before you start melting the marshmallow gives you time to work without rushing once things get hot.
Step 3: Melt the Butter
Place the medium saucepan over medium heat and add 3 tablespoons of butter. Let it melt completely, which takes about a minute. You want the butter fully liquid but not browned or foaming.
Step 4: Add the Marshmallows
Add 4 cups of mini marshmallows to the melted butter and stir constantly. The marshmallows will start to break down and combine with the butter in about 2 to 3 minutes, creating a smooth, creamy mixture.
Step 5: Season the Mixture
Remove the saucepan from heat and stir in 1 teaspoon of vanilla extract and 1/4 teaspoon of salt. Taking the pan off heat prevents the vanilla from cooking off and keeps you from scorching the marshmallow on the bottom of the pan.
Step 6: Combine the Cereal
Pour the marshmallow mixture over the cereal in your bowl and fold everything together with a spatula until every piece of cereal is coated. Work quickly but gently so the cereal stays crispy and doesn’t break apart.
Step 7: Transfer to the Pan
Pour the cereal mixture into your prepared pan and press it down firmly with your spatula or the back of your spoon. The more you compress it, the easier it is to cut into clean bars later, but don’t press so hard that you crush all the cereal.
Step 8: Cool and Set
Let the bars sit at room temperature for at least 30 minutes, or refrigerate for 15 minutes if you’re in a hurry. The mixture needs time to firm up so you can cut clean bars without them falling apart.
Step 9: Cut into Bars
Once set, use the parchment paper to lift the entire slab out of the pan onto a cutting board. Cut into 24 equal bars using a sharp knife, wiping the blade between cuts for clean edges.
Pro Tip: If your marshmallow mixture is cooling and getting difficult to work with before you’ve pressed it all into the pan, just heat it gently over low heat for 30 seconds to soften it back up.
Tips for the Best Special K Bars
- Don’t skip the salt even though the amount is tiny. It’s the secret ingredient that makes these taste more interesting and prevents them from being one-note sweet.
- Work quickly once you’ve combined the cereal and marshmallow because the mixture sets up fast as it cools. If it hardens before you get it into the pan, gently reheat it over low heat.
- Press the mixture firmly and evenly into the pan so your bars are uniform in size and texture. Uneven pressing means some bars will be dense while others crumble.
- Cut the bars while they’re still slightly warm and pliable if you want perfectly clean edges. Cutting them cold sometimes causes cracking at the edges.
- Store them in an airtight container with parchment paper between layers to prevent sticking and keep them fresh longer.
- Use a serrated knife for cleaner cuts, and dip it in hot water and wipe it dry between each cut for the crispest edges.
Common Mistakes to Avoid
- Cooking the marshmallow on too high heat burns it and creates a bitter, off taste that ruins the whole batch. Medium heat is your friend here.
- Not pressing the mixture down firmly enough results in bars that fall apart when you try to pick them up. Spend the extra 30 seconds pressing down hard.
- Adding the vanilla while the mixture is still over heat causes it to evaporate, giving you no vanilla flavor at all. Always add it after removing from heat.
- Cutting the bars too soon while they’re still hot makes them messy and causes them to stick to the knife. Patience here pays off with better-looking bars.
- Using old cereal that’s already lost its crispness creates bars that feel soft and stale instead of crunchy. Fresh cereal makes all the difference in texture.
Serving Suggestions
These bars are wonderful on their own but shine even brighter paired with other treats or as part of a dessert spread. Serve them at room temperature for the best flavor and texture.
- Pack them in lunchboxes as an afternoon snack that beats most commercial options
- Serve alongside cold milk for the ultimate nostalgic snack pairing
- Display them on a dessert table at parties as part of a mixed sweet treat spread
- Gift them in decorated boxes to friends and family who love homemade sweets
- Pair them with coffee or tea for an easy dessert that doesn’t require plates or forks
Variations to Try
- Chocolate Drizzle: Melt semi-sweet chocolate and drizzle it over the top of the cooled bars for added richness and visual appeal. The chocolate adds a sophisticated contrast to the sweet marshmallow.
- Peanut Butter Swirl: Swirl a few tablespoons of peanut butter into the marshmallow mixture before adding the cereal for a classic flavor combination. This variation is perfect for peanut butter lovers.
- Honey Sweetened: Replace half the marshmallows with a 1/4 cup of honey stirred into the butter for a more complex sweetness and slightly softer bars. The honey adds a floral note that feels more sophisticated.
- Coconut Crusted: Press shredded coconut onto the top of the bars before they fully set for tropical flavor and extra texture. Use sweetened coconut if you prefer a sweeter finish.
- Brown Butter Version: Brown the butter before adding the marshmallows for a nutty, deeper flavor that elevates the entire bar. This simple change makes them taste more gourmet.
Dietary Adaptations
- Gluten-Free: Special K cereal is naturally gluten-free, so these bars are naturally safe for gluten-free diets as long as you verify your marshmallows are gluten-free too.
- Dairy-Free: Use dairy-free butter or coconut oil instead of regular butter, and make sure your marshmallows don’t contain any hidden dairy products.
- Vegan: Swap the butter for coconut oil and use vegan marshmallows made with cornstarch instead of gelatin for a completely plant-based version. The taste and texture stay nearly identical.
- Low-Carb/Keto: This recipe is challenging for keto since both cereal and marshmallows are carb-heavy, but you could try using a low-carb cereal alternative and sugar-free marshmallows for a modified version.
Storage and Reheating
Refrigerator
Store the bars in an airtight container with parchment paper between layers to keep them fresh and prevent sticking. They keep for up to one week in the fridge.
- Keep them in a cool spot away from direct heat or sunlight
- Check that the container is truly airtight to prevent them from drying out
Freezer
Wrap individual bars tightly in plastic wrap or place them in a freezer-safe container for longer storage. They freeze beautifully for up to three months.
- Let them thaw at room temperature for about 10 minutes before eating
- Don’t unwrap them until they’ve thawed to prevent condensation from making them soggy
Reheating
These bars are best eaten at room temperature and don’t really need reheating. If you’ve refrigerated them and want them softer, let them sit on the counter for 15 minutes instead of heating them.
- Never microwave them as the marshmallow will become tough and rubbery
- A gentle oven warming at 250 degrees for just a few minutes works if you absolutely must warm them
Nutrition Information
| Nutrient | Amount |
|---|---|
| Calories | 85 |
| Total Fat | 2g |
| Saturated Fat | 1g |
| Carbohydrates | 16g |
| Fiber | 0g |
| Sugar | 13g |
| Protein | 1g |
| Sodium | 105mg |
| Cholesterol | 3mg |
These values are approximate and based on standard ingredients. Variations in brands or substitutions will change the nutritional content of your bars.
Frequently Asked Questions
Can I use regular marshmallows instead of mini ones?
Yes, but you’ll need to chop them into smaller pieces first so they melt evenly and coat the cereal smoothly. Regular marshmallows don’t distribute as easily, so you’ll need extra stirring time.
How far ahead can I make these bars?
You can make them up to one week ahead and store them in an airtight container at room temperature. Keeping them in the fridge extends their life by a few extra days and keeps them slightly firmer.
What if the mixture gets too hard before I press it into the pan?
Place the bowl back over very low heat for 30 seconds to 1 minute to soften the mixture again without melting it completely. Stir gently until it reaches the right consistency for pressing.
Why are my bars turning out too soft or mushy?
You’re likely not pressing them down firmly enough into the pan or you’re not letting them cool long enough before cutting. A 30-minute room temperature rest minimum is essential for proper setting.
Can I add sprinkles or toppings on top?
Absolutely. Press sprinkles, chopped nuts, or crushed candy into the top of the mixture right after you press it into the pan while it’s still slightly warm. Let them set before storing or they may slide off.
Is there a substitute for Special K cereal?
Any crispy cereal works, though you’ll get different flavors and textures. Rice Krispies create the lightest, crunchiest bars, while Corn Flakes or Frosted Flakes add different sweetness levels.
Final Thoughts
Making Special K bars is one of those cooking experiences that proves you don’t need fancy equipment or advanced skills to create something truly delicious. What you need is five ingredients, a few minutes, and the willingness to share your homemade treat with people who’ll be genuinely impressed.
Give this recipe a try this week, and I promise you’ll find yourself making it again and again. There’s real joy in serving something simple, nostalgic, and made with your own two hands.
Explore More Delicious Recipes
If you loved making these bars, you’ll find plenty of other easy dessert and snack recipes that come together just as quickly and taste just as good.
Browse all our favorite recipes here for more treats that your family will love. For something with a protein boost, try our protein cookies recipe that bakes up tender and delicious every single time.
Special K Bars
Ingredients
Equipment
Method
- Line your 9x13 inch baking pan with parchment paper, leaving some overhang on the sides.
- Pour 4 cups of Special K cereal into a large bowl and set aside.
- Place a medium saucepan over medium heat and add 3 tablespoons of butter, melting completely for about 1 minute without browning.
- Add 4 cups of mini marshmallows to the melted butter and stir constantly for 2 to 3 minutes until smooth and creamy.
- Remove the saucepan from heat and stir in 1 teaspoon of vanilla extract and 1/4 teaspoon of salt.
- Pour the marshmallow mixture over the cereal and fold together with a spatula until evenly coated.
- Transfer the coated cereal mixture into the prepared pan and press down firmly with a spatula or spoon handle.
- Let the bars sit at room temperature for at least 30 minutes or refrigerate for 15 minutes until set.
- Lift the set slab using the parchment overhang and cut into 24 bars with a sharp knife, wiping the blade between cuts.