
Picture this: a warm loaf of freshly baked sourdough bread, its crust crackling as you slice into it, releasing an irresistible aroma that fills your kitchen. Making your own Sourdough Starter is the first step to achieving this delightful experience, transforming simple flour and water into a bubbling, tangy mix that captures the essence of artisan bread-making. This recipe is special because it allows you to nurture your starter, creating a flavor profile that is uniquely yours. With just a few ingredients and a little patience, you can embark on a delicious journey into the world of sourdough.
Why You’ll Love This Recipe
This sourdough starter is not just a mixture; it’s a living culture that brings flavor and character to your bread.
- Easy to make with minimal ingredients.
- Customizable flavor profile with regular feedings.
- Creates a tangy, complex bread that’s hard to resist.
- Gives you the satisfaction of baking from scratch.
My Experience Making This Recipe
When I first tried making my own sourdough starter, I felt a mix of excitement and uncertainty. Watching it bubble and grow each day was like nurturing a little pet; I couldn’t help but feel proud.
After a week, I had a lively starter that made the most delicious bread. Each loaf brought a smile to my face, knowing that the magic began with just flour and water.
Recipe Overview
- Recipe Name: Sourdough Starter
- Servings: Varies
- Prep Time: 15 minutes
- Cook Time: N/A
- Total Time: 7 days
- Course: Bread
- Cuisine: Artisan
- Calories per Serving: Varies
Equipment You Will Need
- Glass or plastic container (at least 1 quart)
- Kitchen scale (optional but recommended)
- Spoon or spatula for mixing
- Clean kitchen towel or coffee filter
- Rubber band or string (for securing towel/filter)
Ingredients for Sourdough Starter
- Whole wheat flour – 1 cup (for initial feeding)
- All-purpose flour – 1 cup (for subsequent feedings)
- Water – 1 cup (filtered or bottled, room temperature)
Ingredient Notes and Substitutions
- Whole wheat flour: This flour contains more nutrients, which help jumpstart the fermentation process. You can substitute with rye flour for even more flavor.
- All-purpose flour: It’s versatile and works well for maintaining the starter. Bread flour can be used for a chewier texture.
- Water: Using filtered water prevents chlorine from inhibiting the growth of natural yeast. Tap water can be used if left to sit out for 24 hours.
How to Make Sourdough Starter
Step 1: Combine Ingredients
In a clean container, mix together 1 cup of whole wheat flour and 1 cup of room temperature water. This combination creates the perfect environment for wild yeast and bacteria to thrive.
Step 2: Stir and Cover
Stir the mixture until there are no dry bits of flour left. Cover the container loosely with a clean towel or coffee filter, securing it with a rubber band or string to allow airflow while keeping out dust.
Step 3: Let it Sit
Place the container in a warm spot, around 70°F to 75°F, for 24 hours. This warmth encourages fermentation, which is essential for a thriving starter.
Step 4: Feed the Starter
After 24 hours, you may see some bubbles. Discard half of the mixture and add 1 cup of all-purpose flour and 1 cup of water. This feeding process keeps your starter healthy and active.
Step 5: Repeat Feeding
Continue to feed the starter every 24 hours, discarding half each time. This regular feeding builds strength and develops flavor over the next five to seven days.
Step 6: Check for Activity
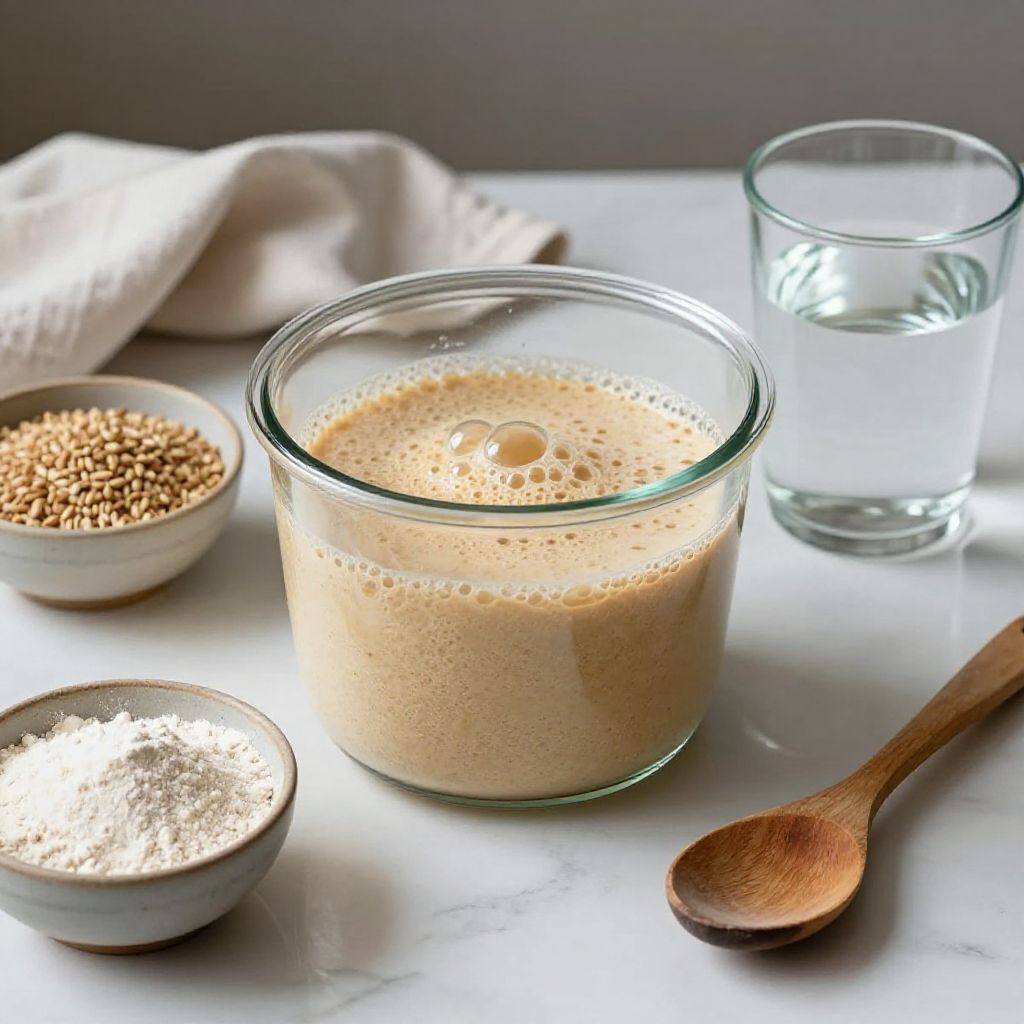
After about a week, your starter should be bubbly and have doubled in size within a few hours of feeding. This indicates that wild yeast is thriving.
Step 7: Test for Readiness
To test if your starter is ready for baking, drop a spoonful in a glass of water. If it floats, you are ready to make sourdough bread!
Step 8: Store the Starter
If you’re not baking right away, store your starter in the refrigerator. Feed it once a week to keep it healthy and active.
Pro Tip: Always use a kitchen scale for precise measurements to ensure a strong starter.
Tips for the Best Sourdough Starter
- Keep your container clean to avoid unwanted bacteria.
- Use filtered water for the best results.
- Make sure to feed your starter at the same time each day for consistency.
- Monitor temperature; warmer spots speed up fermentation.
- Don’t panic if it doesn’t bubble right away; patience is key.
Common Mistakes to Avoid
- Not discarding enough starter can lead to an overly acidic mix.
- Using cold water slows down fermentation.
- Neglecting to feed it regularly can kill your starter.
- Covering too tightly can suffocate the yeast.
Serving Suggestions
Your sourdough starter is a fantastic base for so many recipes. Once you bake your bread, think of pairing it with:
- Homemade butter or flavored spreads.
- Soups and stews for dipping.
- Cheese and charcuterie boards.
- Fresh salads to balance the bread’s density.
Variations to Try
- Add a tablespoon of honey or sugar for a slightly sweeter flavor.
- Use different types of flour, such as rye or spelt, for unique flavors.
- Incorporate a bit of fruit puree for extra nutrients.
- Experiment with adding herbs for a fragrant twist.
Dietary Adaptations
- Gluten-free: Use a gluten-free flour blend but note it may take longer to ferment.
- Dairy-free: This recipe is naturally dairy-free.
- Vegan/vegetarian: This recipe is suitable for all diets.
- Low-carb/keto: Traditional sourdough is not low-carb, consider alternatives.
Storage and Reheating
Refrigerator
Store your starter in the refrigerator when not in use. Make sure to feed it once a week.
- Keep it tightly sealed but allow airflow.
- Label it with the date of last feeding.
Freezer
If you need to take a break, you can freeze your starter. Just make sure it’s well-fed before freezing.
- Portion it into small containers for easy use.
- Thaw in the refrigerator before reactivating.
Reheating
To bring your starter back to life, feed it as usual after thawing. It may take a few feedings to regain full strength.
- Monitor for bubbling and growth.
- Be patient; it may take a few days to reactivate fully.
Nutrition Information
| Nutrient | Amount |
|---|---|
| Calories | 50 |
| Total Fat | 0g |
| Saturated Fat | 0g |
| Carbohydrates | 10g |
| Fiber | 1g |
| Sugar | 0g |
| Protein | 2g |
| Sodium | 0mg |
| Cholesterol | 0mg |
This information can vary based on the specific ingredients used.
Frequently Asked Questions
Can I use all-purpose flour instead of whole wheat for the initial mix?
Yes, but whole wheat flour helps jumpstart the fermentation process due to its higher nutrient content.
How long can I keep my starter in the fridge?
Your starter can last in the fridge for several weeks if fed at least once a week.
What if my starter is too runny?
This may indicate that you need to add more flour during feedings or adjust your water ratio.
Can I make this starter gluten-free?
Yes, using a gluten-free flour blend will work, but it may take longer to develop.
How can I reactivate a frozen starter?
Thaw it in the fridge and then feed it as usual until it becomes bubbly and active again.
Final Thoughts
Creating your own sourdough starter is a rewarding process that connects you to the art of bread-making. With a little patience and care, you’ll be well on your way to baking delicious loaves.
Don’t forget to explore more recipes and tips related to sourdough, like sourdough naan or sourdough stuffing. Happy baking!
Sourdough Starter
Ingredients
Equipment
Method
- In a clean container, mix together 1 cup whole wheat flour and 1 cup water until no dry bits remain.
- Stir the mixture thoroughly, then cover the container loosely with a clean towel or coffee filter secured with a rubber band or string to allow airflow.
- Place the container in a warm spot (70°F to 75°F) and let it sit undisturbed for 24 hours at room temperature.
- After 24 hours, discard half of the starter and add 1 cup all-purpose flour and 1 cup water, stirring until combined.
- Repeat the feeding process every 24 hours by discarding half of the starter and adding 1 cup all-purpose flour and 1 cup water each time, for 5 to 7 days.
- After about one week, check for activity; the starter should be bubbly and double in size within a few hours of feeding.
- Test if the starter is ready for baking by dropping a spoonful into a glass of water; if it floats, it is ready.
- Store unused starter in the refrigerator and feed it once a week to maintain its activity.