
Picture this: a tender, flaky piece of flounder, perfectly seasoned and baked to golden perfection. My Simple Baked Flounder Recipe is not just quick and easy; it delivers a delightful flavor and texture that will impress even the pickiest eaters.
This dish shines with its light seasoning and buttery finish, making it a versatile choice for any weeknight dinner or special occasion. Ready to get started? Let’s gather our ingredients and dive into this simple yet delicious recipe!
Why You’ll Love This Recipe
This recipe is a must-try for a few reasons.
- Quick and easy preparation.
- Light, flaky texture that melts in your mouth.
- Perfectly customizable with your favorite herbs.
- Healthy and low in calories.
- Great for busy weeknights or entertaining guests.
My Experience Making This Recipe
The first time I made this flounder, I was blown away by how simple it was. Just a few minutes of prep and I had a dish that smelled absolutely heavenly while baking.
My family gathered around the table, and the moment they took their first bite, I knew I had a winner. The combination of seasonings made the fish taste gourmet, and I felt like a culinary rockstar.
Recipe Overview
- Recipe Name: Simple Baked Flounder
- Servings: 4
- Prep Time: 10 minutes
- Cook Time: 15 minutes
- Total Time: 25 minutes
- Course: Main Dish
- Cuisine: American
- Calories per Serving: 200
Equipment You Will Need
- Baking dish
- Measuring spoons
- Cooking brush
- Aluminum foil (optional)
- Oven mitts
Ingredients for Simple Baked Flounder
- 4 (6-ounce) flounder fillets
- 2 tablespoons olive oil
- 1 tablespoon lemon juice
- 1 teaspoon garlic powder
- 1 teaspoon dried parsley
- Salt and pepper to taste
Ingredient Notes and Substitutions
- Flounder fillets: These are tender and mild, but you can use tilapia or sole as a substitute.
- Olive oil: This gives a rich flavor; avocado oil works as a great alternative.
- Lemon juice: Fresh juice is best, but bottled juice can be used in a pinch.
- Garlic powder: It adds flavor; fresh minced garlic can be used instead for a punchier taste.
- Dried parsley: Fresh parsley can elevate the dish even more if you have it on hand.
How to Make Simple Baked Flounder
Step 1: Preheat the Oven
Start by preheating your oven to 400°F (200°C). This ensures that the flounder cooks evenly and gets that nice golden finish.
Step 2: Prepare the Baking Dish
Lightly grease your baking dish with olive oil to prevent sticking. A well-greased dish makes cleanup easier and helps the fish cook perfectly.
Step 3: Arrange the Flounder
Place the flounder fillets in the baking dish, spaced evenly apart. This allows the heat to circulate and cook the fish thoroughly.
Step 4: Mix the Seasoning
In a small bowl, combine the olive oil, lemon juice, garlic powder, dried parsley, salt, and pepper. This blend will enhance the flounder’s natural flavors.
Step 5: Brush the Mixture on the Fish
Using a cooking brush, evenly coat the fillets with the seasoning mixture. This step is essential for ensuring each bite is bursting with flavor.
Step 6: Bake the Flounder
Place the baking dish in the preheated oven and bake for 12 to 15 minutes. The fish is done when it flakes easily with a fork and is opaque.
Step 7: Broil for Extra Crispness
If you like a crispy top, switch to broil for the last 2 minutes. Keep a close eye to avoid burning, as it can go from perfect to charred quickly.
Step 8: Serve and Enjoy
Remove the flounder from the oven and let it rest for a minute. Serve with your favorite sides and enjoy the fruits of your labor!
Pro Tip: Always use fresh ingredients for the best flavor. Fresh herbs and citrus will elevate your baked flounder!
Tips for the Best Simple Baked Flounder
- Don’t overcrowd the baking dish; give each fillet space to cook evenly.
- Experiment with different herbs and spices to find your favorite flavor profile.
- Let the fish rest a few minutes before serving to lock in moisture.
- Pair with a fresh salad or steamed veggies for a complete meal.
- Use a meat thermometer to ensure the fish reaches 145°F for safety.
Common Mistakes to Avoid
- Not preheating the oven: This can lead to uneven cooking.
- Overcooking the fish: It should be flaky but not dry; keep an eye on the time.
- Skipping the seasoning: A little seasoning goes a long way; don’t skimp on flavor.
- Using frozen fillets without thawing: This affects cooking time and texture.
Serving Suggestions
This flounder pairs beautifully with several sides.
- Quinoa salad with lemon vinaigrette
- Steamed asparagus with garlic
- Roasted potatoes with rosemary
- Creamy coleslaw for crunch
Variations to Try
- Add a sprinkle of paprika for a smoky flavor boost.
- Top with sliced tomatoes and mozzarella for a Mediterranean twist.
- Marinate in a soy sauce mixture for an Asian-inspired version.
- Incorporate capers for a briny kick.
Dietary Adaptations
- Gluten-free: This recipe is naturally gluten-free.
- Dairy-free: No dairy is used, making it suitable for those avoiding lactose.
- Vegan/Vegetarian: Substitute flounder with baked tofu for a plant-based option.
- Low-carb/Keto: This dish is low in carbs, perfect for keto diets.
Storage and Reheating
Refrigerator
Store any leftovers in an airtight container in the fridge for up to 3 days.
- Keep the fish separate from sides for optimal freshness.
Freezer
Flounder can be frozen, but it’s best eaten fresh.
- Wrap tightly in plastic wrap and aluminum foil to prevent freezer burn.
Reheating
To reheat, place the flounder in a preheated oven at 350°F until warmed through.
- Microwaving is an option, but it may affect the texture.
Nutrition Information
| Nutrient | Amount |
|---|---|
| Calories | 200 |
| Total Fat | 10g |
| Saturated Fat | 1.5g |
| Carbohydrates | 0g |
| Fiber | 0g |
| Sugar | 0g |
| Protein | 25g |
| Sodium | 320mg |
| Cholesterol | 65mg |
This information is an estimate and may vary based on ingredients and portion sizes.
Frequently Asked Questions
Can I substitute flounder with another type of fish?
Yes, tilapia or sole work well as substitutes and have similar textures.
Can I prepare this dish ahead of time?
Yes, you can season the fish and store it in the fridge for a few hours before baking.
How should I store leftovers?
Store leftovers in an airtight container in the refrigerator for up to three days.
What if my flounder is frozen?
Thaw it in the fridge overnight before cooking for the best results.
Why is my baked flounder rubbery?
This may happen if it is overcooked; always check for doneness around the 12-minute mark.
Final Thoughts
I hope you enjoy making this Simple Baked Flounder Recipe as much as I do. It’s a dish that combines simplicity with elegance, perfect for any occasion.
Give it a try and watch how quickly it becomes a staple in your kitchen. And don’t forget to explore more delicious fish recipes like baked haddock or steelhead trout.
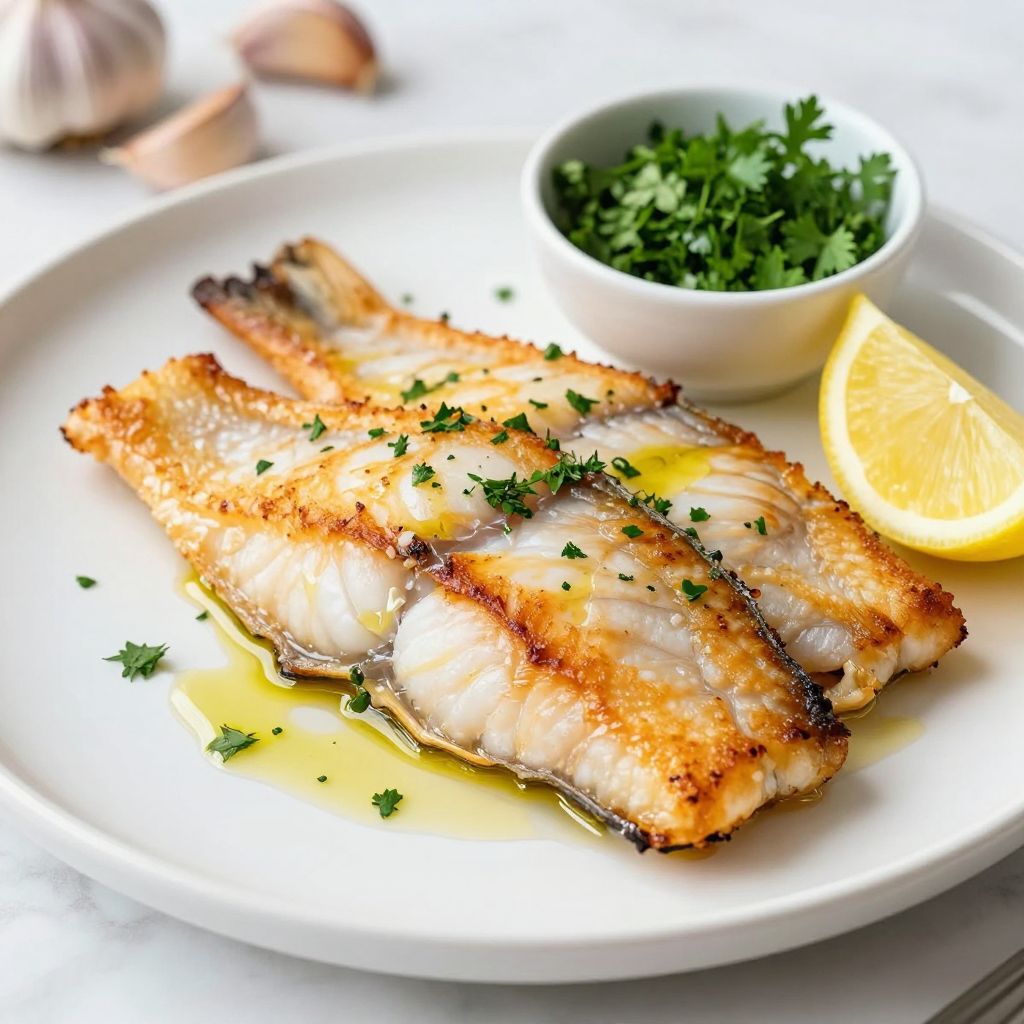
Simple Baked Flounder
Ingredients
Equipment
Method
- Preheat your oven to 400°F (200°C).
- Lightly grease your baking dish with olive oil.
- Place the flounder fillets in the baking dish, spaced evenly apart.
- In a small bowl, combine the olive oil, lemon juice, garlic powder, dried parsley, salt, and pepper.
- Using a cooking brush, evenly coat the fillets with the seasoning mixture.
- Place the baking dish in the preheated oven and bake for 12 to 15 minutes.
- If desired, switch to broil for the last 2 minutes for a crispy top.
- Remove the flounder from the oven and let it rest for a minute.
- Serve with your favorite sides.