There’s something about the smell of corn baking in a buttery cream sauce that instantly transports you back to a grandmother’s kitchen or a holiday dinner table laden with comfort food. Scalloped corn is one of those dishes that sounds fancy but requires nothing more than a baking dish and about twenty minutes of your time.
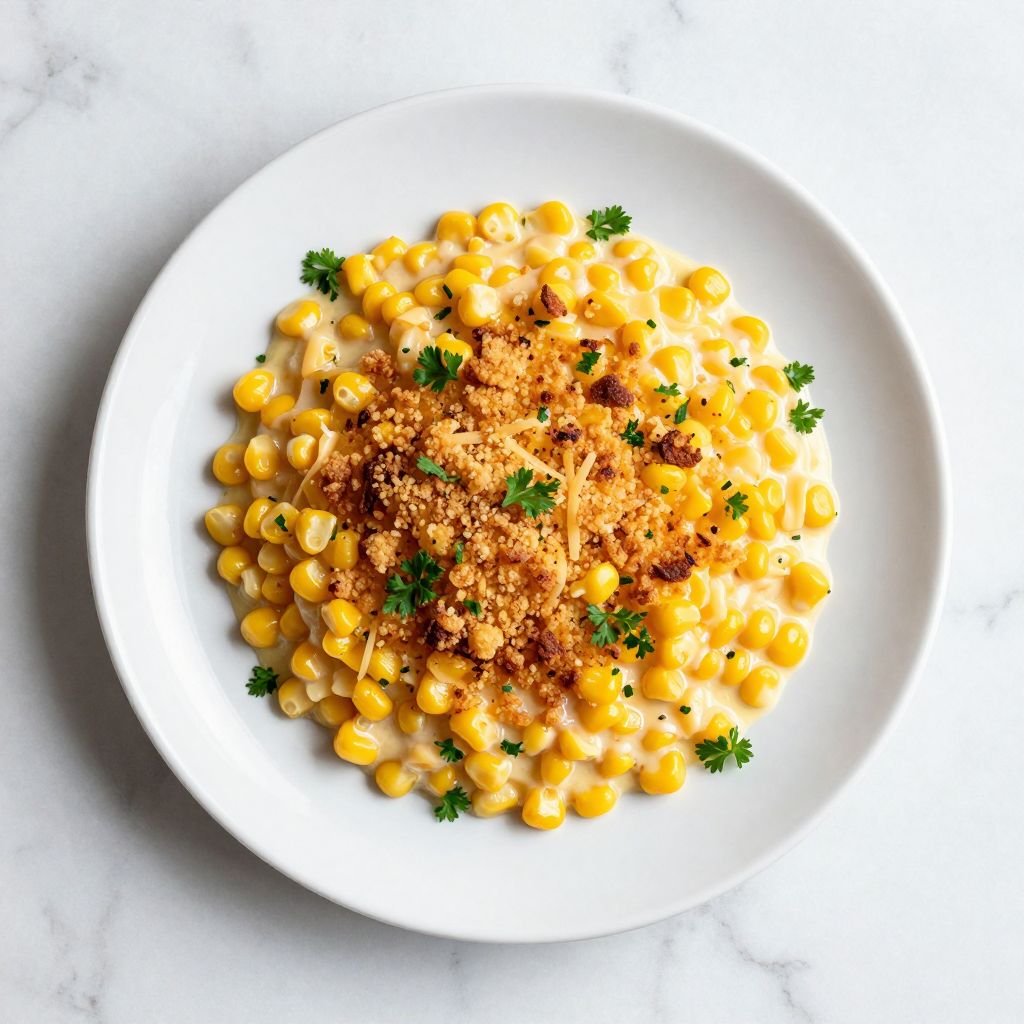
This recipe delivers creamy, tender corn kernels nestled in a golden, crispy-topped custard that tastes like summer and tradition wrapped into one side dish. It’s the kind of recipe that works equally well at a casual weeknight dinner or as a showstopper at a holiday feast, and it reheats beautifully so you can make it ahead without stress.
Why You’ll Love This Recipe
Scalloped corn combines the best textural contrasts: soft corn, creamy sauce, and a crispy toasted crumb topping that everyone fights over.
- Ready in under 45 minutes from start to table
- Requires pantry staples you likely already have on hand
- Tastes decadent but is surprisingly simple to assemble
- Works as a side dish for any protein or protein-free meal
- Impresses guests without requiring culinary expertise
My Experience Making This Recipe
The first time I made scalloped corn, I was skeptical that something this humble could taste this good. I’d always assumed it was the kind of recipe that belonged in a church potluck cookbook, not on my regular dinner rotation.
I was wrong. The moment I pulled the dish from the oven and saw that golden-brown top bubbling slightly at the edges, I knew this was going to become a regular feature in my kitchen. The aroma alone drew everyone to the dining room before the side dish even hit the table.
What surprised me most was how the texture shifted depending on when I ate it: piping hot from the oven, the top stayed crispy and the filling creamy, but even the cooled leftovers had an appealing custard-like quality. My partner, who claims to dislike corn in most forms, asked for seconds and wanted the recipe written down immediately.
Recipe Overview
- Recipe Name: Scalloped Corn
- Servings: 6 to 8
- Prep Time: 15 minutes
- Cook Time: 25 to 30 minutes
- Total Time: 40 to 45 minutes
- Course: Side Dish
- Cuisine: American
- Calories per Serving: Approximately 285
Equipment You Will Need
- 9×13 inch baking dish
- Large mixing bowl
- Medium saucepan
- Wooden spoon or whisk
- Measuring cups and spoons
- Small bowl for topping mixture
- Oven mitts
Ingredients for Scalloped Corn
- Fresh or frozen corn kernels: 6 cups (about 8 ears of fresh corn or three 10-ounce frozen bags)
- Whole milk: 1 and 1/2 cups
- Heavy cream: 1/2 cup
- Unsalted butter: 4 tablespoons, divided
- All-purpose flour: 3 tablespoons
- Salt: 1 teaspoon
- Black pepper: 1/2 teaspoon
- Nutmeg: 1/4 teaspoon (freshly grated if possible)
- Sharp cheddar cheese: 3/4 cup, shredded
- Panko breadcrumbs: 1 cup
- Fresh parsley: 2 tablespoons, finely chopped (optional but recommended)
Ingredient Notes and Substitutions
- Fresh corn kernels deliver the brightest, sweetest flavor, but frozen corn works beautifully and often tastes fresher than shipped fresh corn. If using canned corn, drain it well and skip the thawing step.
- Heavy cream creates that luxurious mouthfeel, but you can substitute it with half-and-half or use all milk for a lighter version. The texture will be slightly less rich but still delicious.
- Sharp cheddar adds a distinct tangy flavor that complements corn perfectly, yet mild cheddar or gruyere work if you prefer subtler cheese notes.
- Panko breadcrumbs give superior crispness compared to standard breadcrumbs. Regular breadcrumbs work but use slightly less since they pack more densely.
- Fresh nutmeg transforms the dish from good to remarkable, as it adds warmth without any spice heat. Pre-ground nutmeg is acceptable if that’s what you have available.
How to Make Scalloped Corn
Step 1: Preheat Your Oven and Prepare the Baking Dish
Start by preheating your oven to 350 degrees Fahrenheit. While it heats, lightly butter or spray your 9×13 inch baking dish so the corn mixture releases easily and the bottom gets those desirable crispy bits.
Step 2: Make the Roux Base
Melt 3 tablespoons of butter in a medium saucepan over medium heat. Sprinkle the flour over the melted butter and stir constantly for about 1 minute until the mixture becomes smooth and paste-like, which is called a roux.
This roux is your thickening agent, and cooking it for a minute removes the raw flour taste while allowing the flavors to meld together properly.
Step 3: Create the Cream Sauce
Gradually pour in the milk and heavy cream while whisking constantly to prevent lumps from forming in your sauce. Keep whisking until the mixture is completely smooth and there are no flour pockets visible.
This gradual approach prevents the flour from clumping, which would leave you with a lumpy sauce instead of the silky, velvety texture you’re after.
Step 4: Season and Simmer
Add the salt, black pepper, and nutmeg to the sauce and stir well. Continue cooking over medium heat, stirring occasionally, for about 5 minutes until the sauce thickens and coats the back of a spoon.
You want the sauce to reach a consistency thicker than cream but pourable enough to distribute throughout the corn without being stiff.
Step 5: Combine Corn and Sauce
Remove the saucepan from heat and stir in the corn kernels and shredded cheddar cheese until well combined. Taste the mixture and adjust seasoning as needed, adding more salt or pepper if desired.
The cheese will melt into the warm sauce, adding a sharp, savory element that balances the natural sweetness of the corn beautifully.
Step 6: Transfer to Baking Dish
Pour the corn mixture into your prepared baking dish and spread it in an even layer. This ensures consistent cooking and helps the filling heat through evenly during baking.
Step 7: Prepare the Topping
In a small bowl, combine the panko breadcrumbs with the remaining 1 tablespoon of melted butter and the fresh parsley. Mix gently with a fork until the breadcrumbs are evenly coated with butter, which helps them brown and crisp rather than stay pale.
Buttered breadcrumbs toast to a golden-brown color, while dry breadcrumbs tend to brown unevenly or remain pale even after baking.
Step 8: Top and Bake
Sprinkle the breadcrumb topping evenly over the corn mixture. Bake in the preheated oven for 25 to 30 minutes until the top is golden brown and the filling bubbles slightly around the edges.
The bubbling around the edges signals that the entire dish has heated through and the flavors have melded together, while the golden top indicates those breadcrumbs have crisped perfectly.
Step 9: Cool Slightly Before Serving
Remove the baking dish from the oven and let it rest for 5 minutes before serving. This brief rest allows the custard-like filling to set slightly, making it easier to scoop and plate without the dish falling apart.
Pro Tip: Make this dish up to 24 hours ahead, cover it with foil, and bake it when you’re ready to serve, which saves precious time on busy dinner nights and actually allows the flavors to deepen overnight.
Tips for the Best Scalloped Corn
- Use fresh corn in late summer when corn is at peak sweetness, or reach for high-quality frozen corn when fresh isn’t available. Frozen corn picked and frozen within hours often tastes better than fresh corn shipped long distances.
- Grate nutmeg fresh just before using it, as pre-ground nutmeg loses its volatile oils and becomes musty over time. A microplane grater makes this easy and creates the finest texture.
- Don’t skip letting the roux cook for a full minute before adding the liquid, as this step develops better flavor and ensures proper thickening. Raw flour in your sauce creates an unpleasant grainy texture.
- Stir the sauce frequently while it thickens to prevent a skin from forming and to ensure even heat distribution. A whisk works better than a spoon for breaking up any stubborn lumps.
- Add the cheese off heat rather than over direct heat to prevent it from becoming stringy or separating. The residual heat is plenty to melt it completely.
Common Mistakes to Avoid
- Skipping the nutmeg because you think it doesn’t belong in corn dishes misses the magic ingredient that elevates this recipe from ordinary to extraordinary. Just a pinch of nutmeg adds warmth and complexity without any perceptible spice.
- Using dried breadcrumbs instead of panko creates a dense, soggy topping that doesn’t crisp properly. Panko’s larger, airier structure allows better browning and crispness.
- Overbaking the dish beyond 30 minutes can dry out the filling and cause the edges to brown too much. Watch for the first signs of golden-brown color and that bubble at the edges as your signal to stop.
- Forgetting to butter the topping before sprinkling it on means you get pale, unappetizing breadcrumbs that taste raw. Butter is essential for achieving that glossy, crispy, golden finish.
- Using a roux that’s too thin or not cooked long enough leaves you with a watery dish instead of a creamy custard. The sauce should visibly thicken on the stove before you add the corn.
Serving Suggestions
Scalloped corn pairs beautifully with roasted meats, grilled fish, or even hearty vegetarian mains since it’s filling enough to anchor a plate. Serve it warm straight from the oven for the best texture contrast between the crispy top and creamy filling.
- Roasted turkey breast or whole roasted chicken for a classic holiday pairing
- Grilled salmon or other flaky white fish for a lighter contrast
- Slow-cooked brisket or pulled pork for a Southern-style meal
- Herb-roasted vegetables and a grain for a completely vegetarian dinner
- Grilled steak as an upscale side dish that elevates simple grilled protein
Variations to Try
- Add diced red bell peppers or jalapeños to the corn mixture for color and a subtle kick of flavor without making the dish spicy or complicated.
- Substitute some of the cheddar with smoked gouda or gruyere cheese to create a more sophisticated, complex cheese flavor profile.
- Stir in crispy bacon bits or diced ham to transform this into a more substantial side that can almost work as a light main course.
- Top with crushed crackers or crushed potato chips instead of breadcrumbs for a crunchier, more indulgent texture.
- Make it slightly spicy by adding cayenne pepper or a dash of hot sauce to the cream sauce for those who like subtle heat.
Dietary Adaptations
- Gluten-free: Use cornstarch instead of flour for the roux, which creates the same thickness with no gluten, and swap regular breadcrumbs for gluten-free panko without changing the final texture.
- Dairy-free: Replace milk and cream with unsweetened oat or almond milk mixed with a bit of coconut cream for richness, and use dairy-free butter and nutritional yeast for cheese-like flavor, though the dish will taste noticeably different.
- Vegan: Combine the dairy-free adaptations above and use vegan butter for cooking, though the richness and cheese flavor will be less prominent than the original.
- Low-carb or keto: This dish is naturally higher in carbs because of the corn, so keto enthusiasts might swap corn for cauliflower florets, which gives a similar texture but dramatically reduces carbohydrates.
Storage and Reheating
Refrigerator
Store leftover scalloped corn in an airtight container for up to 3 days. The filling will continue to thicken as it cools, which is perfectly normal and actually quite pleasant.
- Let the dish cool completely before covering to prevent condensation
- Transfer to an airtight glass container rather than foil for best storage
Freezer
Scalloped corn freezes well for up to 2 months when stored properly in a freezer-safe container. Cool completely and leave about an inch of headspace since the mixture expands slightly when frozen.
- Freeze in the baking dish covered tightly with plastic wrap and foil for easy reheating
- Label with the date so you remember how long it’s been frozen
Reheating
Thaw frozen scalloped corn overnight in the refrigerator before reheating. Reheat in a 325-degree oven, covered with foil, for about 20 to 25 minutes until heated through.
- Remove foil for the last 5 minutes if you want to recrisp the topping
- You can also reheat individual portions in the microwave for 1 to 2 minutes, though the topping won’t stay as crispy
Nutrition Information
| Nutrient | Amount |
|---|---|
| Calories | 285 |
| Total Fat | 16g |
| Saturated Fat | 9g |
| Carbohydrates | 28g |
| Fiber | 2g |
| Sugar | 6g |
| Protein | 8g |
| Sodium | 420mg |
| Cholesterol | 38mg |
These values are approximations based on using the specific ingredients listed and serving the recipe across 8 servings. Nutritional content may vary depending on ingredient brands and portion sizes you use.
Frequently Asked Questions
Can I make scalloped corn ahead of time?
Yes, you can assemble the entire dish up to 24 hours ahead, cover it with foil, and bake it when you’re ready to serve. Assembling ahead actually allows the flavors to deepen and meld together more thoroughly.
What’s the difference between scalloped corn and creamed corn?
Scalloped corn includes a breadcrumb topping and bakes in the oven, while creamed corn is typically served on the stovetop without a topping. The baking process in scalloped corn creates a more structured dish with distinct texture layers.
Can I use canned corn instead of fresh or frozen?
Canned corn works but tends to be softer and sometimes has added salt, so drain it well and taste before adding extra salt. Fresh or frozen corn delivers better texture and flavor, but canned is perfectly acceptable in a pinch.
Why is my scalloped corn watery instead of creamy?
This usually means the roux wasn’t cooked long enough on the stovetop before adding the milk, so the sauce didn’t thicken properly. Make sure to cook the roux for at least 1 minute and the finished sauce for about 5 minutes until it visibly thickens.
Can I double this recipe?
Yes, you can double all ingredients and bake in two 9×13 baking dishes, which will take about the same 25 to 30 minutes since they bake side by side. If you stack them, you may need to add 5 to 10 extra minutes and rotate them halfway through baking.
Final Thoughts
Scalloped corn is one of those recipes that proves simple ingredients in the right proportions create something genuinely special. It’s comfort food at its finest, the kind of dish that makes people feel cared for the moment they taste it.
Make this dish for your next family dinner, holiday potluck, or quiet weeknight meal, and watch how quickly the baking dish empties and how many people ask for seconds. This recipe absolutely deserves a permanent spot in your regular cooking rotation.
Scalloped Corn
Ingredients
Equipment
Method
- Preheat your oven to 350 degrees Fahrenheit. Lightly butter or spray your 9x13 inch baking dish.
- Melt 3 tablespoons of butter in a medium saucepan over medium heat. Sprinkle the flour over the melted butter and stir constantly for about 1 minute until the mixture becomes smooth and paste-like.
- Gradually pour in the milk and heavy cream while whisking constantly to prevent lumps from forming. Keep whisking until the mixture is completely smooth.
- Add the salt, black pepper, and nutmeg to the sauce and stir well. Continue cooking over medium heat, stirring occasionally, for about 5 minutes until the sauce thickens and coats the back of a spoon.
- Remove the saucepan from heat and stir in the corn kernels and shredded cheddar cheese until well combined. Taste the mixture and adjust seasoning as needed.
- Pour the corn mixture into your prepared baking dish and spread it in an even layer.
- In a small bowl, combine the panko breadcrumbs with the remaining 1 tablespoon of melted butter and the fresh parsley. Mix gently with a fork until the breadcrumbs are evenly coated with butter.
- Sprinkle the breadcrumb topping evenly over the corn mixture. Bake in the preheated oven for 25 to 30 minutes until the top is golden brown and the filling bubbles slightly around the edges.
- Remove the baking dish from the oven and let it rest for 5 minutes before serving.