
The smell of freshly baked Royal Bibingka wafting through the house brings back memories of festive celebrations and cozy family gatherings. This delightful rice cake, topped with a rich layer of coconut cream and cheese, is a treat that captures the essence of Filipino culture, making it perfect for any occasion.
Its unique combination of flavors and textures—from the soft, moist cake to the crunchy toppings—makes it a standout dish. Plus, it’s surprisingly easy to whip up in your own kitchen, inviting you to create your own cherished memories.
Why You’ll Love This Recipe
This recipe is a beloved classic that never fails to impress.
- Quick to prepare with simple ingredients.
- Versatile for various toppings and flavors.
- Perfect for special occasions or just because.
- Rich, creamy texture that’s hard to resist.
My Experience Making This Recipe
When I first tried making Royal Bibingka, I felt a mix of excitement and nostalgia. The batter came together effortlessly, and as it baked, the aroma filled my kitchen, drawing my family in like bees to honey.
Watching everyone’s eyes light up upon tasting it was the best reward. Each bite was a delightful reminder of the rich culinary traditions I cherish.
Recipe Overview
- Recipe Name: Royal Bibingka
- Servings: 8
- Prep Time: 15 minutes
- Cook Time: 30 minutes
- Total Time: 45 minutes
- Course: Dessert
- Cuisine: Filipino
- Calories per Serving: 210
Equipment You Will Need
- Mixing bowls
- Whisk
- Baking pan or bibingka mold
- Oven
- Spatula
Ingredients for Royal Bibingka
- 2 cups rice flour
- 1 cup coconut milk
- 1 cup water
- 1 cup sugar
- 2 eggs
- 1 tablespoon baking powder
- 1/2 teaspoon salt
- 1/4 cup butter, melted
- 1/2 cup grated cheese (preferably Edam or cheddar)
- 1/2 cup coconut cream for topping
Ingredient Notes and Substitutions
- Rice flour: This gives the bibingka its signature texture. You can substitute with glutinous rice flour for a chewier version.
- Coconut milk: Adds rich flavor and moisture. Regular milk can work, but you will lose that coconut essence.
- Butter: Used for richness. Vegetable oil can be a good alternative for a dairy-free option.
- Cheese: Provides a savory contrast. You can skip it for a sweet version or use a dairy-free cheese.
How to Make Royal Bibingka
Step 1: Preheat the Oven
Before mixing your ingredients, preheat your oven to 375°F (190°C). This ensures even cooking right from the start.
Step 2: Mix Dry Ingredients
In a mixing bowl, combine the rice flour, sugar, baking powder, and salt. This step ensures even distribution of the leavening agent throughout the batter.
Step 3: Whisk Wet Ingredients
In another bowl, whisk together the eggs, coconut milk, and water. Mixing them separately helps create a smooth batter without clumps.
Step 4: Combine Mixtures
Pour the wet mixture into the dry ingredients and stir until just combined. Overmixing can lead to a dense bibingka, which we want to avoid.
Step 5: Add Melted Butter
Fold in the melted butter gently. This adds richness and keeps the cake moist.
Step 6: Pour into Baking Pan
Grease your baking pan or bibingka mold and pour the batter in. A well-greased pan ensures easy release after baking.
Step 7: Bake
Place the pan in the preheated oven and bake for about 30 minutes. You want the top to be golden brown and a toothpick inserted in the center to come out clean.
Step 8: Add Toppings
Once baked, remove from the oven and immediately spread the coconut cream on top, then sprinkle with grated cheese. This step adds an extra layer of flavor and creaminess.
Pro Tip: Don’t skip the coconut cream topping; it’s what makes this bibingka truly royal!
Tips for the Best Royal Bibingka
- Use fresh coconut milk for the best flavor.
- Let the bibingka cool slightly before cutting for cleaner slices.
- Consider using banana leaves to line your mold for added aroma and authenticity.
- Experiment with different toppings like salted eggs for a twist.
- Serve warm for the best taste and texture.
Common Mistakes to Avoid
- Overmixing the batter can lead to a tough texture. Mix until just combined.
- Baking at too low of a temperature results in a soggy bibingka. Ensure your oven is properly preheated.
- Not greasing the pan adequately can cause sticking. Use butter or oil generously.
- Skipping the toppings makes it less exciting. Toppings are crucial for flavor and presentation.
Serving Suggestions
Serve your Royal Bibingka warm along with a cup of tea or coffee. It pairs wonderfully with any of the following:
- Freshly grated coconut
- Sliced ripe mango
- Sweetened condensed milk drizzle
- Fruits for a refreshing contrast
Variations to Try
- Adding ube (purple yam) to the batter for a colorful twist.
- Using pandan extract for a fragrant variation.
- Incorporating chocolate chips for a sweet treat.
- Mixing in nuts for added crunch and flavor.
Dietary Adaptations
- Gluten-free: Use certified gluten-free rice flour.
- Dairy-free: Substitute coconut cream and cheese with dairy-free options.
- Vegan: Replace eggs with flaxseed meal mixed with water.
- Low-carb/Keto: Use almond flour instead of rice flour for a low-carb version.
Storage and Reheating
Refrigerator
Store any leftovers in an airtight container in the fridge for up to 3 days.
- Wrap slices in plastic for best freshness.
- Reheat in the microwave or oven before serving.
Freezer
For longer storage, freeze the bibingka wrapped in plastic and placed in a freezer bag.
- It can last up to 3 months in the freezer.
- Thaw in the fridge overnight before reheating.
Reheating
You can reheat bibingka in the microwave or oven until warmed through.
- Microwave in short bursts to avoid drying it out.
- Oven reheating helps maintain its texture.
Nutrition Information
| Nutrient | Amount |
|---|---|
| Calories | 210 |
| Total Fat | 8g |
| Saturated Fat | 4g |
| Carbohydrates | 34g |
| Fiber | 1g |
| Sugar | 10g |
| Protein | 3g |
| Sodium | 150mg |
| Cholesterol | 60mg |
This information is an estimate and can vary based on specific ingredients used.
Frequently Asked Questions
Can I use regular flour instead of rice flour?
Regular flour will change the texture significantly, as rice flour gives bibingka its signature chewiness.
Can I make this ahead of time?
Yes, you can prepare the batter a day in advance and store it in the fridge. Just bake it when you are ready.
How should I store leftovers?
Store leftovers in an airtight container in the fridge for up to three days or freeze them for longer storage.
Why did my bibingka turn out dense?
Overmixing the batter can lead to a dense texture, so mix until just combined.
Can I add fruits to the batter?
Absolutely! Adding fruits like blueberries or diced mango can enhance the flavor and texture.
Final Thoughts
Making Royal Bibingka at home is not just about the delicious outcome but the joy it brings to share with loved ones. I encourage you to give this recipe a try and savor the flavors that make it a classic.
If you enjoyed this recipe, explore more delightful dishes and tips at Mama’s Secret Recipes or check out my flavorful Bibimbap Sauce Recipe for another culinary adventure!
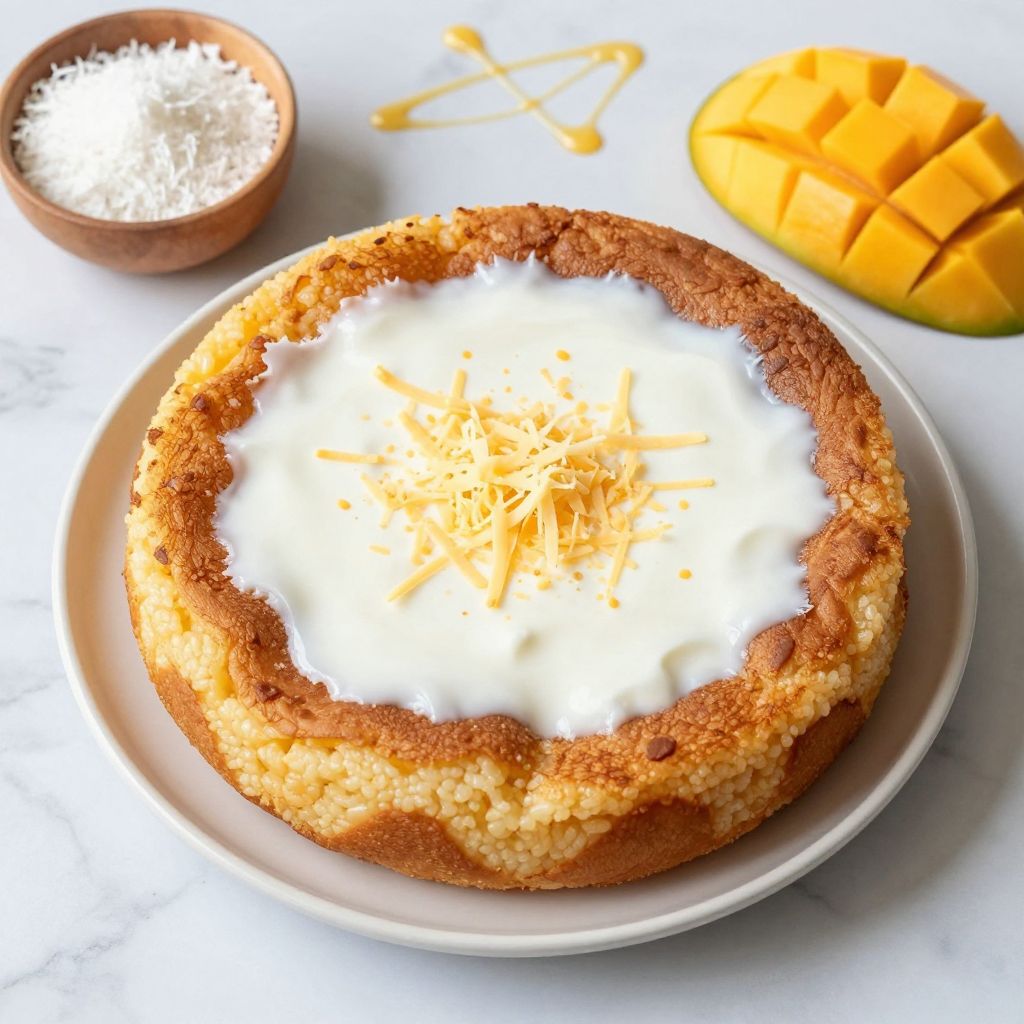
Royal Bibingka
Ingredients
Equipment
Method
- Preheat the oven to 375°F (190°C).
- In a mixing bowl, combine the rice flour, sugar, baking powder, and salt.
- In another bowl, whisk together the eggs, coconut milk, and water.
- Pour the wet mixture into the dry ingredients and stir until just combined.
- Fold in the melted butter gently.
- Grease your baking pan or bibingka mold and pour the batter in.
- Bake for about 30 minutes, or until the top is golden brown.
- Spread the coconut cream on top, then sprinkle with grated cheese.