
Picture this: golden-brown, crispy Chicken Tenders hot out of the oven, their savory aroma filling your kitchen. These tenders are not just a delightful treat; they are quick to prepare and perfect for family dinners or casual gatherings.
This recipe stands out for its incredible flavor and satisfying crunch, combined with the ease of preparation that busy weeknights demand. Let’s dive into the ingredients and steps to create these mouthwatering chicken tenders that will surely become a regular in your meal rotation.
Why You’ll Love This Recipe
These Chicken Tenders are a total crowd-pleaser. You’ll find their crispy texture and juicy interior irresistible.
- Quick to make, perfect for busy nights.
- Kid-friendly and great for all ages.
- Versatile for dipping sauces or toppings.
- Healthier than restaurant options when baked.
- Easy to customize with your favorite spices.
My Experience Making This Recipe
The first time I made these chicken tenders, I was surprised by how simple they were. As soon as they came out of the oven, my family gathered around, and the tenders vanished in minutes.
I love experimenting with different seasonings, and each time, I discover a new favorite. Whether served with barbecue sauce or ranch, the flavors always impress.
Recipe Overview
- Recipe Name: Chicken Tenders
- Servings: 4
- Prep Time: 15 minutes
- Cook Time: 20 minutes
- Total Time: 35 minutes
- Course: Main Course
- Cuisine: American
- Calories per Serving: Approximately 250
Equipment You Will Need
- Baking sheet
- Parchment paper or cooking spray
- Mixing bowls
- Meat mallet or rolling pin (for tenderizing)
- Whisk or fork
Ingredients for Chicken Tenders
- 1 pound chicken breast, cut into strips
- 1 cup all-purpose flour
- 2 large eggs, beaten
- 1 cup breadcrumbs (Panko preferred for extra crunch)
- 1 teaspoon salt
- 1 teaspoon black pepper
- 1 teaspoon garlic powder
- 1 teaspoon onion powder
- 1 teaspoon paprika
Ingredient Notes and Substitutions
- Chicken breast: Used for its lean quality and tenderness. You can substitute with chicken thighs for a juicier option.
- All-purpose flour: This helps the egg adhere to the chicken. For a gluten-free option, use almond flour or a gluten-free baking mix.
- Breadcrumbs: They give the tenders their crunch. You may use crushed cornflakes for an interesting texture.
- Spices: These enhance flavor. Feel free to omit or add spices according to your taste preferences.
How to Make Chicken Tenders
Step 1: Preheat the Oven
Preheat your oven to 425°F (220°C). This high temperature ensures a crispy exterior while keeping the chicken juicy inside.
Step 2: Prepare the Baking Sheet
Line a baking sheet with parchment paper or spray it with cooking spray. This prevents the tenders from sticking and makes for easy cleanup.
Step 3: Set Up the Breading Station
In three separate bowls, place the flour in one, beaten eggs in the second, and breadcrumbs mixed with spices in the third. This setup makes it easy to coat the chicken evenly.
Step 4: Season the Chicken
Season the chicken strips with salt and pepper. This step adds flavor directly to the meat before the breading.
Step 5: Coat the Chicken
Dredge each chicken strip in flour, shaking off excess, then dip into the egg, and finally coat with breadcrumbs. Each layer contributes to the tender’s crunch.
Step 6: Arrange on the Baking Sheet
Place the coated chicken strips on the prepared baking sheet in a single layer. Avoid overcrowding to ensure even cooking and crispiness.
Step 7: Bake the Chicken Tenders
Bake in the preheated oven for 15-20 minutes, flipping halfway through. This allows both sides to get that beautiful golden color.
Step 8: Serve and Enjoy
Once cooked through and crispy, remove from the oven and let them cool slightly. Serve warm with your favorite dipping sauces.
Pro Tip: For extra crunch, try double-dipping the chicken in the egg and breadcrumbs.
Tips for the Best Chicken Tenders
- Use Panko breadcrumbs for the best texture.
- Don’t skip seasoning the chicken; it makes a huge difference.
- Let the tenders rest for a few minutes after baking for the best texture.
- Experiment with spices to find your perfect flavor combination.
- For a healthier option, try air frying instead of baking.
Common Mistakes to Avoid
- Not seasoning the flour; it leads to bland tenders.
- Overcrowding the baking sheet, which causes steaming instead of crisping.
- Skipping the cooling period after baking, which can make them soggy.
- Not flipping the tenders halfway through cooking, resulting in uneven crispiness.
Serving Suggestions
These chicken tenders are amazing on their own but pair beautifully with various sides. Here are a few ideas:
- Fresh salad with a tangy vinaigrette.
- Crispy fries or sweet potato fries.
- Coleslaw for a crunchy contrast.
- Mac and cheese for a comfort food twist.
Variations to Try
- Add grated Parmesan cheese to the breadcrumbs for a cheesy flavor.
- Use spicy seasonings, like cayenne pepper, for a kick.
- Try a honey mustard glaze after baking for added sweetness.
- Swap out chicken for turkey or tofu for a different take.
Dietary Adaptations
- Gluten-free: Use gluten-free flour and breadcrumbs.
- Dairy-free: Ensure all ingredients are dairy-free; most are naturally.
- Vegan: Substitute chicken with tofu or tempeh and use a plant-based egg replacement.
- Low-carb/Keto: Use almond flour instead of regular flour and breadcrumbs.
Storage and Reheating
Refrigerator
Store leftover chicken tenders in an airtight container in the fridge. They will keep for up to 3 days.
- Make sure they are completely cool before sealing.
Freezer
To freeze, place cooked tenders in a single layer on a baking sheet. Once frozen, transfer them to a freezer-safe bag.
- They can be stored for up to 3 months.
Reheating
Reheat in the oven at 350°F (175°C) for about 10-15 minutes until heated through. This helps maintain their crispiness.
- Avoid microwaving as it can make them soggy.
Nutrition Information
| Nutrient | Amount |
|---|---|
| Calories | 250 |
| Total Fat | 10g |
| Saturated Fat | 2g |
| Carbohydrates | 20g |
| Fiber | 1g |
| Sugar | 1g |
| Protein | 25g |
| Sodium | 400mg |
| Cholesterol | 70mg |
This nutritional information is an estimate and may vary based on specific ingredients used.
Frequently Asked Questions
Can I use chicken thighs instead of breasts?
Yes, chicken thighs can be used for a juicier result, but ensure they are cooked through.
Can I make these chicken tenders ahead of time?
Absolutely! You can prepare them and store them in the refrigerator before baking.
How do I store leftovers?
Store leftover chicken tenders in an airtight container in the fridge for up to 3 days.
What should I do if the tenders are soggy?
Ensure they are not overcrowded on the baking sheet and allow them to rest after baking to maintain crispiness.
Can I bake them instead of frying?
Yes, baking is a healthier option and works perfectly for these tenders.
Final Thoughts
Making your own Chicken Tenders at home is rewarding and delicious. With these simple steps, you can create a dish that rivals your favorite restaurant.
Don’t hesitate to experiment with flavors and sides. You might just find a new family favorite.
For more delicious recipes, check out Chicken Crust Pizza Recipe and Chick-fil-A Nuggets Recipe.
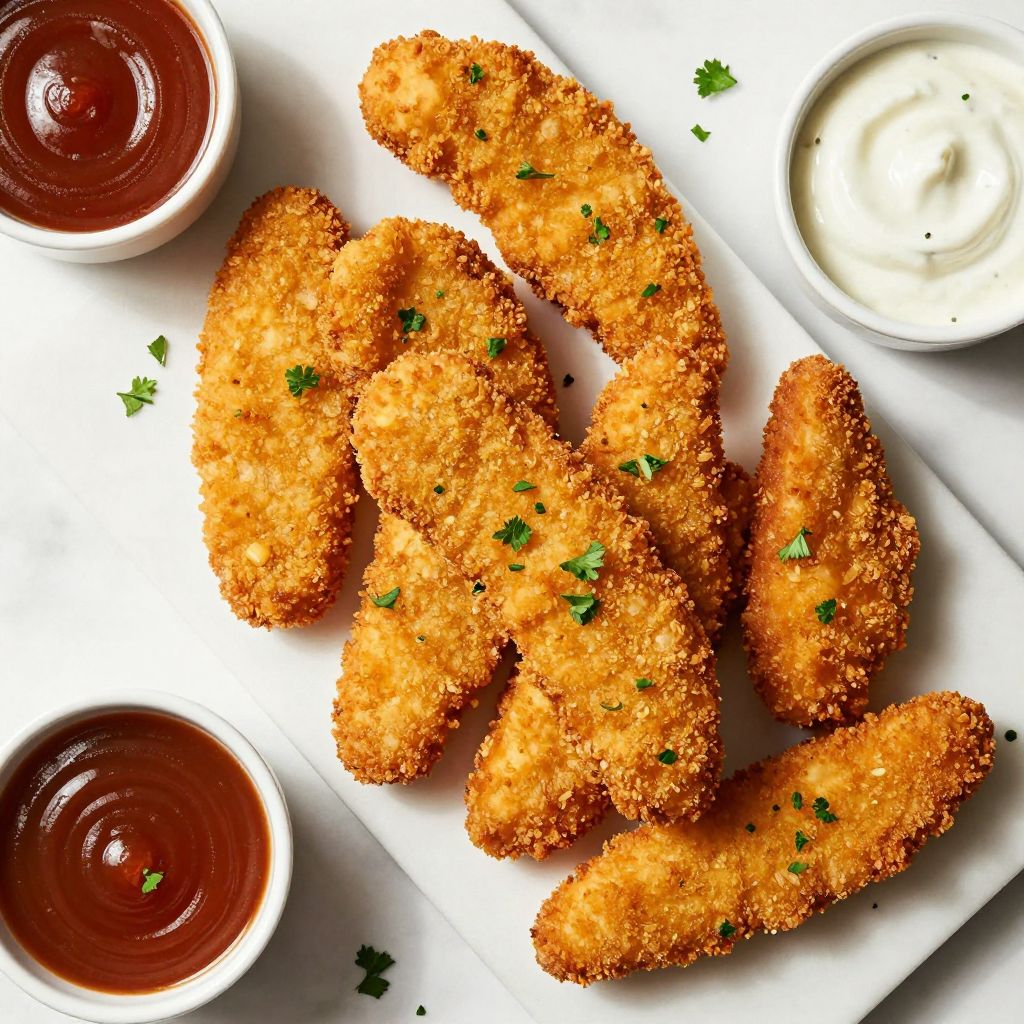
Chicken Tenders
Ingredients
Equipment
Method
- Preheat your oven to 425°F (220°C).
- Line a baking sheet with parchment paper or spray it with cooking spray.
- In three separate bowls, place the flour in one, beaten eggs in the second, and breadcrumbs mixed with spices in the third.
- Season the chicken strips with salt and pepper.
- Dredge each chicken strip in flour, shake off excess, dip into egg, and coat with breadcrumbs.
- Place the coated chicken strips on the prepared baking sheet in a single layer.
- Bake in the preheated oven for 15-20 minutes, flipping halfway through.
- Once cooked through and crispy, remove from the oven and let them cool slightly.
- Serve warm with your favorite dipping sauces.