
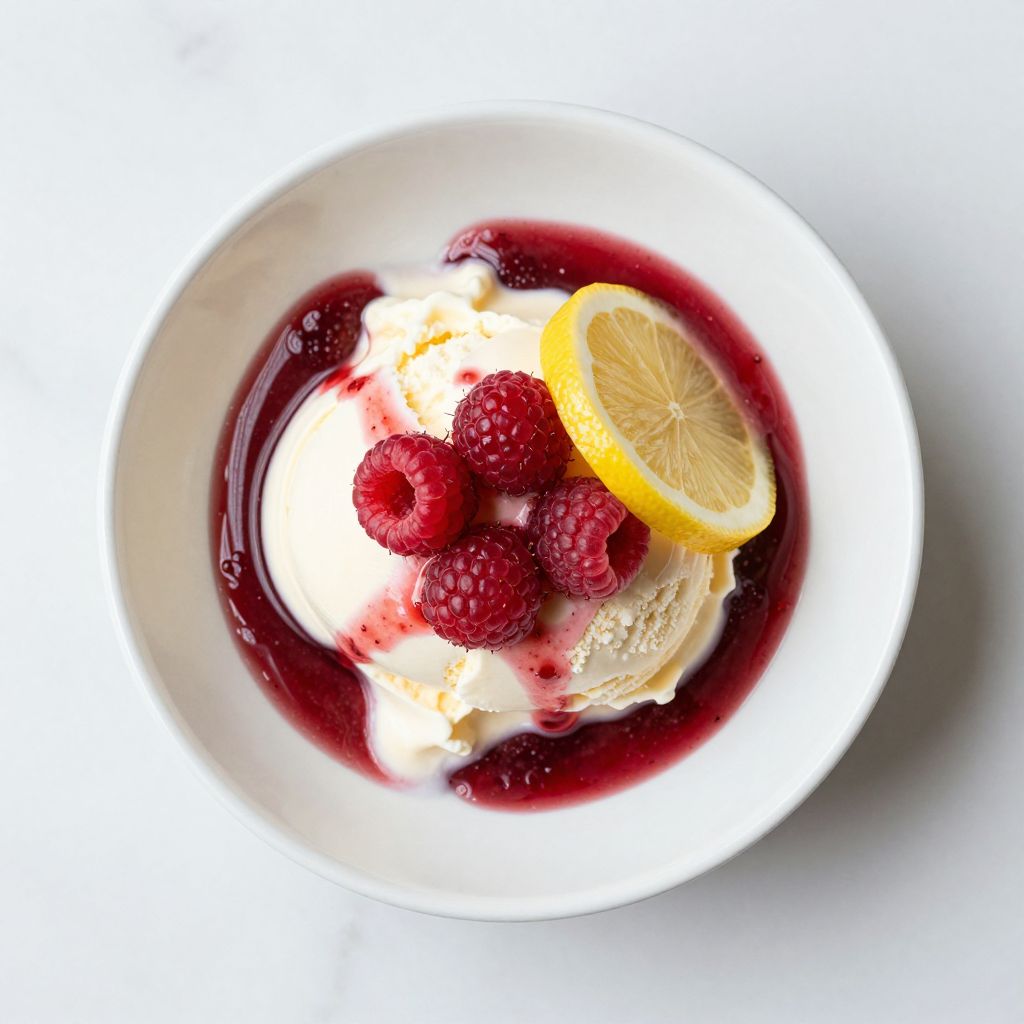
Nothing says summer quite like the bright, jewel-toned splash of homemade raspberry syrup pooling over vanilla ice cream or swirled into a tall glass of sparkling water.
This recipe delivers that vibrant, fruity intensity you crave without any of the artificial flavors lurking in store-bought bottles. You’ll capture the pure essence of fresh raspberries in less than 30 minutes, creating a syrup that transforms breakfast pancakes, lemonades, yogurt bowls, and cocktails into something genuinely special.
What makes this syrup so rewarding is the balance of simplicity and flavor. Just three ingredients create something restaurant-quality, and the entire process feels almost too easy to believe until you taste the result.
Why You’ll Love This Recipe
This raspberry syrup hits every mark for home cooks who want maximum flavor with zero fuss. It’s naturally sweetened, endlessly versatile, and ready to use in minutes.
- Made with just raspberries, sugar, and lemon juice, no mysterious additives.
- Ready in under 30 minutes from start to finish.
- Works beautifully over ice cream, in drinks, on breakfast, or swirled into desserts.
- Stores for weeks in the refrigerator, so you can make it ahead.
- The perfect way to use up a pint of raspberries before they go soft.
My Experience Making This Recipe
I first made this syrup on a whim one July afternoon when I had a pile of raspberries that needed rescuing. The speed of the whole thing shocked me, honestly, and my kitchen filled with this incredible fruity steam that made everyone wonder what was happening.
My kids poured it over everything that week: pancakes, ice cream, stirred into milk like old-fashioned syrup. One batch disappeared so fast I had to make a second round before the weekend ended.
What stuck with me most was how the flavor stayed bright and fresh, never cloying or overly jammy. The lemon juice adds this sharp edge that keeps things balanced and prevents the syrup from tasting one-note.
Recipe Overview
- Recipe Name: Homemade Raspberry Syrup
- Servings: Makes approximately 1 1/2 cups syrup
- Prep Time: 5 minutes
- Cook Time: 20 minutes
- Total Time: 25 minutes
- Course: Condiment or Topping
- Cuisine: American
- Calories per Serving: 45 calories per 2 tablespoon serving
Equipment You Will Need
- Large saucepan
- Wooden spoon or heat-resistant spatula
- Fine-mesh strainer or sieve
- Measuring cups and spoons
- Glass jars or bottles for storage
- Cheesecloth or paper towels (optional, for extra-fine straining)
- Candy or instant-read thermometer (optional, for checking consistency)
Ingredients for Raspberry Syrup
- Fresh raspberries: 3 cups (about 1 1/2 pounds)
- Granulated sugar: 1 1/2 cups
- Fresh lemon juice: 2 tablespoons
Ingredient Notes and Substitutions
- Fresh raspberries: These deliver the vibrant color and pure flavor that makes this syrup special. If you cannot find fresh ones, frozen raspberries work just as well, though the syrup may be slightly thinner and require a bit more simmering time.
- Granulated sugar: This dissolves cleanly into the syrup without adding any color or distinct flavor. You can substitute with organic cane sugar, but avoid brown sugar, which will darken the syrup and add molasses notes.
- Fresh lemon juice: The acidity brightens the fruit flavor and prevents the syrup from tasting flat or one-dimensional. Bottled lemon juice works in a pinch, though fresh-squeezed is noticeably better.
How to Make Raspberry Syrup
Step 1: Combine Raspberries and Sugar
Pour the 3 cups of fresh raspberries into your large saucepan and add the 1 1/2 cups of sugar. Stir gently to combine, letting the sugar begin to coat the berries.
Why this matters: mixing them together allows the sugar to start drawing out the berry juices before you turn up the heat, which means faster syrup development and more intense flavor extraction.
Step 2: Set Over Medium Heat
Place the saucepan over medium heat and bring the mixture to a gentle simmer. You should see small bubbles forming around the edges after about 3 to 5 minutes.
Medium heat prevents the bottom from scorching while giving the sugar time to fully dissolve. If you jump to high heat, you risk burning the fruit and creating a harsh, bitter taste.
Step 3: Stir Occasionally and Mash the Berries
As the mixture heats, use your wooden spoon to gently mash and break down the raspberries against the side of the pan. Stir every couple of minutes to ensure even heating.
Mashing the berries releases more juice and flavor compounds into the liquid. This is where much of the magic happens, so don’t skip this step or rush it.
Step 4: Simmer for About 15 Minutes
Let the mixture bubble gently for about 15 minutes, stirring occasionally. You’ll notice the liquid becoming deeper in color and thickening slightly.
This simmering time allows water to evaporate, concentrating the flavor and achieving the right consistency. The longer the simmer, the thicker your syrup will be, so adjust based on your preference.
Step 5: Add Lemon Juice
Stir in the 2 tablespoons of fresh lemon juice and mix well. The syrup will bubble slightly as the acid reacts with the mixture.
Lemon juice adds brightness and complexity that prevents the syrup from tasting overly sweet or one-dimensional. It also helps preserve the syrup and extends its shelf life.
Step 6: Remove from Heat and Cool Slightly
Turn off the heat and let the mixture cool in the pan for about 5 minutes. You want it warm enough to pour but cool enough to handle safely.
Cooling slightly prevents warping of glass jars and makes the straining process safer and easier. Don’t let it cool completely, as straining will be more difficult if the syrup thickens too much.
Step 7: Strain Through a Fine-Mesh Sieve
Pour the warm syrup through a fine-mesh strainer into a clean bowl, pressing gently on the berries with the back of your spoon to extract as much liquid as possible. Discard the solids.
Straining removes seeds and pulp, giving you a smooth, pourable syrup with a clean texture. Pressing the berries ensures you capture every drop of flavorful liquid.
Step 8: Transfer to Storage Jars
Pour the finished syrup into clean glass jars or bottles while it’s still warm. This helps create a light seal as it cools.
Using warm, clean jars reduces the risk of contamination and makes the syrup easier to pour into containers. Let the syrup cool completely before covering with lids.
Pro Tip: If you prefer an even silkier syrup with no seed texture at all, strain a second time through cheesecloth or a coffee filter, though this step is entirely optional.
Tips for the Best Raspberry Syrup
- Use the ripest raspberries you can find, as they deliver maximum flavor and natural sweetness. Pale or underripe berries will result in a less intense syrup.
- Don’t skip the lemon juice, as its tartness is essential for balance and brightness. Without it, the syrup tastes flat and cloying.
- If your syrup seems too thick after cooling, whisk in a tablespoon of water at a time until you reach the right consistency. Syrup thickens as it cools, so don’t judge thickness while it’s still warm.
- For deeper flavor, add a tiny pinch of vanilla extract or a single vanilla bean pod during simmering, though this is entirely optional and changes the character of the syrup.
- Make this syrup in small batches to preserve the bright, fresh flavor. Larger batches sometimes develop a slightly cooked taste over time.
- Store your jars away from direct sunlight to prevent color fading. The syrup stays vibrant longer in a cool, dark place.
Common Mistakes to Avoid
- Using overripe or moldy berries compromises flavor and can introduce spoilage organisms. Start with fresh, clean fruit every time.
- Cooking on too high heat can scorch the bottom of the pan and create a bitter, burnt taste that ruins the entire batch. Medium heat is your friend here.
- Skipping the lemon juice leaves the syrup tasting flat and overly sweet without complexity. This small ingredient makes an enormous difference.
- Straining too aggressively and squishing the seeds into the syrup creates grittiness and a slightly bitter aftertaste. Press gently, not hard.
- Filling jars while the syrup is too hot can cause the glass to crack or the lid to warp, ruining storage potential. Let it cool for at least 5 minutes first.
Serving Suggestions
This syrup transforms breakfast, desserts, and drinks with minimal effort. A few tablespoons elevate even the simplest dish into something memorable.
- Drizzle generously over vanilla ice cream, whipped cream, or Greek yogurt for an instant dessert.
- Swirl into pancakes, waffles, French toast, or oatmeal for a fruity breakfast boost.
- Mix into sparkling water or club soda for a homemade raspberry fizz that feels fancy but requires zero skill.
- Stir into cocktails, lemonades, or iced tea for professional-looking drinks that taste genuinely special.
- Layer into cakes, cheesecakes, or mousse for hidden pockets of bright flavor and visual appeal.
Variations to Try
- Blackberry Syrup: Swap raspberries for blackberries in equal amounts for a deeper, slightly earthier flavor. The cooking time and technique stay exactly the same.
- Raspberry-Mint Syrup: Add a handful of fresh mint leaves during the last 2 minutes of simmering, then strain them out. This creates a bright, summery syrup perfect for lemonades and cocktails.
- Spiced Raspberry Syrup: Stir in a pinch of cinnamon, nutmeg, or cardamom after removing from heat for warmth and complexity. This version pairs beautifully with oatmeal and yogurt.
- Raspberry-Vanilla Syrup: Add half a vanilla bean or 1/4 teaspoon vanilla extract after simmering for a soft, floral note that feels more dessert-like.
- Less-Sweet Version: Reduce the sugar to 1 cup for a more tart, berry-forward syrup that works well in drinks and requires less total heat and simmering time.
Dietary Adaptations
- Gluten-Free: This recipe is naturally gluten-free as written, with no modifications needed. All three ingredients are naturally free of gluten and cross-contamination risks.
- Dairy-Free: The syrup contains no dairy products and works beautifully over dairy-free ice cream, coconut yogurt, or plant-based whipped cream alternatives.
- Vegan: This recipe is completely vegan as written, using only raspberries, sugar, and lemon juice. No animal products are involved in any step.
- Low-Carb/Keto: Substitute the granulated sugar with erythritol or monk fruit sweetener in a one-to-one ratio for a low-carb version. The flavor and texture remain virtually identical.
Storage and Reheating
Refrigerator
Pour the cooled syrup into clean glass jars with tight-fitting lids. It keeps perfectly for up to 3 weeks in the refrigerator.
- Store in the coldest part of your refrigerator, away from the door where temperature fluctuates.
- If mold appears on the surface, discard the entire jar rather than trying to salvage it.
- The syrup may thicken as it cools; warm it gently before serving if you prefer a pourable consistency.
Freezer
Raspberry syrup freezes beautifully for up to 3 months when stored in freezer-safe containers. Leave about half an inch of headspace to allow for expansion.
- Use ice cube trays to freeze the syrup in small portions for easy thawing and portion control.
- Label containers with the date so you know how long they’ve been frozen.
- Thaw overnight in the refrigerator or gently warm in a small saucepan over low heat.
Reheating
Cold syrup is perfectly fine to use straight from the fridge over ice cream, but if you prefer it warm, reheat gently. Never use high heat, as this can damage the delicate flavor.
- Warm in a small saucepan over low heat for 2 to 3 minutes, stirring occasionally.
- Alternatively, microwave in a glass bowl in 20-second intervals, stirring between each burst.
- Overheating causes the syrup to break down and lose its bright color and fresh taste.
Nutrition Information
| Nutrient | Amount |
|---|---|
| Calories | 45 calories |
| Total Fat | 0 grams |
| Saturated Fat | 0 grams |
| Carbohydrates | 11 grams |
| Fiber | 1 gram |
| Sugar | 10 grams |
| Protein | 0 grams |
| Sodium | 2 milligrams |
| Cholesterol | 0 milligrams |
These values are based on 2 tablespoon servings. Serving size and total intake will vary based on your use, so adjust calculations if you use more or less per serving.
Frequently Asked Questions
Can I use frozen raspberries instead of fresh?
Yes, frozen raspberries work beautifully and often deliver just as much flavor as fresh. Thaw them first and drain any excess liquid, then proceed with the recipe as written, though you may need to add an extra minute or two of simmering time.
How do I know when the syrup is thick enough?
The syrup should coat the back of a spoon but still pour easily. If you want it thicker, simmer for an additional 5 minutes, then test again after cooling, since syrup thickens as it cools.
Can I make this syrup without sugar?
You can substitute sugar with honey, maple syrup, or agave nectar in equal amounts, though each will change the flavor slightly. Alternatively, use a zero-calorie sweetener like erythritol, though the texture may be slightly different.
What if my syrup tastes too tart or too sweet?
If too tart, stir in a tablespoon of sugar at a time and reheat gently until dissolved. If too sweet, add another tablespoon of fresh lemon juice and stir to combine.
Can I use this syrup in cocktails?
Absolutely, this syrup shines in cocktails, mocktails, and mixed drinks. Use about 1 to 2 tablespoons per drink, adjusting based on how strong you want the raspberry flavor.
Does this syrup need refrigeration?
Yes, refrigeration is essential for food safety and preserving the quality of the syrup. Keep it in a sealed jar in the coldest part of your fridge for up to 3 weeks.
Final Thoughts
Making your own raspberry syrup is one of those small kitchen victories that feels bigger than it should. You’re not just creating a condiment, you’re bottling up summer in a jar, capturing the bright essence of fresh raspberries without any of the additives or artificial flavors.
The next time you’re craving something sweet and fruity, reach for this homemade version. Your pancakes, ice cream, and drinks will taste noticeably better, and you’ll feel genuinely proud knowing you made it from scratch in under 30 minutes.
If you love making fruit syrups at home, you might also enjoy exploring our elderberry syrup recipe for a deeper, more complex flavor profile, or try our honey syrup recipe for a naturally sweetened option that works beautifully across both sweet and savory dishes.
Homemade Raspberry Syrup
Ingredients
Equipment
Method
- Pour the 3 cups fresh raspberries and 1 1/2 cups granulated sugar into a large saucepan and stir gently to combine.
- Set the saucepan over medium heat and bring the mixture to a gentle simmer, about 3 to 5 minutes.
- Continue to simmer over medium heat for 15 minutes, stirring occasionally and using the wooden spoon to gently mash the berries.
- Stir in 2 tablespoons fresh lemon juice and simmer for an additional 1 minute.
- Remove the pan from heat and let the mixture cool for 5 minutes.
- Strain the warm syrup through a fine-mesh strainer into a clean bowl, pressing gently on the solids to extract the liquid.
- Transfer the strained syrup into clean glass jars or bottles, let cool completely, then seal and refrigerate.