
There’s something magical about the first bite of queso fresco, that crumbly, salty cheese that melts on your tongue and tastes like sunshine and simplicity all at once. This fresh cheese is a staple in Mexican cuisine, and once you taste homemade queso fresco, you’ll wonder why you ever bothered with store-bought versions.
What makes this recipe special is its simplicity and speed. You need just four ingredients and about 30 minutes to create cheese that tastes fresher and more delicate than anything you’ll find in a supermarket.
The texture is slightly crumbly yet tender, the flavor is mild and slightly tangy, and it pairs beautifully with everything from fresh fruit and honey to warm tortillas and salsa. Whether you’re a seasoned cheese maker or picking up rennet for the first time, this recipe welcomes you into a kitchen skill that feels like magic but is absolutely achievable.
Why You’ll Love This Recipe
Homemade queso fresco delivers restaurant-quality results in your own kitchen, and the ingredient list is refreshingly short. You’ll impress everyone at your table while spending far less than you would on premium store-bought cheese.
- Uses just four simple ingredients with no strange additives or preservatives
- Ready in roughly 30 minutes from start to finish
- Costs a fraction of specialty cheese shop prices
- Tastes noticeably fresher and creamier than commercial versions
- Versatile enough for sweet applications like fruit platters or savory dishes
My Experience Making This Recipe
The first time I made queso fresco, I was honestly nervous about the rennet and whether I’d actually pull it off. Once I heated the milk and watched it transform into curds, any doubt vanished instantly.
The sensory experience is genuinely lovely. Your kitchen fills with a subtle, milky aroma, and you get to witness the actual separation of curds and whey right before your eyes. It feels like kitchen alchemy.
My family tasted it warm, still slightly steaming, with just a pinch of salt, and nobody said another word until their bowls were empty. That quiet approval told me everything I needed to know about whether this recipe was worth repeating.
Recipe Overview
- Recipe Name: Homemade Queso Fresco
- Servings: Makes about 1 pound of cheese
- Prep Time: 10 minutes
- Cook Time: 20 minutes
- Total Time: 30 minutes
- Course: Cheese, Appetizer
- Cuisine: Mexican
- Calories per Serving: 110 calories per 2-ounce serving
Equipment You Will Need
- Large stainless steel pot
- Instant-read thermometer
- Long-bladed cheese knife or butter knife
- Cheesecloth or butter muslin
- Colander or fine-mesh strainer
- Slotted spoon
- Measuring cups and spoons
- Microwave-safe bowl (for reheating whey)
Ingredients for Homemade Queso Fresco
- 1 gallon whole milk (not ultra-pasteurized)
- 1/4 teaspoon liquid rennet or 1/4 rennet tablet diluted in 1/4 cup non-chlorinated water
- 1 teaspoon salt, plus more for seasoning
- 1/4 teaspoon citric acid mixed into 1/4 cup cool, non-chlorinated water
Ingredient Notes and Substitutions
- Whole Milk: Whole milk has the fat content needed for proper curd formation and rich flavor. Ultra-pasteurized milk often won’t set properly, so regular pasteurized milk is your best bet, and local dairy options work beautifully.
- Liquid Rennet: Rennet contains enzymes that coagulate the milk and create curds. Powder rennet works, but you’ll need to adjust amounts and it can be harder to dissolve evenly.
- Citric Acid: This lowers the pH of the milk so the curds form properly. You cannot substitute vinegar here without changing the final texture noticeably.
- Salt: Sea salt or kosher salt work well. Iodized table salt can create a slightly metallic taste, so skip it.
How to Make Homemade Queso Fresco
Step 1: Prepare Your Workspace and Equipment
Gather all your equipment and lay out cheesecloth to drain curds later. Clean everything thoroughly since any residue can interfere with the cheese-making process and affect your final product’s flavor and texture.
Step 2: Add Citric Acid to Cold Milk
Pour the citric acid solution into the gallon of milk and stir gently for one minute. This step acidifies the milk to the proper pH so the rennet can work effectively and create the right curd structure.
Step 3: Heat the Milk to 90 Degrees Fahrenheit
Set the pot over medium heat and slowly warm the milk to 90 degrees, stirring occasionally to ensure even heating. This temperature activates the rennet and begins the coagulation process that turns liquid milk into solid curds.
Step 4: Add the Rennet
Dilute the liquid rennet in cool non-chlorinated water if using tablets, then add it to the warm milk and stir gently for one full minute. The rennet contains enzymes that bind milk proteins together, so thorough mixing ensures even curd formation throughout the pot.
Step 5: Allow Curds to Set for 5 Minutes
Remove the pot from heat and let it sit undisturbed for five minutes while the rennet does its work. You should see the milk thicken into a custard-like consistency, which signals that the curds are beginning to form.
Step 6: Cut the Curds
Using a long-bladed knife, cut the curds into quarter-inch cubes by slicing vertically at half-inch intervals, then horizontally the same way, then at an angle. Smaller curds release whey more efficiently and create that signature crumbly texture in your finished cheese.
Step 7: Heat the Curds to 104 Degrees Fahrenheit
Return the pot to low heat and slowly warm the curds to 104 degrees over about five minutes, stirring gently the whole time. Gradual heating helps the curds firm up and contract, which expels more whey and creates the proper texture.
Step 8: Hold Temperature and Stir
Maintain the temperature at 104 degrees for five more minutes, stirring occasionally to prevent the curds from matting together. This rest period allows the curds to continue shrinking and firming up so they hold their shape when you drain them.
Step 9: Drain the Curds
Line your colander with cheesecloth and carefully pour the curds and whey through it, saving the whey in a separate pot. You’ll need that whey shortly, and draining now separates the solids from the liquid.
Step 10: Reheat Whey and Add Curds Back
Heat the reserved whey to 190 degrees in a microwave-safe bowl or on the stove. This high temperature will cook the curds further and create the final texture, so once it reaches temperature, pour the drained curds back into the hot whey.
Step 11: Cook the Curds in Hot Whey
Stir gently and let the curds cook in the hot whey for about three to five minutes, until they feel slightly firm when you squeeze them gently. The curds will start to float to the surface when they’re ready to drain again.
Step 12: Final Drain and Season
Drain the curds one final time through cheesecloth and sprinkle with salt while they’re still warm. Toss gently to coat evenly, and taste after a minute to adjust seasoning if needed, since salt is the only seasoning in queso fresco.
Pro Tip: Don’t use ultra-pasteurized milk, even though it’s convenient, because the high heat treatment breaks down the protein structures that rennet needs to work with, and you’ll end up with a soupy failure instead of proper curds.
Tips for the Best Homemade Queso Fresco
- Use a reliable thermometer and check it frequently, since even a few degrees off can affect curd formation and your final texture. Instant-read digital thermometers are more accurate than dial versions.
- Use non-chlorinated water for your rennet and citric acid solutions, since chlorine can interfere with the culturing process. Filtered or bottled water works perfectly.
- Buy rennet from a cheese-making supplier rather than a grocery store, since grocery store versions are sometimes old or improperly stored. Fresh rennet makes a noticeable difference in results.
- Keep everything as clean as possible but don’t use soap residue, which can affect flavor and texture. Rinse thoroughly with hot water and air dry your equipment before starting.
- Make this cheese in the morning when you’re alert and can give it full attention, since the process requires gentle handling and careful temperature monitoring. Rushing or distraction often leads to disappointing results.
Common Mistakes to Avoid
- Using ultra-pasteurized milk will result in curds that don’t form properly, leaving you with milky whey and no cheese to harvest. Always check your milk label and choose regular pasteurized versions instead.
- Cutting curds too large prevents proper whey release, leaving you with wet, mushy cheese instead of the light, crumbly texture you want. Quarter-inch pieces are small enough to do the job effectively.
- Heating too quickly or cooling too slowly confuses the curds and prevents them from developing the right texture. Slow, gentle temperature changes give you reliable, consistent results.
- Forgetting to save the whey or letting it cool too much means you can’t cook the curds properly in step ten, and your cheese will lack the right firmness. Keep that whey and reheat it as instructed.
- Squeezing or pressing the curds aggressively during draining breaks them apart and creates a soupy mess. Handle them gently with a slotted spoon and let gravity do most of the work.
Serving Suggestions
Serve queso fresco warm on the day you make it for the most delicate, creamy texture. Cold queso fresco is still delicious but becomes firmer and slightly drier, which some people prefer for crumbling over dishes.
- Crumble over warm black beans with a drizzle of olive oil and fresh cilantro
- Pair with fresh watermelon, lime, and a sprinkle of tajin for a sweet and salty appetizer
- Top warm corn tortillas with queso fresco, roasted poblano, and a touch of crema
- Serve alongside fresh fruit like melon and berries with honey drizzled over top
- Crumble into warm soup or sprinkle over enchiladas just before serving
Variations to Try
- Herb-Infused Queso Fresco: Add minced fresh cilantro, jalapeño, or epazote to the curds while still warm for a more complex flavor that pairs beautifully with salads and grilled vegetables.
- Smoked Queso Fresco: Smoke the finished cheese for 20 to 30 minutes over mild hardwood like apple or pecan to add a subtle depth that complements grilled meats and corn dishes.
- Queso Fresco with Garlic: Add minced roasted garlic to the warm curds for a savory version that works well crumbled over grilled vegetables or hearty soups.
- Lightly Salted Version: Reduce salt to half a teaspoon if you prefer a milder cheese that lets the pure milk flavor shine through, which works especially well with delicate fruit pairings.
Dietary Adaptations
- Gluten-Free: This recipe is naturally gluten-free since cheese contains no gluten, and all four ingredients are standard kitchen staples without hidden gluten.
- Dairy-Free: You cannot make true queso fresco without dairy milk, but cashew-based cheese alternatives can be cultured similarly, though the texture and flavor will be noticeably different from the original.
- Vegetarian: Use vegetarian rennet instead of animal-derived rennet to keep this recipe vegetarian while maintaining the same texture and flavor profile.
- Low-Sodium: Reduce salt to one-quarter teaspoon or skip it entirely if you’re watching sodium intake, though the cheese will taste noticeably blander without any salt at all.
Storage and Reheating
Refrigerator
Store queso fresco in an airtight container lined with cheesecloth to absorb excess moisture. It keeps for five to seven days, though the texture becomes firmer and drier with each passing day.
- Keep it in the coldest part of your refrigerator away from strong odors
- Check daily for any mold or off-smells, which indicate spoilage
- Bring to room temperature for 15 minutes before serving to soften the texture slightly
Freezer
Queso fresco doesn’t freeze well since the texture becomes grainy and crumbly when thawed. If you must freeze it, use it only in cooked applications like melted toppings rather than as a standalone cheese.
- Wrap tightly in plastic wrap and then foil to prevent freezer burn
- Use within two months for best results
- Thaw in the refrigerator overnight before using
Reheating
Queso fresco doesn’t require reheating since it’s eaten fresh, but you can gently warm it in a low oven if you prefer. Never microwave it, as the intense heat will cause it to become tough and rubbery.
- Preheat oven to 300 degrees and warm for five to ten minutes on a baking sheet
- Let it cool for a minute before handling since it will be hot
Nutrition Information
| Nutrient | Amount |
|---|---|
| Calories | 110 |
| Total Fat | 9g |
| Saturated Fat | 6g |
| Carbohydrates | 1g |
| Fiber | 0g |
| Sugar | 0g |
| Protein | 7g |
| Sodium | 380mg |
| Cholesterol | 25mg |
Nutrition values are approximate and based on a two-ounce serving size using whole milk and the ingredients listed. Actual values vary slightly based on milk fat content and salt adjustments.
Frequently Asked Questions
Can I use milk other than whole milk to make queso fresco?
You can use two-percent milk, though the cheese will be less rich and creamy. Skim milk won’t work well since it lacks the fat needed for proper curd formation and flavor development.
How do I know if my milk is ultra-pasteurized?
Check the label for the words “ultra-pasteurized” or “UHT.” If it’s not mentioned, assume it’s regular pasteurized, which is what you need for this recipe to work properly.
Can I make this recipe ahead of time and store the finished cheese?
Queso fresco tastes best eaten the same day you make it, but you can store it for up to seven days in the refrigerator covered with cheesecloth. It becomes firmer and drier over time, so use older batches in cooked applications rather than eating it plain.
What if my curds never form or form very slowly?
This usually means your milk is ultra-pasteurized, your rennet is old, or your water was chlorinated. Start over with regular pasteurized milk, fresh rennet, and filtered water for better results.
Is homemade queso fresco worth the effort compared to store-bought?
Absolutely, yes. Homemade tastes noticeably fresher, creamier, and you control exactly what goes into it. Once you taste the difference, store-bought cheese feels like a pale imitation.
Why does my finished cheese taste salty?
You may have added too much salt or not mixed it evenly with the curds. Next time, start with three-quarters of the salt, taste, and add more gradually until the flavor is right.
Final Thoughts
Making queso fresco at home transforms how you think about cheese. What feels like an intimidating process becomes second nature after one successful batch, and you’ll find yourself making it weekly.
Pull together those four ingredients, follow the steps carefully, and taste the fresh, mild, crumbly cheese that tastes nothing like anything you’ve bought before. Your kitchen will smell like a dairy, your hands will smell like cheese for hours, and your taste buds will thank you endlessly.
If you loved this recipe, explore more fresh cheese options like our whipped ricotta recipe for another creamy, versatile homemade option. You might also enjoy our chipotle queso recipe for a spicy, melted cheese dip that brings serious flavor to any gathering.
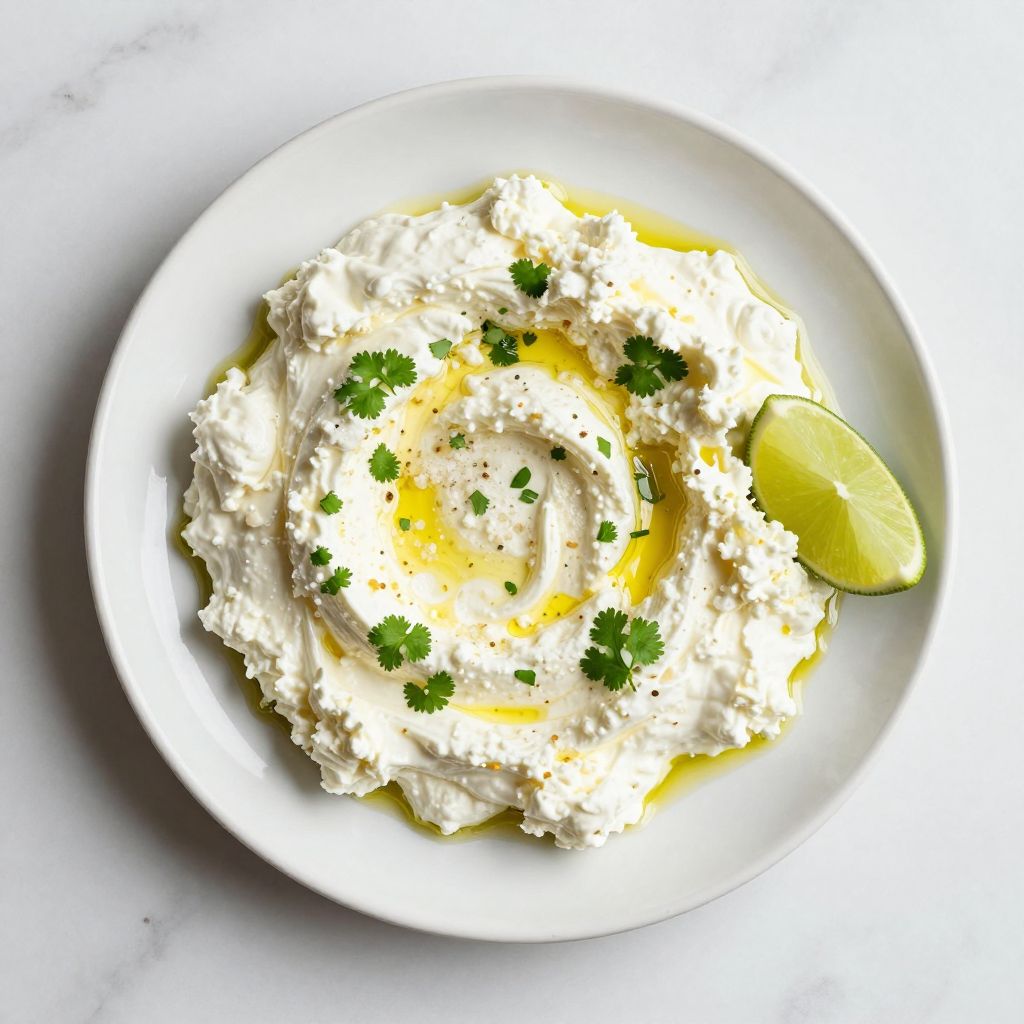
Homemade Queso Fresco
Ingredients
Equipment
Method
- Gather and sanitize all equipment before beginning.
- Stir the citric acid solution into the cold milk for one minute to acidify.
- Heat the milk over medium heat to 90°F (32°C), stirring occasionally.
- Dilute the rennet in cool non-chlorinated water, then stir it into the milk for one minute.
- Remove the pot from heat and let the curds set undisturbed for five minutes.
- Cut the curds into 1/4-inch cubes using a long-bladed knife.
- Return the pot to low heat and slowly warm the curds to 104°F (40°C) over five minutes, stirring gently.
- Maintain 104°F for an additional five minutes, stirring occasionally to prevent matting.
- Line a colander with cheesecloth and drain the curds, reserving the whey.
- Heat the whey to 190°F (88°C) and then pour it over the drained curds, cooking for three to five minutes.
- Drain the curds again in cheesecloth and let them rest for two minutes.
- Sprinkle salt over the warm curds, toss gently to coat, and taste; adjust seasoning if needed.