
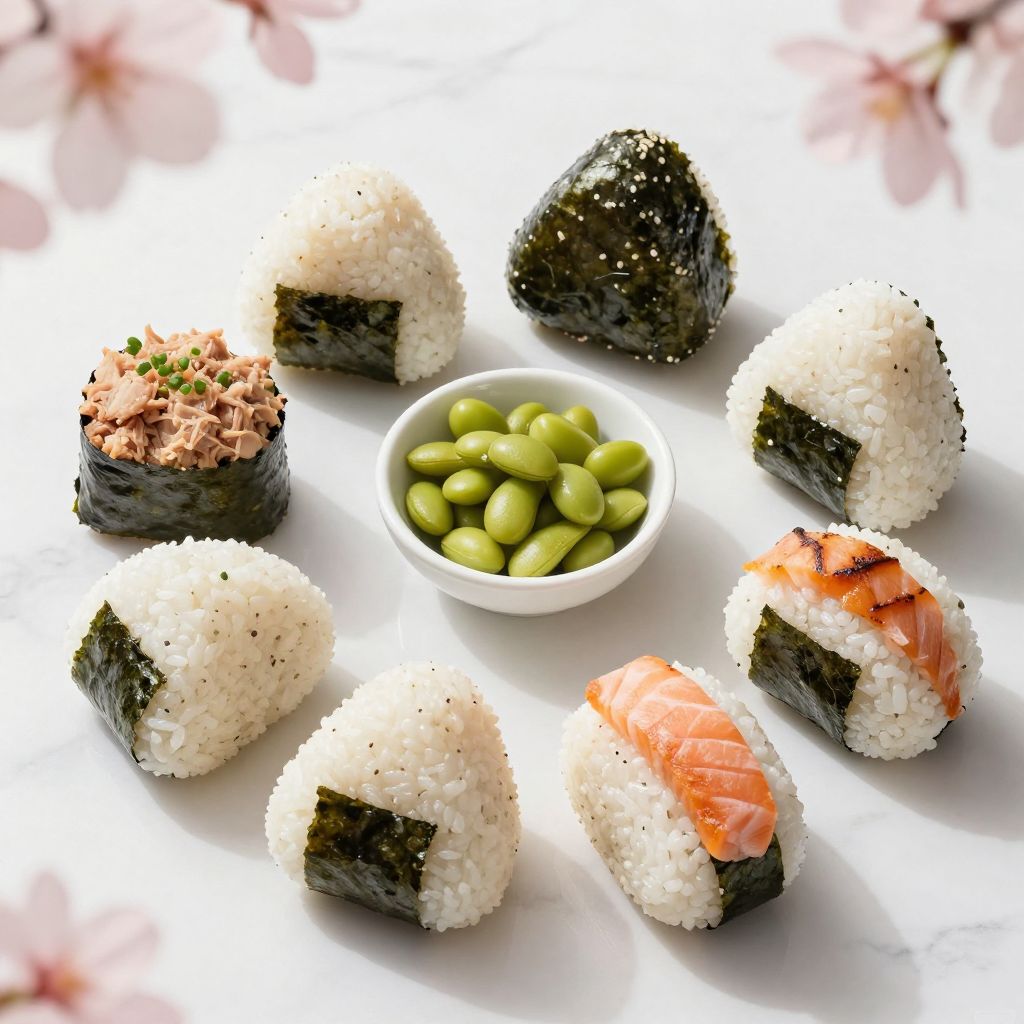
There’s something magical about the first bite of a freshly made Onigiri. These charming Japanese rice balls are not just delicious but also a delightful mix of texture and flavor that transports you straight to a sunny picnic under cherry blossoms. This recipe is special because it’s simple yet versatile; you can fill them with anything your heart desires. Imagine fluffy rice wrapped around savory fillings and a hint of seaweed. Whether you’re packing lunch for the kids or enjoying a snack yourself, these little wonders are perfect for any occasion.
Why You’ll Love This Recipe
Onigiri is a beautiful blend of simplicity and flavor that makes it a favorite among many.
- Quick to prepare, ideal for busy weeknights.
- Customizable fillings to suit your taste.
- Perfect for lunches, snacks, or picnics.
- Easy to make ahead and store.
- A fun way to introduce kids to cooking.
My Experience Making This Recipe
When I first made Onigiri, I was amazed at how quickly they came together. The smell of warm rice and the crispness of the seaweed brought back memories of my last trip to Japan.
Each bite had the perfect balance of flavor and texture. My family loved them, and they disappeared faster than I could make more!
Recipe Overview
- Recipe Name: Onigiri
- Servings: 4
- Prep Time: 10 minutes
- Cook Time: 20 minutes
- Total Time: 30 minutes
- Course: Snack
- Cuisine: Japanese
- Calories per Serving: 150
Equipment You Will Need
- Rice cooker or pot
- Mixing bowl
- Plastic wrap or onigiri mold
- Sharp knife
- Cutting board
Ingredients for Onigiri
- 2 cups sushi rice
- 2 1/2 cups water
- 1/2 teaspoon salt
- 1 tablespoon rice vinegar
- 1 sheet nori (seaweed), cut into strips
- Fillings of choice: umeboshi (pickled plum), tuna salad, or cooked salmon
Ingredient Notes and Substitutions
- Sushi rice: This starchy rice is sticky and holds together well. You can substitute with short-grain rice if needed.
- Nori: Adds a nice umami flavor and texture. You can use soy paper or leave it out for a gluten-free version.
- Fillings: Umeboshi gives a tangy flavor. You can use any filling that you enjoy, like avocado or chicken.
How to Make Onigiri
Step 1: Rinse the Rice
Start by rinsing the sushi rice under cold water until the water runs clear. This removes excess starch and prevents the rice from becoming gummy.
Step 2: Cook the Rice
Combine the rinsed rice and water in a rice cooker or pot, then cook according to the manufacturer’s instructions or bring to a boil, then simmer for 15-20 minutes. Properly cooked rice is crucial for shaping the Onigiri.
Step 3: Season the Rice
Once cooked, let the rice cool slightly, then mix in the salt and rice vinegar gently. This adds flavor and helps the rice hold together.
Step 4: Prepare Your Workspace
Wet your hands with water to prevent the rice from sticking. This technique is essential for shaping the Onigiri without making a mess.
Step 5: Shape the Onigiri
Take a handful of rice and flatten it in your palm. Add a small amount of your chosen filling in the center, then mold the rice around it to form a triangle. Making sure it’s compact ensures they hold their shape.
Step 6: Wrap with Nori
Wrap a strip of nori around the Onigiri or leave it off if you prefer. The nori adds a delightful flavor and texture contrast.
Step 7: Let Them Rest
Allow the Onigiri to sit for about 10 minutes before serving. This helps them set and makes them easier to handle.
Step 8: Serve and Enjoy
Enjoy your Onigiri fresh or pack them for later. They are delightful at room temperature, making them perfect for lunches.
Pro Tip: For extra flavor, try lightly toasting the nori before wrapping the Onigiri.
Tips for the Best Onigiri
- Use high-quality sushi rice for the best texture.
- Keep your hands wet while shaping to prevent sticking.
- Experiment with various fillings to keep things interesting.
- Toast nori strips briefly for added crunch.
- Serve immediately for the freshest taste.
Common Mistakes to Avoid
- Not rinsing the rice well can lead to overly sticky rice.
- Using cold rice makes it hard to mold; always use warm rice.
- Adding too much filling can cause Onigiri to fall apart.
- Skipping the resting time can make them difficult to handle.
Serving Suggestions
Onigiri pairs wonderfully with various sides and beverages.
- Served with miso soup for a comforting meal.
- Pair with edamame for a balanced snack.
- Enjoy with pickled vegetables for added flavor.
- Great with a side of fresh fruit for a light lunch.
Variations to Try
- Add sesame seeds to the rice for extra crunch.
- Try using quinoa instead of rice for a healthy twist.
- Incorporate herbs like basil or cilantro for a fresh flavor.
- Use flavored nori, like wasabi or teriyaki, for a unique touch.
Dietary Adaptations
- Gluten-free: Use gluten-free soy sauce if needed.
- Dairy-free: This recipe is naturally dairy-free.
- Vegan/Vegetarian: Fill with vegetables or tofu for a plant-based option.
- Low-carb/Keto: Substitute rice with cauliflower rice for a lower-carb version.
Storage and Reheating
Refrigerator
Store Onigiri in an airtight container in the fridge for up to 3 days.
- Wrap with plastic to maintain moisture.
- Refrigerate without nori to prevent sogginess.
Freezer
Onigiri can be frozen for up to 1 month.
- Wrap tightly in plastic wrap before freezing.
- Label with the date for easy tracking.
Reheating
Reheat in the microwave for about 30 seconds or until warm.
- Remove nori before reheating to keep it crisp.
- Enjoy at room temperature for the best taste.
Nutrition Information
| Nutrient | Amount |
|---|---|
| Calories | 150 |
| Total Fat | 1g |
| Saturated Fat | 0g |
| Carbohydrates | 32g |
| Fiber | 1g |
| Sugar | 0g |
| Protein | 3g |
| Sodium | 200mg |
| Cholesterol | 0mg |
This is an estimate and may vary based on specific ingredients used.
Frequently Asked Questions
Can I make Onigiri ahead of time?
Yes, Onigiri can be made ahead and stored in the fridge for up to three days.
What can I use as a filling?
Fillings can include pickled vegetables, tuna, or even spicy mayo. Get creative!
How do I prevent them from getting hard?
Wrap them in plastic wrap or an airtight container to keep moisture in.
Can I use brown rice instead of sushi rice?
Yes, but the texture will be different, and the stickiness may not hold as well.
What is the best way to reheat Onigiri?
Microwave them for about 30 seconds, but remove the nori to keep it crisp.
Final Thoughts
Making Onigiri is not just about food; it’s about bringing a piece of Japan into your home kitchen. These little rice balls are not only delightful but also a great way to experiment with flavors.
So grab some rice, get creative with fillings, and enjoy this cozy treat. You won’t regret it, and your taste buds will thank you!
For more delicious recipes, check out this Onigiri recipe and learn how to meal prep with this meal prep guide.
Onigiri
Ingredients
Equipment
Method
- Rinse the sushi rice under cold water until the water runs clear.
- Combine the rinsed rice and water in a rice cooker or pot, then cook according to the manufacturer's instructions or bring to a boil, then simmer for 15-20 minutes.
- Once cooked, let the rice cool slightly, then mix in the salt and rice vinegar gently.
- Wet your hands with water to prevent the rice from sticking.
- Take a handful of rice and flatten it in your palm. Add a small amount of your chosen filling in the center, then mold the rice around it to form a triangle.
- Wrap a strip of nori around the Onigiri or leave it off if you prefer.
- Allow the Onigiri to sit for about 10 minutes before serving.
- Enjoy your Onigiri fresh or pack them for later.