
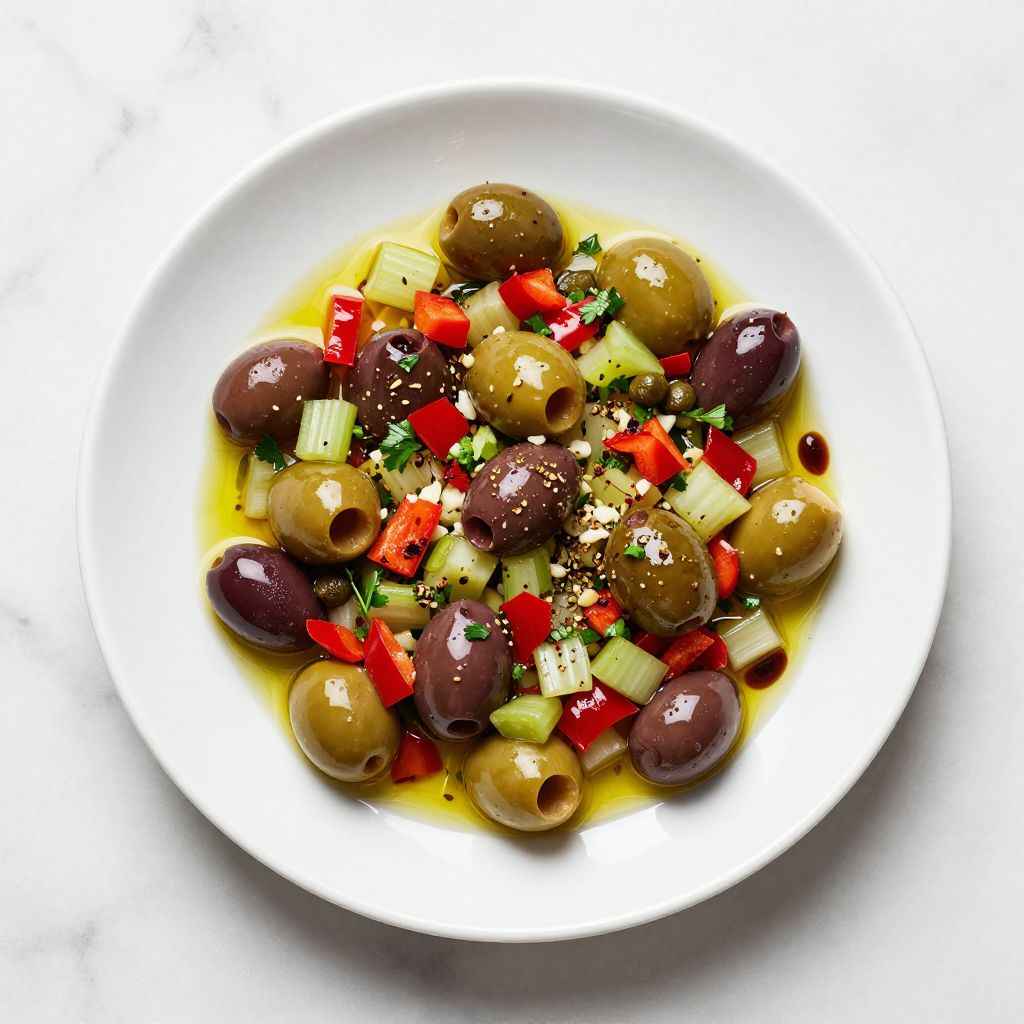
There’s something magical about cracking open a jar of olive salad and finding those briny, garlicky jewels packed with flavor and texture. This olive salad recipe takes you straight to an Italian kitchen, where simple ingredients transform into something that tastes like it came from a high-end delicatessen.
Homemade olive salad beats the jarred stuff every time because you control the salt, the oil, and the balance of flavors. It’s quick to make, keeps for weeks in the fridge, and works as an appetizer, sandwich topping, charcuterie board hero, or pasta mix-in.
What makes this recipe shine is the combination of briny olives, punchy garlic, and crisp celery all bound together in good olive oil. You’ll have a versatile condiment that feels fancy but takes about fifteen minutes to pull together.
Why You’ll Love This Recipe
This olive salad delivers restaurant-quality flavor with minimal effort. It transforms ordinary meals into something special and comes together faster than you’d expect.
- Ready in 15 minutes with zero cooking required
- Keeps for up to three weeks in the refrigerator
- Works as an appetizer, sandwich spread, pasta topping, or salad garnish
- Budget-friendly and made with pantry staples
- Perfect for meal prep and entertaining
My Experience Making This Recipe
I first made this olive salad for a last-minute dinner party when I realized I had nothing impressive to serve as an appetizer. Fifteen minutes later, I pulled a gorgeous, glistening bowl of olive salad out of my kitchen that had guests asking for the recipe before they’d even finished the first taste.
The magic moment happens when you taste the balance of briny olives against the fresh crunch of celery and the punch of raw garlic. The first time I made it, I actually tasted it three times because I couldn’t believe how good something this simple could be.
Now I make a batch every other week because it disappears fast on sandwiches, crackers, and straight from the jar when nobody’s looking. My partner jokes that this recipe is dangerous because it tempts him to eat spoonfuls directly, and honestly, he’s not wrong.
Recipe Overview
- Recipe Name: Classic Olive Salad
- Servings: 8 to 10 servings
- Prep Time: 15 minutes
- Cook Time: 0 minutes
- Total Time: 15 minutes
- Course: Appetizer or Condiment
- Cuisine: Italian
- Calories per Serving: 180
Equipment You Will Need
- Cutting board
- Sharp chef’s knife
- Large mixing bowl
- Measuring cups and spoons
- Wooden spoon or rubber spatula
- Glass storage jars with lids
Ingredients for Olive Salad
- 2 cups Kalamata olives, pitted and halved
- 1 cup green olives, pitted and chopped
- 1 cup celery, finely diced
- 1/2 cup red bell pepper, finely diced
- 1/4 cup roasted red peppers, chopped
- 4 cloves garlic, minced very fine
- 1/4 cup fresh parsley, chopped
- 2 tablespoons capers, drained and roughly chopped
- 1/2 teaspoon dried oregano
- 1/4 teaspoon red pepper flakes
- 1/3 cup extra virgin olive oil
- 2 tablespoons red wine vinegar
- 1 teaspoon Dijon mustard
- Salt and black pepper to taste
Ingredient Notes and Substitutions
- Kalamata olives: These bring deep, fruity flavor and a meaty texture. If you can’t find them, use additional green olives, though you’ll lose some richness.
- Green olives: They provide brightness and a firmer bite. Castelvetrano olives work beautifully if you prefer something milder and buttery.
- Celery: It adds crucial crunch and freshness. Fennel works as a substitute for a slightly licorice-forward twist.
- Red bell pepper: The fresh vegetable adds sweetness and color balance. Yellow or orange peppers swap in for a similar texture with slightly less sweetness.
- Roasted red peppers: They contribute depth and a slightly sweet, smoky note. Skip them if you prefer a lighter flavor, or use sun-dried tomatoes for a tangier version.
- Extra virgin olive oil: Quality oil matters here since it’s raw and prominent. Regular olive oil works but tastes less vibrant and complex.
- Red wine vinegar: It provides acidity and tang. White wine vinegar or lemon juice substitute well if that’s what you have on hand.
How to Make Olive Salad
Step 1: Pit and Prepare the Olives
Pour your Kalamata and green olives into a colander and rinse them under cool water to remove excess brine. Pat them dry with a clean kitchen towel because moisture will dilute the final flavor and make the salad taste watery.
Place the Kalamata olives on your cutting board and use the flat side of your chef’s knife to gently press each olive, cracking the pit so it slides out easily. Once pitted, halve them and transfer to your large mixing bowl.
Step 2: Chop the Green Olives and Set Aside
Take your green olives and chop them into roughly quarter-inch pieces. The smaller pieces allow the green olive flavor to distribute evenly throughout the salad rather than getting mouthfuls of just olives.
Add the chopped green olives to the bowl with the Kalamata olives and set the mixture aside. You want to combine all your olives in one place to make the next steps flow smoothly.
Step 3: Dice the Celery with Precision
Take your celery stalks and slice them lengthwise in half, then cut them into thin matchsticks. Now chop those matchsticks into small, even dice roughly the size of a match head.
Uniform celery pieces matter because they cook into the salad more evenly and contribute to a pleasant, consistent texture. Add your diced celery directly to the olive mixture.
Step 4: Prepare the Fresh and Roasted Peppers
Cut your fresh red bell pepper in half, remove the seeds and white pith, and dice it into pieces about the same size as your celery. This consistency in sizing makes every bite feel balanced and intentional.
Chop your roasted red peppers into similar-sized pieces. If your roasted peppers come packed in oil, drain them first so you control the oil content in your final salad.
Add both the fresh and roasted peppers to your bowl with the olives and celery.
Step 5: Mince the Garlic Very Fine
Peel four garlic cloves and use your chef’s knife to smash each one slightly under the flat blade. This makes mincing faster and releases some of the garlic’s oils, waking up its flavor.
Mince each clove into the smallest pieces you can manage because raw garlic needs this treatment to spread its punch evenly without creating harsh, overpowering bites. Add the minced garlic to your bowl immediately.
Step 6: Add the Fresh Herbs and Spices
Grab your fresh parsley, wash it if it’s dusty, and chop it fine. You want small pieces that distribute throughout rather than big visible chunks that feel awkward in texture.
Add the parsley, drained capers, dried oregano, and red pepper flakes to the bowl. The dried oregano carries Mediterranean authenticity and subtle earthiness, while the pepper flakes add a gentle heat that builds on the palate.
Step 7: Make Your Dressing
In a small bowl, whisk together your extra virgin olive oil, red wine vinegar, and Dijon mustard. The mustard acts as an emulsifier, helping the oil and vinegar blend together rather than separating into two distinct layers.
Whisk vigorously for about thirty seconds until the mixture looks slightly thickened and unified. This step takes just moments but makes a real difference in how the dressing coats and flavors your vegetables.
Step 8: Combine Everything and Season
Pour your dressing over the olive and vegetable mixture and stir everything together with a wooden spoon or rubber spatula. Make sure every piece gets coated with the dressing and that the garlic distributes evenly throughout.
Taste a small spoonful and adjust the seasoning with salt and black pepper. Remember that the olives and capers already bring saltiness, so go light on the added salt and taste before adding more.
Step 9: Let It Rest and Meld
Cover your bowl with plastic wrap or a kitchen towel and let the salad sit at room temperature for at least thirty minutes. This resting period allows the flavors to marry and deepen, transforming separate ingredients into a cohesive whole.
After thirty minutes, give it another stir and taste it again. The flavor will have intensified noticeably, and you may want to add a pinch more pepper or a tiny splash of vinegar if it needs brightness.
Pro Tip: Make this olive salad at least a few hours ahead, or even the night before. The flavors meld beautifully with time, and it tastes noticeably better on day two than it does fresh from the bowl.
Tips for the Best Olive Salad
- Use quality olives because they’re the star of the dish. Cheap, heavily processed olives taste bitter and thin compared to premium varieties that come from actual olive farmers.
- Pit your olives by hand rather than buying pre-pitted ones. Pre-pitted olives often taste mushy and sometimes have a metallic flavor from the pitting machinery.
- Don’t skip the fresh parsley because it adds brightness that balances the briny, salty notes. Fresh herbs matter way more than you’d think in a raw salad like this.
- Taste as you build. Every batch of olives varies slightly in saltiness, so adjust your seasoning as you go rather than adding everything at the end.
- Use a really good extra virgin olive oil because you taste it raw in every bite. The oil quality directly impacts how luxurious and delicious the final salad feels.
- Store your finished olive salad in glass jars rather than plastic containers because plastic can absorb the sharp, briny flavors and smell.
Common Mistakes to Avoid
- Don’t use canned or jarred olives packed in vinegar. These taste weak and over-preserved compared to quality bulk olives from the deli counter.
- Avoid cutting your vegetables too large because they won’t distribute evenly and the salad will feel chunky rather than cohesive. Small, uniform dice is your friend here.
- Don’t skip the drying step after rinsing the olives. Excess moisture waters down your olive oil and vinegar dressing, making the final salad taste diluted.
- Resist the urge to add too much fresh garlic early on. Raw garlic is intense, and you can always add more later, but you can’t take it out.
- Don’t refrigerate immediately after making it. Room temperature resting allows the flavors to meld properly, which is what separates homemade from just okay.
Serving Suggestions
Olive salad works as a standalone appetizer, a sandwich upgrade, or a charcuterie board showstopper. Serve it cold or at room temperature depending on your setting.
- Spoon it onto crostini with crumbled feta cheese for an elegant appetizer
- Use it as a sandwich spread under sliced deli meat and provolone for Italian-inspired sandwiches
- Top burrata cheese with olive salad and crusty bread for a simple, luxurious starter
- Mix it into fresh pasta with a splash of pasta water for a quick, flavorful meal
- Serve it alongside cured meats and cheeses on a charcuterie board
Variations to Try
- Add diced mozzarella di bufala or fresh mozzarella balls for a creamy contrast to the briny olives. The cheese softens slightly as it sits and becomes almost luxurious against the firm vegetables.
- Stir in chopped sun-dried tomatoes for a deeper, slightly tangy flavor profile that leans Mediterranean. This swap works beautifully if you love tomatoes more than fresh peppers.
- Include chopped fresh basil or mint for an herbaceous twist that feels bright and summery. These fresh herbs add a flavor dimension that’s completely different from parsley.
- Mix in white beans or chickpeas to bulk up the salad into more of a substantial side dish or light meal. The beans add protein and heartiness without changing the core olive flavor.
- Add chopped anchovies or a tiny pinch of anchovy paste for umami depth. This variation appeals to people who love salty, savory intensity.
Dietary Adaptations
- Gluten-free: This recipe is naturally gluten-free. Just confirm that your capers and any pre-made ingredients don’t contain hidden gluten in their processing or additives.
- Dairy-free: The recipe contains no dairy, so it’s automatically dairy-free and pairs beautifully with vegan cheeses if you’re serving it on crostini.
- Vegan and vegetarian: This recipe is completely vegan and vegetarian as written. It contains no animal products and works perfectly for plant-based eating.
- Low-carb and keto: Olive salad fits perfectly into low-carb and keto diets with minimal adjustment. The vegetables are low-carb, and the high fat content from olive oil supports ketogenic eating.
Storage and Reheating
Refrigerator
Transfer your olive salad to clean glass jars and store it in the refrigerator where it keeps for up to three weeks. The cold actually helps preserve the flavors and firms up the vegetables slightly.
- Always use a clean spoon when scooping out portions to prevent bacterial contamination
- Keep the jar sealed tightly between uses
- The oil may solidify slightly in the cold, which is completely normal
Freezer
Olive salad doesn’t freeze well because the vegetables become soft and mushy after thawing. The texture suffers significantly, so stick to refrigerator storage if you want to keep it longer than a few days.
- Freezing changes the cell structure of the vegetables irreversibly
- The final defrosted texture feels mushy and disappointing
Reheating
Don’t reheat olive salad because it’s meant to be served cold or at room temperature. Heating it breaks down the fresh vegetables and cooks off the delicate flavors that make it special.
- Let it come to room temperature before serving if it’s been refrigerated
- Use it straight from the jar as an appetizer or condiment
Nutrition Information
| Nutrient | Amount |
|---|---|
| Calories | 180 |
| Total Fat | 17g |
| Saturated Fat | 2.5g |
| Carbohydrates | 8g |
| Fiber | 2g |
| Sugar | 1g |
| Protein | 2g |
| Sodium | 520mg |
| Cholesterol | 0mg |
This nutrition information is an estimate based on the ingredients listed and serving size. Exact values depend on specific brands and preparation methods used.
Frequently Asked Questions
Can I use jarred olives from the grocery store?
Yes, jarred olives work if they’re quality brands from the refrigerated deli section. Canned olives from the pantry shelf taste metallic and mushy, so avoid those entirely.
How far in advance can I make this olive salad?
Make it up to three days ahead and it actually tastes better as the flavors deepen. You can also make it the morning of your event and serve it that same evening.
What if I don’t have red wine vinegar?
White wine vinegar, lemon juice, or sherry vinegar work as substitutes. The flavor profile shifts slightly with each option, but all three taste good and maintain the acidity you need.
Why is my olive salad watery?
You likely didn’t dry your olives thoroughly after rinsing them, or the vegetables released too much moisture while sitting. Use a paper towel to pat everything dry and serve it from a jar to strain off excess liquid at the bottom.
Can I add fresh mozzarella to this recipe?
Yes, fresh mozzarella or burrata cheese works beautifully added just before serving. Add it too early and it becomes overly soft and absorbs the briny flavors, which you may or may not like.
Is this recipe vegan?
Yes, olive salad is completely vegan and vegetarian as written with no animal products at all. It’s naturally plant-based and works perfectly for all dietary preferences.
Final Thoughts
This olive salad recipe becomes a kitchen staple once you make it the first time. The combination of briny olives, fresh vegetables, and good olive oil creates something that tastes like you spent hours on it, when really you invested just fifteen minutes.
Pull a jar from your fridge whenever you need an appetizer, a sandwich upgrade, or a burst of Mediterranean flavor. I promise you’ll find yourself making it constantly once you taste how good homemade really is.
If you enjoy this recipe, explore more salad options like our ham salad recipe for variety, or try the La Scala salad recipe for another Italian-inspired option that’s equally impressive and equally easy to make.
Classic Olive Salad
Ingredients
Equipment
Method
- Rinse the Kalamata and green olives under cool water in a colander, then pat them dry with a clean kitchen towel to remove excess moisture.
- Using the flat side of a knife, gently crack each Kalamata olive, remove the pits, halve the olives, and transfer them to a large mixing bowl.
- Chop the green olives into roughly quarter-inch pieces and add them to the mixing bowl with the Kalamata olives.
- Slice the celery stalks lengthwise, dice into small even pieces, and add to the olive mixture.
- Dice the red bell pepper into pieces similar in size to the celery and add to the bowl.
- Chop the roasted red peppers into similar-sized pieces, drain if packed in oil, then add to the bowl.
- Smash and mince the garlic cloves finely, then add them to the bowl.
- Chop the fresh parsley, then add parsley, capers, dried oregano, and red pepper flakes to the mixture.
- In a small bowl, whisk together extra virgin olive oil, red wine vinegar, and Dijon mustard until the dressing is emulsified.
- Pour the dressing over the olive and vegetable mixture and stir with a wooden spoon until everything is well coated.
- Season with salt and black pepper to taste, cover the bowl, and let the salad rest at room temperature for at least 30 minutes to allow flavors to meld.