
There’s something magical about creating your own edible art, and Modeling Chocolate is the perfect medium for that. This versatile fondant-like chocolate is not only easy to work with but also adds a rich, sweet flavor to your treats that traditional fondant simply cannot match. Whether you’re crafting decorations for a birthday cake or simply indulging in a fun kitchen project, this recipe will guide you through the process with ease.
Why You’ll Love This Recipe
This recipe is a dream come true for any baking enthusiast. It offers flexibility and delightful taste.
- Simple to make with just two ingredients.
- Easily moldable for intricate designs.
- Rich chocolate flavor that enhances desserts.
- Perfect for various occasions and themes.
- Stays pliable for easy handling.
My Experience Making This Recipe
When I first attempted to make Modeling Chocolate, I was amazed at how quickly it came together. The smell of melting chocolate wafting through my kitchen was heavenly, and I felt like a true chocolatier.
As I worked the chocolate into various shapes, I found myself lost in creativity. Each piece became a little work of art, and the compliments from friends and family made it all the more rewarding.
Recipe Overview
- Recipe Name: Modeling Chocolate
- Servings: Varies based on use
- Prep Time: 15 minutes
- Cook Time: 0 minutes
- Total Time: 15 minutes
- Course: Dessert
- Cuisine: Various
- Calories per Serving: Approximately 100
Equipment You Will Need
- Microwave-safe bowl
- Spatula
- Counter space or work surface
- Plastic wrap
- Cutting board (optional for shaping)
Ingredients for Modeling Chocolate
- Chocolate (12 oz, any type: dark, milk, or white)
- Light corn syrup (1/3 cup)
Ingredient Notes and Substitutions
- Chocolate: Used for its flavor and texture; you can substitute with candy melts for a different finish.
- Light corn syrup: This helps with pliability; honey can be used as an alternative, but it may alter the flavor slightly.
How to Make Modeling Chocolate
Step 1: Melt the Chocolate
Begin by chopping your chocolate into small, even pieces to ensure uniform melting. This prevents any burning and ensures a smooth texture.
Step 2: Heat Chocolate
Place the chopped chocolate in a microwave-safe bowl and heat in 30-second intervals, stirring in between. This allows the chocolate to melt gradually without seizing up.
Step 3: Add Corn Syrup
Once the chocolate is fully melted, stir in the light corn syrup. This adds the necessary stretch and bend to your modeling chocolate.
Step 4: Mix Thoroughly
Mix the chocolate and corn syrup until completely combined. The mixture should be smooth and glossy, indicating it’s ready for the next step.
Step 5: Cool the Mixture
Let the mixture cool at room temperature until it’s cool enough to handle. This step is crucial to avoid burns and to make it easier to knead.
Step 6: Knead the Chocolate
Once cooled, knead the chocolate until smooth and pliable. This is where your creativity can flourish, as you can shape it into any form.
Step 7: Wrap and Store
Wrap the modeling chocolate tightly in plastic wrap to prevent it from hardening. Proper storage will keep it fresh for your next baking adventure.
Step 8: Use Your Creation
Now it’s time to create! Roll out, mold, and shape your chocolate into decorations or covers for your cakes and desserts.
Pro Tip: Always work with your modeling chocolate at room temperature for the best results.
Tips for the Best Modeling Chocolate
- Use high-quality chocolate for the best taste and texture.
- Knead thoroughly to ensure smoothness and pliability.
- Store in a cool, dry place to maintain consistency.
- Experiment with colors by adding food coloring during the kneading process.
- Keep your work surface lightly dusted with cornstarch to prevent sticking.
Common Mistakes to Avoid
- Overheating the chocolate can cause it to seize; always melt slowly.
- Not kneading enough can result in a crumbly texture, so give it a good workout.
- Using too much corn syrup can make it overly sticky; stick to the recommended amount.
- Storing it improperly can lead to hardening; always wrap it well.
Serving Suggestions
Modeling chocolate can transform your desserts into stunning centerpieces. Here are some ideas to pair it with:
- Cakes for birthdays or special occasions.
- Cupcakes topped with intricate decorations.
- Cookies that need a little extra flair.
- Chocolate-covered strawberries for a gourmet touch.
Variations to Try
- Add flavored extracts like vanilla or almond for a unique twist.
- Use white chocolate and color it with gel food coloring for vibrant designs.
- Try different types of chocolate, such as dark or milk, to cater to your taste.
- Incorporate spices like cinnamon for a warm flavor profile.
Dietary Adaptations
- Gluten-free: This recipe is naturally gluten-free.
- Dairy-free: Use dairy-free chocolate and corn syrup.
- Vegan/vegetarian: Choose plant-based chocolate and corn syrup.
- Low-carb/keto: Use sugar-free chocolate for a low-carb version.
Storage and Reheating
Refrigerator
Store modeling chocolate wrapped tightly in plastic wrap in the fridge for longer shelf life.
- Keep it away from moisture to prevent stickiness.
- Bring to room temperature before using.
Freezer
Modeling chocolate can be frozen for extended storage.
- Wrap it well to avoid freezer burn.
- Thaw in the refrigerator overnight before using.
Reheating
If your modeling chocolate hardens, gently re-knead it after warming it slightly in your hands.
- Use a microwave in short bursts or heat it with your hands.
- Avoid direct heat to prevent melting.
Nutrition Information
| Nutrient | Amount |
|---|---|
| Calories | 100 |
| Total Fat | 6g |
| Saturated Fat | 4g |
| Carbohydrates | 12g |
| Fiber | 0g |
| Sugar | 10g |
| Protein | 1g |
| Sodium | 5mg |
| Cholesterol | 15mg |
This information is approximate and can vary based on the specific ingredients used.
Frequently Asked Questions
Can I substitute dark chocolate for white chocolate?
Absolutely! Just keep in mind that the flavor and color will change.
How far in advance can I make modeling chocolate?
You can make it up to a week in advance and store it properly.
Can I make modeling chocolate in a humid climate?
Yes, just be mindful of moisture as it can affect the texture; wrap it tightly.
What if my modeling chocolate is too hard?
Simply knead it with your hands or warm it slightly for better consistency.
Can I use it to cover a cake?
Definitely! It works wonderfully for cake coverings and decorations.
Final Thoughts
Making Modeling Chocolate is not just a recipe; it’s a way to express your creativity in the kitchen. Dive into this delicious project, and watch your cakes and desserts come to life.
So roll up your sleeves, grab your ingredients, and have fun with this delightful chocolate medium. For more sweet inspiration, check out my recipes for Dubai Chocolate and Mexican Hot Chocolate.
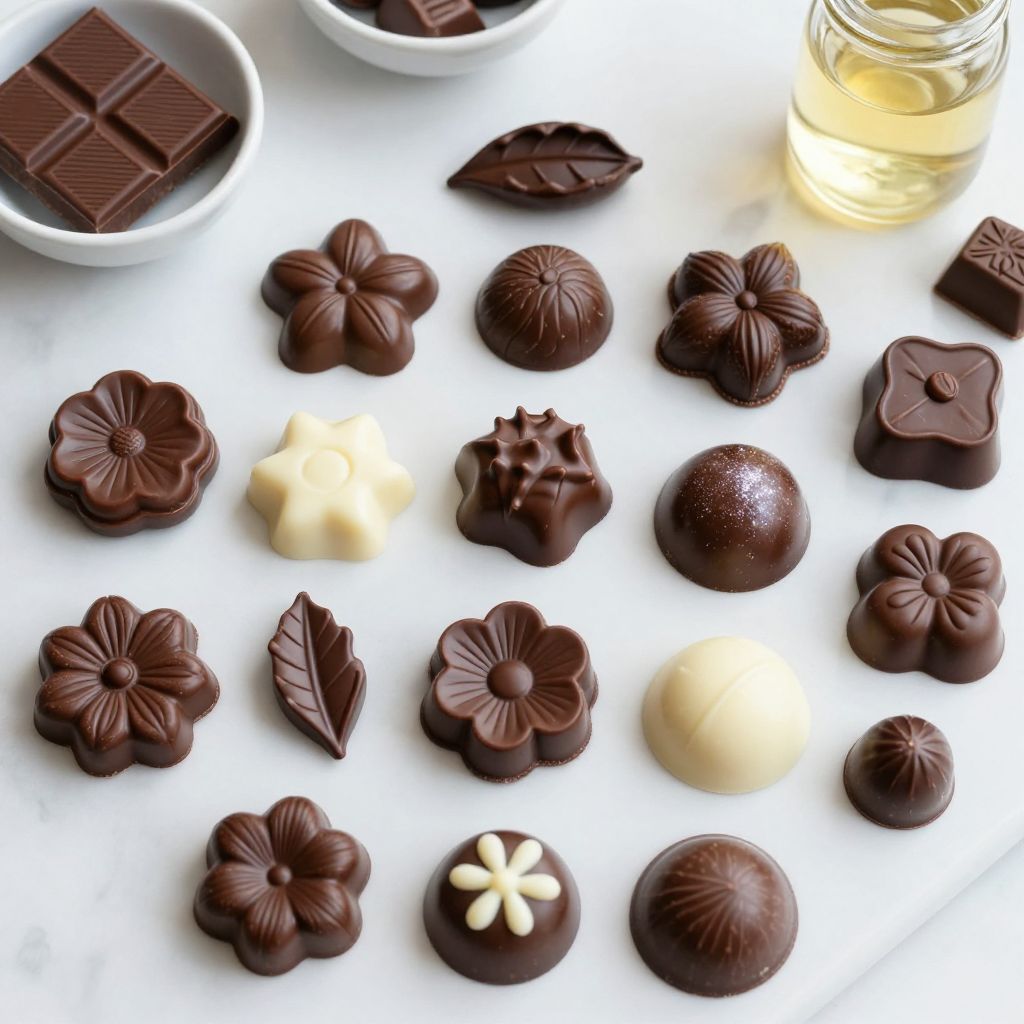
Modeling Chocolate
Ingredients
Equipment
Method
- Chop the chocolate into small, even pieces.
- Place the chopped chocolate in a microwave-safe bowl and heat in 30-second intervals, stirring in between.
- Once the chocolate is fully melted, stir in the light corn syrup.
- Mix the chocolate and corn syrup until completely combined and smooth.
- Let the mixture cool at room temperature until it's cool enough to handle.
- Knead the chocolate until smooth and pliable.
- Wrap the modeling chocolate tightly in plastic wrap to prevent hardening.
- Use the modeling chocolate to create decorations or covers for cakes and desserts.