
Picture this: you bite into a waffle that’s crispy on the outside yet impossibly chewy on the inside, with a subtle sweetness and delicate texture that feels almost cloud-like. That’s the magic of mochi waffles, a Japanese-inspired treat that bridges the gap between traditional breakfast waffles and the beloved glutinous rice cake everyone loves.
These waffles are special because they’re quick to make, naturally gluten-free (if you use the right flour), and absolutely foolproof once you understand the technique. The combination of mochi flour and all-purpose flour creates a texture that’s crispy outside and wonderfully chewy inside, making them perfect for busy mornings, fancy brunches, or whenever you crave something a little different.
Why You’ll Love This Recipe
Mochi waffles deliver impressive results with minimal effort, and they’ve got charm that regular waffles simply don’t match. Here’s what makes them worth your time:
- Crispy exterior with a chewy, tender interior that stays soft even when cooled
- Ready in about 20 minutes from start to finish
- Naturally dairy-free and easily adaptable for various dietary needs
- Stunning presentation that looks restaurant-quality with zero pretension
- Works beautifully with both sweet and savory toppings
My Experience Making This Recipe
The first time I made mochi waffles, I’ll admit I was skeptical about the texture outcome. I’d read all about the chewiness factor, but seeing it happen in real time was something else entirely.
I preheated my waffle iron, mixed the batter, and poured it in, expecting the usual crispy-and-done result. Instead, the waffle came out with this incredible contrast: the outer edges had deep golden-brown ridges while the inside maintained that signature mochi chew that doesn’t feel heavy or dense.
My household demolished the first batch in minutes, and everyone asked when I was making them again. That’s when I knew I’d found something worth perfecting and sharing.
Recipe Overview
- Recipe Name: Mochi Waffles
- Servings: Makes 4 waffles
- Prep Time: 10 minutes
- Cook Time: 12 minutes
- Total Time: 22 minutes
- Course: Breakfast, Dessert
- Cuisine: Japanese-inspired
- Calories per Serving: 240 calories
Equipment You Will Need
- Waffle iron (standard or Belgian)
- Mixing bowl
- Whisk or fork
- Measuring cups and spoons
- Spatula for removing waffles
- Small saucepan (optional, for warming toppings)
Ingredients for Mochi Waffles
- Mochi flour: 1 cup (sweet rice flour)
- All-purpose flour: 1/2 cup
- Sugar: 2 tablespoons
- Baking powder: 1 and 1/2 teaspoons
- Salt: 1/4 teaspoon
- Eggs: 2 large
- Milk: 3/4 cup (dairy or non-dairy)
- Vegetable oil: 3 tablespoons
- Vanilla extract: 1/2 teaspoon
Ingredient Notes and Substitutions
- Mochi flour (sweet rice flour) creates the signature chewy texture and is the heart of this recipe; substitute with tapioca starch for a slightly different but still pleasant chew, though the result will be less authentic.
- All-purpose flour provides structure; you can replace it with an equal amount of cake flour for even more tenderness, though the waffle may become slightly less sturdy.
- Baking powder ensures the waffle rises slightly and stays light inside; omitting it results in a denser, more compact waffle that loses the desired tender crumb.
- Milk can be swapped for almond, oat, or coconut milk without affecting texture; dairy provides slight richness that plant-based milks mimic reasonably well.
- Vegetable oil keeps the waffles moist; melted butter adds flavor but creates a slightly different texture and browning pattern.
How to Make Mochi Waffles
Step 1: Preheat Your Waffle Iron
Turn on your waffle iron and let it heat for about 3 to 5 minutes until it reaches full temperature. Preheating is crucial because a properly heated iron creates those crispy, golden-brown edges while the inside stays soft and chewy.
Step 2: Combine Dry Ingredients
In a mixing bowl, whisk together the mochi flour, all-purpose flour, sugar, baking powder, and salt. Mixing these dry ingredients evenly distributes the leavening agent, which prevents lumpy or unevenly risen waffles.
Step 3: Whisk Wet Ingredients
In another bowl, crack the eggs and whisk them together, then add the milk, vegetable oil, and vanilla extract. Whisking the wet ingredients until combined ensures an even distribution of moisture and fat throughout the batter.
Step 4: Combine Wet and Dry Mixtures
Pour the wet ingredients into the dry ingredients and stir gently with a fork or whisk until just combined. Overmixing activates the gluten in the all-purpose flour and makes the waffles tough, so stop stirring as soon as there are no visible dry pockets.
Step 5: Let the Batter Rest
Let the batter sit for 2 to 3 minutes while your waffle iron finishes heating. This resting period allows the mochi flour to fully absorb the liquid, which is essential for achieving that tender, chewy interior.
Step 6: Grease and Pour
Lightly oil the waffle iron (even if it’s nonstick) and pour about 1/2 cup of batter into the center, then close the lid gently. A light coating of oil ensures the exterior gets crispy and prevents sticking, which would tear the delicate waffle.
Step 7: Cook Until Golden
Cook for about 3 to 4 minutes, or until the waffle is golden brown on the outside and stops steaming. The waffle should release easily from the iron, and steam should slow significantly when it’s done, signaling that the interior has set.
Step 8: Remove and Serve
Use a spatula to gently remove the waffle and place it on a wire rack or serving plate. A rack prevents the bottom from steaming itself soggy, preserving that crucial crispy exterior contrast.
Step 9: Repeat for Remaining Batter
Repeat steps 6 through 8 with the remaining batter until all four waffles are cooked. Keep finished waffles warm on a plate in a low oven if you prefer to serve them all at once.
Pro Tip: Don’t skip the batter resting period; mochi flour needs time to absorb moisture, and this step is what transforms the texture from okay to absolutely magical.
Tips for the Best Mochi Waffles
- Use a kitchen scale to measure your mochi flour if possible, as scooping and leveling can vary by up to 10 percent, affecting texture significantly.
- Keep your waffle iron at medium-high heat; too low and you’ll get a pale, soft exterior, too high and the outside burns before the inside cooks through.
- Don’t open the waffle iron too early or too often; each lift releases steam that helps the waffle cook evenly, and interrupting the process creates dense spots.
- Serve waffles immediately after cooking when the contrast between crispy and chewy is most pronounced.
- If making a batch for multiple people, keep finished waffles in a 200-degree oven on a wire rack rather than stacking them, which causes them to steam and soften.
- Experiment with the batter thickness; slightly thicker batter produces more pronounced chewy centers, while thinner batter yields crispier waffles overall.
Common Mistakes to Avoid
- Overmixing the batter develops gluten and creates tough, dense waffles instead of tender ones; mix only until the dry ingredients are moistened.
- Skipping the rest period means the mochi flour doesn’t fully hydrate, resulting in a grainy, disappointing texture.
- Opening the waffle iron too early releases steam prematurely and interrupts the cooking process, leaving your waffles pale and unevenly cooked.
- Using cold eggs and milk straight from the refrigerator lowers the batter temperature and can result in unevenly cooked waffles.
- Forgetting to oil the waffle iron between batches causes sticking and torn waffles, even on nonstick surfaces.
Serving Suggestions
Mochi waffles work beautifully with both classic sweet toppings and creative savory options. Their unique texture pairs well with contrasting flavors and textures, making them incredibly versatile.
- Drizzle with warm maple syrup and top with fresh berries and whipped cream for a classic approach
- Spread with creamy almond butter, sliced bananas, and a sprinkle of sea salt for a nod to sweet and savory
- Top with matcha whipped cream and fresh strawberries for an elegant, matcha-inspired dessert
- Serve with a fried egg, crispy bacon, and a dollop of sour cream for a surprising savory brunch option
- Dust with powdered sugar and serve alongside fresh whipped cream and lemon curd for a light, elegant presentation
Variations to Try
- Chocolate Chip Mochi Waffles: Fold 1/2 cup of chocolate chips into the batter before cooking, creating pockets of melted chocolate throughout.
- Matcha Mochi Waffles: Replace 2 tablespoons of the mochi flour with matcha powder for a delicate green tea flavor and natural color.
- Coconut Mochi Waffles: Add 1/3 cup of shredded coconut and 1/4 teaspoon of coconut extract to the batter for tropical sweetness.
- Savory Scallion Mochi Waffles: Omit the sugar, add 1/4 cup chopped scallions and a pinch of garlic powder for a unique savory side dish.
- Honey Cinnamon Mochi Waffles: Drizzle 2 tablespoons of honey into the batter and add 1/2 teaspoon of cinnamon for warm, spiced flavor.
Dietary Adaptations
- Gluten-Free: Replace the all-purpose flour with a gluten-free all-purpose blend in equal measure; the result will be equally delicious with virtually no texture difference.
- Dairy-Free: Use almond, oat, or coconut milk instead of regular milk, and the waffles will bake identically with no noticeable change in texture.
- Vegan: Swap the eggs for a flax egg (1 tablespoon ground flaxseed mixed with 3 tablespoons water per egg), though the exterior may brown slightly less.
- Low-Carb/Keto: Use allulose or erythritol in place of sugar and reduce the all-purpose flour to 1/4 cup while increasing mochi flour to 1 and 1/4 cups; the carb count drops significantly with a minor texture trade-off.
Storage and Reheating
Refrigerator
Store leftover waffles in an airtight container for up to 3 days. The texture stays surprisingly pleasant thanks to the mochi flour’s moisture-retaining properties.
- Keep waffles separated with parchment paper to prevent sticking
- Store in a shallow container rather than stacking too high to minimize crushing
Freezer
Mochi waffles freeze beautifully for up to 1 month when stored properly. This makes them perfect for batch cooking and quick future breakfasts.
- Let waffles cool completely before wrapping individually in plastic wrap
- Place wrapped waffles in a freezer bag and label with the date
Reheating
Reheat refrigerated or frozen waffles in a toaster oven at 350 degrees for about 5 minutes, or in a regular toaster on medium setting. The waffle iron is the gold standard for reheating if you want to restore maximum crispiness, taking just 2 to 3 minutes.
- Avoid the microwave, which makes them rubbery and defeats the textural purpose
- Toaster ovens preserve the crispy exterior better than regular toasters
Nutrition Information
| Nutrient | Amount |
|---|---|
| Calories | 240 |
| Total Fat | 11 grams |
| Saturated Fat | 2 grams |
| Carbohydrates | 32 grams |
| Fiber | 0 grams |
| Sugar | 5 grams |
| Protein | 4 grams |
| Sodium | 180 milligrams |
| Cholesterol | 45 milligrams |
These values are approximate and based on standard ingredient measurements. Actual nutrition will vary depending on specific brands used and any toppings or additions you include.
Frequently Asked Questions
Can I Make the Batter Ahead of Time?
Yes, you can make the batter up to 2 hours in advance and store it in the refrigerator. The mochi flour will continue to absorb moisture, so you may need to add a tablespoon of milk if the batter seems too thick before cooking.
Why Is My Waffle Interior Not Chewy?
This usually means either your waffle iron wasn’t hot enough or you cooked the waffle too long. Make sure the iron is fully preheated, and remove the waffle as soon as it stops actively steaming.
Can I Use Glutinous Rice Flour Instead of Mochi Flour?
They’re essentially the same product sold under different names, so yes, glutinous rice flour works perfectly. Just make sure it says “sweet rice flour” and not the savory kind used for coating meats.
How Do I Get the Exterior Extra Crispy?
Brush the cooked waffle with a light coating of vegetable oil immediately after removing it from the iron, or increase your waffle iron heat slightly. The oil creates additional crispiness through gentle frying, while heat increase creates deeper browning.
Are Mochi Waffles Naturally Gluten-Free?
Not fully, because the recipe calls for all-purpose flour, which contains gluten. However, they become naturally gluten-free when you swap the all-purpose flour for a gluten-free all-purpose blend, and the result is virtually identical.
Can I Double This Recipe?
Absolutely, just double all the ingredients and use the same cooking method. A double batch makes 8 waffles and takes about the same total time since you’ll be cooking them continuously.
Final Thoughts
Mochi waffles are one of those recipes that feel fancy enough to impress guests but easy enough to make on a random Tuesday morning. Once you nail the technique, you’ll find yourself making them constantly because they’re just that good.
The contrast between the crispy exterior and the chewy interior is a textural experience that regular waffles simply can’t match, and the recipe comes together in minutes with ingredients you probably already have. Try it this weekend and watch how quickly this becomes a household favorite.
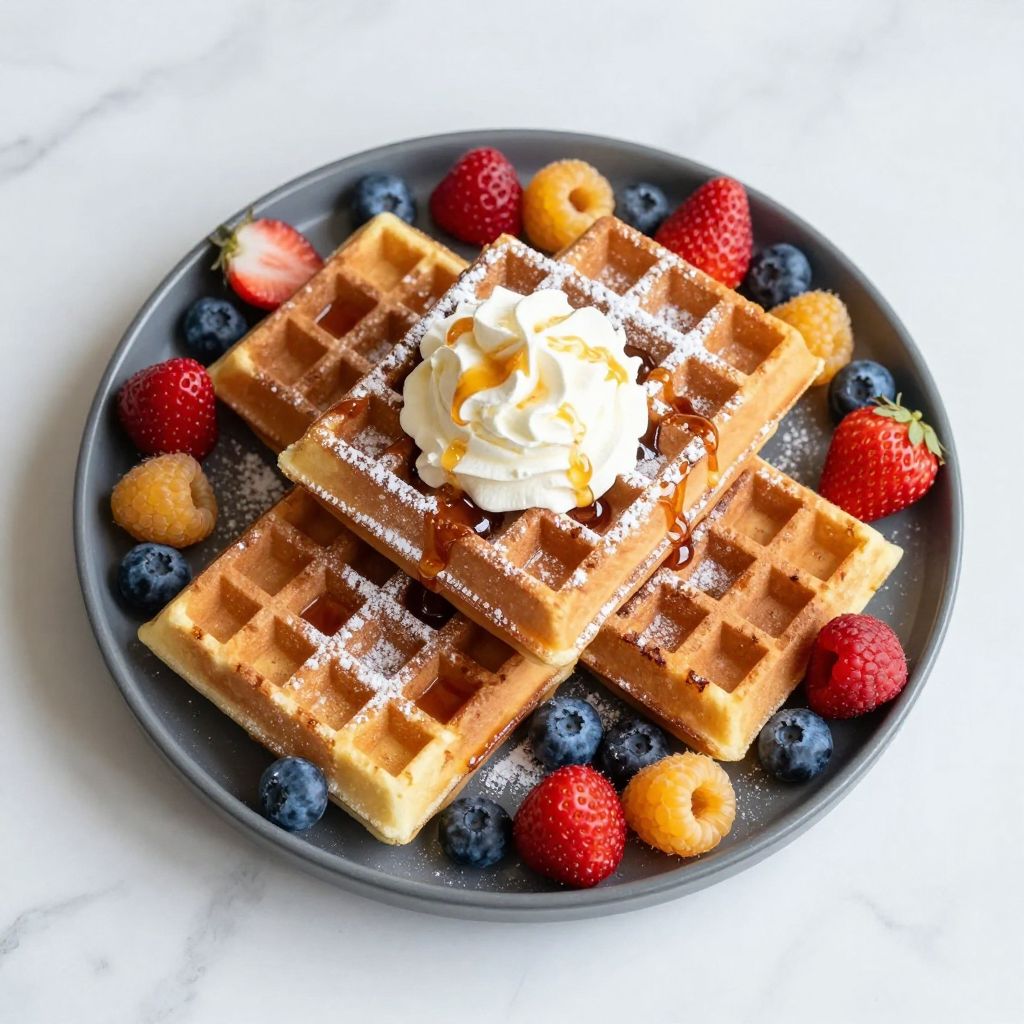
Mochi Waffles
Ingredients
Equipment
Method
- Turn on your waffle iron and let it heat for about 3 to 5 minutes until it reaches full temperature.
- In a mixing bowl, whisk together the mochi flour, all-purpose flour, sugar, baking powder, and salt until evenly combined.
- In another bowl, crack the eggs and whisk them together, then add the milk, vegetable oil, and vanilla extract. Whisk until combined.
- Pour the wet ingredients into the dry ingredients and stir gently with a fork or whisk until just combined. Stop stirring as soon as there are no visible dry pockets.
- Let the batter sit for 2 to 3 minutes while your waffle iron finishes heating to allow the mochi flour to fully absorb the liquid.
- Lightly oil the waffle iron (even if it's nonstick) and pour about 1/2 cup of batter into the center, then close the lid gently.
- Cook for about 3 to 4 minutes, or until the waffle is golden brown on the outside and stops steaming. The waffle should release easily from the iron.
- Use a spatula to gently remove the waffle and place it on a wire rack or serving plate.
- Repeat with the remaining batter until all four waffles are cooked. Keep finished waffles warm on a plate in a low oven if you prefer to serve them all at once.