
There’s nothing quite like the moment you dig into a warm, gooey Lava Mug Cake, and that rich chocolate center oozes out. This recipe is special because it delivers a restaurant-style dessert in just minutes, making it perfect for a cozy night in or a quick treat after a long day.
Why You’ll Love This Recipe
Indulging in a Lava Mug Cake is a delightful experience that combines convenience with decadence.
- Ready in under 5 minutes.
- Perfect for satisfying chocolate cravings.
- Minimal cleanup with a single mug.
- Customizable with various toppings.
- Impressive enough for guests or a special occasion.
My Experience Making This Recipe
When I first tried making this Lava Mug Cake, I was amazed at how something so simple could taste so divine. The rich chocolate flavor and the melt-in-your-mouth texture were an instant hit with my family.
Watching the cake rise and bubble in the microwave is a sight to behold, and the best part is the anticipation before you take that first spoonful. It truly feels like a little piece of heaven in a mug.
Recipe Overview
- Recipe Name: Lava Mug Cake
- Servings: 1
- Prep Time: 2 minutes
- Cook Time: 1 minute
- Total Time: 3 minutes
- Course: Dessert
- Cuisine: American
- Calories per Serving: Approximately 320
Equipment You Will Need
- Mug (microwave-safe)
- Measuring spoons
- Mixing spoon or fork
- Microwave
Ingredients for Lava Mug Cake
- 4 tablespoons all-purpose flour
- 4 tablespoons granulated sugar
- 2 tablespoons unsweetened cocoa powder
- 1/8 teaspoon baking powder
- 3 tablespoons milk
- 2 tablespoons vegetable oil
- 1/4 teaspoon vanilla extract
- 1 tablespoon chocolate chips
Ingredient Notes and Substitutions
- All-purpose flour: Used for structure; whole wheat flour can be a healthier option but might alter texture.
- Granulated sugar: Sweetens the cake; brown sugar can add a hint of caramel flavor.
- Unsweetened cocoa powder: Gives that rich chocolate taste; substitute with Dutch-process cocoa for a smoother flavor.
- Milk: Adds moisture; almond or oat milk works well for dairy-free versions.
- Vegetable oil: Keeps the cake moist; melted butter can be used for richer flavor.
How to Make Lava Mug Cake
Step 1: Combine Dry Ingredients
In your microwave-safe mug, mix the flour, sugar, cocoa powder, and baking powder. This step ensures an even distribution of dry ingredients for a consistent cake.
Step 2: Add Wet Ingredients
Add the milk, vegetable oil, and vanilla extract to the dry mixture. Stir well until there are no lumps; this creates a smooth batter for your cake.
Step 3: Mix in Chocolate Chips
Gently fold in the chocolate chips for that lava effect. They will melt beautifully in the microwave, creating a deliciously gooey center.
Step 4: Microwave the Mug Cake
Place the mug in the microwave and cook on high for 40 to 60 seconds. Keep an eye on it; overcooking can lead to a dry cake.
Step 5: Check for Doneness
The cake should rise and look set but may still jiggle slightly in the center. This indicates that your lava center is intact and ready for you to enjoy.
Step 6: Let it Cool
Allow the mug to sit for a minute before digging in. This cooling time helps the cake firm up a bit while still keeping that molten core.
Step 7: Serve and Enjoy
Spoon into the warm cake and watch the chocolate flow out. Pair it with a scoop of ice cream for an extra indulgent treat.
Step 8: Clean Up
Rinse out your mug right after enjoying your cake to prevent any stuck-on batter. This makes cleanup a breeze, keeping your kitchen stress-free.
Pro Tip: For the best lava effect, do not overcook the cake. A little undercooked in the center is the key to that gooey goodness.
Tips for the Best Lava Mug Cake
- Use a large mug to prevent overflow during cooking.
- Experiment with different chocolate types for varied flavors.
- Do not skip the cooling time for the best texture.
- For a richer taste, add a pinch of espresso powder to the batter.
- Top with whipped cream or berries for a refreshing contrast.
Common Mistakes to Avoid
- Overmixing the batter can lead to a tough cake.
- Using a small mug may result in messy overflow.
- Microwaving for too long will dry out the cake.
- Not letting it cool can result in a messy serving with no structure.
Serving Suggestions
This Lava Mug Cake pairs beautifully with a scoop of vanilla ice cream or a dollop of whipped cream.
- Fresh berries add a burst of flavor.
- A drizzle of caramel sauce enhances sweetness.
- Chopped nuts provide a crunchy contrast.
- Serve with a sprinkle of sea salt for a flavor boost.
Variations to Try
- Substitute peanut butter chips for a nutty twist.
- Use white chocolate for a different flavor profile.
- Add a splash of coffee liqueur for an adult version.
- Incorporate a layer of fruit preserves for added flavor.
Dietary Adaptations
- Gluten-free: Use a 1:1 gluten-free flour blend.
- Dairy-free: Replace milk with almond or coconut milk.
- Vegan: Use flaxseed meal mixed with water as an egg substitute.
- Low-carb/Keto: Use almond flour and a sugar substitute.
Storage and Reheating
Refrigerator
This mug cake is best enjoyed fresh, but you can store leftovers in the fridge.
- Cover the mug with plastic wrap.
- Consume within 1-2 days for best taste.
Freezer
Freezing is not recommended as it alters the texture significantly.
- If necessary, wrap tightly and freeze for up to a month.
- Thaw in the fridge before reheating.
Reheating
Reheat in the microwave for 15-20 seconds. Check for doneness to avoid overcooking.
- Use a microwave-safe cover to retain moisture.
Nutrition Information
| Nutrient | Amount |
|---|---|
| Calories | 320 |
| Total Fat | 16g |
| Saturated Fat | 2g |
| Carbohydrates | 42g |
| Fiber | 2g |
| Sugar | 30g |
| Protein | 4g |
| Sodium | 190mg |
| Cholesterol | 0mg |
Nutrition values are approximate and may vary based on ingredients used.
Frequently Asked Questions
Can I make this cake ahead of time?
This cake is best made fresh, as it loses that molten center when stored.
What can I substitute for the flour?
You can use a gluten-free flour blend or almond flour for a different texture.
How do I store leftovers?
Store in the fridge covered for up to two days to maintain freshness.
My cake came out too dry. What went wrong?
Overcooking is usually the culprit; microwave in short increments to avoid this.
Can I use a different flavor of chocolate?
Absolutely! Dark chocolate or even white chocolate can create unique flavors.
Final Thoughts
There you have it—a simple yet indulgent Lava Mug Cake that you can whip up at a moment’s notice. With its rich, gooey center and ease of preparation, this dessert is sure to become a favorite in your kitchen.
For more delicious treats, check out my Mug Cookie Recipe or try something savory like my Lava Chicken Recipe.
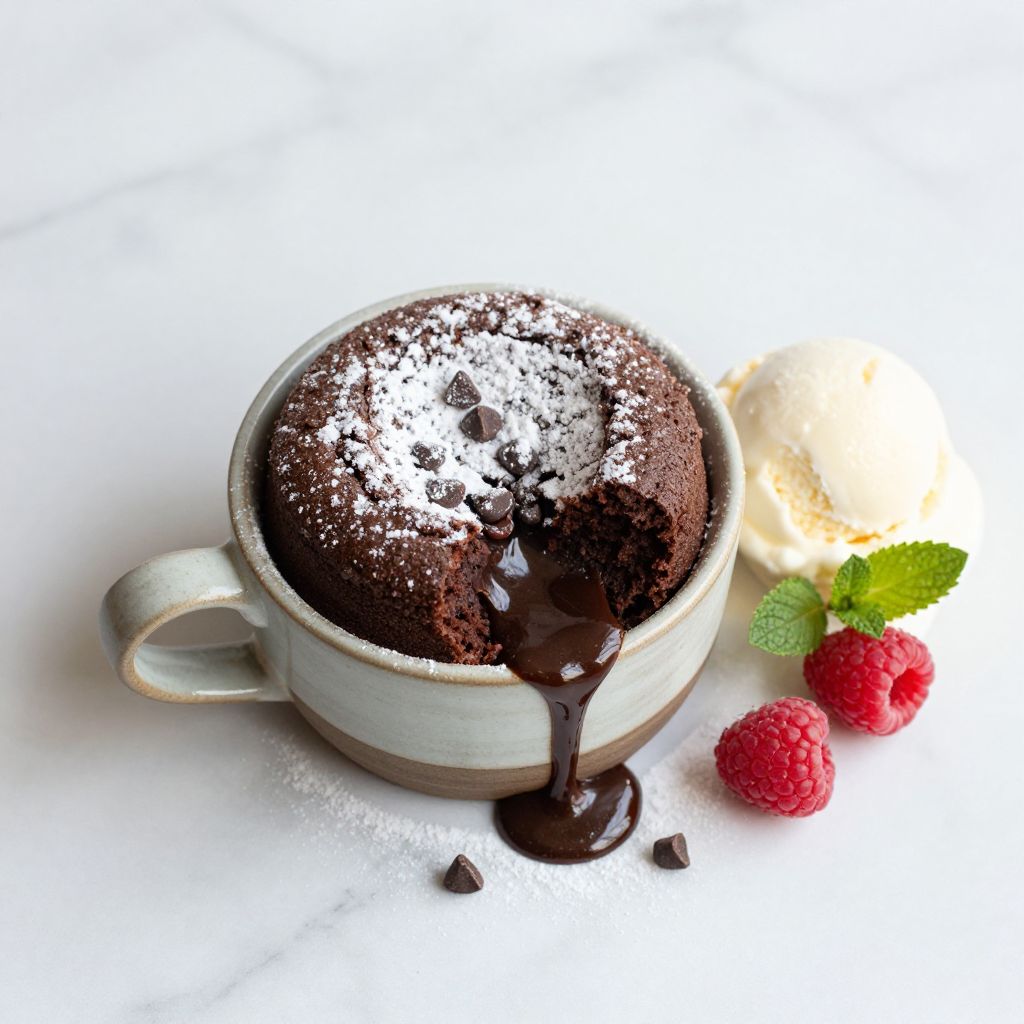
Lava Mug Cake
Ingredients
Equipment
Method
- In your microwave-safe mug, mix the flour, sugar, cocoa powder, and baking powder.
- Add the milk, vegetable oil, and vanilla extract to the dry mixture. Stir well until there are no lumps.
- Gently fold in the chocolate chips.
- Place the mug in the microwave and cook on high for 40 to 60 seconds.
- Check if the cake has risen and looks set but may still jiggle slightly in the center.
- Allow the mug to sit for a minute before digging in.
- Spoon into the warm cake and enjoy.