
Picture slicing into a chicken breast and watching melted cheese and herbs pour out like molten lava across your plate. That’s the moment lava chicken stops being just dinner and becomes theater on a weeknight.
This recipe delivers restaurant-quality drama with home-cook simplicity. A pocket of creamy cheese and fresh herbs hidden inside each breast transforms ordinary chicken into something that feels fancy enough to impress guests, yet quick enough for a busy Tuesday.
The magic lies in the contrast: a golden, crispy exterior protecting a tender, juicy interior that bursts with warm, melted filling. You’ll spend maybe 15 minutes prepping, and dinner hits the table in under 40 minutes total.
Why You’ll Love This Recipe
Lava chicken checks every box for weeknight cooking. It looks impressive, tastes restaurant-quality, and comes together faster than you’d expect.
- Impressive presentation that makes ordinary dinner feel special
- Stuffed with cheese and herbs, so every bite is flavorful and moist
- Versatile filling options let you customize to your taste
- Ready in under 40 minutes from start to table
- Works for weeknight family dinners or casual entertaining
My Experience Making This Recipe
The first time I made lava chicken, I was skeptical about the whole “lava” concept. Would the filling actually stay inside, or would it leak everywhere during cooking?
Turns out, when you seal those pockets properly, the magic happens exactly as promised. I pulled the first chicken breast from the pan, let it rest for just two minutes, then cut into it at the table. My daughter’s eyes went wide when she saw the cheese flowing out.
I’ve made variations with different cheeses and herbs dozens of times since. Spinach and feta, sun-dried tomato and mozzarella, even a simple garlic and parmesan version. Every version gets the same excited reaction from my family.
Recipe Overview
- Recipe Name: Lava Chicken with Mozzarella and Herbs
- Servings: 4
- Prep Time: 15 minutes
- Cook Time: 20 minutes
- Total Time: 35 minutes
- Course: Main Course
- Cuisine: Italian-American
- Calories per Serving: 385
Equipment You Will Need
- Sharp chef’s knife
- Cutting board
- Large skillet or frying pan
- Meat mallet or rolling pin (optional but helpful)
- Paper towels
- Instant-read thermometer
- Plate for resting
Ingredients for Lava Chicken
For the Chicken
- 4 boneless, skinless chicken breasts (about 6 to 8 ounces each)
- Salt and black pepper to taste
- 2 tablespoons olive oil
- 2 tablespoons butter
For the Filling
- 1 cup fresh mozzarella cheese, torn into small pieces
- 2 tablespoons fresh basil, finely chopped
- 1 tablespoon fresh parsley, finely chopped
- 2 cloves garlic, minced
- 2 tablespoons grated Parmesan cheese
- 1/4 teaspoon red pepper flakes (optional)
- Pinch of salt and pepper
Ingredient Notes and Substitutions
- Mozzarella cheese: Fresh mozzarella melts beautifully and creates that signature oozing effect. Use whole milk mozzarella for the best texture. Low-moisture mozzarella works but creates less dramatic flow.
- Fresh basil: Basil provides bright, herbal flavor that complements chicken perfectly. Substitute with 1 tablespoon fresh oregano or thyme if basil is unavailable, though the flavor profile changes.
- Garlic: Minced fresh garlic adds pungent, savory depth to the filling. Use 1/2 teaspoon garlic powder if fresh garlic is not on hand, reducing the amount since powder is more concentrated.
- Chicken breasts: Boneless, skinless breasts cook evenly and are easy to butterfly. Chicken thighs work but require longer cooking time to reach safe internal temperature.
- Olive oil: High-quality olive oil adds flavor to the final dish. Vegetable or avocado oil works for cooking but contributes less flavor.
How to Make Lava Chicken
Step 1: Prepare the Filling
Combine the torn mozzarella, basil, parsley, minced garlic, Parmesan, red pepper flakes, salt, and pepper in a small bowl. Mix gently until all ingredients are distributed evenly throughout the cheese.
Preparing the filling first lets the flavors meld slightly and ensures you’re ready to work quickly once you start butterflying the chicken. This step takes just two minutes but prevents fumbling later.
Step 2: Pat the Chicken Dry
Remove the chicken breasts from their packaging and place them on a clean cutting board. Pat them thoroughly with paper towels to remove any surface moisture.
Dry chicken browns better and gives you better control when butterflying. Moisture creates steam that prevents a golden crust from forming.
Step 3: Butterfly the Chicken Breasts
Place one chicken breast flat on the cutting board with the thickest side facing you. Using a sharp knife, carefully cut horizontally through the thickest part of the breast, moving from the thicker side toward the thinner edge, but stop before cutting all the way through.
You’re creating a pocket, not two separate pieces. The chicken should open like a book when you unfold it gently. Repeat this process with all four chicken breasts.
Step 4: Pound the Chicken Gently
Open each butterflied breast flat on the cutting board. Place plastic wrap or parchment paper over the chicken and gently pound it with a meat mallet or the bottom of a rolling pin until it’s an even thickness of about 1/2 inch.
Pounding ensures even cooking and gives you more surface area for the filling. You want the chicken uniform in thickness so all parts cook at the same rate.
Step 5: Fill and Seal the Chicken
Divide the filling mixture equally among the four chicken breasts, spooning it onto one half of each opened breast. Fold the empty half over the filling side, creating a pocket shape.
Press the edges together gently to seal them, using your fingers to crimp or pinch where the two pieces meet. Work carefully so you don’t tear the chicken, but apply enough pressure that the cheese stays inside during cooking.
Step 6: Season the Outside
Sprinkle both sides of each stuffed chicken breast with salt and pepper to taste. Season generously, as the outer surface won’t get seasoned again once cooking begins.
This is your only chance to season the exterior, so don’t be shy. The salt will help the chicken brown beautifully.
Step 7: Sear the Chicken
Heat the olive oil and butter together in a large skillet over medium-high heat. Once the butter foams and the oil shimmers, carefully place each stuffed chicken breast into the pan.
Working in batches if needed, sear the chicken for 6 to 7 minutes on the first side without moving it. This creates a golden crust that locks in the juices and prevents the filling from escaping.
Step 8: Cook the Other Side
Flip each chicken breast carefully using tongs and sear the second side for another 5 to 6 minutes. The internal temperature should reach 165 degrees Fahrenheit when measured with an instant-read thermometer inserted into the thickest part of the meat, away from the filling.
The exact cooking time depends on how thick your chicken is and how hot your pan is. Start checking at five minutes on the second side to avoid overcooking.
Step 9: Rest Before Serving
Transfer the cooked chicken to a clean plate and let it rest for 3 to 5 minutes before serving or cutting into it. This allows the juices to redistribute throughout the meat and keeps the filling from spilling out immediately when you cut.
Resting is not optional here. It’s what separates lava chicken that flows dramatically on your plate from lava chicken that leaks all over the cutting board.
Pro Tip: Let the filled, sealed chicken breasts rest in the refrigerator for 15 minutes before cooking. This helps them hold their shape better in the pan and ensures the filling stays inside where it belongs.
Tips for the Best Lava Chicken
- Use fresh mozzarella instead of shredded mozzarella. Fresh mozzarella melts into a gorgeous, flowing texture that shredded cheese can’t match.
- Don’t skip the resting step. Those five minutes allow the juices to settle and the cheese to set slightly, so it flows elegantly instead of spilling everywhere.
- Keep your oil and butter hot before adding the chicken. A properly heated pan creates a golden crust in minutes and prevents sticking.
- Seal your chicken pockets firmly but gently. Apply enough pressure that the pocket is crimped shut, but not so much that you tear the delicate meat.
- Use an instant-read thermometer to check for doneness. Chicken is safe at 165 degrees Fahrenheit, and checking avoids both undercooked and overcooked results.
- Don’t flip the chicken more than once. Every flip releases moisture and prevents proper browning on that side.
Common Mistakes to Avoid
- Overstuffing the chicken: Too much filling will leak out during cooking, leaving you with dry chicken and a messy pan. One tablespoon of filling per breast is enough to create that impressive molten effect without overflow.
- Using low-moisture mozzarella: This cheese doesn’t melt as dramatically as fresh mozzarella. Low-moisture versions are better for pizza, not for lava chicken’s signature flowing center.
- Cooking on too low heat: Medium-high heat is essential for developing a golden crust that seals in the filling. Low heat cooks the chicken gently but prevents browning and allows filling to escape.
- Cutting into the chicken immediately: Resting allows the interior to set up slightly so the cheese flows rather than gushes out explosively. Cutting too early creates a mess instead of a presentation.
- Leaving the chicken too thin: Pounding it to uniform thickness prevents uneven cooking, but going below 1/2 inch makes the filling more likely to leak through thin spots.
Serving Suggestions
Lava chicken pairs beautifully with sides that complement its rich, cheesy filling. Light, fresh, or starchy sides balance the protein and drama perfectly.
- Pasta with garlic and oil or a simple marinara sauce
- Roasted vegetables like zucchini, bell peppers, and cherry tomatoes
- A crisp green salad with lemon vinaigrette
- Roasted potatoes or creamy mashed potatoes
- Steamed broccoli with garlic and olive oil
Variations to Try
- Spinach and Feta: Replace the mozzarella and herbs with crumbled feta cheese, fresh spinach sauteed briefly to remove moisture, and dill. This variation creates a Mediterranean flavor profile that’s equally impressive.
- Sun-Dried Tomato and Ricotta: Mix ricotta cheese with chopped sun-dried tomatoes, fresh basil, and garlic for a filling that’s slightly tangy and deeply flavorful. Ricotta creates a creamier, less flowing effect than mozzarella.
- Prosciutto and Mozzarella: Layer thin slices of prosciutto between the mozzarella and herbs for a salty, umami-rich variation. This adds depth and makes the dish feel more indulgent.
- Mushroom and Swiss: Sautee finely chopped mushrooms and combine with shredded Swiss cheese, thyme, and garlic for an earthy, rich filling. This variation appeals to those who prefer savory, umami flavors over bright herb notes.
Dietary Adaptations
- Gluten-Free: This recipe is naturally gluten-free as written. Serve with gluten-free pasta or ensure any side dishes are certified gluten-free.
- Dairy-Free: Replace mozzarella with dairy-free mozzarella and use olive oil instead of butter. The filling will be less melty, but the dish remains flavorful and satisfying.
- Low-Carb/Keto: Skip starchy sides and pair with roasted vegetables or salad instead. The chicken itself is keto-friendly, though the cheese adds fat and calories.
- Vegetarian: Substitute the chicken with thick slices of halloumi or portobello mushroom caps butterflied and stuffed the same way. Cooking times will be shorter, so monitor closely.
Storage and Reheating
Refrigerator
Store leftover lava chicken in an airtight container for up to 3 days. The cheese will solidify slightly as it cools but will still taste delicious.
- Keep the chicken uncovered or loosely covered while it cools to room temperature first
- Then cover tightly and refrigerate
- Label the container with the date so you don’t forget when you made it
Freezer
Lava chicken freezes well for up to 2 months. Freeze it in a single layer on a baking sheet before transferring to a freezer bag to prevent the breasts from sticking together.
- Flash freeze on a baking sheet for one hour before bagging
- Seal in a freezer-safe bag and remove as much air as possible
- Thaw overnight in the refrigerator before reheating
Reheating
Reheat gently to avoid drying out the chicken. The oven method works best because it heats evenly without toughening the meat.
- Oven: Cover with foil and reheat at 325 degrees Fahrenheit for 10 to 15 minutes until warmed through
- Stovetop: Reheat in a skillet over medium heat for 5 to 7 minutes, covered with a lid to trap steam
- Microwave: Heat on 50 percent power for 2 to 3 minutes, checking halfway through. This method dries out the chicken, so use it only as a last resort.
Nutrition Information
| Nutrient | Amount |
|---|---|
| Calories | 385 |
| Total Fat | 18g |
| Saturated Fat | 8g |
| Carbohydrates | 2g |
| Fiber | 0g |
| Sugar | 0g |
| Protein | 48g |
| Sodium | 520mg |
| Cholesterol | 125mg |
These values are estimates based on standard USDA nutrition data for the ingredients listed. Actual nutrition will vary based on specific brands and preparation methods used.
Frequently Asked Questions
Can I Prepare Lava Chicken in Advance?
Yes, you can butterfly, fill, and seal the chicken breasts up to 8 hours ahead. Cover them with plastic wrap and refrigerate until you’re ready to cook.
This makes lava chicken perfect for entertaining because most of the prep happens hours before guests arrive. Just cook them fresh while you’re ready to eat.
What If the Filling Leaks Out During Cooking?
A small amount of leakage is normal, but excessive leaking usually means the seal wasn’t tight enough or the chicken was punctured during cooking. For next time, press the edges together more firmly when you seal the pocket.
If filling does leak, simply scoop it back onto the top of the chicken after cooking. It still tastes delicious, even if the presentation isn’t perfect.
Can I Use Frozen Chicken Breasts?
Thaw frozen chicken breasts completely in the refrigerator overnight before using them. Never try to butterfly or cook frozen chicken because it won’t cook evenly and will leak excessively.
Thawing also makes the meat easier to work with and reduces the risk of puncturing the delicate meat while butterflying.
How Do I Know When the Chicken Is Fully Cooked?
Use an instant-read thermometer inserted into the thickest part of the meat without touching the filling. The internal temperature must reach 165 degrees Fahrenheit for food safety.
Checking with a thermometer removes guesswork and prevents undercooked chicken, which is especially important since the filling makes it harder to judge doneness by appearance alone.
Can I Make This Recipe with Chicken Tenders Instead?
Chicken tenders are too small to butterfly effectively. Stick with full boneless, skinless chicken breasts that are at least 6 ounces each for proper butterflying and filling.
If you only have tenders available, you could sandwich filling between two tenders and secure them with toothpicks, though the result won’t be quite the same.
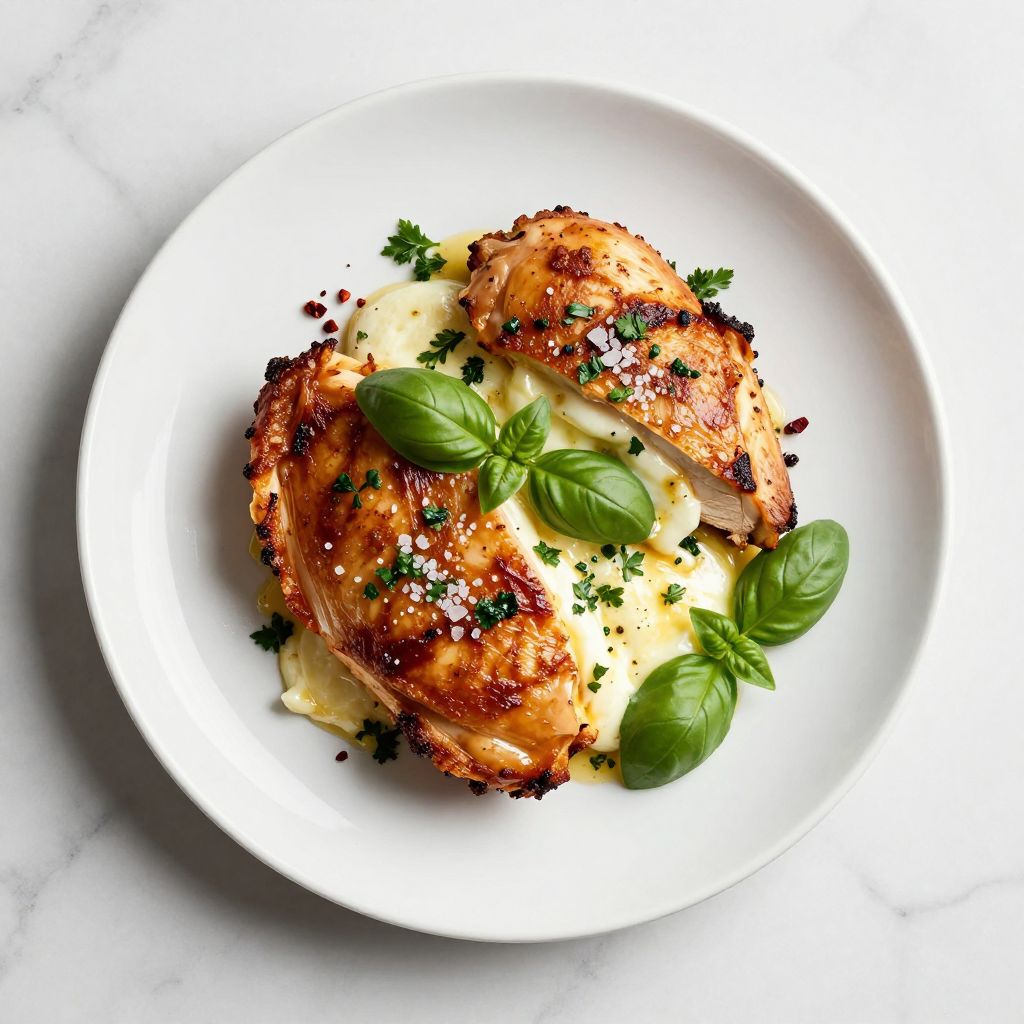
Lava Chicken with Mozzarella and Herbs
Ingredients
Equipment
Method
- Combine the torn mozzarella, basil, parsley, minced garlic, Parmesan, red pepper flakes, salt, and pepper in a small bowl. Mix gently until all ingredients are distributed evenly throughout the cheese.
- Remove the chicken breasts from their packaging and place them on a clean cutting board. Pat them thoroughly with paper towels to remove any surface moisture.
- Place one chicken breast flat on the cutting board with the thickest side facing you. Using a sharp knife, carefully cut horizontally through the thickest part of the breast, moving from the thicker side toward the thinner edge, but stop before cutting all the way through. The chicken should open like a book. Repeat with all four chicken breasts.
- Open each butterflied breast flat on the cutting board. Place plastic wrap or parchment paper over the chicken and gently pound it with a meat mallet or the bottom of a rolling pin until it's an even thickness of about 1/2 inch.
- Divide the filling mixture equally among the four chicken breasts, spooning it onto one half of each opened breast. Fold the empty half over the filling side, creating a pocket shape. Press the edges together gently to seal them, using your fingers to crimp or pinch where the two pieces meet.
- Sprinkle both sides of each stuffed chicken breast with salt and pepper to taste.
- Heat the olive oil and butter together in a large skillet over medium-high heat. Once the butter foams and the oil shimmers, carefully place each stuffed chicken breast into the pan.
- Sear the chicken for 6 to 7 minutes on the first side without moving it.
- Flip each chicken breast carefully using tongs and sear the second side for another 5 to 6 minutes. The internal temperature should reach 165 degrees Fahrenheit when measured with an instant-read thermometer inserted into the thickest part of the meat, away from the filling.
- Transfer the cooked chicken to a clean plate and let it rest for 3 to 5 minutes before serving or cutting into it.