
The smell of cinnamon and apples baking in the oven is pure comfort, and Jewish apple cake delivers that warmth in every slice. This isn’t a fussy dessert that demands your attention or special skills; it’s a straightforward, deeply satisfying cake that tastes like it came straight from a grandmother’s kitchen, even if you’ve never made it before.
What makes this cake special is the combination of tender, moist crumb studded with soft apples and a generous cinnamon-sugar filling that runs through the center and crowns the top. It’s the kind of cake you can make on a Tuesday afternoon and serve to guests on Sunday without anyone knowing how easy it was.
Why You’ll Love This Recipe
This cake checks every box for a reliable, crowd-pleasing dessert that comes together faster than you’d expect. The ingredient list uses pantry staples you likely have on hand, and the method is straightforward enough that even novice bakers can nail it.
- Moist and tender crumb that stays soft for days thanks to the oil and applesauce in the batter.
- Generous cinnamon-sugar swirls throughout, plus a streusel topping for textural contrast.
- Packed with fresh apples that break down slightly during baking and blend into the cake.
- No mixer required for most of the work; you can whisk the batter by hand.
- Works for any occasion, from casual weeknight desserts to potlucks and holiday tables.
My Experience Making This Recipe
I first made this cake on a rainy afternoon when I had a surplus of apples and a craving for something warm and comforting. The kitchen filled with the smell of cinnamon within minutes, and my family gathered around before it even cooled, which told me everything I needed to know.
What struck me most was how forgiving the recipe is; I swapped out all-purpose flour for a blend and used less sugar than some versions called for, and the cake turned out even better. The apples soften into the batter while staying distinct enough to bite, creating this pleasant textural mix that feels intentional rather than accidental.
Every time I make it now, someone asks for the recipe, and I love that it’s simple enough to write out by hand but impressive enough that people think you spent hours in the kitchen. That’s the magic of this cake right there.
Recipe Overview
- Recipe Name: Jewish Apple Cake
- Servings: 12 servings
- Prep Time: 20 minutes
- Cook Time: 50 to 55 minutes
- Total Time: 1 hour 15 minutes
- Course: Dessert
- Cuisine: Jewish/Eastern European
- Calories per Serving: 285 calories
Equipment You Will Need
- One 9×13 inch baking pan
- Medium mixing bowl
- Large mixing bowl
- Whisk
- Wooden spoon or spatula
- Vegetable peeler or sharp paring knife
- Cutting board
- Measuring cups and measuring spoons
- Oven
Ingredients for Jewish Apple Cake
For the Cake
- All-purpose flour: 2 1/2 cups
- Baking powder: 2 1/2 teaspoons
- Salt: 1/2 teaspoon
- Vegetable oil: 3/4 cup
- Granulated sugar: 1 1/2 cups
- Eggs: 3 large
- Applesauce: 1/2 cup unsweetened
- Vanilla extract: 2 teaspoons
- Granny Smith apples: 5 to 6 medium, peeled, cored, and chopped
For the Cinnamon-Sugar Filling and Topping
- Granulated sugar: 1/2 cup
- Ground cinnamon: 3 tablespoons
Ingredient Notes and Substitutions
- Granny Smith apples: These tart, firm apples hold their shape during baking and provide a bright contrast to the sweet cake. You can substitute Honeycrisp or Braeburn apples, though they will soften slightly faster.
- Applesauce: This keeps the cake moist without adding extra fat and adds subtle apple flavor throughout. Unsweetened yogurt or sour cream works as a substitute, though the flavor will shift slightly.
- Vegetable oil: Oil creates a tender, moist crumb that lasts longer than butter-based cakes. You can use melted coconut oil or canola oil with no real change to the result.
- Baking powder: This leavening agent helps the cake rise evenly and creates a light texture. Do not skip it or substitute with baking soda, as the cake will be dense.
- Ground cinnamon: Cinnamon is the signature spice here; fresh cinnamon tastes noticeably better than old cinnamon that’s been in your cabinet for three years. If you only have stale cinnamon, use an extra 1/2 teaspoon to compensate.
How to Make Jewish Apple Cake
Step 1: Prepare Your Pan and Preheat the Oven
Preheat your oven to 350 degrees Fahrenheit. Lightly grease a 9×13 inch baking pan with vegetable oil or cooking spray, then line the bottom with parchment paper if you want easy removal (though it’s not required).
Step 2: Mix the Dry Ingredients
In a medium bowl, whisk together the flour, baking powder, and salt. Whisk for about 30 seconds to aerate the flour and distribute the baking powder evenly, which ensures the cake rises uniformly.
Step 3: Combine the Wet Ingredients
In a large bowl, whisk the oil and sugar together until combined and slightly thickened, about 1 minute. Add the eggs one at a time, whisking well after each addition, then add the applesauce and vanilla extract and whisk until smooth and pale.
Step 4: Fold in the Dry Mixture
Add the flour mixture to the wet ingredients and fold gently with a wooden spoon or spatula until just combined. Overmixing develops gluten and makes the cake tough, so stop as soon as you see no dry streaks of flour.
Step 5: Prepare the Cinnamon-Sugar Mixture
In a small bowl, stir together the sugar and cinnamon until evenly mixed. Set this mixture aside; you’ll use it in two stages.
Step 6: Chop and Fold in the Apples
Peel, core, and chop the apples into roughly 1/2 inch pieces. Fold them into the batter gently until distributed throughout, working quickly so the apples don’t oxidize too much.
Step 7: Layer the Cake with Cinnamon-Sugar
Spread half of the batter into the prepared pan. Sprinkle half of the cinnamon-sugar mixture over the batter, then top with the remaining batter and smooth the surface gently.
Sprinkle the remaining cinnamon-sugar mixture over the top in an even layer. This creates the signature streusel effect that gives the cake its distinctive appearance and flavor.
Step 8: Bake Until Golden and Set
Place the pan in the preheated oven and bake for 50 to 55 minutes, until the top is golden brown and a toothpick inserted into the center comes out clean or with just a few moist crumbs. The cake is done when it springs back lightly when touched.
Remove the pan from the oven and let it cool in the pan for at least 15 minutes before serving. This resting time allows the structure to set, making the cake easier to cut and serve.
Pro Tip: Don’t skip the cooling time; slicing the cake while it’s still hot will result in crumbles instead of clean pieces.
Tips for the Best Jewish Apple Cake
- Use fresh, quality cinnamon if you can; old cinnamon loses its punch. If yours is more than a year old, grab a fresh jar because it makes a noticeable difference in flavor.
- Chop the apples evenly so they bake at the same rate and distribute flavor throughout the cake. Unevenly sized pieces bake at different speeds.
- Don’t overmix the batter after adding the flour; mix just until the dry ingredients disappear. Overmixing creates a dense, tough cake instead of a tender crumb.
- Let the cake cool fully before cutting and serving if you want neat slices. A warm cake crumbles because the crumb hasn’t fully set.
- Store the cake covered at room temperature to keep it moist for up to three days. The oil in the batter keeps it fresh longer than butter-based cakes.
- Don’t skip the applesauce; it adds moisture and subtle apple flavor that deepens the overall taste without making the cake wet.
Common Mistakes to Avoid
- Using mealy or soft apples: Soft varieties like Red Delicious break down into mush instead of staying distinct pieces. Stick with firm, tart apples like Granny Smith.
- Overmixing the batter after adding flour: This develops gluten and creates a tough, dense cake instead of a tender crumb that melts on your tongue.
- Skipping the cinnamon layer in the middle: This layer creates moisture and flavor pockets that make the cake more interesting. Skipping it makes the cake taste one-note.
- Baking at too high a temperature: The top will brown too fast and the inside won’t bake through. Stick to 350 degrees for even, golden results.
- Cutting the cake while it’s still hot: The crumb hasn’t set yet, so you’ll end up with crumbles on your plate instead of a clean slice.
Serving Suggestions
This cake shines on its own, but a few additions elevate it from everyday dessert to something special. Serve it slightly warm or at room temperature, and consider pairing it with something cool or creamy for balance.
- With whipped cream or vanilla ice cream: The cool, creamy contrast against the warm, spiced cake is irresistible.
- With a drizzle of honey: A light honey drizzle adds sweetness and glossy appeal without overpowering the apple and cinnamon flavors.
- With strong black coffee or tea: The warm spices in the cake pair beautifully with the bitterness of coffee or the earthiness of tea.
- With a dusting of powdered sugar: A light dusting adds visual appeal and a subtle sweetness without changing the cake’s flavor profile.
- As a breakfast or brunch cake: This cake is wholesome enough to serve at breakfast with a cup of coffee, making it perfect for Sunday mornings.
Variations to Try
- Add nuts to the topping: Mix 1/2 cup of chopped walnuts or pecans with the cinnamon-sugar mixture before sprinkling. This adds crunch and richness.
- Swap apples for pears: Use firm Bosc pears instead of apples for a slightly different, more delicate flavor that’s equally delicious.
- Add a cream cheese filling: Blend 4 ounces of softened cream cheese with 1/4 cup of sugar and spread it as a layer between the batter and the top cinnamon-sugar layer for extra richness.
- Make it spiced: Add 1/2 teaspoon of ground nutmeg and 1/4 teaspoon of ground cloves to the cinnamon-sugar mixture for deeper, warming spice notes.
- Create a streusel topping: Mix the cinnamon-sugar with 1/3 cup of oats, 2 tablespoons of melted butter, and 1/4 cup of chopped almonds, then sprinkle on top for texture and crunch.
Dietary Adaptations
- Gluten-free: Swap the all-purpose flour for a 1-to-1 gluten-free flour blend. The texture may be slightly denser, but the flavor remains unchanged.
- Dairy-free: This recipe is already dairy-free since it uses oil instead of butter. Just verify your baking powder is aluminum-free.
- Vegan: Replace each egg with 1/4 cup of applesauce or a commercial flax egg, and use the same amount of oil. The cake will be slightly denser but still moist and delicious.
- Lower sugar: Reduce the sugar to 1 cup and use unsweetened applesauce. The cake will be less sweet but still satisfying, and the apples will taste more prominent.
Storage and Reheating
Refrigerator
Store the cooled cake in an airtight container or cover the baking pan tightly with plastic wrap. The cake keeps for up to five days in the refrigerator.
- Let it come to room temperature for 20 minutes before serving for the best flavor and texture.
- The oil keeps the cake moist; it actually improves slightly after a day as flavors meld.
Freezer
Wrap individual slices or the whole cake tightly in plastic wrap, then place in a freezer bag or airtight container. The cake freezes well for up to three months.
- Thaw at room temperature for about two hours before serving.
- Avoid thawing in the refrigerator, as condensation can make the cake soggy.
Reheating
If you want to serve the cake warm, wrap it in foil and heat at 300 degrees for 10 to 15 minutes until warmed through. Alternatively, microwave individual slices for 20 to 30 seconds.
- Don’t overheat or the cake will dry out.
- Serve with whipped cream or ice cream for extra moisture if reheating.
Nutrition Information
| Nutrient | Amount |
|---|---|
| Calories | 285 |
| Total Fat | 14g |
| Saturated Fat | 1.5g |
| Carbohydrates | 38g |
| Fiber | 1g |
| Sugar | 25g |
| Protein | 3g |
| Sodium | 210mg |
| Cholesterol | 45mg |
These values are approximate and based on standard ingredients. Variations in brands or substitutions will affect the final nutrition profile.
Frequently Asked Questions
Can I make this cake ahead of time?
Yes, bake the cake up to three days ahead and store it covered at room temperature. You can also freeze it for up to three months; thaw at room temperature before serving.
What if I don’t have applesauce on hand?
You can substitute with the same amount of sour cream, plain yogurt, or even mashed banana, though the flavor will shift slightly. The applesauce adds moisture and subtle apple flavor that makes the cake special.
Why is my cake dry?
The most common cause is overbaking or overmixing the batter after adding flour. Make sure to pull the cake out as soon as a toothpick comes out mostly clean, and fold the batter gently until the flour just disappears.
Can I use sweetened applesauce instead of unsweetened?
You can, but the cake will be noticeably sweeter. If you use sweetened applesauce, reduce the granulated sugar to 1 1/4 cups to keep the sweetness balanced.
Is this cake suitable for Passover?
Traditional Jewish apple cake uses all-purpose flour, so it’s not Passover-compliant as written. You could substitute matzoh meal and potato starch in equal amounts to the flour for a Passover version, though the texture will be different.
How do I know when the cake is done baking?
A toothpick inserted into the center should come out clean or with just a few moist crumbs. The top should be golden brown and the cake should spring back lightly when touched.
Final Thoughts
This Jewish apple cake is the kind of dessert that reminds you why simple, honest baking is so rewarding. It doesn’t require special ingredients, fancy techniques, or hours in the kitchen, yet it tastes like you put real care into every step.
Make it this week, and you’ll understand why this recipe has been passed down through families for generations. It’s approachable, delicious, and guaranteed to make your kitchen smell like home.
If you enjoyed this recipe, explore more wonderful apple-based desserts on the blog. Try the apple dump cake recipe for an even simpler approach, or bake the applesauce cake recipe for another moist, tender variation using pantry staples.
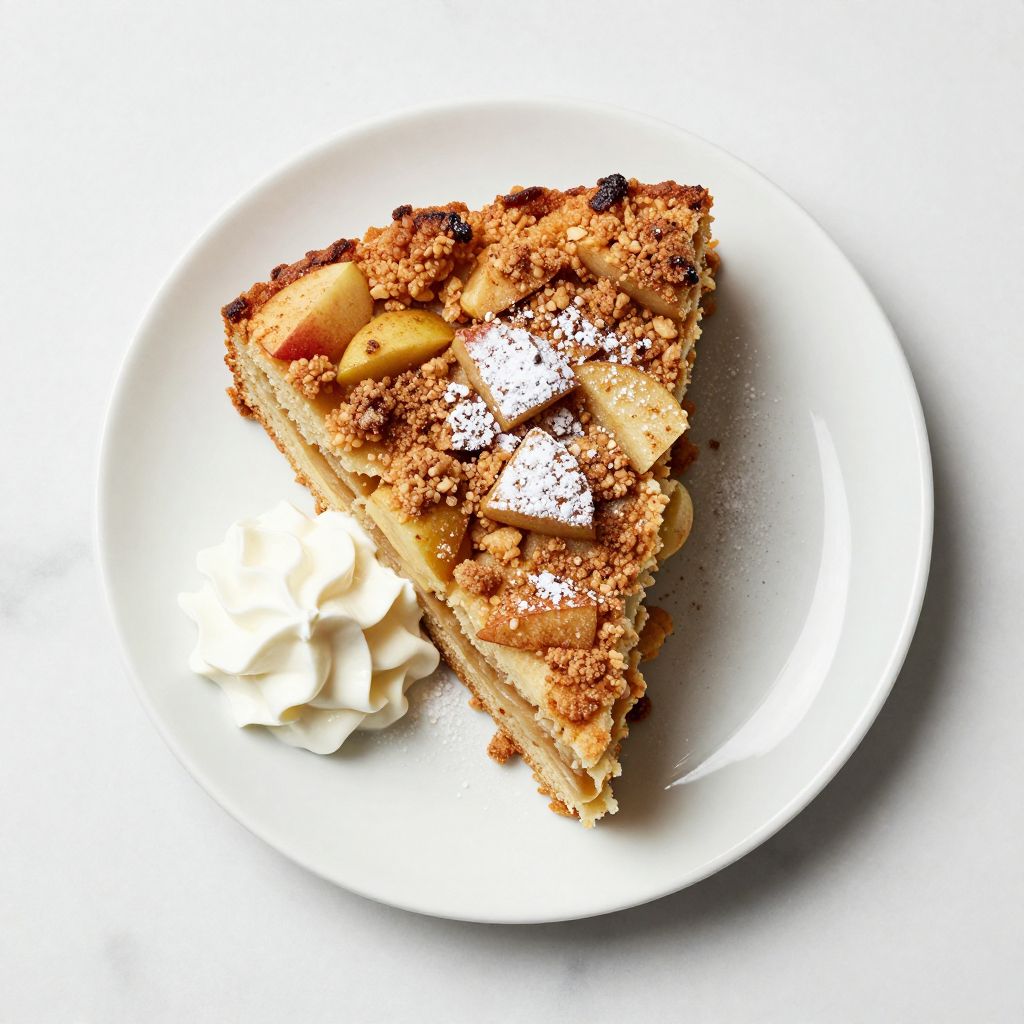
Jewish Apple Cake
Ingredients
Equipment
Method
- Preheat the oven to 350 degrees Fahrenheit and grease a 9x13 inch baking pan.
- In a medium bowl, whisk together 2 1/2 cups flour, 2 1/2 teaspoons baking powder, and 1/2 teaspoon salt.
- In a large bowl, whisk 3/4 cup oil and 1 1/2 cups sugar until combined, then add 3 eggs one at a time, followed by 1/2 cup applesauce and 2 teaspoons vanilla, whisking until smooth.
- Fold the dry ingredients into the wet mixture until just combined, avoiding overmixing.
- Stir together 1/2 cup sugar and 3 tablespoons cinnamon in a small bowl and set aside.
- Peel, core, and chop apples, then fold the 5 to 6 chopped apples into the batter.
- Spread half the batter into the pan, sprinkle half the cinnamon-sugar mixture over it, top with remaining batter, and finish with the remaining cinnamon-sugar.
- Bake for 50 to 55 minutes until golden brown and a toothpick comes out clean.
- Let the cake cool in the pan for at least 15 minutes before slicing and serving.