
There’s something deeply satisfying about the crisp snap of a homemade saltine cracker breaking between your teeth, that moment when you realize you’ve created something so simple yet so perfectly textured from scratch.
Saltine crackers might seem like they belong only in factory packaging, but making them at home is shockingly straightforward and produces crackers that taste fresher and crisper than anything store-bought. These crackers work as a vehicle for soups, cheese, or just a handful of sea salt, and they’ll disappear from your kitchen faster than you can stack them.
Why You’ll Love This Recipe
Homemade saltines deliver a crunch and flavor that commercial versions simply can’t match, plus you control every ingredient that goes into them.
- Crispy, light, and perfectly salted from edge to edge.
- Takes less than an hour from start to finish.
- Requires just five basic ingredients you likely have on hand.
- Stores beautifully for up to two weeks in an airtight container.
- Customizable with herbs, seeds, or different salt varieties.
My Experience Making This Recipe
I made these crackers on a whim during a lazy Sunday afternoon, expecting them to be mediocre at best. The dough came together so easily I was almost suspicious, rolling thin enough to see the counter through it.
Twenty minutes into the oven and the kitchen smelled like buttered wheat and toasted salt. My partner walked in, grabbed a still-warm cracker from the cooling rack, and ate half of them before I could even photograph them properly.
The real surprise was how they stayed crispy for days in a sealed container, unlike store-bought crackers that go soft within hours. I’ve made them at least a dozen times since, and they’ve become my go-to accompaniment for chowders and my guilty late-night snack.
Recipe Overview
- Recipe Name: Homemade Saltine Crackers
- Servings: About 40-50 crackers
- Prep Time: 15 minutes
- Cook Time: 20-25 minutes
- Total Time: 40 minutes
- Course: Snack or Appetizer
- Cuisine: American
- Calories per Serving: 35 calories (per cracker)
Equipment You Will Need
- Measuring cups and spoons
- Large mixing bowl
- Rolling pin
- Two baking sheets
- Parchment paper
- Fork (for pricking dough)
- Pastry brush or small brush
- Knife or pizza cutter (for cutting crackers)
- Cooling rack
- Airtight container for storage
Ingredients for Saltine Crackers
- All-purpose flour: 2 cups
- Water: 3/4 cup
- Butter: 4 tablespoons, melted
- Sea salt: 1 1/2 teaspoons, divided
- Baking soda: 1/4 teaspoon
Ingredient Notes and Substitutions
- All-purpose flour: Provides structure and the tender crumb that defines a saltine. Bread flour will create tougher crackers, so stick with all-purpose for the best texture.
- Water: Binds the dough together without adding fat or flavor like milk would. You can use vegetable broth for a slightly savory flavor, though it changes the classic profile slightly.
- Butter: Adds richness and helps the crackers brown and crisp. Coconut oil or olive oil can substitute, though they’ll shift the flavor and texture slightly.
- Sea salt: Provides the signature salty punch and creates the visual salt crystals on top. Kosher salt works but is less visually striking; table salt will oversalt quickly so use less if substituting.
- Baking soda: Creates slight lift and helps the crackers brown evenly. You cannot omit it without affecting the final cracker’s structure.
How to Make Saltine Crackers
Step 1: Mix Your Dry Ingredients
Combine 2 cups all-purpose flour, 1/4 teaspoon baking soda, and 1 teaspoon sea salt in a large mixing bowl. Whisk them together thoroughly so the baking soda distributes evenly throughout the flour, which ensures your crackers will rise uniformly in the oven.
Step 2: Create Your Dough
Pour 3/4 cup water and 4 tablespoons melted butter into the flour mixture. Stir with a wooden spoon or your hands until a shaggy dough forms that pulls away from the sides of the bowl.
Step 3: Knead the Dough
Transfer the dough to your work surface and knead it for about 2 minutes until smooth and slightly elastic. Don’t overwork it or your crackers will be tough instead of tender and crispy.
Step 4: Rest the Dough
Cover the dough loosely with plastic wrap or a clean kitchen towel and let it rest for 5 minutes. This brief rest allows the flour to fully hydrate and makes rolling much easier without the dough fighting back.
Step 5: Prepare Your Baking Sheets
Preheat your oven to 400 degrees Fahrenheit. Line two large baking sheets with parchment paper so the crackers won’t stick and will brown evenly on the bottom.
Step 6: Roll Out the Dough
Divide the dough in half and work with one portion at a time, keeping the other half covered. Using a rolling pin, roll the dough as thin as possible, ideally to about 1/16 inch thick, so you get that signature cracker crunch rather than a cracker-cookie hybrid.
Step 7: Cut and Transfer Crackers
Using a knife, pizza cutter, or pastry wheel, cut the rolled dough into roughly 2-inch squares. Transfer each square to your prepared baking sheets, spacing them close together but not touching since they won’t spread much.
Step 8: Prick and Salt
Using a fork, prick each cracker 3-4 times across the top to prevent them from puffing up unevenly during baking. Lightly brush or sprinkle the remaining 1/2 teaspoon sea salt across all the crackers, which creates that authentic saltine appearance and flavor.
Step 9: Bake Until Golden
Bake for 20-25 minutes, rotating the pans halfway through, until the crackers are golden brown and the edges are slightly darker. Watch carefully after the 15-minute mark since ovens vary and you want them crispy but not burnt.
Step 10: Cool Completely
Remove the crackers from the oven and let them cool on the baking sheets for 5 minutes, then transfer them to a cooling rack. They’ll continue to crisp up as they cool, so don’t move them around too much or they might break.
Pro Tip: The thinner you roll your dough, the crispier your crackers will be; aim for almost see-through thickness for maximum crunch.
Tips for the Best Saltine Crackers
- Use a bench scraper or long knife to help lift and flip the dough while rolling so it doesn’t stick to your work surface.
- Roll between two sheets of parchment paper if your dough keeps sticking, then simply peel off the top sheet before cutting and baking.
- For extra crispy crackers, increase the oven temperature to 425 degrees and reduce baking time to 15-18 minutes, checking frequently.
- If your dough tears while rolling, simply pinch it back together or patch it with a small piece of dough; this recipe is very forgiving.
- Store crackers in an airtight container at room temperature for up to two weeks; they’ll stay crispy far longer than store-bought versions.
- For maximum crunch, place a sheet of parchment between layers of crackers in your storage container so they don’t soften from steam.
Common Mistakes to Avoid
- Rolling too thick: Crackers thicker than 1/8 inch will taste more like flatbread or a dense cookie rather than the light, crispy cracker you’re aiming for.
- Skipping the fork pricks: Without pricking, steam gets trapped and causes the crackers to puff into little clouds instead of staying flat and crispy.
- Overcrowding the baking sheets: Crackers need air circulation to crisp evenly; if they’re packed too tightly, the bottoms won’t brown properly.
- Not rotating the pans halfway through: Most ovens have hot spots that cause uneven browning, so rotating ensures consistent color and texture across all your crackers.
- Storing while still warm: Crackers release moisture as they cool, so sealing them while hot creates steam that softens them within hours.
Serving Suggestions
These crackers shine alongside soups, cheese boards, or simply topped with a smear of butter and a pinch of salt. Serve them warm from the oven for the absolute best crunch, or keep them in a basket at room temperature for entertaining.
- Pair with creamy tomato or clam chowder for the perfect textural contrast.
- Top with sharp cheddar cheese and a slice of dill pickle for a tangy snack.
- Serve alongside a charcuterie board with cured meats, aged cheeses, and fresh fruit.
- Crumble them over salads for added crunch instead of using packaged croutons.
- Layer them with peanut butter and jam for a nostalgic snack that tastes better homemade.
Variations to Try
- Herb and Garlic: Add 1 teaspoon each of dried oregano and garlic powder to the flour mixture for a savory twist that pairs beautifully with tomato soup.
- Seeded Crackers: Sprinkle sesame seeds, poppy seeds, or everything bagel seasoning on top before baking instead of sea salt for a nuttier flavor.
- Whole Wheat Version: Replace 1 cup all-purpose flour with whole wheat flour for a nuttier flavor and added nutrition, though the crackers will be slightly denser.
- Parmesan and Black Pepper: After brushing with butter, sprinkle grated Parmesan cheese and freshly cracked black pepper across the crackers for a sharp, savory bite.
- Rosemary and Sea Salt: Mix 1 teaspoon finely chopped fresh rosemary into the dough and finish with fleur de sel for an elevated cracker that feels special.
Dietary Adaptations
- Gluten-Free: Substitute the all-purpose flour with a 1:1 gluten-free flour blend; expect slightly crumblier crackers since gluten provides structure.
- Dairy-Free: Replace butter with vegetable oil or coconut oil in equal amount; the crackers will crisp similarly though with slightly less richness.
- Vegan: Use plant-based butter or coconut oil instead of dairy butter; everything else in the recipe is already plant-based.
- Low-Carb/Keto: Swap all-purpose flour for almond flour or a keto-friendly flour blend, though the texture will be grainier and you may need slightly more water to achieve the right dough consistency.
Storage and Reheating
Refrigerator
Store cooled crackers in an airtight container at room temperature rather than refrigerating, since the cold actually draws moisture into the crackers and softens them faster. Homemade saltines stay crispy at room temperature for up to two weeks.
- Use an airtight glass container or resealable plastic bag for best results.
- Place parchment paper between layers to prevent crackers from softening from steam.
- Avoid storing near the stove or other heat sources that create humidity.
Freezer
Frozen saltines last up to three months and thaw beautifully without any texture loss. Transfer them to a freezer-safe container with parchment between layers to prevent breakage during storage.
- Thaw at room temperature for about 30 minutes before serving.
- Do not thaw in the microwave, which can introduce unwanted moisture.
Reheating
If your crackers soften slightly over time, restore the crunch by placing them on a baking sheet and heating at 300 degrees for 5-10 minutes, then cooling completely before serving. This evaporates any trapped moisture without burning them.
- Watch carefully during reheating to avoid over-browning.
- Allow crackers to cool completely before storing again.
Nutrition Information
| Nutrient | Amount |
|---|---|
| Calories | 35 |
| Total Fat | 1.5g |
| Saturated Fat | 0.8g |
| Carbohydrates | 5g |
| Fiber | 0.2g |
| Sugar | 0g |
| Protein | 0.9g |
| Sodium | 140mg |
| Cholesterol | 3mg |
Nutritional values are approximate and based on making about 48 crackers from this recipe. Values vary slightly depending on exact cracker size and specific ingredients used.
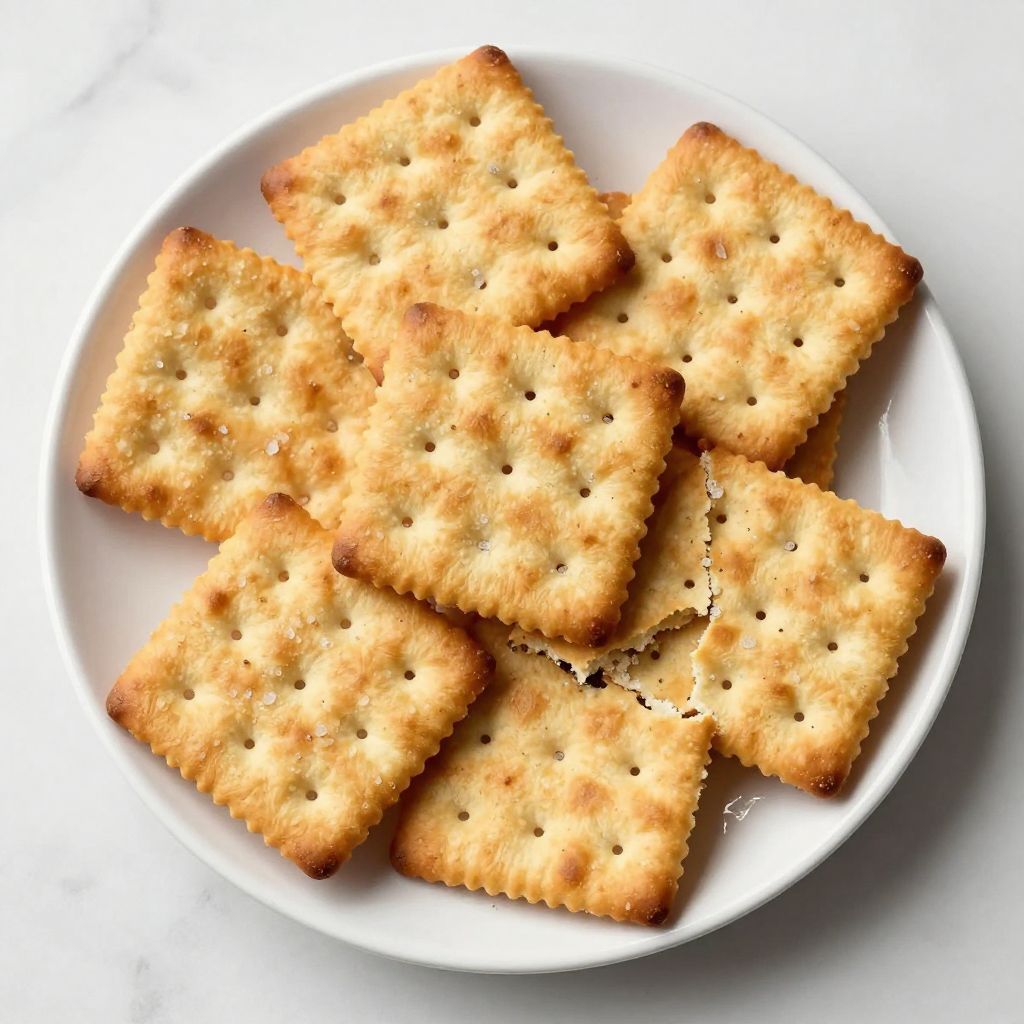
Homemade Saltine Crackers
Ingredients
Equipment
Method
- Preheat the oven to 400°F (200°C) and line two baking sheets with parchment paper.
- In a large mixing bowl, whisk together 2 cups all-purpose flour, 1/4 teaspoon baking soda, and 1 teaspoon of the sea salt until evenly combined.
- Pour 3/4 cup water and 4 tablespoons melted butter into the flour mixture and stir until a shaggy dough forms.
- Turn the dough out onto a lightly floured surface and knead for about 2 minutes until smooth and elastic.
- Cover the dough with plastic wrap and let rest for 5 minutes to relax the gluten.
- Divide the dough in half and roll one portion at a time into a thin sheet about 1/16 inch thick.
- Using a knife or pizza cutter, cut the dough into 2-inch squares and transfer them to the prepared baking sheets.
- Prick each square 3-4 times with a fork, then sprinkle the remaining 1/2 teaspoon sea salt over the crackers.
- Bake for 20-25 minutes, rotating the sheets halfway through, until the crackers are golden brown and crisp.
- Let the crackers cool on the baking sheets for 5 minutes, then transfer to a cooling rack to cool completely.
Notes
Frequently Asked Questions
Can I make this dough ahead of time?
Yes, wrap the dough tightly in plastic wrap and refrigerate for up to 24 hours. Let it come to room temperature for 15 minutes before rolling to make it easier to work with.
Why are my crackers puffing up instead of staying flat?
You’re likely not pricking them enough or deeply enough with the fork. Make sure to prick each cracker 3-4 times with good pressure so the fork actually pierces through the dough.
Can I use instant yeast or baking powder instead of baking soda?
Baking soda is the correct leavening agent for this recipe since it provides just enough lift without creating a yeasty flavor. Yeast or baking powder will change the final product significantly.
How do I know when the crackers are done baking?
They should be golden brown, with slightly darker edges, and feel completely dry and crisp when you tap them. If they still feel soft in the center, bake for another 2-3 minutes and check again.
Can I add more salt on top without making them too salty?
Yes, the amount of salt you sprinkle on top adds mostly surface flavor rather than penetrating the entire cracker. Taste one after cooling to check the salt level before adjusting future batches.
What if my dough is too dry or too wet?
If it’s too dry and crumbly, add water one tablespoon at a time until it comes together. If it’s too sticky, dust your work surface with a little extra flour as you roll rather than adding more flour to the dough itself.
Do I have to use melted butter or can I use softened butter?
Melted butter distributes more evenly throughout the dough and creates a more uniform texture in the crackers. Softened butter will work but may create slightly uneven browning.
Final Thoughts
Making saltine crackers at home might feel like an unnecessary project when they’re so available at the store, but once you taste the difference, you’ll understand why it matters. That combination of crispy, tender, and perfectly salted is simply worth the minimal effort.
Give yourself permission to make a batch this week and taste what fresh, homemade crackers can really be. They’ll become your go-to for soups, snacking, and impressing anyone who discovers you made them from scratch.
Looking for more cracker and snack ideas to add to your kitchen repertoire? Browse through our full collection of homemade recipes for inspiration. You might also enjoy exploring other ways to use saltine crackers in both sweet and savory dishes.