
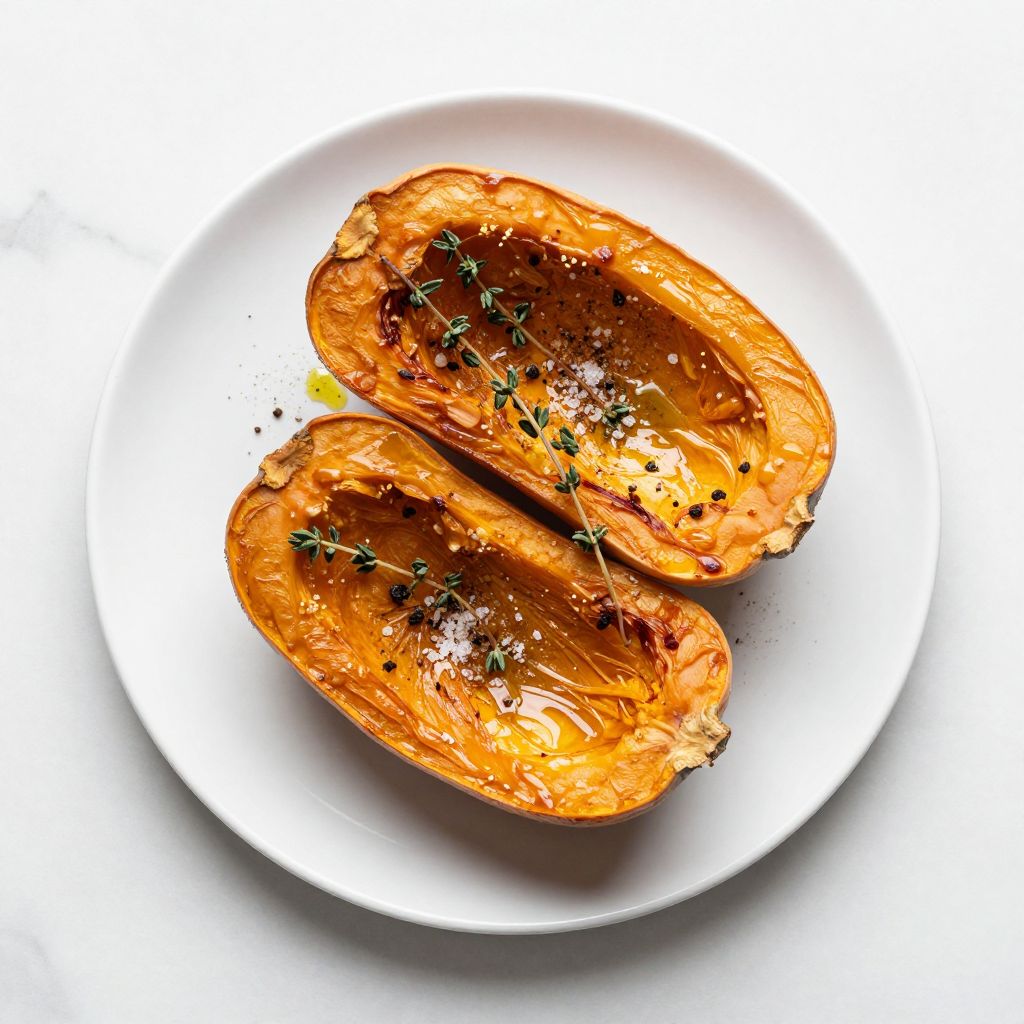
There’s something magical about roasting honeynut squash: the kitchen fills with a warm, caramel-like aroma, and within an hour, you’ve transformed a humble winter squash into something sweet, creamy, and utterly craveable. I’ve found that this smaller cousin of butternut squash delivers all the cozy comfort of fall in a recipe that actually fits into a weeknight dinner rotation.
Roasted Honeynut Squash is special because it requires minimal prep, cooks faster than larger squashes, and tastes naturally sweet without added sugar. The flesh becomes silky and rich when roasted, making it perfect for meal prep, side dishes, pasta, soups, or even a simple standalone plate with a drizzle of good olive oil and fresh herbs.
This recipe works for beginners and experienced cooks alike, adapts beautifully to whatever’s in your pantry, and consistently delivers restaurant-quality results. Let’s get into it.
Why You’ll Love This Recipe
This roasted honeynut squash recipe hits multiple needs at once: it’s fast, flexible, and genuinely delicious with zero fuss. You’ll find yourself making it repeatedly because the payoff is so worth the minimal effort.
- Naturally sweet with no added sugar, appealing to both health-conscious cooks and those with a serious sweet tooth
- Cooks in under 45 minutes, making it realistic for busy weeknight dinners
- Smaller than butternut squash, so prep and cooking time shrink dramatically compared to larger varieties
- Works as a side dish, pasta base, soup ingredient, or grain bowl component without modification
- Stores well and reheats beautifully, making it perfect for meal prep
My Experience Making This Recipe
I discovered honeynut squash by accident at a farmer’s market about five years ago, and honestly, I’ve been slightly obsessed ever since. The vendor described it as “butternut’s sweeter, faster cousin,” and I was sold on the spot.
The first time I roasted one at home, I halved it, scooped out the seeds, drizzled with olive oil and salt, and let the oven do the work. Within 35 minutes, the edges were caramelized and the flesh was so tender I could cut it with a fork.
My family devoured it plain while it was still hot, which told me everything I needed to know about this recipe’s potential. Since then, I’ve roasted dozens of these squashes, topped them with everything from crispy sage to maple glaze, and never once regretted the choice.
Recipe Overview
- Recipe Name: Roasted Honeynut Squash
- Servings: 4
- Prep Time: 10 minutes
- Cook Time: 35 minutes
- Total Time: 45 minutes
- Course: Side Dish
- Cuisine: American
- Calories per Serving: 85
Equipment You Will Need
- Cutting board
- Sharp chef’s knife
- Spoon or melon baller (for scooping seeds)
- Baking sheet
- Aluminum foil or parchment paper
- Small bowl (for mixing oil and seasonings)
- Pastry brush or spoon (for brushing oil)
- Kitchen timer
Ingredients for Roasted Honeynut Squash
- 2 honeynut squashes (about 1.5 pounds each), halved and seeded
- 3 tablespoons extra virgin olive oil
- 1 teaspoon kosher salt
- 1/2 teaspoon black pepper
- 1/2 teaspoon garlic powder (optional but recommended)
- 1/4 teaspoon cinnamon (optional, for subtle warmth)
- Fresh thyme or sage sprigs (optional, for garnish)
Ingredient Notes and Substitutions
- Honeynut squash: A smaller, sweeter winter squash with thin skin that’s easier to cut than butternut. You can substitute butternut squash, though it will need 10 to 15 extra minutes of roasting and yields larger pieces.
- Extra virgin olive oil: Provides richness and helps the squash caramelize beautifully. Ghee or melted butter work equally well and add a richer, more savory flavor.
- Kosher salt: Enhances the natural sweetness and seasons evenly across the flesh. Table salt works but use slightly less, as it’s finer and saltier by volume.
- Garlic powder: Adds subtle umami without overpowering the squash’s delicate flavor. Fresh minced garlic can replace it, though it may burn slightly at high heat.
- Cinnamon: Plays up the squash’s natural sweetness with warm spice notes. Nutmeg or a pinch of cayenne pepper offer different but equally delicious flavor directions.
How to Make Roasted Honeynut Squash
Step 1: Preheat Your Oven
Set your oven to 425 degrees Fahrenheit and allow it to preheat for 10 minutes. A hot oven is critical here because it creates the caramelized, slightly crispy edges that make roasted squash so addictive.
Step 2: Prep Your Squashes
Rinse your honeynut squashes under cool water and pat them dry with a clean kitchen towel. Dry squashes brown more evenly and prevent moisture from interfering with caramelization, so don’t skip this step.
Step 3: Cut the Squashes in Half
Place a honeynut squash on your cutting board with the stem end pointing toward you. Using a sharp chef’s knife, carefully cut the squash in half from stem to bottom, then repeat with the second squash.
Step 4: Scoop Out the Seeds
Use a sturdy spoon or melon baller to scoop out the seeds and stringy bits from each squash half, creating a clean cavity. Work gently to avoid gouging the flesh, and save those seeds if you want to roast them separately for a snack.
Step 5: Prepare Your Seasoning Mix
In a small bowl, whisk together the olive oil, kosher salt, black pepper, garlic powder, and cinnamon if using. This creates an even coating and ensures seasonings distribute uniformly across all four squash halves.
Step 6: Oil and Season the Squashes
Using a pastry brush or the back of a spoon, brush the seasoned oil generously over the cut side of each squash half, making sure to coat the flesh evenly and work some oil into the cavity. Don’t be shy here; the oil is what creates that beautiful caramelization and keeps the flesh moist.
Step 7: Arrange on the Baking Sheet
Line a baking sheet with foil or parchment paper and arrange the squash halves cut-side down in a single layer. Placing them cut-side down ensures the flat surface makes contact with the hot pan, encouraging even browning and caramelization.
Step 8: Roast Until Tender and Caramelized
Transfer the baking sheet to your preheated oven and roast for 30 to 35 minutes, until the flesh is fork-tender and the edges are deeply caramelized and slightly crispy. You’ll know it’s done when a fork pierces the thickest part of the flesh with no resistance.
Step 9: Cool Briefly and Serve
Remove the baking sheet from the oven and let the squash cool for 3 to 5 minutes so it’s easy to handle. Serve warm or at room temperature, optionally garnished with fresh thyme or sage.
Pro Tip: Don’t flip the squash halves during roasting; keeping them cut-side down the entire time locks in moisture and maximizes the caramelized, golden surface on the flesh.
Tips for the Best Roasted Honeynut Squash
- Choose squashes that feel heavy for their size and have no soft spots, blemishes, or mold on the skin. Density indicates maturity and sweetness.
- Pat the cut sides dry with a paper towel before oiling; excess moisture prevents browning and creates steam instead of caramelization.
- Don’t crowd the baking sheet; each squash half needs space for heat circulation. Use two baking sheets if necessary rather than stacking them.
- Keep an eye on the edges after 30 minutes; if they’re browning too quickly, lower the oven temperature to 400 degrees for the final five minutes.
- Taste a small bite before seasoning further; honeynut squash varies in sweetness, and you may want to adjust salt or spices based on your batch.
- Invest in a sharp knife for cutting; a dull blade makes the task dangerous and frustrating. A honeynut squash’s skin is thinner than butternut, so a good knife makes a real difference.
Common Mistakes to Avoid
- Using a dull knife: This is the number one cause of slips and cuts when prepping squash. A sharp knife makes cutting effortless and safe.
- Roasting cut-side up: The skin side doesn’t brown well, and the flesh dries out faster. Always roast cut-side down for moisture and caramelization.
- Skipping the oil: Some people try to roast squash without oil to cut calories, but the oil is what creates the caramelized edges and keeps the flesh creamy. Skip it and you’ll get mushy, steamed squash instead.
- Overcrowding the pan: Squash halves need room to breathe so steam can escape and browning can happen. Cramming them together creates a steamed, pale result.
- Opening the oven too often: Every time you open the door, heat escapes and cooking time extends. Set a timer and trust the process.
Serving Suggestions
Roasted honeynut squash is wonderfully versatile and works equally well as a standalone side or as a component in larger dishes. Try it warm, at room temperature, or even chilled the next day.
- Topped with crispy sage butter and crumbled goat cheese for an elegant side dish
- Tossed with pasta, garlic, and fresh thyme for a simple vegetarian main course
- Stuffed with quinoa, toasted nuts, and dried cranberries for a hearty vegetarian dinner
- Scooped into grain bowls with roasted chickpeas, leafy greens, and tahini dressing
- Blended into a smooth soup with vegetable broth, coconut milk, and warming spices
Variations to Try
- Maple and Thyme: Drizzle roasted squash with pure maple syrup and garnish with fresh thyme and a crack of sea salt for a sweet-savory finish that’s perfect for holiday tables.
- Spiced with Chili and Lime: Season with smoked paprika, cayenne, garlic, and finish with fresh lime juice and cilantro for a bright, heat-forward twist.
- Brown Butter and Sage: After roasting, brush the hot squash with nutty brown butter infused with crispy sage leaves for an Italian-inspired flavor bomb.
- Coconut and Curry: Brush with a mixture of coconut oil, curry powder, and ginger before roasting, then finish with toasted coconut flakes and a squeeze of lime.
- Parmesan Crust: Top the roasted squash with a mixture of grated Parmesan, breadcrumbs, and melted butter, then broil for two minutes until golden and crispy.
Dietary Adaptations
- Gluten-free: This recipe is naturally gluten-free; no modifications needed. Double-check any breadcrumb toppings or seasoning blends if using them.
- Dairy-free: Replace butter with olive oil or coconut oil and skip cheese toppings. The squash roasts beautifully without any dairy products.
- Vegan: This recipe is already vegan when made with olive oil and no animal products. All variations can be easily made vegan by skipping cheese and using plant-based butters.
- Low-carb or keto: Honeynut squash contains about 12 grams of net carbs per serving, which works for some keto plans but not strict versions. Consider butternut squash alternatives or portion control.
Storage and Reheating
Refrigerator
Store roasted honeynut squash in an airtight container for up to four days. The flesh firms up slightly as it cools, making it easy to portion out or repurpose.
- Scoop the cooled flesh into portions and store in glass containers
- Keep the skin intact for easier handling and to prevent drying out
- Label containers with the date for easy tracking
Freezer
Roasted honeynut squash freezes beautifully for up to three months. Let it cool completely before freezing to prevent condensation.
- Scoop cooled flesh into portions and freeze on a baking sheet before transferring to freezer bags
- Alternatively, freeze squash halves whole in an airtight container or heavy-duty freezer bag
- Thaw overnight in the refrigerator before reheating
Reheating
Reheated roasted squash tastes best when warmed gently to preserve its creamy texture. Avoid the microwave if possible, as it can make the flesh mealy.
- Cover with foil and warm in a 350-degree oven for 10 to 15 minutes until heated through
- Reheat on the stovetop in a skillet with a splash of water over medium heat for five to eight minutes
- Serve immediately with fresh herbs or a drizzle of olive oil to restore moisture
Nutrition Information
| Nutrient | Amount |
|---|---|
| Calories | 85 |
| Total Fat | 7 g |
| Saturated Fat | 1 g |
| Carbohydrates | 8 g |
| Fiber | 1.5 g |
| Sugar | 3.5 g |
| Protein | 1 g |
| Sodium | 280 mg |
| Cholesterol | 0 mg |
Nutritional values are approximate and based on standard USDA data for roasted squash with olive oil seasoning. Individual results vary based on specific ingredients and portion sizes used.
Frequently Asked Questions
Can I eat the skin of roasted honeynut squash?
Yes, the skin becomes soft and tender after roasting and is completely edible. Many people enjoy eating the thin skin along with the flesh, though you can scoop the flesh out if you prefer.
How do I know when honeynut squash is ripe and ready to cook?
Look for a golden-tan skin with no green patches, firm texture with no soft spots, and squashes that feel heavy for their size. If the stem is brown and dry, that’s another sign of maturity.
Can I prepare honeynut squash ahead of time?
Absolutely, you can cut and seed honeynut squash up to one day in advance, then cover and refrigerate. However, oil and season just before roasting to prevent the flesh from oxidizing or drying out.
Why is my roasted squash watery or mushy instead of creamy?
This usually happens from roasting cut-side up, which traps steam, or from using insufficient oil, which doesn’t help caramelize the edges. Always roast cut-side down and brush generously with oil.
What’s the difference between honeynut and butternut squash?
Honeynut is smaller, cooks faster, and has sweeter, creamier flesh that’s finer-textured than butternut. Butternut is larger, takes longer to cook, and has a slightly earthier, less sweet flavor.
Can I roast honeynut squash cut-side up?
You can, but it won’t brown as well and the flesh may dry out. Cut-side down is always the better option for maximum caramelization and moisture retention.
Do I need to peel honeynut squash before roasting?
No, there’s no need to peel it before roasting. The skin softens and becomes tender during cooking, making it edible and easier to handle than trying to peel the raw squash.
Final Thoughts
Roasted honeynut squash is the kind of recipe that proves the most satisfying dishes don’t require complex techniques or endless ingredients. This one delivers restaurant-quality results with just a few pantry staples and your oven doing the heavy lifting.
Whether you’re cooking for yourself, feeding your family, or preparing a meal to bring to someone, this honeynut squash recipe works every single time. Make it this week and taste why this simple preparation has become a seasonal staple in my kitchen.
More Recipes to Explore
If you loved this roasted honeynut squash recipe, you’ll find plenty of inspiration in our other seasonal vegetable dishes. Check out our collection of comforting side dishes and creative squash preparations for your next dinner.
Try our fried squash recipe for a crispy, golden take on summer vegetables, or explore our corn pudding recipe using Jiffy mix for a creamy, nostalgic side that pairs beautifully with roasted squash on any weeknight table.
Roasted Honeynut Squash
Ingredients
Equipment
Method
- Preheat the oven to 425°F (220°C) and let it heat for at least 10 minutes.
- Rinse the honeynut squashes under cool water and pat dry with a towel.
- Place each squash on a cutting board and, using a sharp chef’s knife, cut in half lengthwise from stem to bottom.
- Use a spoon or melon baller to scoop out seeds and stringy bits from each squash half.
- In a small bowl, whisk together olive oil, kosher salt, black pepper, garlic powder, and cinnamon if using.
- Brush the seasoned oil evenly over the cut sides of each squash half, making sure to coat inside the cavity.
- Line a baking sheet with aluminum foil or parchment paper and arrange the squash halves cut-side down in a single layer.
- Roast in the preheated oven for 30 to 35 minutes, until the flesh is fork-tender and edges are deeply caramelized.
- Remove from oven and allow squash to cool for 3 to 5 minutes before serving warm, optionally garnished with fresh thyme or sage.