
There’s nothing quite like opening your oven to find a Dutch oven pot roast bubbling away, filling your kitchen with rich aromas of beef, root vegetables, and herbs that make your mouth water before you even taste it. This recipe is special because it transforms a tough, affordable cut of meat into something so tender and flavorful that your dinner guests will think you spent hours in the kitchen, when really you just let the oven do the heavy lifting.
A proper pot roast delivers deep, savory flavor with minimal hands-on work, making it perfect for weeknight dinners or impressive Sunday gatherings. The Dutch oven’s heavy cast iron creates an ideal environment for low and slow cooking, locking in moisture and developing a rich sauce that coats every bite.
Why You’ll Love This Recipe
This pot roast checks every box for a weeknight winner or special occasion centerpiece. You get restaurant-quality results from one pot, tender meat that falls apart at the fork, and a silky gravy that begs for crusty bread.
- Minimal active time with maximum flavor payoff
- Forgiving recipe that improves with slightly longer cooking
- One-pot meal that simplifies cleanup
- Makes excellent leftovers for sandwiches and soups
- Naturally pairs with simple sides, so meal planning feels easy
My Experience Making This Recipe
The first time I made this pot roast, I was skeptical that something this simple could taste so good. I browned the beef, tossed in vegetables, added some broth and herbs, then slid it into the oven and walked away for three hours.
When I lifted the lid, steam billowed out and the smell made my entire family gather in the kitchen before dinner was even on the table. The meat shredded with a spoon, the carrots had turned sweet and tender, and the sauce had reduced into something rich enough to coat the back of a spoon.
My partner took one bite and asked when I’d be making it again, which is basically the highest compliment I can receive. Now I make this every month or so because it never disappoints, and everyone always asks for seconds.
Recipe Overview
- Recipe Name: Dutch Oven Pot Roast
- Servings: 6 to 8 people
- Prep Time: 15 minutes
- Cook Time: 3 hours
- Total Time: 3 hours 15 minutes
- Course: Main Dish
- Cuisine: American
- Calories per Serving: 385
Equipment You Will Need
- Dutch oven with a tight-fitting lid
- Large cutting board
- Sharp chef’s knife
- Paper towels
- Measuring cups and spoons
- Wooden spoon or heat-resistant spatula
- Meat thermometer (optional but recommended)
- Shallow dish for dredging flour
Ingredients for Dutch Oven Pot Roast
- 3 pound chuck roast or beef shoulder
- 2 teaspoons kosher salt
- 1 teaspoon black pepper
- 3 tablespoons all-purpose flour
- 2 tablespoons vegetable oil or butter
- 1 medium onion, roughly chopped
- 4 large carrots, cut into 2-inch pieces
- 3 large potatoes, cut into 1-inch chunks
- 4 cloves garlic, minced
- 2 cups beef broth
- 1 cup dry red wine or additional broth
- 2 bay leaves
- 1 teaspoon dried thyme
- 1 teaspoon dried rosemary
- 2 tablespoons tomato paste
Ingredient Notes and Substitutions
- Chuck roast: This cut has fat marbling that renders into gelatin during slow cooking, creating that signature tender texture. Beef shoulder or brisket works equally well, though brisket may need an extra 30 minutes.
- Beef broth: Quality broth builds the sauce’s backbone, so use homemade or low-sodium store-bought. Chicken broth will work but produces a lighter, less rich result.
- Red wine: The wine adds depth and slight acidity that brightens the sauce. Skip it entirely or use an extra cup of broth if you prefer to keep it alcohol-free.
- Root vegetables: Carrots, potatoes, and onions are classic, but parsnips, celery root, or turnips add interesting variations and cook in the same timeframe.
- Fresh herbs: If you have fresh thyme and rosemary, use double the amount and add them in the final 30 minutes to preserve their fresh flavor.
How to Make Dutch Oven Pot Roast
Step 1: Pat the Beef Dry
Remove the roast from the refrigerator 20 minutes before cooking so it reaches closer to room temperature, which promotes even browning. Pat it completely dry with paper towels because moisture on the surface prevents a proper sear and creates steam instead of that rich, caramelized crust you’re after.
Step 2: Season the Roast
Sprinkle the beef generously with salt and pepper on all sides, working the seasonings into any crevices. Let it sit for 5 minutes so the salt can penetrate the meat and enhance its natural flavors rather than just sitting on the surface.
Step 3: Dredge in Flour
Pour flour into a shallow dish and coat the roast on all sides, shaking off excess. The flour creates a light crust during searing and helps thicken the sauce later without needing a slurry or cornstarch.
Step 4: Sear the Beef
Heat oil in your Dutch oven over medium-high heat until it shimmers, then carefully place the roast inside and resist the urge to move it for 4 minutes. Searing develops deep caramelization and fond (those browned bits) that add incredible complexity to your sauce, so patience here really matters.
Turn the roast and sear the remaining sides for 3 minutes each until all surfaces have a rich brown crust. Transfer the roast to a plate and set aside.
Step 5: Prepare the Vegetables
In the same Dutch oven, add the onion and garlic, stirring for about 1 minute until fragrant. The residual heat and fat will soften them slightly and prevent the garlic from burning when you add the other ingredients.
Add the carrots and potatoes, stirring to coat them in the remaining oil and fond. These vegetables will cook alongside the roast and soak up all those amazing flavors while softening perfectly.
Step 6: Deglaze and Build the Sauce
Pour the red wine into the pot, scraping the bottom with a wooden spoon to release all that browned fond stuck to the pan. Let it simmer for 2 minutes to reduce slightly and cook off some of the raw alcohol taste.
Add the beef broth, tomato paste, bay leaves, thyme, and rosemary, stirring to combine everything thoroughly. The tomato paste adds umami and slight acidity that rounds out the flavors beautifully.
Step 7: Return the Roast and Cover
Nestle the seared roast back into the pot, making sure it’s mostly submerged in the liquid. The liquid should come about halfway up the sides of the meat, which allows it to both braise and steam for perfectly tender results.
Cover the Dutch oven with its lid and transfer it to a preheated 325-degree oven. This low temperature ensures slow, gentle cooking that breaks down the collagen into gelatin without drying out the meat.
Step 8: Braise Low and Slow
Braise for 2.5 to 3 hours, checking at the 2-hour mark that liquid is gently simmering and the meat is becoming fork-tender. The roast is done when a fork easily pierces the thickest part and shreds with minimal pressure.
If the pot seems dry, add a splash more broth. If there’s excessive liquid, you can remove the lid for the final 30 minutes to allow some evaporation and sauce concentration.
Pro Tip: Insert a meat thermometer into the thickest part away from bone or fat, aiming for an internal temperature of 190 degrees Fahrenheit, which ensures the collagen has fully converted to gelatin and the meat pulls apart easily.
Tips for the Best Dutch Oven Pot Roast
- Don’t skip the searing step. Those caramelized edges create depth and complexity that you absolutely cannot achieve by braising directly, so those extra 10 minutes transform the entire dish.
- Use a Dutch oven that fits the roast snugly without too much extra space, which helps concentrate flavors and prevents excessive evaporation during cooking.
- Chop your vegetables larger than you think you need to because they’ll soften considerably during the 3-hour braise and will fall apart if cut too small.
- Resist opening the lid constantly to check progress because each time you lift it, heat escapes and cooking time increases. A quick peek at the 2-hour mark is fine.
- Let the roast rest in the pot for 10 minutes after removing from the oven before serving, which allows the meat to reabsorb some of its juices and prevents them from spilling onto your plate.
- Skim excess fat from the surface of the sauce if desired, though some cooks love that richness left in. You can use a fat separator or refrigerate overnight so the fat solidifies and lifts off easily.
Common Mistakes to Avoid
- Using a roast that’s too lean. Chuck roast has perfect marbling that becomes tender and flavorful through slow cooking, while lean cuts become stringy and tough.
- Cooking at too high a temperature. High heat toughens the meat fibers and causes excessive evaporation, so stick to 325 degrees and resist the urge to crank it up.
- Adding tender vegetables at the start. Potatoes and carrots cook in half the time the roast needs, so adding them at the beginning results in mushy vegetables, which is why adding them halfway through works better for texture.
- Overcrowding the pot with vegetables. Too much vegetable matter releases excess moisture and prevents proper caramelization, so aim for a balanced ratio of meat to vegetables.
- Skipping the sear on the roast. Braising alone produces tender meat but lacks the deep, complex flavors that only the Maillard reaction from searing can create.
Serving Suggestions
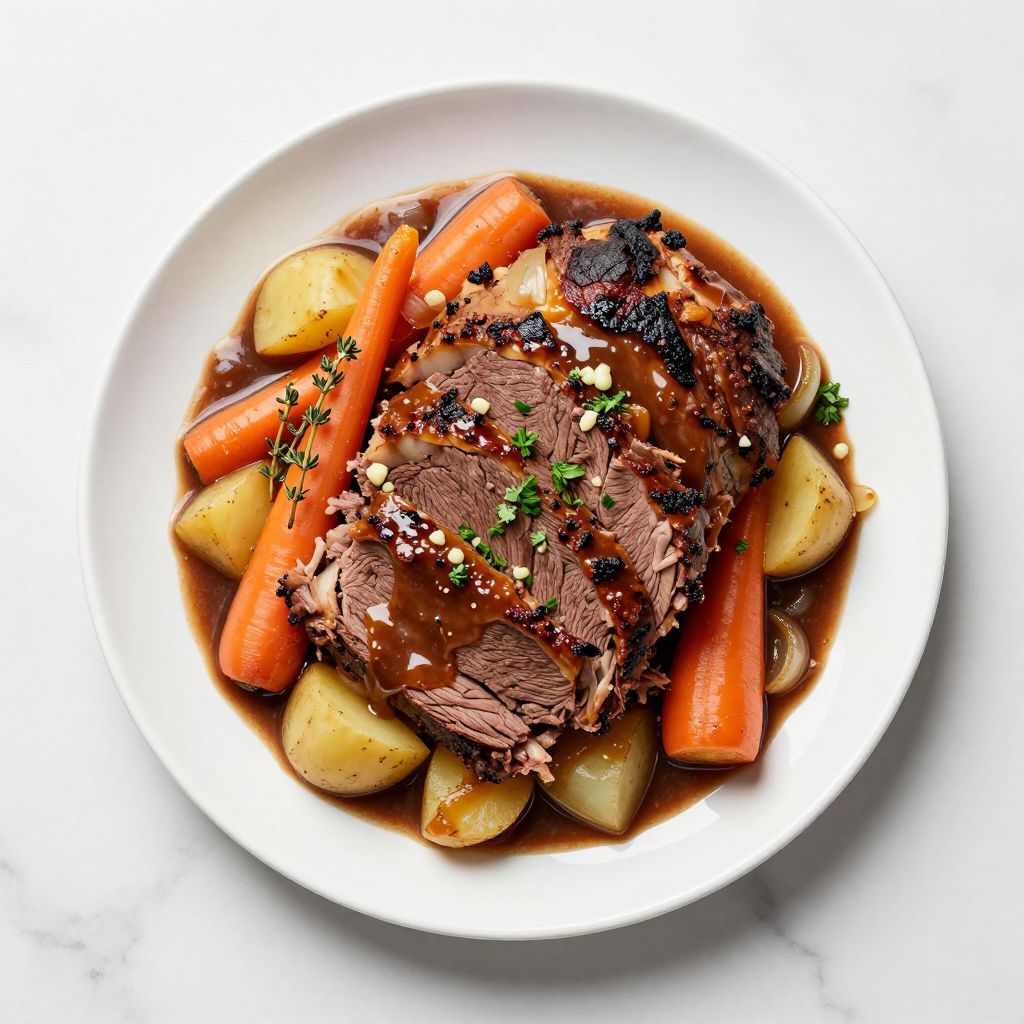
Serve the pot roast right in the pot or transfer it to a beautiful platter for a more impressive presentation. The key is spooning plenty of that silky sauce over everything and making sure each person gets vegetables and meat in every bite.
- Crusty bread or dinner rolls for soaking up the sauce
- Creamy mashed potatoes to catch extra gravy
- Simple green salad with a sharp vinaigrette to cut through the richness
- Steamed or roasted Brussels sprouts for a fresh, slightly bitter contrast
- Egg noodles tossed with butter and parsley as an alternative to potatoes
Variations to Try
- Red Wine Pot Roast: Use 1.5 cups red wine and only 0.5 cups broth, which creates a deeper, more wine-forward sauce with subtle tannins that pairs beautifully with the beef.
- Beer-Braised Version: Replace the red wine with hearty beer like porter or stout, which adds subtle chocolate and roasted notes that complement beef wonderfully.
- Asian-Inspired Pot Roast: Swap the red wine for soy sauce and rice wine, add ginger and star anise, and use broth instead of beef broth for a completely different flavor profile.
- Spring Vegetable Version: Use baby potatoes and carrots, add fresh peas and asparagus in the final 20 minutes, and finish with fresh herbs like tarragon for a lighter spring take.
- Mushroom-Rich Pot Roast: Add 1 pound of mushrooms (cremini or portobello), sliced and browned separately, which creates earthy depth and extra umami in the sauce.
Dietary Adaptations
- Gluten-Free: Skip the flour dredge or use cornstarch for searing, and ensure your broth and other ingredients are certified gluten-free, though the overall result tastes identical.
- Dairy-Free: This recipe is naturally dairy-free, though you can skip any butter and use vegetable oil instead without any flavor loss.
- Vegan or Vegetarian: Replace the beef with hearty mushrooms like king trumpet or portobello, use vegetable broth, and extend cooking to 1.5 hours at 325 degrees, though the texture and richness will differ significantly.
- Low-Carb or Keto: Use cauliflower florets and zucchini instead of potatoes, reduce or eliminate the flour dredge, and proceed as normal for a keto-friendly version with similar results.
Storage and Reheating
Refrigerator
Store the pot roast in an airtight container for up to 4 days. The flavors actually improve as it sits, so it makes an excellent make-ahead meal.
- Cool completely before covering to prevent condensation
- Store the meat and sauce together to keep the meat from drying out
- Skim hardened fat from the top if desired
Freezer
Freeze in airtight containers or freezer bags for up to 3 months. The sauce freezes beautifully and actually helps protect the meat from freezer burn.
- Leave a little headspace in containers to account for expansion
- Label with the date so you remember when you made it
- Thaw overnight in the refrigerator before reheating
Reheating
Reheat gently on the stovetop over medium-low heat or in a 325-degree oven covered with foil, adding a splash of broth if the sauce seems thick. Avoid high heat, which can toughen the meat fibers and cause the sauce to break.
- Stovetop method takes about 15 to 20 minutes and gives you more control
- Oven method works for larger quantities and keeps everything moist
- Microwave works for single servings but heats unevenly, so stir frequently
Nutrition Information
| Nutrient | Amount |
|---|---|
| Calories | 385 |
| Total Fat | 18g |
| Saturated Fat | 7g |
| Carbohydrates | 22g |
| Fiber | 4g |
| Sugar | 5g |
| Protein | 38g |
| Sodium | 620mg |
| Cholesterol | 95mg |
Nutritional values are approximate and based on a 6-serving yield. Your specific counts may vary depending on exact ingredient brands and portion sizes, so use this as a general guide rather than absolute numbers.
Frequently Asked Questions
Can I Make This in a Slow Cooker?
Yes, but you’ll miss the caramelization from searing unless you brown the roast first in a skillet. Sear as directed, then transfer to a slow cooker with all other ingredients and cook on low for 6 to 8 hours until fork-tender.
What If My Roast Is Still Tough After 3 Hours?
Some roasts need an extra 30 to 45 minutes depending on size, marbling, and your oven’s accuracy. Return it to the oven covered and check every 15 minutes until a fork easily penetrates the thickest part.
Can I Prepare This the Night Before?
Absolutely. Prepare through Step 6, cover, and refrigerate overnight. The next day, bring it to room temperature for 30 minutes, then proceed with braising, adding an extra 15 minutes to the cooking time since it starts cold.
Why Is My Sauce Too Thin?
Remove the roast and vegetables, then simmer the sauce on the stovetop over medium heat for 10 to 15 minutes until it reduces and thickens. Alternatively, mix a tablespoon of cornstarch with 2 tablespoons cold water and whisk it in while the sauce simmers.
Can I Use a Different Cut of Meat?
Chuck roast, beef shoulder, and brisket all work beautifully, though brisket may need an extra 30 minutes. Avoid expensive cuts like ribeye or tenderloin because their tender texture doesn’t benefit from long braises and slow cooking wastes their premium quality.
How Do I Know When to Add the Vegetables?
Add them after about 1.5 hours of cooking when the meat has softened somewhat but still needs another hour to reach full tenderness. This timing ensures the vegetables cook through without becoming mushy.
Final Thoughts
This pot roast recipe delivers the kind of comfort food that feels fancy without requiring actual fancy cooking skills. Once you understand the basic technique of searing, braising, and timing your vegetables, you can make this over and over with confidence.
Give this recipe a try and watch as your kitchen fills with those irresistible aromas and your family gathers around the table asking for seconds. You’ve got this, and your dinner guests will be seriously impressed.
If you enjoyed this pot roast, explore more delicious comfort food recipes on our site. Learn how to create your own pot roast seasoning recipe for custom flavor profiles, or try our smoked chuck roast recipe for a completely different preparation method that’s equally impressive.
Dutch Oven Pot Roast
Ingredients
Equipment
Method
- Remove the roast from the refrigerator 20 minutes before cooking and pat it dry with paper towels.
- Season the roast generously with kosher salt and black pepper on all sides.
- Dredge the roast in all-purpose flour in a shallow dish, shaking off any excess flour.
- Heat vegetable oil or butter in the Dutch oven over medium-high heat until shimmering.
- Sear the roast on the first side for 4 minutes without moving it, then sear the remaining sides for 3 minutes each to develop a brown crust. Transfer the roast to a plate and set aside.
- Add the chopped onion and minced garlic to the pot and cook for 1 minute until fragrant.
- Add the carrots and potatoes to the pot, stirring to coat them in the oil and browned bits.
- Pour in the red wine and scrape the bottom of the pot with a wooden spoon to release any fond, then simmer for 2 minutes to reduce slightly.
- Add the beef broth, tomato paste, bay leaves, dried thyme, and dried rosemary, stirring to combine.
- Return the roast to the Dutch oven, ensuring it is submerged halfway in the liquid, then cover with the lid.
- Transfer the covered pot to a preheated 325°F oven and braise for 2.5 to 3 hours, or until the meat is fork-tender.
- Check the roast at the 2-hour mark and add a splash of broth if the pot looks dry. If there is too much liquid, remove the lid for the final 30 minutes of cooking to allow the sauce to thicken.
- Remove the pot from the oven and let the roast rest in the pot, covered, for 10 minutes before serving.